Table of Contents
Advertisement
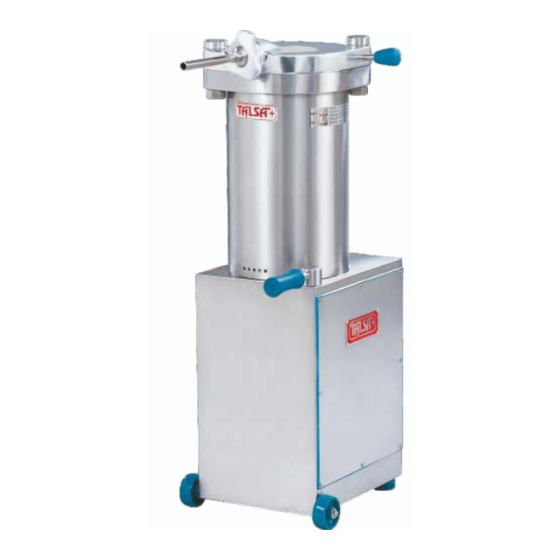
H15•H20•H26•H31•H42•H52
Fillers / Stuffers
Image: H26p
OPERATING INSTRUCTIONS AND EC-DECLARATION OF CONFORMITY
Before operating the unit read this manual thoroughly.
This manual should be retained for future reference.
Davison's Butcher Supply
5309 Sheila Street
Commerce, CA 90040
Toll Free: 888-265-9245
OutSide the USA: 00-1-323-265-9245
davbutsup@gmail.com
www.davisonsbutcher.com
or
www.talsaparts.com
Advertisement
Table of Contents

Related Manuals for Talsa H15


Summary of Contents for Talsa H15
- Page 1 H15•H20•H26•H31•H42•H52 Fillers / Stuffers Image: H26p OPERATING INSTRUCTIONS AND EC-DECLARATION OF CONFORMITY Before operating the unit read this manual thoroughly. This manual should be retained for future reference. Davison's Butcher Supply 5309 Sheila Street Commerce, CA 90040 Toll Free: 888-265-9245 OutSide the USA: 00-1-323-265-9245 davbutsup@gmail.com...
-
Page 2: Www.davisonsbutcher.com
Davison's Butcher Supplies has been serving the World Wide needs for The Meat Packers and Food Processing industry since 1927. After 60 years in Vernon we moved to Commerce in 1987. We ship our products nationwide via UPS, usually the same day an order is received. - Page 3 THE 3 DIGIT NUMBERS SHOWN IN THE PRINT DRAWING ARE NOT VALID FOR ORDERS. PLEASE ORDER PARTS BY USING ONLY THE 4 DIGIT CODE DETAILED IN THE ENCLOSED PARTS LIST AND ONLY THROUGH THE AUTHORIZED DEALER WHO SOLD THE MACHINE. FOR SOME PARTS ADDITIONAL TECHNICAL AND ELECTRICAL DRAWING DETAILS WILL BE NEEDED.
-
Page 4: Www.davisonsbutcher.com
PARTS LIST 7008 7008 7005 7007 Aluminium lid H-200 7023 7299 7143 7568 Stainless steel lid Brass bushing for 0052 0052 0027 0027 aluminium lid H-201 7259 7517 7262 7571 Brass bushing for S/S lid Aluminium nozzle/horn 7048 7048 7048 7048 retention nut, open slot H-202 S/S nozzle/horn... -
Page 5: Www.davisonsbutcher.com
PARTS LIST H-213 7737 7737 7737 7737 7737 7737 Oil filter cover H-214 2014 2014 2014 2014 2290 2290 Green plastic wheel H-217 Contactor H-219 2019 2866 2019 2019 2019 2019 Air extraction fan Complete hydraulic H-220 0038 2610 0012 0012 0803 0803 cylinder Green rubber Anti- H-221... -
Page 6: Www.davisonsbutcher.com
PARTS LIST lid gasket, green silicon, 6230 6230 6231 6093 6232 6240 circular profile, for P- models (package of 3) H-242 lid gasket, green silicon, 6233 6234 rectangle profile, for E- models (3 units) 7026 7026 7021 7021 Lid bolt for aluminium lid H-243 7039 7039 7142 7142 Lid bolt for s/s lid only... -
Page 7: Www.davisonsbutcher.com
PARTS LIST H-259 2403 2403 2403 2403 2403 2403 Pressure gauge hose Inferior barrel gasket, H-261 2398 2398 2399 2468 2537 3449 green, circular Metal-plastic washer H-263 0086 0086 0086 0086 0086 0086 3/8” for oil emptying screw Special straight s/s H-265 2580 2580 2580 2580 2580 2580 washer for oil emptying... -
Page 8: Www.davisonsbutcher.com
Main elements • Lid bolt Horn/nozzle nut Couverle Lid Lever Piston Pison Lid bolt nut Knee lever Base Horn/nozzle Oil drain plug Air outlet holes Wheel Valve pressure/speed control Transport handle Rubber foot www.davisonsbutcher.com www.talsaparts.com... -
Page 9: Www.davisonsbutcher.com
Unpacking. Upper lid screws (E models). Proper displacement of machine. 400/380 Volt. 230/220 Volt. Clean before use. 3-phase motor voltage change. Start-stop switch (i models only). Raise piston. Lower piston. Make room for mixture. www.davisonsbutcher.com www.talsaparts.com... -
Page 10: Www.davisonsbutcher.com
Insert on lid green gasket. Installing locking nozzle/horn nut. Putting on nozzle/horn. Remove piston. Unscrew piston locking bolt. Piston seals cleaning. Piston cleaning. www.davisonsbutcher.com www.talsaparts.com... -
Page 11: Www.davisonsbutcher.com
ELECTRIC SCHEMAS • H31.a H42.a H52.a automatic 3-phase GMC-6M 3-ph 400V 230V Updated Feb 2014 Micro Motor with internal thermo protection H31.am H42.am H52.am automatic 1-phase GMC-12M 1-ph 230V 220V Updated Feb 2014 Motor with internal Micro www.talsaparts.com www.davisonsbutcher.com thermo protection... -
Page 12: Www.davisonsbutcher.com
ELECTRIC SCHEMAS • H15.a H20.a H26.a automatic 3-phase GMC-6M 3-ph 400V 230V Updated Feb 2014 Micro H15.am H20.am H26.am automatic 1-phase GMC-9M 1-ph 230V 220V Updated Feb 2014 Micro www.davisonsbutcher.com www.talsaparts.com... -
Page 13: Www.davisonsbutcher.com
USA/CANADA ELECTRIC SCHEMAS • USA/Canada only: H26pa-UL/CSA H15pa/H20pa H31pa/H42pa H52pa automatic 3-phase GMC-9M 60Hz 3-ph 208V 220V Updated Feb 2014 Motor with internal Micro * Fan only in H42/H52 3-phase stuffers. thermo protection USA/Canada only: H15pam/H20pam H26pam/H31pam H42pam/H52pam automatic 1-phase 60Hz GMC-12M 1-ph... -
Page 14: Www.davisonsbutcher.com
ELECTRIC SCHEMAS • • ELECTRIC SCHEMA model A-automatic, 3-phase. • • 1/L1 3/L2 5/L3 -KM1 -KM1 Updated Feb 2014 • ELECTRIC SCHEMA model A-automatic, 1-phase. • • 1/L1 -KM1 Updated Feb 2014 -KM1 www.talsaparts.com www.davisonsbutcher.com... -
Page 15: Www.davisonsbutcher.com
NOTICE: This cap is for transport purposes only!. Before operating the machine, replace it with the enclosed depressurized oil cap/dipstick. ALWAYS LEAVE THE PISTON IN THE BOTTOM OF THE MEAT CYLINDER ONCE YOU HAVE FINISHED USING THE MACHINE. PRES. WARNING • ATTENTION • 400/230 V dual-voltage machine factory preset to: 3x400 V •... -
Page 16: Www.davisonsbutcher.com
European Community regarding health and safety requirements. This declaration is no longer valid if the machine is modified without the manufacturers consent. Generic Denomination: Hydraulic Filler Function: Meat Filling Machine Type/Model: H15, H20, H26, H31, H42, H52 Serial number: please refer to the plate on the machine Applicable Directives of the European Union: ... -
Page 17: Table Of Contents
Illustrations www.talsanet.com Labeled Diagram Spare Parts List Main Components EORI: ESA46428025 Drawings Electrical Diagram "A” Models (with micro-switch & contactor) Talsa Products are designed and manufactured to the highest For Your Safety European standards. Proper 1.1 Important Warnings! installation, operation 1.2 Operating Hazards! -
Page 18: For Your Safety
Use ONLY genuine TALSA parts and accessories and have them installed only by a qualified technician. Use of unapproved parts and accessories voids TALSA’s warranty and may result in personal injury or damage to the machine. -
Page 19: Tips & Useful Information
DESCRIPTION, FEATURES AND USE Talsa hydraulic piston fillers/stuffers combine rigorous engineering standards, the best available technology and superior materials to provide years of trouble-free service, simple operation and easy maintenance. TALSA stuffers/fillers are noted for the following features: ... -
Page 20: Standard & Optional Accessories
H PISTON FILLERS/STUFFERS MANUAL 2.1 Standard & Optional Accessories Standard accessories included: Optional accessories available through your authorized dealer: Three nozzles ø12, 20, 30 mm. Stainless steel lid, piston and nut (standard on the H26S & H31S models). ... -
Page 21: Technical Data
5º Engler 50ºC (equiv. ISO3498: cat HL VG46, DIN8659: HL-46) Stainless steel grade AISI304 (equiv. DIN 1.4301, AFNOR Z6CN 18.09) Aluminum grade (H15/20, opt H26/31) AFNOR AG6T-Y (equiv. ASTM G8A - UNE L2331) Please note: The above capacities & weights are all approximate! -
Page 22: Delivery And Unpacking
DELIVERY AND UNPACKING All machines are delivered on a pallet and protected either by cardboard packaging (H15, H20, H26 & H31 models) or wooden crate (H42 & H52 models).We use only recyclable packaging and ask that you please recycle these materials. -
Page 23: Connecting To A Power Source
H PISTON FILLERS/STUFFERS MANUAL Important! ALWAYS fill the reservoir up to, but not exceeding, the dipstick’s “MAXIMUM” level mark since the more oil there is in the reservoir, the more effectively the hydraulic assemblage will be cooled. This helps lengthen the life of the oil. -
Page 24: Operating Instructions
H PISTON FILLERS/STUFFERS MANUAL IMG. 8: Position for 3x400/380 V IMG. 9: Position for 3x230/220 V IMG. 7: Unit’s base panel removed 5.5 Checking the Turning Direction of the Three-Phase Motor Electrical Hazard: Only a qualified electrician MUST carry out this operation. After verifying that the stuffer/filler is compatible with the electrical wiring at the Important: installation site, proceed as follows:... -
Page 25: Usage Steps
H PISTON FILLERS/STUFFERS MANUAL 6.1 Usage Steps Open the lid completely with a slight upward pressure to reduce friction. Before first use, and regularly thereafter (see the CLEANING section below), wash the meat barrel, the underside of the lid, and the nozzle that will be used with a sponge dipped in hot water. -
Page 26: Useful Operating Tips
H PISTON FILLERS/STUFFERS MANUAL 18) When finished using the machine, clean it, lower the piston to its lowest position in the barrel. Unplug the machine and, if it is stored away from the work area, make sure that it cannot accidentally roll and cause personal injury or property damage. -
Page 27: Cleaning The Meat Barrel Exterior & Lid
H PISTON FILLERS/STUFFERS MANUAL 7.1 Cleaning the Meat Barrel Exterior & Lid Use a sponge, hot water and a mild cleanser to clean the machine’s exterior. Warning: Thoroughly clean the underside of the lid (especially the dough exit hole), the ... -
Page 28: Cleaning Recommendations
H PISTON FILLERS/STUFFERS MANUAL Warning! ALWAYS use caution when removing the piston for maintenance or cleaning operations since it is heavy and there’s a risk of injury should the piston fall during dismantling Never fill the barrel with water since the water could seep down into the machine’s base and damage electrical and mechanical components. -
Page 29: Recommended Intervals For Manual Cleaning
H PISTON FILLERS/STUFFERS MANUAL 7.5 Recommended Intervals for Manual Cleaning Interval Parts To Clean Products Tools Notes Underside of the lid, lid gasket, Mild Sponge, Remove food residue from retaining screw using Daily interior of barrel and piston bolt detergent, cleaning a brush if necessary. -
Page 30: Maintenance & Inspection Tips
If the filter must be replaced, use a similar filter with a thread of 3/8” BSP and a filtering capacity of 10 liters per minute (5 liters per minute for the H15 &H20 models). After reassembling the unit, the closing clamp must be tightly sealed. -
Page 31: Troubleshooting Guide
Call your local dealer to have it replaced. Contact your local authorized TALSA dealer with any questions or concerns you have that are not addressed in this manual; they will be delighted to provide you with additional information and assistance. -
Page 32: Www.davisonsbutcher.com
This manual contains proprietary information which is protected by copyright. All rights are reserved. No part of this document may be photocopied, reproduced, or translated to another language without the prior written consent of the proprietary. The proprietary makes no warranty of any kind with regard to this material, including, but not limited to, the implied warranties of merchantability and fitness for a particular purpose.
Need help?
Do you have a question about the H15 and is the answer not in the manual?
Questions and answers