Table of Contents
Advertisement
Available languages
Available languages
Quick Links
STARTING UP
▲
!
Before using your ARNOVA for the first time, completely charge the battery!
Charging the Battery
1. Connect the supplied power cable to the ARNOVA and to a wall outlet.
2. The ARNOVA device will turn on and start charging.
The Power indicator light is red while the battery is charging.
It will turn green when the battery is fully charged.
Installation Wizard
The first time you start up your ARNOVA, the installation wizard will bring you through a few screens to
help you set up the principal settings: language, country, time, etc.
1
Advertisement
Table of Contents

Related Manuals for Archos Arnova 8G3


Summary of Contents for Archos Arnova 8G3
- Page 1 STARTING UP ▲ Before using your ARNOVA for the first time, completely charge the battery! Charging the Battery 1. Connect the supplied power cable to the ARNOVA and to a wall outlet. 2. The ARNOVA device will turn on and start charging. The Power indicator light is red while the battery is charging.
-
Page 2: Description Of The Device
DESCRIPTION OF THE DEVICE 1. On/Off button: enables to turn on or turn off the device. 2. Micro-SD card slot 3. Micro-USB port - to charge the battery of your ARNOVA - to connect your ARNOVA to your computer, using the included USB cable 4. -
Page 3: Connecting To The Wifi Network
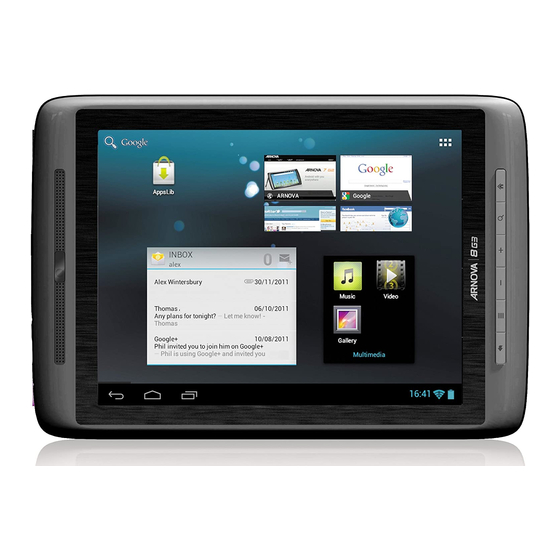
CONNECTING TO THE WIFI NETWORK For this procedure to work, you need to be in a WiFi zone that will allow you to connect to it. Every time the ARNOVA is in range of a network that you have already configured once, it will attempt to make a connection. How to configure a WiFi network From the status bar, at the bottom right hand of the screen, you can access the WiFi settings quickly. - Page 4 THE ARNOVA INTERFACE Your ARNOVA device is equipped with a capacitive touchscreen. Use your Touch for text search fingertip to navigate. These are default Android™ All apps button applications (Web Browser, Tap on this icon to reveal all EMail, etc.). Tap on an icon the Android™...
- Page 5 CUSTOMIZING YOUR PRODUCT The extended Home screen Navigate between different home screen panels by swiping left and right. Zoom: In some apps Customizing the Home screen panels (such as - To change your wallpaper, hold your finger on the screen at an empty Browser, and Gallery), location, then choose from the list.
- Page 6 CUSTOMIZING YOUR PRODUCT Add widgets Use the lock screen Widgets are like windows into your apps. They’re available from an All To protect personal information, you can Apps tab for you to move onto your Home screens. adjust your tablet’s lock settings: To see your widgets: 1.
-
Page 7: Transferring Media
TRANSFERRING MEDIA For Windows: note that the below procedure requires at least Windows XP and Windows Media Player 11. 1. Connect your tablet to your computer using the USB cable. Your device is automatically detected. It appears as an icon on “My Computer”. 2. -
Page 8: Register Your Product
REGISTER YOUR PRODUCT! On the web at http://arnovatech.com/register Ä We recommend that you take a few minutes to register it (http://arnovatech.com/register). This will allow you to get access to ARNOVA technical support (http://arnovatech.com/support). NEED HELP? On our Website: see the Frequently Asked Questions section on http://arnovatech.com/faq Contact our Technical Support Team: visit http://arnovatech.com/support for e-mail support. -
Page 9: Première Utilisation
PREMIÈRE UTILISATION ▲ Avant d’utiliser votre ARNOVA pour la première fois, chargez complètement sa batterie ! Charger la batterie 1. Branchez le câble d’alimentation fourni sur le port-micro USB de l’ARNOVA et sur une prise secteur. 2. Votre ARNOVA s’allume et commence à se charger. Le témoin de charge est rouge lorsque la batterie est en charge. -
Page 10: Description De L'appareil
DESCRIPTION DE L’APPAREIL 1. Bouton On/Off : permet d’allumer ou d’éteindre l’appareil. 2. Emplacement pour carte Micro-SD 3. Port micro-USB - pour connecter votre ARNOVA à un ordinateur, à l’aide du câbleUSB fourni (pour transférer des fichiers) - pour charger l’appareil via l’adaptateur secteur. 4. - Page 11 SE CONNECTER À UN RÉSEAU WIFI Pour suivre cette procédure, vous devez vous situer dans une zone WiFi vous permettant de vous connecter. Chaque fois que l’ARNOVA détectera un réseau que vous avez déjà configuré, il tentera de s’y connecter. Comment configurer un réseau WiFi A partir de la barre de statut, dans le coin inférieur droit de l’écran, vous pouvez accéder rapidement aux paramètres WiFi.
- Page 12 L’INTERFACE DE L’ARNOVA Votre ARNOVA est équipé d’un écran tactile capacitif. Utiliser la pulpe de votre Pour saisir vos termes de recherche doigt pour naviguer. Des raccourcis Android™ Icone Toutes les applications par défaut (Navigateur Appuyez sur cet icone Web, E-mail, etc.). Appuyez pour afficher toutes les sur un icone pour ouvrir applications Android™...
- Page 13 PERSONNALISATION DE L’APPAREIL L’écran d’accueil étendu Faites glisser votre doigt horizontalement sur l’écran pour aller sur le côté gauche ou droit de l’écran d’accueil étendu. Changer le fond d’écran Zoomer : Dans des applications telles - Pour changer votre fond d’écran, maintenez votre doigt appuyé sur un que les navigateurs, emplacement vide de l’écran, puis choisissez parmi la liste d’options.
- Page 14 PERSONNALISATION DE L’APPAREIL Ajouter des widgets Utiliser le verrouillage écran Les widgets sont comparables à des fenêtres ouvertes sur vos Pour protéger vos informations applications. Vous pouvez les sélectionner dans l’onglet “Toutes les confidentielles, vous pouvez modifier applications”, puis les déplacer vers vos écrans d’accueil. les paramètres de verrouillage de votre Pour afficher vos widgets, procédez comme suit : tablette :...
- Page 15 TRANSFERT DE FICHIERS MULTIMÉDIA Pour Windows : la procédure décrite ci-dessous nécessite au minimum le système d’exploitation Windows XP et Windows Media Player 11. 1. Connectez votre tablette à votre ordinateur en utilisant le câble USB. Votre appareil est automatiquement détecté. Il s’affiche sous forme d’icone dans “Poste de travail”. 2.
-
Page 16: Enregistrez Votre Produit
ENREGISTREZ VOTRE PRODUIT ! Ä Sur Internet : http://arnovatech.com/register Nous vous conseillons de prendre quelques minutes pour l’enregistrer (http://arnovatech.com/register). Cela vous permettra d’avoir accès au support technique ARNOVA (http://arnovatech.com/support). BESOIN D’AIDE ? Sur notre site Web: Consultez la Foire Aux Questions (FAQ) sur http://arnovatech.com/faq Contactez notre équipe d’assistance technique: Allez sur http://arnovatech.com/support pour une assistance par e-mail. - Page 17 STARTEN ▲ Vor der erstmaligen Verwendung des ARNOVA sollte der Akku vollständig aufgeladen werden! Aufladen des Akkus 1. Verbinden Sie das mitgelieferte Stromkabel mit dem ARNOVA und mit einer Steckdose. 2. Daraufhin schaltet sich der ARNOVA-Player ein und startet den Ladevorgang. Während der Akku aufgeladen wird, leuchtet die Leistungsanzeige rot.
- Page 18 BESCHREIBUNG DES ARNOVA 1. EIN/AUS-Taste 2. microSD Karten Steckplatz 3. Micro USB Port: - zum Aufladen der Batterie Ihres ARNOVA - zum Verbinden des ARNOVA mit dem Computer über das mitgelieferte USB Kabel (zur Datei-Übertragung). 4. Kopfhöreranschluss 5. Hardware-Reset: Falls Ihr ARNOVA einmal abstürzt, können Sie dieReset-Taste drücken, indem Sie einen scharfen Gegenstand verwenden, wie z.
- Page 19 WIFI-NETZWERKVERBINDUNG Dazu müssen Sie sich in Reichweite eines WLAN-Netzwerks befinden. Das ARNOVA Gerät erkennt bereits konfigurierte Netzwerke und wird mit diesen eine Verbindung herstellen. Konfiguration eines WiFi-Netzwerks Von der Statusleiste aus können Sie schnell auf die WiFi-Einstellungen zugreifen. 1. Tippen Sie auf die Uhrzeit in der Statusleiste. Das Status-Dashboard wird angezeigt.
- Page 20 DIE ARNOVA BENUTZEROBERFLÄCHE Ihr ARNOVA-Gerät ist mit einem Kapazitiven Touchscreen ausgerüstet. Suchbegriff eintippen Die Bedienung erfolgt durchBerührung des Touchscreens. Anzeige von Desktop- Alle Apps Symbol Verknüpfungen von Android™ Tippen Sie auf dieses Icon, um (WebBrowser, eMail, usw.). alle installierten Android™- Tippen Sie auf ein Icon, um die Anwendungen zu sehen entsprechende Anwendung zu...
- Page 21 ANPASSEN IHRES PRODUKTES Der erweiterte Desktop Bewegen Sie Ihren Finger horizontal auf dem Touchscreen, um auf die linke oder rechte Seite des Desktops zu gelangen. Pinch-to-zoom: Hintergrund ändern Einige Anwendungen - Zum Ändern des Wallpaper den Finger auf eine freie Stelle des lassen sich einfach Bildschirms legen und dann aus der Liste auswählen.
- Page 22 ANPASSEN IHRES PRODUKTES Widgets hinzufügen Bildschirmsperre verwenden Widgets sind wie Fenster für Ihre Apps. Sie können sie über den Tab Zum Schutz Ihrer persönlichen Daten “Alle Apps” auf Ihre Startbildschirme verschieben. können Sie die Sperreinstellungen Ihres So zeigen Sie Ihre Widgets an: Tablets anpassen: 1.
- Page 23 ÜBERTRAGEN VON MEDIADATEIEN Für Windows: Beachten Sie, dass der nachfolgende Vorgang mindestens Windows XP und Windows Media Player 11 erfordert. 1. Verbinden Sie Ihr Tablet mit Ihrem Computer mithilfe des USB-Kabels. Ihr Gerät wird automatisch erkannt. Es erscheint als Symbol auf Ihrem „Arbeitsplatz“. 2.
-
Page 24: Registrieren Sie Ihr Produkt
REGISTRIEREN SIE IHR PRODUKT! Ä Im Internet unter http://arnovatech.com/register Wir empfehlen Ihnen, sich ein paar Minuten Zeit zu nehmen, und es zu registrieren (http://arnovatech.com/register). Dadurch erhalten Sie Zugriff auf den technischen Support von ARNOVA (http://arnovatech.com/support). SIE BENÖTIGEN HILFE? Auf unserer Website: Für häufig gestellte Fragen (FAQ) siehe http://arnovatech.com/faq Kontaktieren Sie unseren technischen Kundendienst: Sie erhalten unter http://arnovatech.com/support Hilfe per E-Mail. -
Page 25: Antes De Empezar
ANTES DE EMPEZAR ▲ Antes de utilizar su ARNOVA por primera vez, cargue completamente la batería. Cargado de la batería 1. Conecte el cable de alimentación suministrado al conector de alimentación del ARNOVA y a una toma eléctrica de pared. 2. -
Page 26: Descripción Del Arnova
DESCRIPCIÓN DEL ARNOVA Botón ON/OFF: manténgalo pulsado para encender/apagar el dispositivo. 2. Ranura para tarjetas Micro-SD 3. Puerto micro-USB: - para conectar el ARNOVA a un ordenador, mediante el cable USB incluido (para transferir archivos). - para cargar el dispositivo mediante el adaptador de alimentación 4. -
Page 27: Conexión A Una Red Wifi
CONEXIÓN A UNA RED WIFI Para que este procedimiento funcione, debe encontrarse en una zona WiFi que le permita conectarse. Cuando el ARNOVA se encuentre dentro del alcance de una red que ya haya configurado una vez, intentará realizar una conexión. - Page 28 EL INTERFAZ DEL ARNOVA El dispositivo ARNOVA está equipado con una pantalla táctil capacitiva. Toca para realizar una búsqueda textual Utilizar la pulpa de los dedos. Todas las aplicaciones Estos son los accesos directos Android™ (Navegador web, Dé un toque en este EMail, etc.).
- Page 29 PERSONALIZACIÓN DEL PRODUCTO La pantalla de inicio ampliada Deslice el dedo horizontalmente en la pantalla para ir al lado izquierdo o derecho de la pantalla de inicio ampliada. Personalización de los elementos de la pantalla de inicio Pinzar[Zoom]: En algunas aplicaciones, - Para cambiar el fondo de pantalla, mantenga el dedo en la pantalla en puede ampliar y un punto vacío y elija uno de la lista.
- Page 30 PERSONALIZACIÓN DEL PRODUCTO Cómo añadir widgets Cómo utilizar la pantalla de bloqueo Los widgets son como ventanas de las aplicaciones. Están disponibles Para proteger la información personal, en la pestaña “Todas las aplicaciones” para que puedas moverlos a las puedes modificar los ajustes de bloqueo pantallas del escritorio.
- Page 31 TRANSFERENCIA DE ARCHIVOS MUL TIMEDIA En Windows: tenga en cuenta que el procedimiento siguiente requiere al menos Windows XP y Windows Media Player 11. 1. Conecte su tablet al ordenador usando el cable USB. El dispositivo se detecta automáticamente. Aparecerá como un icono en «Mi PC». 2.
-
Page 32: Registre Su Producto
¡REGISTRE SU PRODUCTO! Ä En Internet en http://arnovatech.com/register Dedique unos pocos minutos de su tiempo para registrarlo (http://arnovatech.com/register). De esta forma, podrá acceder al servicio de asistencia técnica de ARNOVA (http://arnovatech.com/support). ¿NECESITA AYUDA? En nuestro sitio web: consulte la sección de preguntas más frecuentes en http://arnovatech.com/faq Póngase en contacto con nuestro equipo de Asistencia Técnica: visite http://arnovatech.com/support para la asistencia por e-mail. - Page 33 AVVIO ▲ Prima di utilizzare il dispositivo ARNOVA per la prima volta, caricare completamente la batteria. Caricamento della batteria 1. Collegare il cavo di alimentazione fornito al dispositivo ARNOVA e a una presa a muro. 2. Il dispositivo ARNOVA si accende e viene avviata la ricarica. L’indicatore della carica è...
- Page 34 DESCRIZIONE Pulsante ON/OFF: tenere premuto per accendere/spegnere. 2. Slot per schede micro SD 3. Porta micro USB - per collegare ARNOVA al vostro PC, utilizzare il cavo USB (anche per trasferire files) - per caricare il dispositivo utilizzando l’adattatore di alimentazione o il cavo USB collegato a un computer acceso 4.
- Page 35 CONNESSIONE A UNA RETE WIRELESS Per procedere è necessario trovarsi in una zona WIFI che permetta la connessione. Ogni qualvolta ARNOVA si trova in un raggio di rete che avete già configurato una volta, cercherà una connessione. Come configurare una rete WiFi Dalla barra di sistema è...
- Page 36 INTERFACCIA Il dispositivo ARNOVA è dotato di uno capacitivo schermo a sfioramento. Selezionare la ricerca di Utilizzando la polpa delle dita. testo Tutte le applicazioni Queste sono le scorciatoie Android™ (Web Browser, Sfiorare questa icona per EMail, ecc.) - sfiorare un’icona mostrare le applicazioni per aprire l’applicazione Android™...
- Page 37 PERSONALIZZA IL PRODOTTO Schermo intero Fare scivolare il dito in senso orizzontale sullo schermo per posizionarsi sulla parte sinistra o destra dello schermo. Cambiare lo sfondo Avvicinare le dita[Zoom]: In Per modificare lo sfondo, posizionare il dito sullo schermo in una posizione alcune applicazioni, vuota, quindi scegliere dall’elenco.
- Page 38 PERSONALIZZA IL PRODOTTO Aggiungere widget Utilizzare il blocco schermo I widget sono come finestre sulle applicazioni. Sono disponibili in Per proteggere le informazioni personali, una scheda Tutte le applicazioni per poterli spostare nelle schermate è possibile modificare le impostazioni di Home.
- Page 39 TRASFERIMENTO DI CONTENUTI MUL TIMEDIALI Per Windows: notare che per la procedura seguente è necessario almeno Windows XP e Windows Media Player 11. 1. Collegare il tablet al computer usando il cavo USB. Il dispositivo viene rilevato automaticamente. Esso appare come un’icona in “Risorse del computer”. 2.
-
Page 40: Registrazione Del Prodotto
REGISTRAZIONE DEL PRODOTTO Su Internet all'indirizzo http://arnovatech.com/register Ä Vi suggeriamo di registrarlo; ci vorranno solo pochi minuti (http://arnovatech.com/register). Una volta registrato, potrete accedere al servizio di assistenza tecnica di ARNOVA (http://arnovatech.com/support). SERVE AIUTO? Sul nostro sito Web: consultare la sezione FAQ (Frequently Asked Questions) all'indirizzo http://arnovatech. com/faq Contattare il nostro servizio di assistenza tecnica: visitare il sito Web http://arnovatech.com/support per ricevere assistenza mediante posta elettronica. - Page 41 OPSTARTEN ▲ Laad de batterij volledig op alvorens de ARNOVA voor de eerste maal te gebruiken. De batterijen laden 1. Sluit het meegeleverde netsnoer aan op de micro-USB-poort van de ARNOVA en op een stopcontact. 2. Uw ARNOVA zal worden ingeschakeld en starten met laden. Het aan/uit-lampje brandt rood wanneeer de batterij aan het opladen is.
-
Page 42: Beschrijving Arnova
BESCHRIJVING ARNOVA AAN/UIT-knop: ingedrukt houden om in/uit te schakelen. 2. Micro-SD-kaartsleuf 3. Micro-USB-poort - met de bijgesloten USB-kabel kunt u uw ARNOVA met uw computer verbinden (om bestanden over te brengen) -Voor het opladen van het apparaat met de voedingsadapter of met de USB-kabel (als deze is aangesloten op een ingeschakelde computer) 4. - Page 43 WIFI-NETWERKVERBINDING Hiervoor dient u zich in een WiFi-zone te bevinden, zodat u verbinding kunt maken. Telkens dat uw ARNOVA zich in een zone bevindt met een netwerk dat u al geconfigureerd hebt, zal het proberen om hier verbinding mee te maken. Het opzetten van een WiFi-netwerk Vanuit de systeembalk is het mogelijk om de WiFi-instellingen snel te openen.
- Page 44 DE ARNOVA-INTERFACE Uw ARNOVA-apparaat is uitgerust met een capacitieve aanraakscherm. Gebruik Toets om tekst te zoeken de vinger pulp. Applicaties knop Dit zijn de standaard Android™- snelkoppelingen (Web Browser, Druk op dit pictogram EMail, enz.). Druk op een om al de op uw ARNOVA pictogram om de betreffende geïnstalleerde Android™- applicatie te openen.
- Page 45 PERSONALISEER UW PRODUCT Het uitgebreide beginscherm Schuif met uw vinger horizontaal over het scherm om naar de linker- of de rechterkant van uw uitgebreide beginscherm te gaan. De achtergrond wijzigen Knijp[Zoom]: Als u uw achtergrond wilt wijzigen, houdt u een leeg gedeelte van het In bepaalde scherm aangeraakt met uw vinger en kiest u een optie in de lijst.
- Page 46 PERSONALISEER UW PRODUCT Widgets toevoegen Het vergrendelingsscherm gebruiken Met widgets heeft u overal toegang tot uw apps. U kunt ze vanaf het Om uw persoonlijke gegevens tabblad ‘Alle apps’ verplaatsen naar uw startschermen. te beschermen, kunt u de Uw widgets weergeven: vergrendelingsinstellingen van de tablet aanpassen: 1.
- Page 47 MEDIA OVERZETTEN NAAR UW ARNOVA Voor Windows: Opgelet, onderstaande procedure vereist minstens Windows XP en Windows Media Player 11. 1. Sluit uw tablet met behulp van de USB-kabel op uw computer aan. Uw toestel wordt automatisch gedetecteerd. Deze verschijnt als een pictogram op “My Computer” (Mijn computer). 2.
-
Page 48: Hulp Nodig
UW PRODUCT REGISTREREN Op het internet op http://arnovatech.com/register Ä Wij raden u aan om uw ARNOVA-product te registreren (http://arnovatech.com/register). Na registratie krijgt u toegang tot de technische ondersteuning van ARNOVA (http://arnovatech.com/support). HULP NODIG? Op onze website: raadpleeg het onderdeel Frequently Asked Questions op http://arnovatech.com/faq Neem contact op met onze Technisch ondersteuning: surf naar http://arnovatech.com/support voor ondersteuning via e-mail. - Page 49 INICIANDO ▲ Antes de utilizar o dispositivo ARNOVA pela primeira vez, carregue completamente a bateria! Carregar a bateria 1. Conecte o cabo de força fornecido com o conector USB ARNOVA e na tomada de parede. 2. O dispositivo ARNOVA ligar-se-á e começará a carregar. A luz indicadora do botão Power fica vermelha enquanto a bateria carrega.
-
Page 50: Descrição Do Aparelho
DESCRIÇÃO DO APARELHO Botão On/Off: permite ligar ou desligar o dispositivo. 2. Slot do cartão SIM 3. Porta Micro-USB - para carregar a bateria do ARNOVA - para conectar o ARNOVA no computador, usando o cabo USB incluído (para transferir ficheiros). 4. - Page 51 CONECTANDO A UMA REDE WIFI Para este procedimento de trabalho, você precisa estar em uma área de WiFi que permitirá que você se conecte a ela. Todas as vezes que ARNOVA estiver no alcance de uma rede que você já configurou uma vez, ela tentará fazer uma conexão.
- Page 52 A INTERFACE ARNOVA O dispositivo ARNOVA vem equipado com um ecrã táctil capacitivo. Utilize a Toque para procurar o ponta do dedo para navegar. texto O ícone Todas as Aplicações Estes são os atalhos Android™ por defeito (Navegador da Toque neste ícone para apresentar todas as Web, E-Mail, etc.).
- Page 53 PERSONALIZANDO O SEU PRODUTO Ecrã inicial ampliado Deslize o dedo na horizontal no ecrã para se deslocar para o lado esquerdo ou direito do ecrã inicial ampliado. Alterar a imagem de fundo Aperte[Zoom]: Para alterar o seu papel de parede, toque continuamente com o dedo no Em algumas ecrã...
- Page 54 PERSONALIZANDO O SEU PRODUTO Adicionar widgets Utilizar o ecrã de bloqueio Os widgets são como janelas para as suas aplicações. Estão Para proteger as informações pessoais, pode disponíveis num separador Todas as Aplicações para que os possa ajustar as definições de bloqueio do tablet: mover para os Ecrãs Principais.
- Page 55 TRANSFERIR CONTEÚDO MUL TIMÉDIA Para Windows: note que o procedimento a seguir exige pelo menos o Windows XP e Windows Media Player 11. 1. Ligue o comprimido para o seu computador usando o cabo USB. O dispositivo é automaticamente detectado. Ele aparece como um ícone no “Meu Computador”. 2.
-
Page 56: Precisa De Ajuda
REGISTRE SEU PRODUTO! Na web em http://arnovatech.com/register Ä Recomendamos que você leve alguns minutos para registrá-lo (http://arnovatech.com/register). Isto lhe permitirá o acesso ao suporte técnico ARNOVA (http://arnovatech.com/support). PRECISA DE AJUDA? Em nosso site da web: veja a seção de Perguntas Prequentes no http://arnovatech.com/faq Contate nossa Equipe de Suporte Técnico: visite http://arnovatech.com/support para suporte de email. -
Page 57: National Restrictions
National restrictions This device is intended for home and office use in all EU countries (and other countries following the EU directive 1999/5/EC) without any limitation except for the countries mentioned below: Country Restriction Reason/remark Bulgaria None General authorization required for outdoor use and public service France Outdoor use... - Page 58 Open Source Software Offer The software bundled with this product includes software files subject to certain open source license requirements. Such open source software files are subject solely to the terms of the relevant open source software license. Such open source software is provided on an “AS IS” basis to the maximum extent permitted by applicable law. For the open source files contained herein, please access “Open source license”...
- Page 59 FCC Statement This device complies with Part 15 of the FCC Rules. Operation is subject to the following two conditions: (1) this device may not cause harmful interference, and (2) this device must accept any interference received, including interference that may cause undesired operation.
Need help?
Do you have a question about the Arnova 8G3 and is the answer not in the manual?
Questions and answers