Table of Contents
Advertisement
Advertisement
Table of Contents

Subscribe to Our Youtube Channel
Related Manuals for Aeroqual Dust Sentry Pro


Summary of Contents for Aeroqual Dust Sentry Pro
- Page 1 MRK-D-0048 V4 Aeroqual Dust Sentry / AQS User Guide Page | 1...
- Page 2 Sentry, Dust Sentry Profiler Alternative sources of information and help In addition to this user guide, Aeroqual offers other sources of information which can assist in the operation of the monitors. The Aeroqual website contains brochures, technical notes and user guides for all products.
-
Page 3: Table Of Contents
Table of Contents Dust Sentry / Dust Sentry Pro / AQS 1 Introduction ................ 5 Overview ..........................5 Product comparison ........................ 6 Applications by product ......................6 Optional external sensors ....................... 7 Dimensions ..........................7 Specifications .......................... 8 Quick Setup Guide ........................... 9 Pre-planning .......................... - Page 4 Warranty ............................ 62 Appendix ........................... 63 12.1 Gas module design ....................... 63 12.2 Particulate Matter module design..................65 12.3 Mains wiring color guide ......................67 12.5 Calibration Records ....................... 68 MRK-D-0048 V4 Aeroqual Dust Sentry / AQS User Guide Page | 4...
-
Page 5: Dust Sentry / Dust Sentry Pro / Aqs 1 Introduction
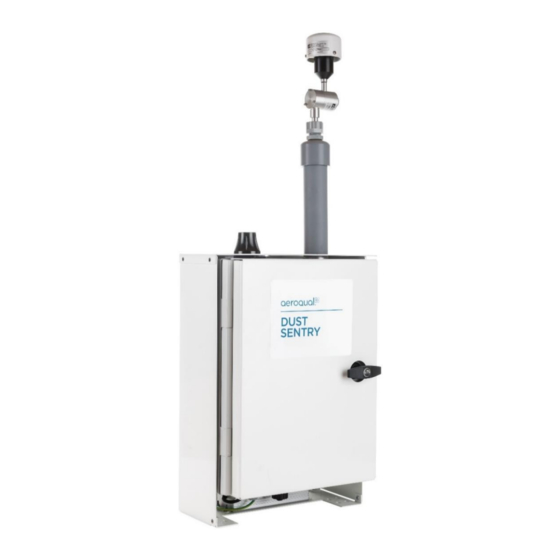
1 Dust Sentry / Dust Sentry Pro / AQS 1 Introduction 1.1 Overview Dust Sentry / Dust Sentry Pro / AQS 1 (collectively referred to herein as ‘monitors’) are tools for air quality professionals to target specific applications of interest in industrial, urban environment and regulatory applications. -
Page 6: Product Comparison
Dust Sentry measures a single size fraction selected by the user but the Dust Sentry Pro measures four size fractions simultaneously. AQS 1 also measures gases in addition to particulate, up to three gas modules may be integrated. -
Page 7: Optional External Sensors
See Section 2.6.1 for wiring external sensors. 1.5 Dimensions These dimensions are for a visual representation only, for full details.– see section 1.6 Specifications. Dimensions are in millimetres (mm). MRK-D-0048 V4 Aeroqual Dust Sentry / AQS User Guide Page | 7... -
Page 8: Specifications
0 -500 ppb (0.1 ppb) Compounds (PID) Gas calibration interval As required *Above 40 °C the laser may require more frequent servicing. All monitors use the same software platform: https://www.aeroqual.com/product/air-monitoring- software MRK-D-0048 V4 Aeroqual Dust Sentry / AQS User Guide Page | 8... -
Page 9: Quick Setup Guide
Send any questions about things you are unsure about to technical@aeroqual.com 7. Write a checklist Write your own checklist to ensure a smooth installation and setup. Include any reporting requirements that will be required. MRK-D-0048 V4 Aeroqual Dust Sentry / AQS User Guide Page | 9... - Page 10 All monitors are supplied with a traceable factory calibration. This calibration is applicable to the commissioning phase and accordingly Aeroqual does not recommend an initial calibration as part of monitor commissioning.
-
Page 11: Pre-Planning
Configure MOXA modem (where supplied) Aeroqual recommends these steps be performed in an office or laboratory as part of a quality control check of the monitor to make sure the monitor has arrived undamaged and the flow system, electrical system and communication system are working as expected. -
Page 12: Assembly
Online reference https://training.aeroqual.com/mod/page/view.php?id=624 Online video YouTube Channel: Aeroqual Service and Maintenance playlist Assemble the PM inlet The particle sampling inlet is easy to assemble by push fitting the various supplied parts together. If no sharp cut cyclone has been ordered then only a sampling inlet assembly and TSP head will need to be assembled. - Page 13 Replace the nut after you have done this. MRK-D-0048 V4 Aeroqual Dust Sentry / AQS User Guide Page | 13...
- Page 14 Figure 2-6 During field installation, secure the PM inlet using the retaining screws and plug in the heater Attach gas inlet (AQS Only) Figure 2-7 (L-R) Dust Sentry, Dust Sentry Pro come with insert. AQS supplied with Swagelok fitting. ...
-
Page 15: Power Requirements
Install 2 power outlets, 1 for the monitor and one for calibration equipment. NOTE: Aeroqual does not supply the mains power cable or the electrical plug for your local power socket, you must supply this yourself. -
Page 16: Wiring Auxiliary Sensors
AUX module. Each third party sensor requires a different wiring configuration. See 2.6.2 Auxiliary sensor wiring diagrams. When you are happy with the wiring then apply power, and log on to the Aeroqual Connect software as described in section 4.1 Aeroqual Connect (via Direct WIFI / LAN). - Page 17 Gill Ultrasonic Wind Sensor Cirrus MK427 Noise Sensor Vaisala WXT536 Weather Sensor Met One MSO Weather Sensor Novalynx Silicon Pyranometer Online reference training.aeroqual.com DM 1.3 Tech training Section 2.3 MRK-D-0048 V4 Aeroqual Dust Sentry / AQS User Guide Page | 17...
-
Page 18: Mounting And Site Positioning Guidelines
For example, there should be no obstruction to the air flow in the predominant wind direction. A minimum clear sky angle of 120 degrees is recommended. MRK-D-0048 V4 Aeroqual Dust Sentry / AQS User Guide Page | 18... -
Page 19: Safety
If using a tripod, ensure the tripod legs are bolted to the ground to prevent the unit from falling. Ensure the monitor is in a secure location to avoid vandalism or theft. MRK-D-0048 V4 Aeroqual Dust Sentry / AQS User Guide Page | 19... -
Page 20: Connectivity
– see section 4.2.2 Connecting using a cellular modem. There are two ways to connect to your monitors: Aeroqual Connect (via Direct WIFI / LAN) for initial set up and when access to the internet is limited; ... -
Page 21: Aeroqual Cloud (Via Network Wifi / Modem)
Access your monitor on Aeroqual Connect After connecting your monitor to your device, open an internet browser window and enter 10.10.0.1 in the address bar. You should see the Aeroqual Connect login screen. Log in with the default user name and password provided. - Page 22 The WIFI or wired LAN IP address will likely be in the format: 192.168.XXX.XXX Figure 4-7 shows the Connect software with an assigned IP address in the address bar in the browser. MRK-D-0048 V4 Aeroqual Dust Sentry / AQS User Guide Page | 22...
- Page 23 Aeroqual supplies an optional cellular modem (MOXA G3111 HSPA) for remote communication. This is Aeroqual part number R38. This must be correctly configured to work on the local telecommunications network in your country. The modem requires a standard SIM card (dynamic IP) which you can buy from a cell phone store.
- Page 24 Ethernet mode is set to DCHP (server) in this method. Figure 4-8 To establish a direct connection, a laptop must be connected to the ePC using an Ethernet cable MRK-D-0048 V4 Aeroqual Dust Sentry / AQS User Guide Page | 24...
-
Page 25: Communication Settings
Ethernet cable. Enter 10.10.0.1 to connect directly to the monitors. NOTE: Should you need to reset the communication settings, see the following section, Section 4.4. MRK-D-0048 V4 Aeroqual Dust Sentry / AQS User Guide Page | 25... -
Page 26: Resetting The Communication Settings Back To Factory Settings
The WIFI settings can be set back to Access Point mode and the monitor will again appear as a WIFI network with the SSID name “Aeroqual AQM” and WIFI password “Aeroqual”. To achieve this you will need a USB flash drive. -
Page 27: Operation
The data from each module can be viewed on screen in a Table. The from and to dates can be selected using a calendar tool, and the averaging period such as daily, hourly or minute can also be selected. MRK-D-0048 V4 Aeroqual Dust Sentry / AQS User Guide Page | 27... - Page 28 PC to Aeroqual Cloud. This feature is used if the Monitor does not have an active data connection to Aeroqual Cloud at the monitoring site but the data is required to be in Aeroqual Cloud for data storage and so all stakeholders can access the data.
-
Page 29: Calibration And Service
These files are then uploaded one by one using the manual sync upload tool in Aeroqual Cloud. Figure 5-5 The manual sync tool in the Manage Data app allow all data from the Monitor to be manually uploaded to the Cloud if a local data connection is not available 5.2 Calibration and Service... -
Page 30: Diagnostics And Advanced
The Diagnostic and Advanced App provides access to monitor and individual module operating parameters and is used by Aeroqual technical support to troubleshoot and diagnose monitor condition. It provides real time information about the status of the modules and also allows operational settings of the modules to be viewed or edited. -
Page 31: Administration
These access credentials are published in multiple public documents and are only used to first connect to and configure the monitor. Aeroqual recommends that a new Administrator user is created with secure password and the default Administrator user is deleted which will make the monitor more secure. -
Page 32: Service & Maintenance
Recommended service frequencies for each service activity are given in Section 6.1. Further detail on each of the service activities can be found on the Aeroqual training website: training.aeroqual.com (The training website requires a login, please email technical@aeroqual.com) -
Page 33: Flow Meters And Flow Measurement
Flow meters for gas flow measurement For gas flow measurements, Aeroqual recommends either the Bios Defender DryCal or the TSI 4040 (AQM R7) flow meter. These can both be used to measure gas flow and Particle Monitor flow. -
Page 34: Journal
Vacuum gauge R23 (Included in both Dust Sentry and AQS R20 Service Kits, also available separately) Electrical multi meter (Only required for troubleshooting) Adjustable spanner MRK-D-0048 V4 Aeroqual Dust Sentry / AQS User Guide Page | 34... - Page 35 Philips head screwdriver Parts required None Service interval Recommended Monthly. Online reference training.aeroqual.com: Dust Monitor technical Training Section 4.2 Online video YouTube Channel: Aeroqual Service and Maintenance playlist MRK-D-0048 V4 Aeroqual Dust Sentry / AQS User Guide Page | 35...
- Page 36 Figure 6-7 To measure the flow rate, remove the inlet filter and attach the inlet flow adaptor. 6.5.4.2 Measure the flow rate of the module The module flow rate is measured using a high quality flow meter such as the Aeroqual R7 or the Bios Dry Cal. See Section 6.1 ...
- Page 37 Service Interval See Section 6.1 for further discussion on filter change frequencies. Online reference training.aeroqual.com: Dust Monitor technical Training, section 5.1 Online video YouTube Channel: Aeroqual Service and Maintenance playlist The filters for the Particle Monitor are located inside the optical module. Use a large flat head screw driver to unscrew the filter housing on the front panel of the optical module.
- Page 38 Service Interval Recommended Monthly. (See Section 6.1) Online reference training.aeroqual.com: Dust Monitor technical Training Section 4.1 Online video YouTube Channel: Aeroqual Service and Maintenance playlist The AQS R56 includes a flow adaptor which is fitted on the inlet, for the Particle Monitor it is fitted above the cyclone as shown in Figure 6-11.
- Page 39 Figure 6-14 The flow rate of the Particle Profiler is set by adjusting the flow adjustment valve The flow rate of the Particle Profiler is adjusted to 1.0 LPM ± 0.05 LPM using the flow adjustment valve as shown in Figure 6-14. MRK-D-0048 V4 Aeroqual Dust Sentry / AQS User Guide Page | 39...
- Page 40 Parts required None Recommended Every three months (See Section 6.1) Service Interval Online reference training.aeroqual.com: Dust Monitor technical Training Section 4.2 Online video None 6.5.7.1 Leak check a Particle Monitor 1. Remove the TSP head and install the R23 vacuum gauge above the sharp cut cyclone 2.
- Page 41 Figure 6-17 Pinch the tube with the newer Particle Profiler pump module NOTE: The pressure change (leak rate) should be no more than 10 kPa in 10 seconds MRK-D-0048 V4 Aeroqual Dust Sentry / AQS User Guide Page | 41...
- Page 42 Parts required None Service interval Recommended Monthly. (See Section 6.1) Online reference training.aeroqual.com: Dust Monitor technical training Section 4.4 Online video YouTube Channel: Aeroqual Service and Maintenance playlist 6.5.8.1 Check zero baseline of Particle Monitor The Particle Monitor (nephelometer) has an automatic zero calibration function which runs every 12 hours, this procedure automatically changes the zero offset of the Particle Monitor.
- Page 43 Parts required None Recommended 6 Monthly. (See Section 6.1) Service interval Online reference training.aeroqual.com: Dust Sentry technical Training Section 5.1 Online video YouTube Channel: Aeroqual Service and Maintenance playlist MRK-D-0048 V4 Aeroqual Dust Sentry / AQS User Guide Page | 43...
- Page 44 Tools required Diaphragm pump R10, flowmeter DS R8 or AQM R7 Parts required None Service interval Only as required. (See Section 6.1) Online reference None Online video None MRK-D-0048 V4 Aeroqual Dust Sentry / AQS User Guide Page | 44...
- Page 45 Figure 6-22 A gas module can be checked for leaks by using a diaphragm pump and R7 flow meter NOTE: If the module is found to have a leak, contact the Aeroqual distributor in your local country for technical support.
-
Page 46: Factory Calibration Of Particle Monitor
The Particle Monitor optical module (nephelometer) requires a factory service and calibration every two years. For information about factory service and calibration of the Particle Monitor, please check with the Aeroqual distributor nearest to you. MRK-D-0048 V4 Aeroqual Dust Sentry / AQS User Guide Page | 46... -
Page 47: Scheduled Maintenance
Leak check a gas 6.5.11 As required following module flow check module Add, remove, replace 6.5.12 As required gas module Table 6-1 Service frequency guidelines for various service activities MRK-D-0048 V4 Aeroqual Dust Sentry / AQS User Guide Page | 47... -
Page 48: Calibration
Aeroqual provides all of the equipment required to perform field calibration. Aeroqual offers a portable calibrator called the AirCal 1000. ... - Page 49 Air 6D 103 litres C10 fitting Table 7-1 Recommended gas cylinders from Calgaz. A two-stage pressure regulator is required for use with these gas cylinders. Aeroqual can supply the regulator, part number AIC GASREG01, for use with C10 fitting. The Aeroqual regulator is shown attached to the Calgaz cylinder in Figure 5-1.
- Page 50 Flow meters for gas flow measurement It is important to have a high quality flow meter for the gas flow measurement. Figure 7-2 Recommended high quality flow meters. Left: Bios DryCal, Right: Aeroqual R7 flow meter. Gas module field calibration frequency Typically only advanced users will need to field calibrate their monitor.
- Page 51 0.1 ppm. The Calibration screen in the Calibration and Service App in the Aeroqual software is where you will perform the calibration and change any monitor settings.
- Page 52 ] – a[O ] = [O The NO a value is set at the Aeroqual factory and adjusts for the relative response of the O module towards ozone calibration gas. The a value should be checked and adjusted as part of routine field calibration, see Figure 3b.
- Page 53 If the inlet flow has changed (more than ± 20 %) since last time it was measured (step 5.6) then go to Step 6. Close the door Record the final total flow. MRK-D-0048 V4 Aeroqual Dust Sentry / AQS User Guide Page | 53...
- Page 54 Move on to next module and go back to Step 7.2.1. 7.2.3 Record the stabilised reading in Table 7, column 7.2.3 from the 10 minute average. MRK-D-0048 V4 Aeroqual Dust Sentry / AQS User Guide Page | 54...
- Page 55 Table 8 Column 8.1.2 8.1.2 Start the NO calibration gas flowing at your chosen span point, Aeroqual recommends 0.1 ppm. Make sure there is excess flow out from the tee at the monitor inlet as shown in Figure 5-6.
- Page 56 Figure 5-5. 8.1.11 Deliver ozone from the ozone calibrator at your chosen span point, Aeroqual recommends 0.1 ppm, make sure the tee is closed using the cap as shown in Figure 5-5.
-
Page 57: Particle Monitor Calibration
‘health’ of the internal components. Field calibration In order to perform a field calibration, your Aeroqual monitor must be located at the same site as a Reference PM monitor. This is called ‘Co-location’ and is widely performed in ambient air quality monitoring to assess the performance of a new monitor. - Page 58 PM concentration. BAM and TEOM monitors run continuously and data is available at as low as 10 minute averages. This data can be noisy, so Aeroqual recommend that 1 hour or 24hr averages are used to minimise this noise.
- Page 59 The slope of the curve Reference vs Dust Monitor is 0.6568. So a gain of 0.6568 needs to be applied to the monitor. The Aeroqual monitor will need a new gain, calculated using the formula below: ������ �������� = ������ �������� �� �� ������������...
-
Page 60: Troubleshooting
Table 8-1 Not all known issues are listed in Table 8-1 especially if not known to Aeroqual when this user guide was written. The Aeroqual training website provides a comprehensive and up to date list of known issues and provides solutions as soon as solutions become available. - Page 61 If this error occurs contact the Aeroqual distributor in your local country for technical support. Fault isolation / Symptom Possible cause Reference Solution Gas module troubleshooting Flow leak or incorrect Section 6.5.4 flow Negative readings Dirty inlet gas filter Change filter Section 6.5.5...
-
Page 62: Copyright
Aeroqual reserves the right to revise this document or withdraw it at any time without prior notice. The availability of particular products may vary by region. Please check with the Aeroqual distributor nearest to you. -
Page 63: Appendix
NOTE: O and NO Modules have no serviceable parts. The VOC analyzer module uses a replaceable 10.6 eV UV lamp, if the lamp needs replacing contact the Aeroqual distributor in your local country for technical support. Gas Module design Gas modules come in two different designs. These two designs are shown schematically in Figure 12-1. A list of which gas modules use which design is given in Table 12-1. - Page 64 Figure 12-3. Figure 12-3 A single pump is used for all gas modules. The vacuum port of the pump is connected to the outlet of each gas module MRK-D-0048 V4 Aeroqual Dust Sentry / AQS User Guide Page | 64...
-
Page 65: Particulate Matter Module Design
Every two years (24 months) Every year (12 months) Inlet flow rate 2.0 LPM 1.0 LPM Table 12-2 Summary of the difference between the Particle Monitor and the Particle Profiler. MRK-D-0048 V4 Aeroqual Dust Sentry / AQS User Guide Page | 65... - Page 66 Figure 12-5 The size selection in the Particle Monitor is determined by the sharp cut cyclone on the inlet. MRK-D-0048 V4 Aeroqual Dust Sentry / AQS User Guide Page | 66...
-
Page 67: Mains Wiring Color Guide
Online reference training.aeroqual.com DM 1.3 Tech training Section 4.5 Particle Profiler module The Dust Sentry uses a custom-designed Met One optical particle counter (OPC) to measure four particle size fractions simultaneously. There is no sharp cut cyclone used in the Particle Profiler; both the concentration and size are measured inside the optical particle counter. -
Page 68: Calibration Records
Zero air source Flow meter Gas Regulator 1 Gas Regulator 2 Table 3: Gas cylinder details Cylinder Gas Type Gas Balance Manufacturer Expiry date pressure Air N Isobutylene Air N MRK-D-0048 V4 Aeroqual Dust Sentry / AQS User Guide Page | 68... - Page 69 Previously measured flow rate After opening the door Replace the inlet filters Measure flow rate again Go to section 6 if required then record final inlet flow rate here MRK-D-0048 V4 Aeroqual Dust Sentry / AQS User Guide Page | 69...
- Page 70 6.3 then pass, if Pass / Fail Pass / Fail Pass / Fail Pass / Fail changed then fail. What was the reason for the change in flow rate? MRK-D-0048 V4 Aeroqual Dust Sentry / AQS User Guide Page | 70...
- Page 71 Max +0.050 0.0 0.005 0.002 Min -0.050 Max +0.05 0.0 0.002 0.002 Min -0.05 Comments: Equation 4: New offset = Current offset + (AQM gas reading / Gain) MRK-D-0048 V4 Aeroqual Dust Sentry / AQS User Guide Page | 71...
- Page 72 The Ox module gain adjustment is made during the NO2 calibration gas delivery The NO2 a value adjustment is made during the Ozone gas delivery The NO2 gain value is NOT adjusted as part of the calibration process MRK-D-0048 V4 Aeroqual Dust Sentry / AQS User Guide Page | 72...
- Page 73 Observation / reading Pass / Fail / Done Disconnect calibration equipment Record total inlet flow rate Replace the mesh inlet and cap Lock door Secure the site Service mode MRK-D-0048 V4 Aeroqual Dust Sentry / AQS User Guide Page | 73...
Need help?
Do you have a question about the Dust Sentry Pro and is the answer not in the manual?
Questions and answers