Table of Contents
Advertisement
Available languages
Available languages
Quick Links
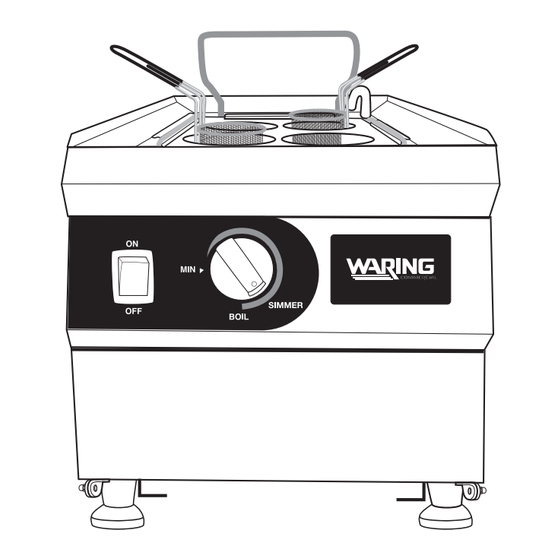
Electric Countertop
Pasta Cooker/Rethermalizer
Hervidor de pasta/Calentador
de alimentos de sobremesa
Cuiseur à pâtes/Appareil de remise
en température de comptoir
WPC100
For your safety and continued enjoyment of this product,
always read the instruction book carefully before using.
Para su seguridad y para disfrutar plenamente de este producto, siempre lea
cuidadosamente las instrucciones antes de usarlo.
Afin que votre appareil vous procure en toute sécurité beaucoup de satisfaction,
lire attentivement le mode d'emploi avant de l'utiliser.
Advertisement
Table of Contents

Subscribe to Our Youtube Channel
Related Manuals for Waring WPC100

Summary of Contents for Waring WPC100
- Page 1 Cuiseur à pâtes/Appareil de remise en température de comptoir WPC100 For your safety and continued enjoyment of this product, always read the instruction book carefully before using. Para su seguridad y para disfrutar plenamente de este producto, siempre lea cuidadosamente las instrucciones antes de usarlo.
-
Page 2: Important Safeguards
IMPORTANT SAFEGUARDS When using electrical appliances, basic safety precautions should always be taken, including the following: READ ALL INSTRUCTIONS. 2. TO AVOID SERIOUS PERSONAL INJURY: Do not attempt to fry with this unit. This unit is not a fryer. WARNING: During and after operation, the pasta cooker reaches/has reached very high temperatures. - Page 3 CAUTION when using electrical appliances, basic safety precautions should always be followed. DO NOT operate electric pasta cooker if unit appears damaged or malfunctions in any manner. Call customer service for assistance. 17. Do not operate this unit without water. 18.
-
Page 4: Specifications
APPROVED FOR COMMERCIAL USE The pasta cooker does not contain any user-serviceable parts. Please contact a Waring Authorized Service Center for any repairs, or phone Waring Customer Service 1-800-4-WARING. Do not remove any components or service panels on this product. -
Page 5: Grounding Instructions
GROUNDING INSTRUCTIONS For your protection, the Waring Pasta Cooker/Rethermalizer is ® supplied with a molded 3-prong grounding-type plug and should be used in combination with a properly connected grounding-type outlet. Use of any other voltage or altering of the plug or cord may damage the unit, will void the warranty and may cause injury. - Page 6 PARTS (4 supplied) (2 supplied)
-
Page 7: Installation
INSTALLATION Carefully remove the Pasta Cooker from the packaging and place the unit on a firm, level surface. Use only the baskets provided with the unit. DO NOT substitute the baskets or attempt to replace the baskets. This unit is to be installed with adequate backflow protection to comply with applicable federal, state, and local codes. -
Page 8: Before First Use
BEFORE FIRST USE Clean the Pasta Cooker 1. Use a non-corrosive, grease-dissolving commercial cleaner to clean the protective metal oils from all surface parts and the tank interior. 2. Follow the cleaner manufacturer’s directions. CAUTION: Be careful not to disturb the thermostat and high limit capillaries when cleaning down inside the tank. - Page 9 Small Round 7.5 oz. RETHERMALIZING INSTRUCTIONS 1. Fill the WPC100 with water to the maximum capacity (under the overflow drain). There are no markings for this. 2. Set the temperature control to SIMMER and let the water preheat until it reaches temperature. This should take no more than 30 minutes.
- Page 10 make sure there is enough space between food bags for water flow and that the bags do not overlap. 4. NOTE: Monitor internal food temperatures closely for food safety. Follow FDA and USDA guidelines for minimum food temperatures. Most foods should be cooked to a higher internal temperature than 140˚F per federal guidelines.
-
Page 11: Cleaning And Maintenance
CLEANING & MAINTENANCE WARNING: In addition to what is listed here, refer to all Important Safeguards on page 2 of this manual. ALWAYS DISCONNECT OR UNPLUG THE ELECTRICAL POWER FROM THE PASTA COOKER BEFORE CLEANING. DO NOT use any cleaning fluids that can be harmful to you, others around you, or to the environment. - Page 12 DELIMING The pasta cooker MUST be delimed periodically (depending upon usage, every 3–4 weeks). Follow the deliming agent manufacturer’s instructions. Rinse thoroughly at least 3 times before using pasta cooker after deliming. The appliance is not to be cleaned with a water jet. The pasta cooker should be cleaned after each day’s operation;...
-
Page 13: Troubleshooting
Round basket resting supports and basket support are removable and dishwasher safe. Overflow drain is removable and dishwasher safe. (Fig. 9) If any food or debris gets lodged into the drain Fig. 9 at the bottom of the basin, it is removable for cleaning. -
Page 14: Limited One-Year Warranty
Under this warranty, Waring will repair or replace any part that, upon our examination, is defective in materials or workmanship, provided the product is delivered prepaid to the Waring Service Center at 314 Ella T. - Page 15 NOTES...
-
Page 16: Medidas De Seguridad Importantes
MEDIDAS DE SEGURIDAD IMPORTANTES Al usar aparatos eléctricos, siempre debe tomar precauciones básicas de seguridad, incluso las siguientes: LEA TODAS LAS INSTRUCCIONES. 2. PARA EVITAR EL RIESGO DE LESIONES GRAVES: No utilice este aparato para freír; no es una freidora. ADVERTENCIA: el aparato alcanza temperaturas muy altas durante el funcionamiento, y permanece muy caliente después del uso. - Page 17 14. NO jale el cable para desconectarlo de la toma de corriente. Después de apagar (“OFF”) el aparato, agarre la clavija y jale esta suavemente de la toma de corriente. 15. Apague y desconecte el aparato antes de manipularlo o limpiarlo.
-
Page 18: Especificaciones
27. Siempre averigüe el nivel del agua antes del uso y agregue agua si es necesario (el nivel del agua bajará con cada uso). 28. SIEMPRE ESTÉ LISTO en caso de incendio; asegúrese de tener un extinguidor de incendios correctamente clasificado cerca. 29. -
Page 19: Instrucciones De Puesta A Tierra
INSTRUCCIONES DE PUESTA A TIERRA Para su protección, el cable de su aparato está dotado de un enchufe con puesta a tierra, el cual debe ser conectado a una toma de corriente debidamente puesta a tierra. Utilizar el aparato sobre una red de tensión inadecuada o modificar el cable o la clavija puede dañar el aparato y causar lesiones. - Page 20 PIEZAS...
-
Page 21: Instalación
INSTALACIÓN Saque cuidadosamente el aparato de la caja y colóquelo sobre una superficie firme, estable y nivelada. Utilice solamente las cestas proveídas. NO utilice otras cestas o intente modificar las cestas. Cuando el aparato está conectado al agua corriente, la instalación debe incluir una protección anti-retorno conforme con los códigos federales, estatales y locales relevantes. -
Page 22: Antes Del Primer Uso
ANTES DEL PRIMER USO Limpie el aparato 1. Use un limpiador de grasa comercial no corrosivo para eliminar los aceites usados para proteger las superficies metálicas (piezas y cuba) del aparato. 2. Siga las instrucciones del fabricante del limpiador. PRECAUCIÓN: tenga cuidado de no tocar los tubos capilares del termóstato al limpiar el interior de la cuba (Fig. - Page 23 PRECAUCIÓN: las resistencias deben permanecer plano en el fondo de la cuba. El agua debe cubrirlas completamente, alcanzando por lo menos el nivel “MIN”. Conecte el cable a una toma de corriente y ponga el interruptor en “ON” para encender el aparato. El interruptor se encenderá y el agua empezará...
-
Page 24: Medidas De Seguridad
INSTRUCCIONES DE CALENTAMIENTO 1. Llene la cuba hasta la capacidad máxima, justo debajo del rebosadero. Nota: la capacidad máxima no está indicada. 2. Ponga el control de temperatura en “SIMMER” y permita que el agua se caliente hasta la temperatura deseada; esto no debería tomar más de 30 minutos. -
Page 25: Limpieza Y Mantenimiento
Escurrimiento – Cestas redondas Sacar la cesta del agua, sacudirla ligeramente y colocarla sobre el marco para cestas redondas (Fig. 3). Fig. 3 Escurrimiento – Cestas rectangulares Saque la cesta del agua y cuélguela del gancho para escurrir (Fig. 4). Fig. - Page 26 REMOCIÓN DEL PANEL DE PUERTA Ubique la bisagra derecha del panel de puerta. Saque la barra de bloqueo y jale la parte derecha del panel. Luego, jalar el lado izquierdo del panel (Fig. 5). WATER REFILL WATER REFILL CLOSE CLOSE CLOSE CLOSE CLOSE...
- Page 27 ADVERTENCIA: permita que el agua y el aparato se enfríen completamente antes de la limpieza. 1. Ponga el control de temperatura en “MIN” (Fig. 6). Ponga el interruptor en “OFF” y desconecte el cable de la toma de corriente. 2. Abra la válvula de desagüe o la válvula de Fig.
-
Page 28: Resolución De Problemas
RESOLUCIÓN DE PROBLEMAS En caso de problema, siga las instrucciones a continuación. PROBLEMA CAUSA SOLUCIÓN El aparato no se Suministro eléctrico Averigüe la fuente de enciende alimentación Interruptor apagado Cerciórese de que el cable está conectado y de que el interruptor está... -
Page 29: Garantía Limitada De Un Año
(a excepción de detergentes) y semilíquidos no abrasivos, y que no haya sido sujeta a cargas que excedan su máxima capacidad. Bajo esta garantía, Waring reparará o reemplazará toda pieza que, tras estar inspeccionada por nuestro servicio posventa, demuestre defectos de materiales o fabricación, siempre que el producto se regrese a un centro de servicio autorizado o se entregue con franqueo pagado a: 314 Ella T. -
Page 30: Importantes Consignes De Sécurité
IMPORTANTES CONSIGNES DE SÉCURITÉ L'utilisation d'appareils électriques requiert la prise de précautions élémentaires, parmi lesquelles les suivantes : LIRE TOUTES LES INSTRUCTIONS. 2. POUR ÉVITER LES RISQUES DE BLESSURE GRAVE : Ne pas utiliser cet appareil pour frire ; ce n'est pas une friteuse. AVERTISSEMENT : l’appareil atteint de très hautes températures pendant la cuisson et reste très chaud après l’utilisation. - Page 31 14. NE PAS tirer sur le cordon pour le débrancher ; après avoir éteint l’appareil, saisir le cordon par la fiche et tirer doucement pour débrancher celle-ci de la prise de courant. 15. Éteindre et débrancher l’appareil avant toute manipulation ou entretien.
-
Page 32: Spécifications
une surveillance étroite pendant l’utilisation. 27. Toujours vérifier le niveau d’eau avant l’utilisation et ajouter de l'eau au besoin (le niveau de l’eau baissera à chaque utilisation). 28. TOUJOURS ÊTRE PRÊT en cas d’incendie. Toujours garder un extincteur adéquat à proximité. 29. -
Page 33: Instructions De Mise À La Terre
INSTRUCTIONS DE MISE À LA TERRE Pour votre protection, le cuiseur à pâtes/appareil re remise en température Waring Commercial est équipé d'une fiche à trois ® broches. Cette fiche doit être branchée dans une prise de terre correctement configurée. Brancher l'appareil sur la tension inadéquate ou modifier la fiche ou le cordon d'alimentation peut... - Page 34 PIÈCES...
- Page 35 INSTALLATION Sortir prudemment l’appareil de la boîte et le poser sur une surface solide, stable et nivelée. N’utiliser que les paniers de cuisson fournis avec l’appareil. NE PAS utiliser d’autres paniers ou essayer de modifier les paniers. Si l’appareil est raccordé à l’eau courante, l’installation doit comprendre une protection anti-retour se conformant aux codes fédéraux, provinciaux, et locaux pertinents.
-
Page 36: Avant La Première Utilisation
AVANT LA PREMIÈRE UTILISATION Nettoyer l’appareil 1. Utiliser un nettoyant à graisse commercial non corrosif pour éliminer les huiles utilisées pour protéger les surfaces en métal (pièces et cuve) de l’appareil. 2. Suivre les consignes du fabricant du nettoyant. MISE EN GARDE : veiller à ne pas endommager les tubes capillaires du thermostat en nettoyant l’intérieur de la cuve Fig. - Page 37 MISE EN GARDE : veiller à ce que les résistances restent à plat. L’eau doit complètement les recouvrir, atteignant au moins le niveau “MIN”. Brancher le cordon dans une prise de courant et appuyer (“ON”) sur l’interrupteur pour allumer l’appareil. L’interrupteur s’allumera et l'appareil commencera à...
-
Page 38: Mesures De Sécurité
INSTRUCTIONS DE RÉCHAUFFAGE 1. Remplir la cuve jusqu’au maximum de sa capacité, juste en- dessous du trop-plein de sécurité. Remarque : la capacité maximale n'est pas indiquée. 2. Régler le thermostat sur “SIMMER” et laisser l’eau chauffer jusqu’à ce qu’elle atteigne la température voulue ; cela ne devrait pas prendre plus de 30 minutes. -
Page 39: Nettoyage Et Entretien
Égouttage – Paniers ronds Sortir le panier de l'eau, le secouer légèrement et le poser sur le cadre pour paniers ronds (Fig. 3) Fig. 3 Égouttage – Paniers rectangulaires Sortir le panier de l'eau et le suspendre au crochet d’égouttage (Fig. 4) Fig. - Page 40 RETRAIT DU PANNEAU DE PORTE Localiser la charnière droite du panneau de porte. Retirer la tige de blocage de la charnière et tirer sur le côté droit du panneau. Tirer ensuite sur le côté gauche du panneau (Fig. 5). WATER REFILL WATER REFILL CLOSE CLOSE...
- Page 41 AVERTISSEMENT : laisser l'eau et l’appareil refroidir complètement avant le nettoyage. 1. Régler le thermostat sur “MIN” (Fig. 6). Mettre l’interrupteur sur “OFF” et débrancher le cordon de Fig. 6 la prise de courant. 2. Ouvrir (position “OPEN”) la valve de vidange ou la valve d’évacuation des eau usées pour vider la cuve (Fig.
-
Page 42: Résolution De Problèmes
RÉSOLUTION DE PROBLÈMES En cas de problème, suivre les instructions suivantes. PROBLÈME CAUSE SOLUTION Le cuiseur à pâtes Alimentation Vérifier la source ne fonctionne pas électrique d'alimentation L’interrupteur ne Vérifier que l’appareil est s’allume pas branché et que l’interrupteur est sur “ON” Fiche/cordon Appeler le service après-vente endommagés... -
Page 43: Garantie Limitée D'un An
été soumis à des charges excédant sa capacité maximale. Au titre de cette garantie, Waring réparera ou remplacera toute pièce nous paraissant afficher un vice de matière ou de fabrication. Pour un service au titre de cette garantie, envoyez l'appareil, port payé, à... - Page 44 Todas las marcas registradas, comerciales o de servicio mencionadas en este documento pertenecen a sus titulares respectivos. Toutes les marques déposées, commerciales ou de service ci-incluses appartiennent à leurs propriétaires respectifs. ©2017 Waring Commercial 314 Ella T. Grasso Ave Torrington, CT 06790 www.waringcommercialproducts.com...
Need help?
Do you have a question about the WPC100 and is the answer not in the manual?
Questions and answers