Table of Contents
Advertisement
Advertisement
Table of Contents

Related Manuals for Ayyeka Wavelet

Summary of Contents for Ayyeka Wavelet
- Page 1 Rev. 1.5 September 2017...
-
Page 2: Table Of Contents
Wavelet Kits ..............................11 Wavelet Device ............................... 11 Sensor Integration ............................11 User Interface ..............................12 Installing the Wavelet Kit ........................... 13 Assembling the Wavelet Kit..........................13 Connecting to an External Power Source ....................... 13 Turning the Wavelet On ..........................14 Ayyeka Web-based Data Management System .................... - Page 3 Viewing a Data Stream ........................... 55 Editing a Data Stream ............................. 56 Hiding a Data Stream ............................58 Viewing and Filtering Samples ........................60 Sorting the Samples table ........................... 60 Hiding Samples in the Samples table ......................61 www.ayyeka.com +1 (310) 876-8040 info@ayyeka.com...
- Page 4 Removing a User from a Group ........................105 Editing a Group ............................. 105 Sharing Sites and accounts ..........................106 Sharing Sites with Any User .......................... 106 Sharing an Account with any Ayyeka User ....................108 www.ayyeka.com +1 (310) 876-8040 info@ayyeka.com...
- Page 5 Customizing your User Interface Display ..................... 115 Using the Ayyeka API ............................117 Using the Ayyeka REST API ........................... 117 Gaining Access to Ayyeka Data via the REST API ..................117 Using the Ayyeka REST API Methods ......................121 Using the Ayyeka SOAP API .......................... 122 Gaining Access to Ayyeka Data via the SOAP API ..................
- Page 6 Appendix A: Connector 42-00009 datasheet ....................137 Ayyeka Warranty .............................. 138 Revision History ..............................143 www.ayyeka.com +1 (310) 876-8040 info@ayyeka.com...
-
Page 7: Notices
NOTICES © Copyright 2017 Ayyeka Technologies Ltd. Trademark Acknowledgments Ayyeka® is a registered trademark of Ayyeka Technologies Ltd. Wavelet is a trademark of Ayyeka Technologies Ltd. All other trademarks are property of their respective owners. FCC Notice Contains FCC ID: QIPPXS8 This device complies with Part 15 of the FCC Rules. -
Page 8: Glossary
A set of routines, protocols, and tools for building software and applications Cloud computing Internet-based computing, providing shared resources, data and information to computers and other devices on-demand. Supervisory Control and Data Acquisition. SCADA A system for remote monitoring and control. User Interface www.ayyeka.com +1 (310) 876-8040 info@ayyeka.com... -
Page 9: Introduction
INTRODUCTION Scope This document is intended for users, installers and integrators of Wavelet Kits. Related Documentation Ayyeka Knowledge Base Wavelet Kits Quick Start Guides Wavelet Datasheet Sensor Documentation API Web API Guide Ayyeka DNP3 Outstation Installation Guide ... -
Page 10: Product Overview
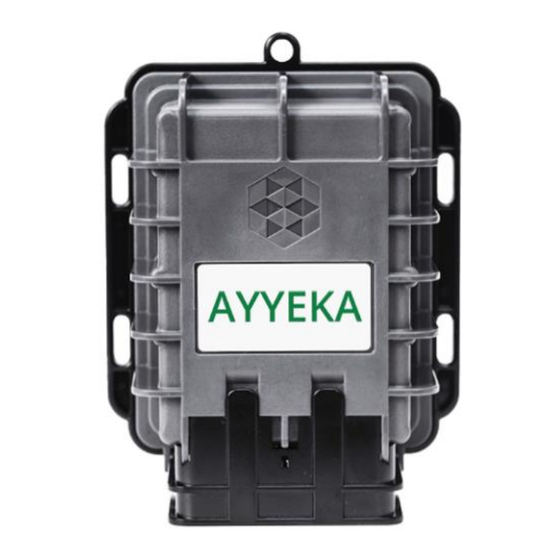
PRODUCT OVERVIEW Ayyeka’s Wavelet™ is a remote infrastructure monitoring tool that delivers field data to decision makers. It is an all-inclusive, plug-and-play system, including batteries, SIM card, sensors, and installation hardware. After learning your specific needs, Ayyeka pre-integrates the appropriate sensors with the Wavelet data collection, storage and communication device which is then installed onto existing infrastructure. -
Page 11: Wavelet Kits
Wavelet Kits Each Wavelet Kit, composed of a Wavelet device and smart sensors, is targeted at a specific need in the infrastructure sector. The intended usage dictates the type of sensors included in the kit. Ayyeka offers various kits in each of the following categories: Water ... -
Page 12: User Interface
User Interface The data collected by the Wavelet device and transmitted to the Ayyeka cloud can be viewed in the Ayyeka web-based data management system. This system enables: Visualizing data in real-time Generating reports for presentation and analysis ... -
Page 13: Installing The Wavelet Kit
INSTALLING THE WAVELET KIT Assembling the Wavelet Kit The assembly instructions depend on the type of Wavelet Kit. Refer to the Quick Start Guide corresponding to your kit type. Connecting to an External Power Source If you wish to connect the Wavelet device to an external power source, follow these guidelines:... -
Page 14: Turning The Wavelet On
Turning the Wavelet On The Wavelet device is delivered in hibernation mode. To turn it on, press the magnetic activator, provided in the Wavelet Kit, onto the Ayyeka logo appearing on the Wavelet device. The Wavelet device turns on and performs a 10-minute calibration process, after which it starts operating in normal mode. -
Page 15: Ayyeka Web-Based Data Management System
User Groups. Previously, this functionality was provided in the Management tab window – enables access to the Ayyeka REST API and SOAP API, which provide programmatic access to your Wavelets' information Accessing the Data Management System To access the Ayyeka data management system: Navigate to home.ayyeka.com... - Page 16 Figure 5: Account hierarchy In the example shown above, the AYYEKA TRAINING account consists of two organizations, Environmental and Wastewater Utility. Environmental manages two sites. A site is a representation of a physical location. Typically, each site includes one device. In some instances, multiple devices might be assigned to a single site. Each device generates and subsequently transmits data streams (time-stamped data) from one or more sensors (such as pressure, turbidity, conductivity, etc.) integrated with the device.
-
Page 17: Understanding User Roles
Users. 3. Create user groups, which define who receives alerts when data thresholds are exceeded. Refer to Managing User Groups. 4. View your sites (groups of Wavelet devices), and edit their settings if necessary. Refer to Managing Sites. www.ayyeka.com +1 (310) 876-8040... - Page 18 Refer to Configuring Data Stream Thresholds. View and optionally change a stream’s sampling interval; this is the rate at which the Wavelet samples the relevant sensor for data. Refer to Managing a Stream’s Sampling Interval.
-
Page 19: Using The Ayyeka Visualization Window
USING THE AYYEKA VISUALIZATION WINDOW Click the Visualization tab to display the initial Visualization window. Figure 6: Initial Visualization window www.ayyeka.com +1 (310) 876-8040 info@ayyeka.com... - Page 20 Side bar – links to the 5 main views: Visualization, Reports, Devices, Account, API. The available views depend on your permissions (role). Sites Tree pane – lists all Wavelet sites and their data streams: The Sites Tree pane includes also a search box, which you can use to search for your sites.
-
Page 21: Viewing Site Information
Viewing Site Information 1. To view the data from a specific Wavelet site, click the site in the Sites Tree pane or on the map. The right pane refreshes to show the site and its data streams. Figure 7: Viewing an individual site 2. - Page 22 Figure 8: Viewing an individual data stream www.ayyeka.com +1 (310) 876-8040 info@ayyeka.com...
-
Page 23: Understanding The Data Stream Chart
You can set the start and end date for the chart by clicking the Range drop-down and setting the dates. Setting the Time Frame You can set the time frame shown in the window by selecting the desired time frame in the Time Frame selector. www.ayyeka.com +1 (310) 876-8040 info@ayyeka.com... -
Page 24: Using The Zoom And View Tools
3. Repeat step (2) as desired. If you select more than five data streams in all, or more than two different types of data streams, the data from the additional data streams will appear in a new tab. www.ayyeka.com +1 (310) 876-8040... - Page 25 The following example shows a comparison of two data streams from the same site. Figure 9: Comparing two data streams www.ayyeka.com +1 (310) 876-8040 info@ayyeka.com...
-
Page 26: Generating Reports
If you selected to specify streams By Site, specify the site, and then specify stream(s) in the site. If you selected to specify streams By Stream Type, specify the stream type, and then specify stream(s) of that type. d. Specify the reporting Time Period. www.ayyeka.com +1 (310) 876-8040 info@ayyeka.com... - Page 27 4. Click Export to CSV. A CSV file is created, showing the history of the selected streams during the selected time period. Figure 12: Stream History Report – Example www.ayyeka.com +1 (310) 876-8040 info@ayyeka.com...
-
Page 28: Aggregation Report
Note that you can generate an Aggregation report for multiple streams only if all those streams are of the same type (such as Level), and use the same unit of measurement (such as inches). www.ayyeka.com +1 (310) 876-8040 info@ayyeka.com... - Page 29 5. If you select to run the report for a single stream, you can run any combination of the following statistical analysis functions: Sum, Average, Min, Max or Standard Deviation. Figure 14: Aggregation Report - Defining Report Criteria for a Single Stream www.ayyeka.com +1 (310) 876-8040 info@ayyeka.com...
- Page 30 If you had specified a single stream, and the Min, Max and Standard Deviation functions in the report criteria, the resultant report will look similar to the following: Figure 16: Aggregation Report – Example for a Single Stream www.ayyeka.com +1 (310) 876-8040 info@ayyeka.com...
-
Page 31: Custom Stream History Report
1. Click Reports in the side bar. 2. In the Custom Stream History Report pane, select the specific streams you wish to view, and the reporting time period. Figure 17: Custom Stream History Report - Defining Streams and Time Period www.ayyeka.com +1 (310) 876-8040 info@ayyeka.com... - Page 32 For each data field you wish to include in the report: Select the field in the Data Fields drop-down. If a format drop-down appears, select a format. Note that you can edit the format directly in the window. Click Add Field. www.ayyeka.com +1 (310) 876-8040 info@ayyeka.com...
- Page 33 4. Click Export to CSV. A CSV file is created, showing the history of the selected streams during the selected time period. For example, for the report criteria defined in Figure 18, the resultant CSV report file is as follows: Figure 19: Custom Stream History Report - Example with no header row www.ayyeka.com +1 (310) 876-8040 info@ayyeka.com...
-
Page 34: Managing Sites
A map view, showing the location of the site. You can change the view by clicking the layers icon at the top right corner of the view. A street view from Google of the site’s location. www.ayyeka.com +1 (310) 876-8040 info@ayyeka.com... -
Page 35: Editing A Site
1. Click Devices in the sidebar, and click the site name in the Sites Tree pane. 2. In the right pane, click Actions under the site icon, and select Edit. Figure 21: Selecting to edit a site www.ayyeka.com +1 (310) 876-8040 info@ayyeka.com... - Page 36 3. In the Site Name Configuration window, you can: Change the name of the site. Change the organization to which the site belongs. Note that a site can belong to only one organization. 4. Click Submit. www.ayyeka.com +1 (310) 876-8040 info@ayyeka.com...
-
Page 37: Changing The Site Location
Edit the coordinates displayed in the Coordinates fields. The coordinates originally displayed are the site location as transmitted by the devices in the site. Note: Do not edit the HDOP field. It is reserved for future use. www.ayyeka.com +1 (310) 876-8040 info@ayyeka.com... -
Page 38: Managing Devices
Device information and configuration options appear in the right pane. This includes: The device’s serial number, part number, its site name, last transmission time, hardware version and firmware version, Ayyeka ID and ICC ID (=ID of the SIM card). The ability to send various commands to the device. ... -
Page 39: Managing Device Configuration
The device’s Configuration tab enables viewing and changing device configuration definitions. With the exception of the actions described in the following sub-sections, we recommend not changing these definitions without consulting with Ayyeka by contacting support@ayyeka.com. Setting the Device Transmission Intervals The device transmission interval defines how often the device transmits the data gathered by its sensors. - Page 40 Setting a Device Transmission Interval to a Custom Setting. Note also that the changes won’t take effect and won’t be visible on this screen until the Wavelet next communicates with the server. Setting a Device Transmission Interval to a Custom Setting To set a device transmission interval to a custom setting: 1.
- Page 41 It is recommended not to set a value below 10 minutes, since this will drain the battery. Figure 28: Send New Value window 6. To change the Event transmission interval (in minutes), select GSM > GSM_PRIORITY > 1 > home_interval_minutes and follow the instructions in the sub-steps of step 5. www.ayyeka.com +1 (310) 876-8040 info@ayyeka.com...
-
Page 42: Setting The Device Sampling Interval
Received from the device (such as files containing sensor readings), and Files Sent to the device (such as files containing device configuration changes). Viewing the Device Event Log To view the device event log: 1. Click Devices in the sidebar. 2. In the Sites Tree pane, click the device name. www.ayyeka.com +1 (310) 876-8040 info@ayyeka.com... -
Page 43: Viewing The Commands Sent To The Device
2. In the Sites Tree pane, click the device name. 3. In the right pane, click the Commands tab. Figure 31: Device – Commands tab The table lists all the commands sent to the device. These mainly include device configuration changes. www.ayyeka.com +1 (310) 876-8040 info@ayyeka.com... -
Page 44: Viewing The Health Of The Device
2. In the Sites Tree pane, click the device name. 3. In the right pane, click the Health tab. Figure 32: Device – Health tab This tab is intended for device troubleshooting, to help identify the possible source of issues. www.ayyeka.com +1 (310) 876-8040 info@ayyeka.com... -
Page 45: Viewing Device Cellular Information
Note that device technical alerts are not sent immediately when the configured device thresholds are crossed. Rather, they are sent once every 3 hours. However, each alert has a timestamp which identifies exactly when the alert was triggered, as shown in the figure below. Figure 34: Technical alert contents www.ayyeka.com +1 (310) 876-8040 info@ayyeka.com... -
Page 46: Viewing The List Of Technical Alerts
The internal battery threshold. If the internal battery level falls to below this threshold, a battery threshold alert will be sent. An empty cell indicates that no alert is sent for battery levels. www.ayyeka.com +1 (310) 876-8040 info@ayyeka.com... -
Page 47: Adding A Technical Alert
2. In the Sites Tree pane, click the Preferences icon adjacent to the account name. 3. Click + Add. Figure 36: Selecting to Add a Technical Alert The Create Technical Alert window appears: Figure 37: Creating a technical alert www.ayyeka.com +1 (310) 876-8040 info@ayyeka.com... - Page 48 Use the slider to set the lower battery threshold (in percentage of battery power remaining). If the internal battery level falls to below the threshold, a battery threshold alert will be sent. Click Submit. www.ayyeka.com +1 (310) 876-8040 info@ayyeka.com...
-
Page 49: Editing, Deactivating, Reactivating Or Deleting A Technical Alert
Edit technical alert settings. Click this icon and edit the settings in the window that appears. Deactivate the technical alert. A deactivated technical alert does not trigger any alerts, but is not deleted from the database. Reactivate the technical alert. Delete the technical alert from the database. www.ayyeka.com +1 (310) 876-8040 info@ayyeka.com... -
Page 50: Setting The Device Reporting Profile
2. Select the device in the Sites Tree pane. 3. In the bottom part of the device information box, click the arrow in the drop-down Commands list, and select Set Reporting Profile. Figure 40: Selecting to set reporting profile www.ayyeka.com +1 (310) 876-8040 info@ayyeka.com... - Page 51 3 consecutive days relative to its expected transmission schedule, it is considered to be in an Interrupted Transmission state, and an Interrupted Transmission alert is sent. www.ayyeka.com +1 (310) 876-8040 info@ayyeka.com...
-
Page 52: Setting Up Live Notifications
2. Select the device in the Sites Tree pane. 3. In the bottom part of the device information box, click the arrow in the drop-down Commands list, and select Set Up Live Notifications. Figure 42: Selecting to Set Up Live Notifications www.ayyeka.com +1 (310) 876-8040 info@ayyeka.com... -
Page 53: Cancelling Live Notifications
2. Select the device in the Sites Tree pane. 3. In the bottom part of the device information box, click the arrow in the drop-down Commands list, and select Set Up Live Notifications. 4. In the Live Notifications window that appears: www.ayyeka.com +1 (310) 876-8040 info@ayyeka.com... - Page 54 Specify the user for whom you wish to cancel Live Notifications. b. Set the Period to Stop. Click Submit. Figure 44: Selecting to Stop Live Notifications www.ayyeka.com +1 (310) 876-8040 info@ayyeka.com...
-
Page 55: Managing Data Streams
MANAGING DATA STREAMS Each data stream shows the actual data received from a specific sensor connected to a specific Wavelet device. Viewing a Data Stream To view data stream information: 1. Click Devices in the sidebar. 2. In the Sites Tree pane, click the data stream name. -
Page 56: Editing A Data Stream
1. Click Devices in the sidebar, and click the stream name in the Sites Tree pane. 2. In the right pane, click Actions underneath the graph, and select Edit Stream. Figure 46: Selecting to edit a data stream www.ayyeka.com +1 (310) 876-8040 info@ayyeka.com... - Page 57 5. Optionally change the Sample Value Scale, which specifies how many decimal points to display after a whole value. This enables you to set the level of accuracy when displaying values in the Sites Tree pane and in generated reports. 6. Click Submit. www.ayyeka.com +1 (310) 876-8040 info@ayyeka.com...
-
Page 58: Hiding A Data Stream
1. Click Devices in the sidebar, and click the stream name in the Sites Tree pane. 2. In the right pane, click Actions underneath the graph, and select Hide from Users. Figure 48: Selecting to Hide a Stream A confirmation window appears. www.ayyeka.com +1 (310) 876-8040 info@ayyeka.com... - Page 59 Click Devices in the sidebar, and click the stream name in the Sites Tree pane. b. In the right pane, click Actions underneath the graph, and select Show To Users. The stream will now be visible to all account users from their next login. www.ayyeka.com +1 (310) 876-8040 info@ayyeka.com...
-
Page 60: Viewing And Filtering Samples
You can sort the entries in the table by a specific column. To do so, click the column head and then click the arrow appearing to the right. The samples are sorted in descending order. Click again to sort by ascending order. www.ayyeka.com +1 (310) 876-8040... -
Page 61: Hiding Samples In The Samples Table
1. In the samples table (Figure 51), select Show Samples. 2. In the dropdown menu, enter the start and end dates, and click Submit. Only samples from the specific period are displayed in the table. www.ayyeka.com +1 (310) 876-8040 info@ayyeka.com... -
Page 62: Configuring Data Stream Thresholds
Configuring Data Stream Thresholds A key feature of the Ayyeka system is the ability to configure multiple thresholds for any data stream, and specify actions such as alerts when data samples cross a threshold. Thresholds are configured using ranges of values bound by a lower and upper limit. Let’s say you want to configure thresholds for a Temperature data stream. - Page 63 View or change threshold actions, such as: Setting whether to transmit data immediately Setting a Threshold’s Transmission Interval Setting a Threshold’s Sampling Interval Defining a Threshold’s Alert Recipients Setting Resultant Sampling Actions www.ayyeka.com +1 (310) 876-8040 info@ayyeka.com...
-
Page 64: Changing Threshold Settings
It is recommended to give each threshold an appropriately descriptive name because in the threshold alert text, the threshold name is the only indication of the reason why the alert was sent, as shown below. Figure 54: Example alert text www.ayyeka.com +1 (310) 876-8040 info@ayyeka.com... - Page 65 The lower limit of the lowest (left-most) threshold is not-editable, and is set by the system depending on the given stream’s lowest value. The upper limit of the highest (right-most) threshold is not-editable, and is set by the system depending on the given stream’s highest value www.ayyeka.com +1 (310) 876-8040 info@ayyeka.com...
- Page 66 To set a threshold’s false alarm filter: 1. In the threshold definition area (Figure 55), click the value adjacent to False Alarm Filter. 2. Overwrite the current value with the new value. 3. Save changes by clicking www.ayyeka.com +1 (310) 876-8040 info@ayyeka.com...
-
Page 67: Adding A New Threshold
Changing a threshold’s range Setting a threshold’s False Alarm Filter Setting Threshold Actions 3. Save changes by clicking . The changes will go into effect the next time the device communicates with the server. www.ayyeka.com +1 (310) 876-8040 info@ayyeka.com... -
Page 68: Setting Threshold Actions
For each threshold, you can define what actions the device should take when stream samples fall within the range of the threshold. To set threshold actions: 1. In the threshold definition area (Figure 55), click Actions. www.ayyeka.com +1 (310) 876-8040 info@ayyeka.com... - Page 69 In the Threshold actions window, you can set any of the following: Setting whether to transmit data immediately Setting a Threshold’s Transmission Interval Setting a Threshold’s Sampling Interval Defining a Threshold’s Alert Recipients Setting Resultant Sampling Actions www.ayyeka.com +1 (310) 876-8040 info@ayyeka.com...
- Page 70 Normal is the default interval. Transmission intervals Event and Emergency are two alternate intervals. Data is always transmitted at the Normal rate, unless a different rate is specified– either Event or Emergency – when stream samples fall within a certain threshold range. www.ayyeka.com +1 (310) 876-8040 info@ayyeka.com...
- Page 71 To define the stream sampling rate when samples are within a threshold range: 1. In the Sampling Interval (sec.) section of the threshold’s Actions view (Figure 56), select or enter a sampling interval, in seconds. 2. Click to save your settings. www.ayyeka.com +1 (310) 876-8040 info@ayyeka.com...
- Page 72 Select an alert medium – email and/or SMS. The message will be sent to the mobile phone number or email address defined for each of the group’s users (refer to Inviting a New User). www.ayyeka.com +1 (310) 876-8040 info@ayyeka.com...
- Page 73 Select a data stream. b. Select an action: Pause, Resume, Single or Pause Single. Click Add. 7. Repeat the previous step for every additional action you want to add. 8. Save changes by clicking www.ayyeka.com +1 (310) 876-8040 info@ayyeka.com...
- Page 74 Click Add. 2. Repeat the previous step for every data stream for which a certain sampling action should be taken whenever data crosses into the threshold you are setting. 3. Click to save your settings. www.ayyeka.com +1 (310) 876-8040 info@ayyeka.com...
-
Page 75: Viewing And Editing The Treatment Of Raw Data
2. In the right pane, select the Configuration tab. Figure 57: Selecting a stream’s Configuration tab In the Configuration tab you can perform the following: Hiding Bad Samples of Raw Data Changing the Conversion Formula Limiting Display of Engineering Values www.ayyeka.com +1 (310) 876-8040 info@ayyeka.com... -
Page 76: Hiding Bad Samples Of Raw Data
You can set the minimum and maximum values for raw data. Raw data that is outside this range will be discarded. This is useful in cases where you know that values outside this range are not real values, caused for example by the sensor being disconnected from the Wavelet device. To hide bad samples of raw data: 1. -
Page 77: Changing The Conversion Formula
1. Click Devices in the sidebar, and click the stream name in the Sites Tree pane. 2. In the right pane, select the Configuration tab. 3. In the Configuration tab (Figure 57), click the frame under (2) Convert To Eng. Units. Figure 60: Selecting to change the conversion formula www.ayyeka.com +1 (310) 876-8040 info@ayyeka.com... - Page 78 4. Define the formula for converting raw data to engineering units in either of the following ways: Edit the existing formula, as shown in Figure Click the beaker to define the formula by entering a pair of (Raw value, Final value) values. The system will compute the actual formula. www.ayyeka.com +1 (310) 876-8040 info@ayyeka.com...
- Page 79 Figure 62: Raw Data Converter configuration – by extrapolation 5. Click Update old samples to retroactively update old samples according to the new conversion formula. You can update samples up to two weeks back. 6. Click Submit. www.ayyeka.com +1 (310) 876-8040 info@ayyeka.com...
-
Page 80: Limiting Display Of Engineering Values
In the right field, enter a value for rounding down. For example, if you enter 145, then all values above 145 will display as 145. 5. Click Update old samples to retroactively update old samples according to the new clamping values. You can update samples up to two weeks back. 6. Click Submit. www.ayyeka.com +1 (310) 876-8040 info@ayyeka.com... -
Page 81: Managing A Stream's Sampling Interval
Managing a Stream’s Sampling Interval A stream’s sampling interval is the rate at which the Wavelet samples the relevant sensor for data. For example, a sampling interval of 5 minutes means that the Wavelet samples the sensor every 5 minutes. - Page 82 4. In the Stream Management table, make sure that Data Streams is selected in the top right drop-down box. 5. In the Stream Management table, check the stream’s Sample Interval value, displayed in minutes. For example, Figure 64 shows that the sampling interval of the Wind Speed stream is 30 seconds. www.ayyeka.com +1 (310) 876-8040 info@ayyeka.com...
-
Page 83: Discovering A Stream's Association With A Sample Group
4. In the Stream Management table, make sure that Data Streams is selected in the top right drop-down box. 5. In the Stream Management table, the stream’s Sample Group value indicates the following: 1 – The stream is associated with Sample Group 1. www.ayyeka.com +1 (310) 876-8040 info@ayyeka.com... -
Page 84: Changing A Stream's Association With The Sample Groups
1. Click Devices in the sidebar. 2. In the Sites Tree pane, click the device name. 3. In the right pane, click the Configuration tab. The Stream Management table is displayed. Figure 66: Viewing a stream’s Type and Number www.ayyeka.com +1 (310) 876-8040 info@ayyeka.com... - Page 85 Set the value of group (step f in Figure 67) as follows: Group=0: This stream is not associated with any Sample Group. Its value is custom set, and can be changed as described in Setting a Stream’s Custom Sampling Interval Value. www.ayyeka.com +1 (310) 876-8040 info@ayyeka.com...
-
Page 86: Setting The Sampling Interval Value Of A Sample Group
4. In the Stream Management table, hover over the line displaying the number of the sample group whose sampling interval you wish to modify. A green pencil icon appears at the right end of the line. Figure 68: Option for modifying the Sampling Interval www.ayyeka.com +1 (310) 876-8040 info@ayyeka.com... - Page 87 Figure 69: Setting the sampling interval for a Sample Group 7. If you changed the sampling interval, you must reboot the device in order for the change to take effect. Refer to Rebooting a Device. www.ayyeka.com +1 (310) 876-8040 info@ayyeka.com...
-
Page 88: Setting A Stream's Custom Sampling Interval Value
Figure 71: Setting a custom sampling interval 7. If you changed a stream’s sampling interval value, you must reboot the device in order for the change to take effect. Refer to Rebooting a Device. www.ayyeka.com +1 (310) 876-8040 info@ayyeka.com... -
Page 89: Managing Organizations
An account owner can create organizations and assign to them sites. To add an organization 1. Click Account in the sidebar. 2. In the right pane, select the Organizations tab. 3. Click + Add Organization. Figure 72: Selecting to add an organization www.ayyeka.com +1 (310) 876-8040 info@ayyeka.com... - Page 90 Figure 73: Create Organization window 4. In the Create Organization window: a. Enter a name for the organization. b. Optionally enter a description. Specify which sites you are assigning to the organization. Figure 74: Assigning sites to an organization www.ayyeka.com +1 (310) 876-8040 info@ayyeka.com...
-
Page 91: Editing An Organization
Figure 75: Selecting to edit an organization The Update Organization window appears (very similar to Figure 73). 4. In the Update Organization window, change the organization’s name, description, or assigned sites. 5. Click Submit. www.ayyeka.com +1 (310) 876-8040 info@ayyeka.com... -
Page 92: Managing Users
The user’s organization, and his Organizational Role The user’s mobile phone number The user’s Account Role (if any) You can click in the top right to select to display also the user’s Email address. www.ayyeka.com +1 (310) 876-8040 info@ayyeka.com... -
Page 93: Inviting A New User
1. Click Account in the sidebar. 2. In the right pane, select the Users tab. 3. Click Invite User. Figure 77: Selecting to Invite User – at the Account level The Invite User window appears. www.ayyeka.com +1 (310) 876-8040 info@ayyeka.com... - Page 94 Add. Repeat these actions for every organization in which you wish to assign the user a role. Click Submit. Figure 78: Invite User window – Account User (Left) or Organization User (Right) www.ayyeka.com +1 (310) 876-8040 info@ayyeka.com...
- Page 95 5. An invitation to access the Ayyeka Management Console is sent by email to the newly invited user. To accept, the new user clicks Accept Invitation in the email message Figure 79: Ayyeka Invitation email message www.ayyeka.com +1 (310) 876-8040...
- Page 96 6. An Ayyeka Management Console page opens in the new user’s browser, displaying an Invited User Details window. The new user should: a. Enter the user’s actual First Name and Last Name. b. Optionally change the email address, which currently lists the email address to which the invitation was sent.
- Page 97 7. Upon a successful submission, a login window with a successful registration message appears. The new user can enter his username and password to log into the Ayyeka Management Console. To access the Ayyeka Management Console anytime, the user can browse to https://home.ayyeka.com.
-
Page 98: Editing, Disabling Or Deleting A User
Indicates the user password has expired. Click this icon to define a new password. Deactivate the user. A deactivated user does not receive threshold alerts and cannot access the UI, but is not deleted from the database. Activate a deactivated user. Delete the user from the database. www.ayyeka.com +1 (310) 876-8040 info@ayyeka.com... -
Page 99: Adding Existing Users To Organization(S)
3. Click + Add User in the Users column of the organization to which you want to add a user. Figure 84: Selecting to add a user to an organization The Add User to Organization window appears. www.ayyeka.com +1 (310) 876-8040 info@ayyeka.com... - Page 100 If the role assigned here is not identical to the role assigned to the user upon user creation, the system grants him permissions to the organization’s assets that correspond to the higher of the two roles. www.ayyeka.com +1 (310) 876-8040 info@ayyeka.com...
-
Page 101: Managing User Groups
User. Note: Only a user with an “Owner” role can manage user groups. An Account Owner can manage user groups in any organization, while an Organization Owner can manage the user groups in his organization. www.ayyeka.com +1 (310) 876-8040 info@ayyeka.com... -
Page 102: Adding A User Group
1. Click Account in the sidebar. 2. In the right pane, select the User Groups tab. 3. Click + Add Group. Figure 86: Selecting to add a user group The Add New Group window appears. www.ayyeka.com +1 (310) 876-8040 info@ayyeka.com... - Page 103 Note: If the group was created at the organization level, the group is automatically associated with that organization, and there is no option to select a different organization. www.ayyeka.com +1 (310) 876-8040 info@ayyeka.com...
-
Page 104: Assigning A User To A Group
The list includes also the owner performing the Add User operation, thus an owner can add himself to the group he created. Note: A user can be a member of more than one group. www.ayyeka.com +1 (310) 876-8040 info@ayyeka.com... -
Page 105: Removing A User From A Group
1. In the Account > User Groups tab, click to the right of the group name. Figure 91: Selecting to edit a group 2. In the Edit Group Properties window that appears, edit the group’s properties, as described in Adding a User Group. www.ayyeka.com +1 (310) 876-8040 info@ayyeka.com... -
Page 106: Sharing Sites And Accounts
SHARING SITES AND ACCOUNTS The Ayyeka user interface provides several options for sharing sites and accounts, with users who are not associated with those sites or accounts. Sharing Sites with Any User You can share any site that you can manage, even with users who are not members of the organization to which the site belongs. - Page 107 You can click Select All if you wish to select all of the account’s sites, or click Clear All to delete all the sites you selected. Click Add Group or Update Group. 3. Assign to the group those users with whom you wish to share the sites (refer to Assigning a User to a Group). www.ayyeka.com +1 (310) 876-8040 info@ayyeka.com...
-
Page 108: Sharing An Account With Any Ayyeka User
Sharing an Account with any Ayyeka User An account owner can share the account with any Ayyeka user, as well as define that user’s role in the account. Note: If you share an account with a user, that user cannot then share the account with others, even if you granted him Account Owner permissions. - Page 109 A Share Account window appears. Figure 95: Share Account window 4. In the Share Account window: a. Specify the user, by entering the user’s Ayyeka User Email. b. Specify an account role for that user. www.ayyeka.com +1 (310) 876-8040 info@ayyeka.com...
-
Page 110: Setting Personal Preferences
To set your own user details: 1. At the bottom of the side bar, click the arrow to the right of your login name. 2. Select Profile. Figure 96: Selecting the Profile option The Profile Details window appears. www.ayyeka.com +1 (310) 876-8040 info@ayyeka.com... - Page 111 Figure 97: Profile Details window 3. Click Edit Profile to edit your user details. The Edit Profile Details window appears. Figure 98: Edit Profile Details window www.ayyeka.com +1 (310) 876-8040 info@ayyeka.com...
-
Page 112: Changing Your Own Password
New Password. Note that a green line appearing under the password box indicates a strong password; an orange line indicates a medium-strength password; and a red line indicates an insufficiently-strong password. Figure 100: Update Password window 5. Click Submit. www.ayyeka.com +1 (310) 876-8040 info@ayyeka.com... -
Page 113: Forgot Password
1. In the Login page, click Forgot password. Figure 101: Selecting the Forgot Password option 2. In the window that appears, enter the email address associated with your Ayyeka user account, and click Submit. Figure 102: Forgot Password – enter your sign-in email address 3. -
Page 114: Sending A Test Email And Sms
Figure 103: Reset Your Password email message 4. An Ayyeka Management Console page opens in your browser, with a window for defining a new password. Enter a new password and confirm it, and then click Submit. 5. Upon a successful password change, a login window with a successful password change message appears. -
Page 115: Customizing Your User Interface Display
To customize your user interface display: 1. At the bottom of the side bar, click the arrow to the right of your login name. 2. Select Preferences. Figure 107: Selecting the Preferences option The Preferences window appears. www.ayyeka.com +1 (310) 876-8040 info@ayyeka.com... - Page 116 Account – The defined Preferences apply to each of the users of the account(s) you can manage, unless a user’s organization owner set the organization’s preferences, or the user set his own preferences. Therefore, the Preferences that the logged-in user sets, always override any other Preferences settings. www.ayyeka.com +1 (310) 876-8040 info@ayyeka.com...
-
Page 117: Using The Ayyeka Api
Ayyeka provides programmatic access to your Ayyeka Wavelets' information using a simple and secure REST or SOAP based web services API. To use the Ayyeka REST API or SOAP API, you need basic familiarity with software development, REST or SOAP web services, and Ayyeka's user interface. - Page 118 3. In the Generate API Client window that appears: a. In Type, select the type of API client you wish to generate: REST API or SOAP API. b. Optionally enter a Comment. Click Generate. Figure 110: Selecting the API Client to generate www.ayyeka.com +1 (310) 876-8040 info@ayyeka.com...
- Page 119 Click Close. Figure 111: API client key and secret 5. The API Clients window refreshes to display the newly generated API client in the table. Figure 112: API Clients table www.ayyeka.com +1 (310) 876-8040 info@ayyeka.com...
- Page 120 Figure 113: Options for deleting or deactivating an API client 3. Select the icon corresponding to the action you wish to take: Deactivate the API client. A deactivated API client cannot be used to access Ayyeka data, but is not deleted from the database.
-
Page 121: Using The Ayyeka Rest Api Methods
Specifically, see the section Step 3: Authentication with Access Token. Using the Ayyeka REST API Methods The methods available for RESTful access to Ayyeka data are listed and explained in the REST API Reference window of the Ayyeka UI. To access the page, click API in the sidebar, then select API Documentation > REST API Reference. -
Page 122: Using The Ayyeka Soap Api
SOAP API. Gaining Access to Ayyeka Data via the SOAP API The process of gaining access to Ayyeka data via the SOAP API includes the following steps: 1. Register your application as an API client with Ayyeka. Refer to Step 1 – Creating an API Client. -
Page 123: Using The Ayyeka Soap Api Methods
Using the Ayyeka SOAP API Methods The methods available for SOAP API access to Ayyeka data are listed and explained in the SOAP API Reference window of the Ayyeka UI. To access the page, click API in the sidebar, then select API Documentation > SOAP API Reference. -
Page 124: Maintenance
Wavelet device are completely dry. Place the Wavelet device face down on a dry, stable surface with the connectors pointing downward. Partially unscrew the six (6) screws located on the back of the Wavelet enclosure, until you can lift off the back panel with the screws still affixed to their screw holes. - Page 125 Replace the Wavelet back panel, ensuring that the battery cable is neatly arranged and not pinched within the Wavelet enclosure. Tighten the six (6) back panel screws until the Wavelet is closed and sealed. Do not over-tighten as this will strip the screw threads.
-
Page 126: Troubleshooting
4. Replace the Wavelet back panel, ensuring that the battery cable is neatly arranged and not pinched within the Wavelet enclosure. 5. Tighten the six (6) back panel screws until the Wavelet is closed and sealed. Do not over-tighten as this will strip the screw threads. -
Page 127: Led Light Status Indicators
LED Light Status Indicators The LEDs on the Wavelet's interface board provide indications of the device's status. LEDs Status Indications LEDs Status Interpretation Not connected to network. The LED lights do not blink when the device is sampling. All LED are off Note: Wavelet may be powered down (power switch is in the OFF position), in Hibernate mode, or have insufficient battery power. -
Page 128: Accessing The Interface Board Leds
Accessing the Interface Board LEDs To access the Wavelet's interface board LEDs: Partially unscrew the six (6) screws located on the back of the Wavelet enclosure, until you can lift off the back panel. The three LEDs, COMM, ERROR, and STAT, are on the interface board, as shown in the figure below. -
Page 129: Technical Support - Contact Information
Technical Support – Contact Information Address: Ayyeka Technologies, Inc. 5 Kiryat HaMada Street Jerusalem, Israel 9777605 Phone: +1.310.876.8040 (US) +972.2.624.3732 (IL) Email: support@ayyeka.com Internet: www.ayyeka.com www.ayyeka.com +1 (310) 876-8040 info@ayyeka.com... -
Page 130: Faq
The internal GPS antenna is located at the top of the device, opposite the connectors panel. That side of the Wavelet device needs a clear view of a patch of sky for about 5-10 minutes in order to pick up a GPS signal. -
Page 131: How Can I Change The Destination Server Address
How can I change the destination server address? If you must change the address of the server to which Wavelet devices transmit their data, perform the following: 1. Click Devices in the sidebar. 2. In the Sites Tree pane, select the device. -
Page 132: Why Are Device Configuration Changes Not Taking Effect
2. In the bottom part of the device information box, click the arrow in the drop-down Commands list, and select Reboot. Both the configuration changes and the reboot will take effect after the device contacts the server. Figure 120: Selecting to reboot a device www.ayyeka.com +1 (310) 876-8040 info@ayyeka.com... -
Page 133: Specifications
SPECIFICATIONS Wavelet Specifications Data and Software Data Architecture Ayyeka private cloud and/or on-premises server Cyber Security AES-256 encryption Sensor fingerprinting One-Time Password (OTP) Software Integration SOAP-API REST-API SCADA Integration OPC-UA OPC-DA OPC-HDA ... - Page 134 Serial Protocols Modbus RTU ASCII Custom Serial Channels Up to 15 Analog Channels Up to 4 (current loop, voltage) Discrete Channels Up to 2 Sensor Power Supply Output 12 V, 350 mA www.ayyeka.com +1 (310) 876-8040 info@ayyeka.com...
- Page 135 Storage Temperature Range -40°C to +80°C (-40°F to +176°F) *Complies with: Radiated emission standards (ETSI EN 301 489-1/ -17 Class B and CFR 47 FCC Part 15 Subpart B Class B), Immunity per ETSI EN 301 www.ayyeka.com +1 (310) 876-8040 info@ayyeka.com...
-
Page 136: Wavelet Mechanical Drawings
Wavelet Mechanical Drawings Figure 121: Wavelet Mechanical Drawings www.ayyeka.com +1 (310) 876-8040 info@ayyeka.com... -
Page 137: Appendix A: Connector 42-00009 Datasheet
APPENDIX A: CONNECTOR 42-00009 DATASHEET www.ayyeka.com +1 (310) 876-8040 info@ayyeka.com... -
Page 138: Ayyeka Warranty
AYYEKA TECHNOLOGIES LTD. (HEREAFTER REFERRED TO AS “AYYEKA TECHNOLOGIES,” “WE,” OR “US”) WARRANTS THE AYYEKA TECHNOLOGIES-BRANDED HARDWARE AND PARTS CONTAINED IN THE ORIGINAL PACKAGING (HEREAFTER “WAVELET KIT”) AGAINST DEFECTS IN MATERIALS AND WORKMANSHIP FOR A PERIOD OF ONE (1) YEAR FROM THE DATE OF ORIGINAL RETAIL PURCHASE BY THE END-USER PURCHASER (“WARRANTY PERIOD”). - Page 139 Wavelet Kit without the express written permission of Ayyeka Technologies; (g) defects caused by normal wear and tear or otherwise due to the normal aging of the Wavelet Kit, or (h) if any serial number has been removed or defaced from the Wavelet Kit.
- Page 140 Ayyeka Technologies, assumes the remaining term of the Warranty or ninety (90) days from the date of replacement or repair, whichever provides longer coverage for you. a Wavelet Kit or part is replaced or a refund provided, any replacement item becomes your property and the replaced or refunded item becomes Ayyeka Technologies’...
- Page 141 Ayyeka Technologies will cancel the credit card authorization, and you will not be charged for the Wavelet Kit or part and shipping to and from your location. If you fail to return the replaced Wavelet Kit or part as instructed or return a replaced part that is ineligible for service, Ayyeka Technologies will charge your credit card for the authorized amount.
- Page 142 This Warranty is governed by and construed under the laws of the country in which the Wavelet Kit purchase took place. Ayyeka Technologies or its successor in title is the warrantor under this Warranty.
-
Page 143: Revision History
Updating the Generating Reports section Adding the Email and SMS Alert group Addition of Sending Live Notifications section Updating the Using the Ayyeka REST API Methods section Updating the Battery Replacement Instructions section Updating role names Updating with new UI look www.ayyeka.com...
Need help?
Do you have a question about the Wavelet and is the answer not in the manual?
Questions and answers