Zipato Zipatile User Manual
Hide thumbs
Also See for Zipatile:
- Quick start manual (9 pages) ,
- Quick start manual (7 pages) ,
- Quick start manual (12 pages)
Advertisement
Advertisement
Table of Contents

Related Manuals for Zipato Zipatile


Summary of Contents for Zipato Zipatile
- Page 1 Zipatile User’s Manual Version 1.0...
- Page 2 TPG does not recommend, endorse, prefer, or support any product made by another manufacturer. About this manual This Product Manual describes how to setup, use, and maintain the ZipaTile. It also describes how to use the Zipato automation software. This manual includes a full table of contents, chapter task lists, and numerous cross-references to help you find the specific information you are looking for.
-
Page 3: Use Cases
Introduction ZipaTile is the complete home control and automation system in a form of a single device. It can be easily mounted on any wall, in any home. Featuring large number of built-in sensors and hardware modules, ZipaTile replaces numerous home devices such as security system, thermostat, automation controller, IP camera, alarm siren or intercom and bring them all together in one, smart and beautiful device. -
Page 4: Installation And Setup
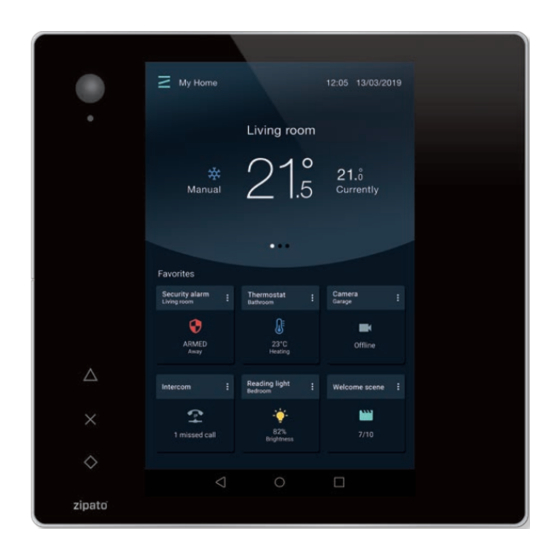
"peace of cake" for anyone without any previous programming experience. Intercom You can use your ZipaTile as internal door phone station with most of SIP based outdoor door phone units. Being supported by the Zipato server, ZipaTile will forward any call from the outdoor unit to your mobile phone wherever you are, or you can just use ZipaTile to answer the call. - Page 5 Optional Tools which may be needed: • Screwdrivers: Flathead and Philips • Pliers • Wire stripper • Non-contact voltage detector • Wire cutter • Electrical tape • Drill and drill bits appropriate for the wall type Overview Figure 1. ZipaTile front view...
- Page 6 Figure 2. ZipaTile rear view Figure 3. ZipaTile top view Figure 4. Wiring diagram (EU RU IN)
- Page 7 ZipaTile is primarily intended for on-wall mounting, but it can be used on table top as well. In this case, please keep the wall holder affixed to ZipaTile and use the built-in table top stand at the back of the wall holder.
- Page 8 Wall mount with built in power supply This is a default way of using ZipaTile. It requires usage of in-wall power supply and a wall hole with the 110-220V power wire at the place where you want to mount the ZipaTile.
- Page 9 If there is no in-wall box at desired mounting location, please use the wire channel at the back of the wall holder to place the power wires behind the ZipaTile and use the bundled plug-in power supply to connect to the wall socket.
- Page 10 Setting up your ZipaTile Turn on the ZipaTile Press and hold (3 sec) the power button on top of the ZipaTile. Booth process will start with the Zipato logo on the screen and it will finish when you see the ZipaTile lock screen.
-
Page 11: Wifi Internet Connection
WiFi Internet connection In order to configure your ZipaTile properly, ZipaTile has to be connected to Internet router over the WiFi. Figure 10. Settings screen 1. Open the Settings app. 2. Choose Wi-Fi. Choose Wi-Fi to view a list of available Wi-Fi networks on the right side of the screen. - Page 12 Figure 11. Registration When login first time to Zipato application, you will be required to enter your mobile number and choose your location. This way you will be able to receive phone and SMS security alerts, as well as to get the local weather information on your ZipaTile.
- Page 13 ZipaTile applications. Figure 12. Lock screen 1. Security widget Showing the status of the Zipato security partition. You can change the status by pressing it, or by pressing the button aside of Security widget 2.
-
Page 14: Intruder Alarm
You can add additional safety sensors as ZONES into your Safety alarm. However, in order to add sensor as a ZONE in your Safety alarm system, you have to first add sensor into your Zipato system (go to ADD NEW... -
Page 15: Device Manager
This way you can use ZipaTile to control your lights, blinds, curtains, read status of meters, sensors etc… You can also create ROOMS in Zipato DEVICES and assign a room to each device. This way you can easily find and manage devices within one room. -
Page 16: Live View
Since Zipato Rule Creator is offering many options, and it is based on drag and drop, it is highly recommended to use it on PC rather than on ZipaTile itself. In order to use Zipato Rule Creator go to: my.zipato.com > rule creator. -
Page 17: Weather Station
> ip > and click "enable" on the SIP server with the serial number of your ZipaTile (the one which you would like to be your Intercom server). After enabling the Zipato Intercom Server, you will be able to find "Intercom" option in the main menu. Over there you can check basic Intercom settings and manage Intercom Clients, Servers, and create Groups. -
Page 18: Music Player
1. Please check do you use Country code in your mobile number. The number should look like this: +1 764 456456 2. Please check whether you have enough Zipato credits in your Zipato wallet. You can check this if you go to Zipato > Settings > Wallet... - Page 19 AFB DOMOTICS S.L a +34 934-081-741 C/ Garcilaso 213 2º 1ª 08027 Barcelona (Spain) www.afbdomotics.com...
Need help?
Do you have a question about the Zipatile and is the answer not in the manual?
Questions and answers