Table of Contents
Advertisement
Quick Links
INSTRUCTION MANUAL
Read these instructions carefully before using your
microwave oven, and keep it carefully.
If you follow the instructions, your oven will provide you with
many years of good service.
SAVE THESE INSTRUCTIONS CAREFULLY
Guangdong Midea Microwave and Electrical Appliances Manufacturing
Co.,Ltd. MD Microwave Oven Manufacturing
Yongan 6 Road, Beijiao, Shunde, Guandong, P.R.C
Microwave Oven
Model:EM234GTQ-S
Advertisement
Table of Contents

Related Manuals for Midea EM234GTQ-S


Summary of Contents for Midea EM234GTQ-S
-
Page 1: Microwave Oven
If you follow the instructions, your oven will provide you with many years of good service. SAVE THESE INSTRUCTIONS CAREFULLY Guangdong Midea Microwave and Electrical Appliances Manufacturing Co.,Ltd. MD Microwave Oven Manufacturing Yongan 6 Road, Beijiao, Shunde, Guandong, P.R.C ... -
Page 2: Precautions To Avoid Possible Exposure To Excessive Microwave Energy
PRECAUTIONS T O AVOID POSSIBLE EXPOSURE TO EXCESSIVE MICROWAVE ENERGY (a) Do not attempt to operate this oven with the door open since this can result in harmful exposure to microwave energy. It is important not to defeat or tamper with the safety interlocks. -
Page 3: Important Safety Instructions Warning
IMPORTANT SAFETY INSTRUCTIONS WARNING When using electrical appliances basic safety precautions should be followed,including the following: WARNING-To reduce the risk of burns,electric shock, fire,injury to persons,or exposure to excessive microwave energy 8. Use this appliance only for its intended 1. Read all instructions before using the uses as described in this manual. -
Page 4: Grounding Instructions
19. Liquids, such as water, coffee, or tea are able to be overheated beyond the boiling point without appearing to be boiling. Visible bubbling or boiling when the container is removed from the microwave oven is not always present. THIS COULD RESULT IN VERY HOT LIQUIDS SUDDENLY BOILING OVER WHEN THE CONTAINER IS DISTURBED OR A SPOON OR OTHER UTENSIL IS INSERTED INTO THE LIQUID. -
Page 5: Radio Interference
1. A short power-supply cord is provided to reduce the risks resulting from becoming entangled in or tripping over a longer cord. 2. Longer cord sets or extension cords are available and may be used if cared is exercised in their use. -
Page 6: Materials You Can Use In Microwave Oven
Materials you can use in microwave oven Remarks Utensils Aluminum foil Shielding only. Small smooth pieces can be used to cover thin parts of meat or poultry to prevent overcooking. Arcing can occur if foil is too close to oven walls. The foil should be at least 2.5cm away from oven walls. -
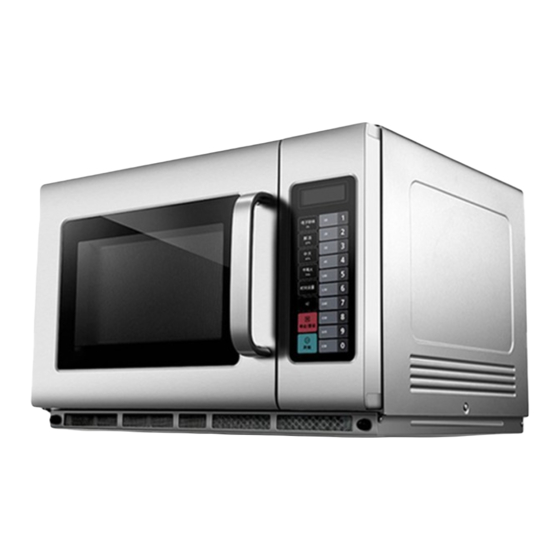
Page 7: Names Of Oven Parts And Accessories
SETTING UP YOUR OVEN Names of Oven Parts and Accessories Remove the oven and all materials from the carton and oven cavity. Your oven comes with the following part and accessories: Instruction Manual E) Ceramic board A) Control panel Back plate B) Observation window C) Door assembly Front plate... -
Page 8: Countertop Installation
Countertop Installation Remove all packing material and accessories. Cabinet: Remove any protective film found Examine the oven for any damage such as on the microwave oven cabinet surface. dents or broken door. Do not install if oven is damaged. Installation Select a level surface that provide Fig 2 enough open space for the intake... -
Page 9: Cleaning Instructions
Cleaning Instructions Always keep the oven clean 1. Cleaning the glass viewing window, the inner door panel and oven front face. For best performance and to maintain the high degree of safety, the inner door panel and oven front face should be free of food or grease build-up. Wipe these parts with a mild detergent, rinse and wipe dry. -
Page 10: Operation
OPERATION Control Panel and Features (1) Power Buttons (2) Time Entry Button (3) Double Quantity Button (4) Stop/Reset Button (5) Start Button (6) Number Keyboard... -
Page 11: Appendix. A User Options
OPERATION INSTRUCTION Appendix. A User Options Items bolded below are the default values. Option Discription Setting 3 seconds beep OP:10 Continuous beep OP:11 EOC Tone 5 quick beeps,Repeating OP:12 Beeper Off OP:20 OP:21 Beeper Medium OP:22 Volume High OP:23 Keybeep Off OP:30 Beeper Keybeep On... - Page 12 Appendix. B Default Cook Times The oven shall ship with the following Preset Cook Times unless otherwise noted in the product Specification. Button Cook Factors Display (Time) Power 0:10 100% 0:20 100% 0:30 100% 0:45 100% 1:00 100% 1:30 100% 2:00 100% 2:30...
- Page 13 1. Power Up _ _ _ _ _ _ _ " " displays when the oven is electrified for the first time. If " " button pressed, the oven will change to idle mode. For some model: " " displays when the oven is electrified for the first time.
- Page 14 5. Pause Mode 1) This mode allow the users to temporarily stop the cooking cycle to inspect or stir the food item. 2) While in Manual Cook Mode, or Preset Program Cook Mode, if the door is open or closed, or if the " "...
- Page 15 8. End of Cook Cycle Mode 1) After the time has expired in a Manual Cook Mode, or a Preset Program Cook Mode, the oven shall go into The End of Cook Cycle Mode. 2) During this mode, "DONE" displays. 3) If either User Option OP:11 or "OP:12"...
- Page 16 11. Programming Mode This mode allows the user to assign cook times and power levels to the once touche button. 1) Open the door and press "1" pad for 5 seconds,the buzzer will sound once and enter to Programming Mode. 2) "PROGRAM"...
- Page 17 12. Double Quantity cooking 1) Through the use of the X2 pad, the user can easily set the time two of a particalar food item. 2) If the "X2" button is pressed in ready mode, followed by the starting of a Preset Program, or if the "X2"...
- Page 18 14. Use Option Mode This allows the user choose between various ways for the oven to operate. 1) Open the oven door and press "2" pad for 5 seconds. The buzzer sounds once and enter this mode. The screen displays "OP: - -". 3) Press any number button to enter related mode setting.
- Page 19 How to remove and install the filter Pull up the plastic nail cap Take off the fil er . To restall,align the base plate mounting holes, insert the plastic nails,press the plastic nail cap...
- Page 20 How to remove and install the blockage be sure to unplug the Warning:Before remove and install the oil blockage, appliance from the power supply,and avoid high temperature scald. thumb pressed here 1 hands with oil blockage ,pressed on 1.Hands to take the oil blockage ,after alignment arrow shown,pushed back slamly, then...
-
Page 21: Troubleshooting
Trouble shooting...
Need help?
Do you have a question about the EM234GTQ-S and is the answer not in the manual?
Questions and answers