Table of Contents
Advertisement
Advertisement
Table of Contents

Related Manuals for lassele LUI-150A


Summary of Contents for lassele LUI-150A
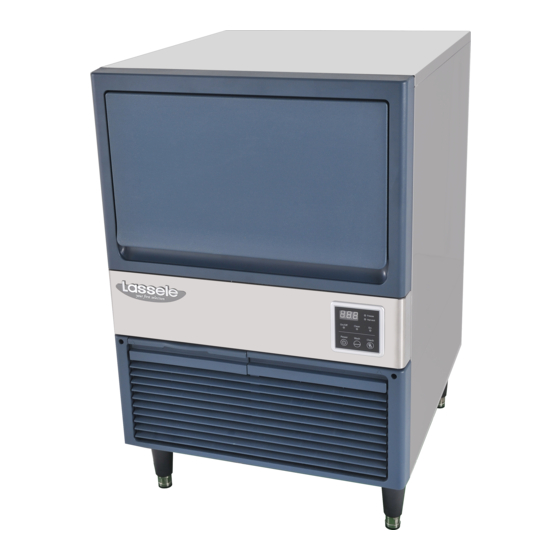
- Page 1 Installation and User’s Manual LUI-150A LUI-250A I512A-091 ver.201701_01...
-
Page 2: Table Of Contents
Table of Contents Freight Claim Procedure(Important) 1. Specifications ................... 4 1.1 Technical Specification 1.2 Product Dimensions 1.3 Accessories Included in the Machine 1.4 Nameplate Format 2. Installation & Operation Guide ............7 2.1 Location Requirements 2.2 Installation Requirements 2.3 Electrical Requirements 2.4 Check list before, Installation 2.5 Setup 2.6 Water Supply &... -
Page 3: Freight Claim Procedure(Important)
Failures caused by improper or erratic voltages, adverse environmental or water conditions, improper drainage, interruption in electrical or water supply. • Improper or unauthorized repair. • Any ice maker that has been installed and/or maintained inconsistent with the instructions provided by Lassele... -
Page 4: Specifications
1. Specifications 1.1 Technical Specification ● Electrical Data Safety Sanitation Energy Total Rating Model Condenser AMPs Approval Approval Star 115V/60Hz/1Ph Certified 150A 220-240V/50Hz/1Ph Certified 220V/60Hz/1Ph Cooling 8.3A 115-120V/60Hz/1Ph Certified 250A 220- 240V/50Hz/1Ph Certified 220V/60Hz/1Ph ● Refrigerant Data 150A 250A HI - 220 psig HI - 460 psig Design Pressure LOW - 105 psig... -
Page 5: Product Dimensions
1. Specifications CONTENTS 1.2 Product Dimensions ● 150A ● 250A... -
Page 6: Accessories Included In The Machine
1.3 Accessories Included in the Machine Name Picture Quantity Scoop Legs 6inch(150 ~ 176 mm) User Manual 1.4 Nameplate Format LUI - 250A See the Nameplate for electrical and refrigeration specifications. This Nameplate is located on the upper part of the Left Side Panel. We reserve the right to make changes in specifications and design without prior notice. -
Page 7: Installation & Operation Guide
2. Installation & Operation Guide WARNING - The ice maker should be installed, following regulations of the country, state and region. - Please install it after fully understanding the manual before installation. It might cause breakdown, injury and death during installation. - Please be careful not to drop tools to the bin or floor during installation. -
Page 8: Electrical Requirements
Installation condition ● Condition Minimum Maximum °F Ambient Temperature °C °F Water Temperature °C psig Water Pressure 206.8 689.4 115V Voltage 220V 2.3 Electrical Requirements WARNING - All kinds of power wiring work including power cable connection and earth have to be done in accordance to the law and regulations of the country, state, and region. -
Page 9: Checklist Before Installation
2.3.1 Power Connection - For details about size of cable for power supply, please refer to the “1.1 Technical Specification” . 2.4 Checklist before Installation - After unpacking, please check the product appearance. If there is damage on the product, please contact local store. -
Page 10: Water Supply & Drain Connections
2.6 Water Supply & Drain Connections WARNING - Installation of water supply and pipe system has to be done in accordance to the law and regulation of the country, state, and region. - The icemaker is to be installed with adequate backflow protection to comply with applicable federal, state, and local codes. - Page 11 Conditions for water supply and drainage ▶ connecting Water Water Size of a Location temperature pressure fitting connecting hose 7°C (45°F) Min. 30 psig Min. Water inlet 3/8” FPT ID 1/4” copper pipe(Min.) 32°C(90°F) Max. 100 psig Max. Drain 3/4” FPT ID 3/4”...
-
Page 12: Wire
2.7 Wire WARNING - Wiring should qualify standards of the country, state and county that the machine is installed. Otherwise it might cause electric shock, injury, fire or death. - Wiring should be done by a qualified electrical engineer who meets applicable national, state and local regulations. -
Page 13: Final Check
2.8 Final Check WARNING After installation, make sure that all the components, fixture, and thumbscrews are tightly in their places. Make sure that no impurities fall into the ice storage container. (1) Is ambient temperature of the installation area within the allowed range 45-100°F(7-37°C)? (2) Is temperature of water supplied in the installation area within the allowed range 45-90°F (7-32°C)? (3) Are all the packing materials such as packing box, inside tape, and other materials removed completely? -
Page 14: Operation
3. Operation 3.1 Button (1) Power Push the button for 2 seconds to turn on/off. (2) Wash Use the button when cleaning the machine. Refer to the 'cleaning' label on the left side of the machine. (3) Check Only for service persons to check status of the machine 3.2 Status Light (1) On/Off : shows power status in green. -
Page 15: 7-Segment
3.3 7– segment Display Status Ready for cycle 1 = Water Supply Period .00 = Elapsed time (x 10 sec) 2 = Harvesting Period .00 = Elapsed time (min) 3 = Freezing Period .00 = Elapsed time (min) Drainage cycle Wash mode Shown when wash button is pressed. -
Page 16: Operation Cycle
3.4 Operation Cycle Icemaker is operated in accordance to the following process (1) Water Supplying Cycle Once power is on, water supply valve opens to fill the water tank with water required. (2) Harvesting Cycle To remove ice made on the evaporator, water flow stops and it becomes hot. Then, ice is released from the evaporator to storage container. -
Page 17: Error Code
3.6 Error Code Code Problem Possible Cause Remarks Refrigerant leaked or pipe blocked Compressor not operating Freezing error Fan motor not operating (freezing time exceeds Ambient or water temperature too high A/T: 45-100°F(7-38°C) 60 min) W/T: 45-90°F(7-32°C) Voltage: 115V : 100~130V Voltage too high or too low 220V : 208~230V Refrigerant leaked or pipe blocked... -
Page 18: Maintenance & Cleaning
4. Maintenance & Cleaning WARNING Icemaker shall be maintained and cleaned based on this manual and cleaning label attached on each unit 4.1 Maintenance Maintenance Period ● Please refer to the following table for guidance on Maintenance Period. It may be shorter depending on surrounding environment and hygiene regulations of the installation area. -
Page 19: 150A]Interior Cleaning & Sanitizing Procedure
4.2 [150A] Interior Cleaning & Sanitizing Procedure The icemaker should be cleaned and sanitized every six months. Depending on the water quality of the installation place, it could be done more often. WARNING - Please use a detergent and sterilizer, according to directions of the product. sanitizer for ice machines, and follow directions of those products. -
Page 20: 150 Sanitizing Procedure
17) Wash disassembled parts with 6 liters of cleaning solution from 3). Only use nylon brush (Not wire brush), sponge and soft cloth to brush the parts. (Dishwashing liquid also can be used while the cleaning procedure) - BIN - EVAPORATOR PLASTIC PARTS 18) Wash storage out with clean water and dry the storage. -
Page 21: 150 Product Disassembly
4.2.3 150 Product Disassembly Top Cover Screw 1. Unscrew two screws on the back side of top cover then pull the top cover out to disassemble it referring to above image. Door 2. Lift the door up through the groove to disassemble it referring to above image. - Page 22 Screw Partition Top Cover 3. Unscrew two screws on the Partition Top Cover and lift it up to disassemble it referring to above image. Bracket lnner Cabi 4. Detach Bracket Inner Cabi from the evaporator referring to above image.
- Page 23 Drain Hose Overflow 5. Pull Hose Drain and Over Flow Pipe out to disassemble them referring to above image. Ice Guide Water Tank 6. Press hooks on evaporator bracket and pull it to the bottom to detach water tank and Ice Guide referring to...
- Page 24 Partition Evaporator LF , RH 7. Lift Partition Evaporator LF up and RH to disassemble it referring to above image. Cover Evaporator 8. Lift Cover Evaporator up to disassemble it referring to above image.
- Page 25 Spray Tube Supply Tube Spray Guide 9. Disconnect Spray Tube, Supply Tube, and Spray Guide from the connected hose then lift them up to disassemble them referring to above image. Hose Assy 10. Lift the Hose Assy up to disassemble it referring to above image.
-
Page 26: 250A]Interior Cleaning & Sanitizing Procedure
4.3 [250A]Interior Cleaning & Sanitizing Procedure Thumb Screw Ice Guide Storage bin Water Tank Drain pipe A display is composed of 3 buttons and 5 status lights and 3 7-segment. Fig 5 4.3.1 250 Cleaning Procedure 1) Turn off the ice maker. If ices are being made, wait for cycle completion and then turn off the ice maker. 2) Remove all remaining ices in the storage. -
Page 27: 250 Sanitizing Procedure
Bracket Guide ice evaporator LF Bracket evaporator RH Thumb Screw level sensor Water Tank Water Tank Drain pipe Fig 6 Fig 7 4.3.2 250 Sanitizing Procedure 1) Prepare 10 liters of cleaning solution by diluting 1 pack(28.4g/1 Oz) of Kay-5 sanitizer with 12 liters of warm water. -
Page 28: 250 Product Disassembly
4.3.3 250 Product Disassembly Top Cover Screw 1. Unscrew two screws on the back side of top cover then pull the top cover out to disassemble it referring to above image. Cover Rear 1 ~9 : Screw 2. Unscrew nine screws in order of the numbers marked in above image and pull the Cover real out to detach it. - Page 29 Side Cover RH Side Cover LF 3. Pull the Cover Side LF and RH to disassemble it. Cover Evaporator Upper Cover Front Screw Thumb Screw 4. 1) Unscrew four screws marked on above image. 2) Open the door and release two thumb screw on left and right side of cabinet referring to above image. 3) Lift Cover Front and Cover Evaporator Upper up to disassemble it.
- Page 30 Hinge RH Screw 5. 1) Open the door and unscrew two screws fixing Hinge RH. 2) Pull the Door and Hinge RH to the left to disassemble them referring to above image. Drain Pipe 6. Pull the Drain Pipe out to disassemble it referring to above image.
- Page 31 Ice Guide Thumb Screw Water Tank 7. Unscrew two thumb screw marked on above image and pull Water Tank out to disassemble it. Evaporator Cover 8. Pull Evaporator Cover out to disassemble it referring to above image.
- Page 32 Spray Tube Supply Tube Spray Guide 9. Disconnect Spray Tube, Supply Tube, and Spray Guide from the connected hose then lift them up to disassemble them referring to above image. Hose Assy Hose Assy 10. Lift the Hose Assy up to disassemble it referring to above image.
-
Page 33: Exterior Cleaning
4.4 Exterior Cleaning To prevent corrosion, clean oil or dust in outer surface with cleaning towel or neutral detergent. 4.5 Storage Container and Scoop Clean storage container inside and scoop with neutral detergent. Wash with clean water afterwards. Storage container is for ice only. Do not store any other stuff in the storage container. 4.6 Air Filter Dust in the filter may decrease function of icemaker. - Page 34 MEMO...
- Page 35 MEMO...
- Page 36 Manufacturer : DAEYEONG E&B Co., Ltd. (BANWOL SMARTHUB 1-38) 55, SANDAN-RO 163 BEON-GIL, DANWON-GU, ANSAN-CITY, GYEONGGI-DO, SOUTH KOREA TEL.+82-31-364-8941 FAX. +82-31-491-1603 www.daeyeong.co.kr...
Need help?
Do you have a question about the LUI-150A and is the answer not in the manual?
Questions and answers
تنظیمات دستگاه lassele lui-100a دستکاری شده است لطفا روش تنظیم مجدد را توضیح دهید
How reset factory lassele Lui-150A
How reset factory?