Table of Contents
Advertisement
Quick Links
Advertisement
Table of Contents

Related Manuals for Neon MCB1536


Summary of Contents for Neon MCB1536
-
Page 1: Instruction Manual
Instruction Manual SPEAKER SYSTEM CD MICRO SYSTEM MCB1536... -
Page 2: Some Dos And Don't On The Safe Use Of Equipment
Some Dos And Don't On The Safe Use Of Equipment This equipment has been designed and manufactured to meet international safety standards but, like any electrical equip- ment, care must be taken if you are to obtain the best results and safety is to be assured. *********************************** DO read the operating instructions before you attempt to use the equipment. -
Page 3: Safety Warnings
- Consult the dealer or an experienced radio/TV technician for help. This device complies with Part 15 of the FCC Rules. Operation is subject to the following two conditions: (1) This device may not cause harmful interference, and (2) this device must accept any interference received, including interference that may cause undesired operation. - Page 4 Where the MAINS plug or an appliance coupler is used as the disconnect device, the disconnect device shall remain readily operable. Interference Do not place the unit on or near appliances which may cause electromagnetic interference. If you do, it may adversely affect the operating performance of the unit, and cause a distorted picture or sound. Batteries Batteries used in the remote control for this unit are easily swallowed by young children and this is dangerous.
-
Page 5: Battery Safety Guidelines
Battery Safety Guidelines Used correctly, domestic batteries are a safe and dependable source of portable power. Problems can occur if they are misused or abused — resulting in leakage or, in extreme cases, re or explosion.Here are some simple guidelines to safe battery use designed to eliminate any such problems. -
Page 6: Table Of Contents
Table of Contents Some Dos And Don't On The Safe Use Of Equipment ..................1 Safety Warnings ..............................2 Battery Safety Guidelines ............................4 ............................5 Table of Contents Unpacking ................................7 Product Overview ..............................8 Remote Control Overview .............................9 Battery Installation for the Remote Control .................. 10 Handling the Remote Contro ......................10 Remote Control Operation Range ....................11 Connections .................................12... - Page 7 CD Operation ................................. 17 CD Playing .............................. 17 To Skip Search and Play ........................17 To Search ..............................17 Text Display During Playback......................17 Programme Play ........................... 17 Playing Repeatedly (CD) ........................17 MP3/WMA Disc Playing ............................18 Playing Repeatedly (MP3 disc) ......................18 Using the USB ............................
-
Page 8: Unpacking
Unpacking Remove all packaging from the unit. Retain the packaging. If you dispose of it please do so according to local regulations. The following items are included: FM/DAB INTRO REPEAT RANDOM P-EQ LOUDNESS S-BASS SLEEP CLOCK TIMER PRESET INFO SOURCE PAIRING SCAN MUTE... -
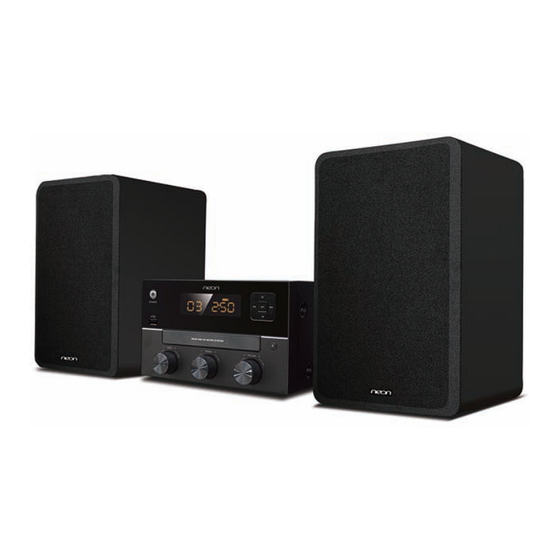
Page 9: Product Overview
Product Overview Front view 1. Standby/Source Button Remote Sensor Vacuum Fluorescent Display (VFD) Display Lens Disc Tray 5. Fast Forward Button SOURCE Tuning Forward Button Reverse Button BASS TREBLE VOLUME Tuning Backward Button Next Button Preset Up Switch Previous Button Preset Down Switch Play/Pause Button 6. -
Page 10: Remote Control Overview
Remote Control Overview Remote control Standby Button CD Function Button FM Button REPEAT Button INTRO Button LOUDNESS Button P-EQ Button Clock Button Next Button Preset Up Button 10. Fast Backward ButtonD Tuning Forward Button 11. Previous Button PRESET DOWN Button 12. -
Page 11: Battery Installation For The Remote Control
Battery Installation for the Remote Control 1. Remove the insulating mylar strip from the battery if the battery is being used for the first time. It is located at the bottom back side of the remote control. 2. Unwind the screw and slide open the battery compartment of the remote control. -
Page 12: Remote Control Operation Range
Remote Control Operation Range SOURCE BASS TREBLE VOLUME Point the remote control to the unit no more than 5 metres from the remote control sensor and within 60° horizontally and 40° vertically of the front of the unit. The operating distance may vary according to the brightness of the room. Note: •... -
Page 13: Connections
Connections Connecting the Speakers Connect the speaker cables between the terminals as shown below. Connect the cables with the silver line to the (-) terminals and cables with the golden line to the (+) terminals. The main unit Right Speaker Box Left Speaker Box Rear View Rear View... -
Page 14: Eco Power/Clock Mode Features
ECO Power/Clock mode Features Powering ON/OFF When you insert the AC Power cable into a wall outlet, the unit will be in clock mode. • Press the Standby button to switch the unit on. The word “HELLO” be displayed on the display. •... -
Page 15: Sound Quality
Sound Quality Adjusting the Volume To increase or decrease the volume, rotate the - VOLUME + control on the unit or press the VOL +/- buttons on the remote control. Adjusting the Super Bass You can reinforce the bass sound to maintain rich, full bass at low volume.Press the S-BASS button on the remote control to get the effect. -
Page 16: Listening To Radio Broadcasts
FM Radio You can listen to FM stations. Stations can be tuned in manually, automatically, or from a preset memory storage. Caution: Before listening to the radio, please check that the FM antenna is correctly connected and adjusted for length and direction. -
Page 17: Fm Display Modes
FM Display Modes Display Every time you press the button, the display will cycle through the following display modes: Station Name, Programme Type, Date / Clock,Radio Text,Frequency. The information is displayed on the lower segment of the display. Station Name Station Name When an RDS station is received, the name of that station will be displayed. -
Page 18: Cd Operation
CD Operation CD Playing 1. Repeatedly press the SOURCE button on the front panel of the unit or press the CD button on the remote control. “DISC” will be shown on the display. 2. Press the K button on the unit to open the disc door and place the disc on the disc tray (with the printed side up). 3. -
Page 19: Mp3/Wma Disc Playing
MP3/WMA Disc Playing Note: MP3/WMA music playback from a CD maybe be affected due to the type and format of the disc or condition of the recording. If you are having trouble playing a certain disc, it is recommended to use the USB input instead for best MP3/ WMA playback. -
Page 20: Using The Usb
Using the USB By connecting an USB mass storage device (including USB flash memory, USB flash players or memory cards) to this unit, you can enjoy the device's stored music through the unit. 1. Insert the USB device's USB plug into the socket on the front of unit. -
Page 21: Playing From A Bluetooth Device
2. Turn on the Bluetooth function on your device. 3. Search for other Bluetooth devices with your device. 4. Select “MCB1536” in the pairing list. 5. Enter default password “0000” if necessary. 6. Press and hold the PAIR button more than 2 seconds to clear pairing history. -
Page 22: Set The Alarm Timer
Setting the Daily on Timer You can use the setting timer to make the unit automatically turn on at a certain time everyday from standby. When the setting timer is on, the timer indicator “ ” will be displayed.The clock must be correctly set for the timer to operate correctly. -
Page 23: Disc Handling
Disc Handling Handling Precautions • Hold the disc by the edges so the surface will not be soiled with fingerprints. (A) Fingerprints, dirt and scratches can cause skipping and distortion. • Do not write on the label side with a ball-point pen or other writing implements. •... -
Page 24: Troubleshooting
Troubleshooting If you are having a problem with your unit, check this list for a possible solution before calling for service. If you cannot solve the problem from the hints given here, or the unit has been physically damaged, call a qualified per- son, such as your dealer, for service. -
Page 25: Specifications
Specifications Power Requirements 100-240V ~ 50/60Hz FM Tuning Range 87.5~108 MHz ≤ Power Consumption 28W (ECO Standby 0.5W) USB port Output Power 35W x 2 ≤ Dimensions W200 XH120 X D 250 MM Speaker Specification Impedance 6Ω Input Power Dimensions W140 XH232 X D 158 MM Bluetooth Specification Communication system... -
Page 26: Notes For Battery Disposal
Notes for battery disposal The batteries used with this product contain chemicals that are harmful to the environment. To preserve our environment, dispose of used batteries according to your local laws or regulations. Do not dispose of batteries with normal household waste.
Need help?
Do you have a question about the MCB1536 and is the answer not in the manual?
Questions and answers