Table of Contents
Advertisement
Advertisement
Table of Contents

Related Manuals for Neon MCB820


Summary of Contents for Neon MCB820
- Page 1 INSTRUCTION MANUAL MCB820 Retro Bluetooth Micro System...
-
Page 2: Table Of Contents
Table of Contents Safety Warnings ..............................3 Battery Safety Guidelines ..........................5 Pack Contents..............................6 Product Overview ............................7 Remote Control Overview ..........................8 Installation of Battery ................................. 9 Handling the Remote Control..............................9 Remote Control Operation Range ............................10 Connecting the AC Power Cord ........................10 ECO-Power/Standby Mode Features ...................... - Page 3 Use the USB ..............................16 Play from USB....................................16 Charge your device ..................................16 Play from Bluetooth device ..........................17 Setting the Sleep Timer ............................ 17 Set the alarm timer ............................18 Listen to an external device ........................... 18 Listen to a digital recording device ....................... 19 Specifications ..............................19 Maintenance ...............................20 Cleaning the Unit ..................................
-
Page 4: Safety Warnings
Safety Warnings - Read all the instructions carefully before using the unit and keep them for future reference. - Retain the manual. If you pass the unit onto a third party make sure to include this manual. - The product complies with the requirement of the 1999/5/EC directive. Dame - Please inspect the unit for damage after unpacking. - Page 5 If you do, it may adversely affect the operating performance of the unit, and cause a distorted picture or sound. Batteries - Batteries used in the remote control for this unit are easily swallowed by young children and this is dangerous. - Keep loose batteries away from young children and make sure that the battery holder tray is secure in the remote control.
-
Page 6: Battery Safety Guidelines
Used correctly, domestic batteries are a safe and dependable source of portable power. Problems can occur if they are misused or abused — resulting in leakage or, in extreme cases, fire or explosion.Here are some simple guidelines to safe battery use designed to eliminate any such problems. -
Page 7: Pack Contents
Pack Contents Make sure all of the following contents are included. PROGRAM SOURCE MUTE PAIRING REPEAT INTRO INFO RANDOM P-EQ LOUDNESS S-BASS TIMER/SLEEP CLOCK The Unit Remote Control MP3-LINK Cable (battery included) Quick Start Guide Optical Cable AC Adaptor Quick Start Guide - 6 -... -
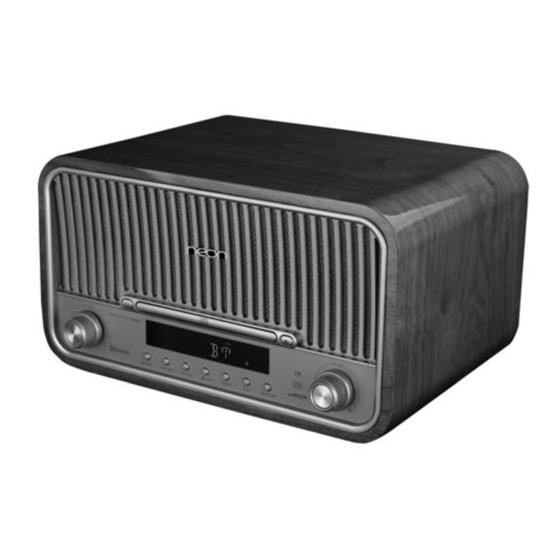
Page 8: Product Overview
Product Overview Source Knob ( SOURCE Standby Button ( ) LED Display Lens Previous Button ( Search Backward Button ( Preset Down Button ( PRE - Next Button ( Search Forward Button ( Preset Up Button ( PRE + Play/Pause Button ( Tuning Backward Button ( TUN - Stop Button (... -
Page 9: Remote Control Overview
Remote Control Overview Standby Button ( ) Album Up Button ( ) Preset Up Button ( ) Adjust Time Button ( ) Previous Button ( ) Search Backward Button ( ) Tuning Backward Button ( ) Source Select Button ( SOURCE Program Button ( PROGRAM... -
Page 10: Installation Of Battery
Installation of Battery For first-time use: Remove the protective tab to activate the remote control battery. It is located at the bottom back side of the remote control. To replace the remote control batteries: 1. Loosen the screw on the battery compartment cover with a screwdriver. -
Page 11: Remote Control Operation Range
Remote Control Operation Range Point the remote control to the unit no more than 6 meters from the remote control sensor and within 60° horizontally and 40° vertically of the front of the unit. The operating distance may vary according to the brightness of the room. -
Page 12: Eco-Power/Standby Mode Features
ECO-Power/Standby Mode Features Switching ON / OFF When you first connect the unit to the AC power, the unit will be in standby mode. • Press the button, the unit switches to the last selected source. • Press the button to switch the unit back to standby mode. Switching the system to ECO Power/Standby mode Long pressing the for 2 seconds or more to switch to ECO Power or standby mode. -
Page 13: Sound Quality
Sound Quality Adjusting the Volume To increase or decrease the volume, rotate the knob on the unit or press the VOLUME VOL +/- buttons on the remote control. Mute sound You can mute the sound temporarily. During play, press the button to mute or unmute sound. -
Page 14: Fm Radio Operation
FM Radio Operation Caution: Before listening to the radio, please check that the FM Antenna is correctly adjusted for length and direction. Tuning in to a Station 1. Rotate the knob on the unit or repeatedly press the button on the remote SOURCE SOURCE control to select TUNER source. -
Page 15: Disc (Audio Cds And Mp3/Wma Discs) Operation
Disc (audio CDs and MP3/WMA discs) Operation Disc Playing 1. Rotate the knob on the unit or repeatedly press button on the remote SOURCE the SOURCE control to select DISC source. The word “DISC” will be displayed on the LED. 2. -
Page 16: Playing The Beginning (Intro) Of Each Track
5. Repeat above steps 3-4 to select and store all desired tracks. 6. Press the button to start programme play. 7. Press the button once to stop the programme play. Press the button twice to clear programme. Playing the Beginning (Intro) of each Track Press the button on the remote control to play the beginning of each track consecutively. -
Page 17: Use The Usb
Use the USB Play from USB Note: Ensure that the USB device contains playable audio contents for supported formats. 1. Insert the USB device into the socket on the rear of the unit. 2. Rotate the knob on the unit or repeatedly SOURCE press button on the remote control to... -
Page 18: Play From Bluetooth Device
Bluetooth source. The word “BT” will be displayed on the LED. 2. Activate the Bluetooth function in your Bluetooth device (see the device user manual). 3. Select "MCB820" on your device for pairing. - For elder devices, you need to input “0000” as pairing password. -
Page 19: Set The Alarm Timer
Set the alarm timer This unit can be used as an alarm clock. You can select DISC, TUNER or USB as the alarm source. Caution: Make sure that you have set the clock correctly. 1. In standby mode, long pressing the button on the remote control for 2 seconds TIMER/SLEEP or more, the “... -
Page 20: Listen To A Digital Recording Device
Listen to a digital recording device 1. Connect the OPTICAL jack on the rear of the unit to the DIGITAL IN jack on a digital recording device (such as DTS-Digital Theatre compatible, with Dolby Digital decoder) with the singal cable. 2. -
Page 21: Maintenance
Maintenance Cleaning the Unit Note: Ensure the unit is fully unplugged from the mains socket before cleaning. - To clean the unit, wipe the case with a slightly moist, lint-free cloth. - Do not use any cleaning fluids containing alcohol, ammonia or abrasives. - Do not spray an aerosol at or near the unit. -
Page 22: Troubleshooting
Troubleshooting If you are having a problem with your unit, check this list for a possible solution before calling for service. If you cannot solve the problem from the hints given here, or the unit has been physically dam- aged, call a qualified person, such as your dealer, for service. No power Disc does not play - Ensure that the AC adaptor plug of the... - Page 23 T h e a u d i o q u a l i t y i s p o o r a f t e r connection with a Bluetooth-enabled device. - The Bluetooth reception is poor. Move the device closer to this unit or remove any obstacle between them.
- Page 24 Use only power supplies listed in the user manual. This product complies with the requirement of the 2014/30/EU, 2014/35/EU, 2014/53/EU directive. The symbol on the product or its packaging indicates that this product must not be disposed of with your other household waste. Instead, it is your responsibility to dispose of your waste equipment by handing it over to a designated collection point for the recycling of waste electrical and electronic equipment.
Need help?
Do you have a question about the MCB820 and is the answer not in the manual?
Questions and answers