
Subscribe to Our Youtube Channel
Related Manuals for Topfield TF6500F


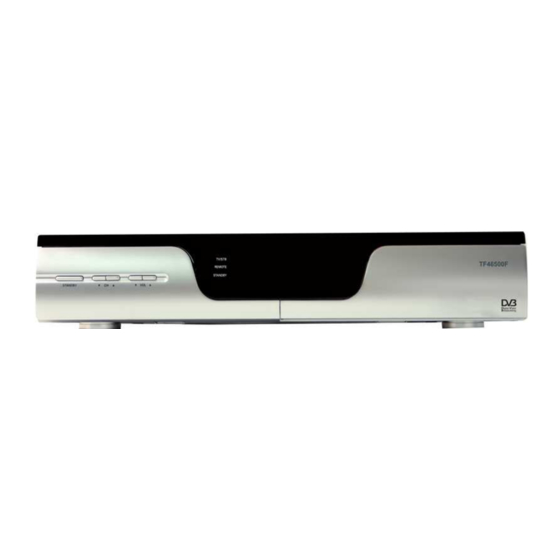
Summary of Contents for Topfield TF6500F
-
Page 1: User Manual
All manuals and user guides at all-guides.com TOPFIELD TF6500F User Manual Digital Satellite Receiver Free To Air... -
Page 2: Table Of Contents
All manuals and user guides at all-guides.com CONTENTS Contents Contents 1 Overview Introduction ......Controlling The Digital Receiver . - Page 3 All manuals and user guides at all-guides.com 2.6.1 LNB Setting ......10 2.6.2 Service Search ..... . . 12 2.6.3 Motorized DiSEqC 1.2 .
- Page 4 All manuals and user guides at all-guides.com CONTENTS 5.3.4 Multifeed ......35 A Information A.1 Operational Functions and Features .
-
Page 5: Overview
Chapter 1 Overview 1.1 Introduction The TF6500F digital receiver is fully compliant with the in- ternational digital video broadcasting standard, and can play digital satellite services. To operate it, you need a satellite an- tenna, which must be installed and directed at the required satellite. -
Page 6: Controlling The Digital Receiver
All manuals and user guides at all-guides.com Overview • This digital receiver supports DiSEqC 1.0, DiSEqC 1.1, DiSEqC 1.2 and USALS (DiSEqC). • This digtial receiver saves up to 5000 TV and radio ser- vices. • You can edit the service list and make your own favorite service list. -
Page 7: Remote Control
All manuals and user guides at all-guides.com 1.2 Controlling The Digital Receiver buttons switch services up and down, and move the cursor up and down in the menus. buttons change the volume, and select individual entries in the menus. 1.2.2 Remote Control ⃝... - Page 8 All manuals and user guides at all-guides.com Overview > ⃝ buttons change the volume, and select and change individual entries in the menus. ⃝ OK button displays the service list, and selects an entry in the menus. ⃝ TV/Radio button toggles between TV mode and radio mode.
-
Page 9: Installation
All manuals and user guides at all-guides.com Chapter 2 Installation 2.1 Packing Contents Unpack your receiver and check the following cables and ac- cessories are also included in the package: • 1 remote control. • 2 batteries (AAA 1.5 V). •... - Page 10 All manuals and user guides at all-guides.com Installation • When setting up the digital receiver, make sure it is in a horizontal position and that the mains socket is easily accessible. • Do not expose the digital receiver to any moisture. The digital receiver is designed for use in dry rooms.
-
Page 11: The Connection Panel
All manuals and user guides at all-guides.com 2.3 The Connection Panel 2.3 The Connection Panel LNB IN R - AUDIO - L RF OUT RF IN LNB OUT VIDEO S/PDIF RS-232 1) LNB IN: Satellite broadcast input socket. 2) LNB OUT: Satellite broadcast output socket. -
Page 12: Connecting To The Television By Scart Cable
All manuals and user guides at all-guides.com Installation satellite antenna cable into the LNB OUT socket on the digi- tal receiver and the corresponding socket on the other digital receiver. LNB IN R - AUDIO - L RF OUT RF IN LNB OUT VIDEO S/PDIF... -
Page 13: Connecting To The Tv By Rf Cable
All manuals and user guides at all-guides.com 2.5 Inserting Batteries in The Remote Control LNB IN R - AUDIO - L RF OUT RF IN LNB OUT S/PDIF RS-232 VIDEO 2.4.4 Connecting to The TV by RF Cable Connect the aerial antenna cable to the RF IN socket on the digital receiver, and then plug a RF cable into the RF OUT socket on the digital receiver and the corresponding input socket on the television. -
Page 14: Station Settings
All manuals and user guides at all-guides.com Installation If the digital receiver no longer reacts properly to remote con- trol commands, the batteries may be flat. Be sure to remove used batteries. The manufacturer accepts no liability for dam- age resulting from leaking batteries. Note Batteries, including those which contain no heavy met- als, may not be disposed of with household waste. - Page 15 All manuals and user guides at all-guides.com 2.6 Station Settings that corresponds to the direction of the antenna. If a desired satellite is not in the list, then select Other. LNB Frequency Select the local oscillator frequency of the LNB. You can input the frequency with the numeric buttons.
-
Page 16: Service Search
All manuals and user guides at all-guides.com Installation Set the DiSEqC 1.1 parameter and DiSEqC 1.0 parameter according to the antenna configuration. For exam- ple, to select A7 in the figure, set the DiSEqC1.1 parameter to 2 of 4 and the DiSEqC1.0 parameter to 3 of 4. - Page 17 All manuals and user guides at all-guides.com 2.6 Station Settings quency, symbol rate and polarization type of the transponder you want to search. To use the Advanced mode, you have to know the audio PID, video PID or PCR PID of the transpon- der you want to search.
-
Page 18: Motorized Diseqc
All manuals and user guides at all-guides.com Installation Start Search To start the service search, select this menu. To cancel the £ ¢ ¡ search in process, press the button. EXIT 2.6.3 Motorized DiSEqC 1.2 To configure the settings with DiSEqC 1.2, select the Installa- tion >... -
Page 19: Usals Setting
All manuals and user guides at all-guides.com 2.6 Station Settings Movement In the user mode, the antenna is moved by fine tuning. In the > installer mode, the antenna is moved by button (to the east) button(to the west). Motor Control Goto: Move the motor to the stored position of the selected satellite. - Page 20 All manuals and user guides at all-guides.com Installation Motorized DiSEqC 1.3 Set this parameter to enable if you have DiSEqC 1.3 switch. Satellite Name Select a satellite that will be used to identify a motor position. Satellite Angle This parameter represents the longitude of the selected satel- lite and it can be set automatically in case of selecting a satellite name.
-
Page 21: Editing The Transponder List
All manuals and user guides at all-guides.com 2.6 Station Settings Frequency Select a transponder of which signal is strong. Goto the position After setting the Longitude, Latitude and the longitude of the selected satellite, this menu is used when you want to move the desired direction (position) of the dish saved before. - Page 22 All manuals and user guides at all-guides.com Installation Symbol Rate You can see the symbol rate of specified satellite on the right side of the menu. Polarization You can select the polarization from Horizontal and Vertical modes. SAT Name Edit You can change the name of the satellite name by this menu.
-
Page 23: Factory Setting
All manuals and user guides at all-guides.com 2.6 Station Settings Add Satellite Using this menu, you can add new satellite name by keyboard, then it will be added in the Satellite Name menu. Delete Satellite By selecting this item, you can delete the selected satellite in- formation. - Page 24 All manuals and user guides at all-guides.com Installation Store It stores all the data and system setting as current setting. The stored data and seting will be restored by Recover function. It is permitted only to the installers. The PIN code is different from that of users.
-
Page 25: Preference Settings
All manuals and user guides at all-guides.com Chapter 3 Preference Settings 3.1 Time Setting To set the local time, select the System Setting > Local Time Setting menu. The exact local current time can be adjusted by using the Mode, the Local Time and the Time Offset submenus. -
Page 26: Timer Setting
All manuals and user guides at all-guides.com Preference Settings Local Time The Local Time is adjustable only when the Mode is in the Manual mode. Adjust the current time, if necessary, by using > the numeric buttons and buttons. GMT is referred to the standard time of Greenwich. It cannot be changed. - Page 27 All manuals and user guides at all-guides.com 3.2 Timer Setting Service: Select the service to be reserved for recording by press- £ ¢ ¡ button. > Mode: By using buttons, select one among One Time, Everyday, Every Weekend, Weekly, and Every Week- day.
-
Page 28: Access Restriction
All manuals and user guides at all-guides.com Preference Settings 3.3 Access Restriction To set the access restrictions, select the System Setting > Parental Control menu. Password to various menus can be configured. The PIN Code box will automatically appear when this menu is selected. The default PIN Code is 0000. -
Page 29: Language Setting
All manuals and user guides at all-guides.com 3.4 Language Setting Access Control The Access Control menu controls access to following items: Time Setting, Language Setting, A/V Output Setting, Organiz- ing Services, Organizing Favorites, Installation and IRD Lock. > Press buttons to Locked/Unlocked the access. Locked means controlling the access to the specific menus with the PIN Code system. -
Page 30: Audio And Video Setting
All manuals and user guides at all-guides.com Preference Settings 3.5 Audio and Video Setting To set the audio and video set- tings, select the System Setting > A/V Output Setting menu. TV Type Select your TV standard. For automatic PAL/NTSC selection, set it to Multi. -
Page 31: Menu Transparency
All manuals and user guides at all-guides.com 3.6 Menu Transparency mode is configurable later on by using the sound button on your remote control. RF Output When the digital receiver is connected to the TV by an RF ca- ble, you may need to select the correct TV standard system. >... -
Page 32: Listing Services
All manuals and user guides at all-guides.com Listing Services Chapter 4 Listing Services 4.1 Editing The Service List To edit the service list, select the Organizing Services menu. Browse £ ¢ ¡ Press button. Now, browsing through the Organizing Ser- vices is possible. - Page 33 All manuals and user guides at all-guides.com 4.1 Editing The Service List Rename £ ¢ ¡ buttons to select Rename item and press button £ ¢ ¡ to move the cursor to the Service List. Press button to display keyboard, and rename the service.
-
Page 34: Editing The Favorites List
All manuals and user guides at all-guides.com Listing Services 4.2 Editing The Favorites List To edit the favorite services list, select the Organizing Favorties menu. On the Fav List mode, four standard lists are selected as the default menus: News, Sports, Movie and Music. Up to 30 lists including these lists can be added and renamed. -
Page 35: Daily Usage
All manuals and user guides at all-guides.com Chapter 5 Daily Usage 5.1 Selecting a Service £ ¢ ¡ Press button to see the ser- vice list then the service list with the help window will be dis- played. Select one of the ser- vices you want to enjoy. -
Page 36: Information Box
All manuals and user guides at all-guides.com Daily Usage £ ¢ ¡ Pressing button in the ser- vice list pops up the multipic- ture selection window. Choose any form you desire to view. The multipicture function is also available in the favorite list, which appears on pressing the £... -
Page 37: Electronic Program Guide
All manuals and user guides at all-guides.com 5.3 Electronic Program Guide Service Name Frequency Signal Strength Service Event Name Time CAS, Parental Number Information Subtitle, Lock Teletext Mark Event Description Start Time – End Time / Dolby / Multifeed > You can see the Current/Next event by pressing button in the information box. -
Page 38: Subtitle
All manuals and user guides at all-guides.com Daily Usage £ ¢ ¡ button switches the EPG from Single Service to Multi Ser- vice and in opposition. 5.3.1 Subtitle You can choose a language of subtitle using the subtitle button on the remote control. -
Page 39: Sound Track
All manuals and user guides at all-guides.com 5.3 Electronic Program Guide 5.3.3 Sound Track You can choose a language of soundtrack by pressing the sound button when a broadcaster supports various languages of soundtrack. Also, it is possible to choose a mode among Stereo, Mono, Left and >... -
Page 40: A Information
All manuals and user guides at all-guides.com Information Appendix A Information A.1 Operational Functions and Features • Fully compliant with MPEG-2 digital and DVB • DiSEqC 1.0, 1.1, 1.2 and USALS(DiSEqC 1.3) supported • 5000 services programmable including radio service •... -
Page 41: A.2 Technical Specification
All manuals and user guides at all-guides.com A.2 Technical Specification • Exciting games embedded • RCA AV output supported • RF-modulator output supported • Timer function provided • Multipicture function provided • User image display fuction provided in the radio mode A.2 Technical Specification Table A.1: Specifications of Tuner &... - Page 42 All manuals and user guides at all-guides.com Information Table A.3: Specifications of Connection Sockets TV SCART Video CVBS/RGB/YUV, Audio L/R output RCA A/V Video CVBS output Audio L/R output S/PIDF Digital audio or Dolby AC-3 bitstream out- RS-232 9 pin D-sub type Transfer rate : Max.
-
Page 43: Index
All manuals and user guides at all-guides.com service list 39 Index Symbol Low Noise Block, @empty, 10–30 4 –18 (age), Mode, multipicture, Button, multipicture selection, CAS, Network Information Table, Conditional Access System, NIT, No Block, Date, Duration, favorite list, Packet Identifier, Free To Air, PID, FTA,... - Page 44 All manuals and user guides at all-guides.com 40 Store Wakeup Time Store, Total Block, Type, Wakeup Time,...
- Page 45 All manuals and user guides at all-guides.com WEEE Information...
- Page 46 All manuals and user guides at all-guides.com...
- Page 47 All manuals and user guides at all-guides.com...
- Page 48 All manuals and user guides at all-guides.com...
- Page 49 All manuals and user guides at all-guides.com...
- Page 50 All manuals and user guides at all-guides.com...
- Page 51 All manuals and user guides at all-guides.com...
- Page 52 All manuals and user guides at all-guides.com...
- Page 53 All manuals and user guides at all-guides.com...
- Page 54 All manuals and user guides at all-guides.com Copyright © 2005, TOPFIELD Co., Ltd. English Version http://www.i-topfield.com 110T-081B7-201-0 Rev. 1...
Need help?
Do you have a question about the TF6500F and is the answer not in the manual?
Questions and answers