
Related Manuals for Topfield TF 6100 VI


Summary of Contents for Topfield TF 6100 VI
-
Page 1: User Guide
TOPFIELD TF 6100 VI User Guide Digital Satellite Receiver manufactured by TOPFIELD under VIACCESS license... -
Page 3: Table Of Contents
Contents iii Contents 1 Introduction Features ....... Controlling the digital receiver . - Page 4 iv Contents 3 Preference Settings Language settings ......14 Video and audio settings ..... . 15 3.2.1 Television standard .
- Page 5 Contents v 5.2.6 Viewing teletext ..... . 36 Viewing electronic programme guide ....37 Watching multifeed programme .
-
Page 7: Introduction
Chapter 1 Introduction The TF 6100 VI digital receiver is fully compliant with the in- ternational Digital Video Broadcasting (DVB) standard, and thus is able to receive digital broadcasts of that standard. For its operation you need an antenna, which must be installed appropriately. -
Page 8: Controlling The Digital Receiver
2 Introduction • Can store up to 5000 television and radio services. • You can view information about the current television or radio programme. • Has an electronic programme guide that provides an overview of scheduled programmes. • You can update the firmware of the digital receiver to the latest version which would be provided by the manufac- turer. -
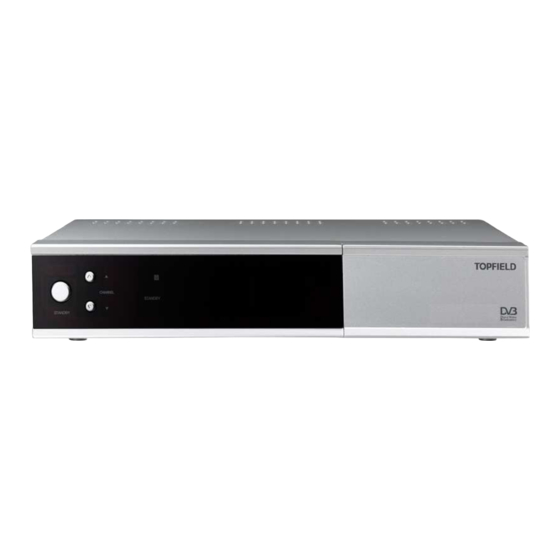
Page 9: The Front Panel
1.2 Controlling the digital receiver 3 1.2.1 The front panel The front panel of the digital receiver has buttons to control the digital receiver, and specific lamps and a display to indicate its status. The following indicates what they mean. STANDBY button switches the digital receiver between standby mode and operation mode. -
Page 10: The Remote Control
4 Introduction 1.2.2 The remote control button switches the digital re- ceiver between standby mode and operation mode. mutes the sound. Press again to switch it back on. Numeric buttons are used to enter a service number for service change or to specify values for menu options. - Page 11 1.2 Controlling the digital receiver 5 It is also used to select a menu item. switches between television services and radio services. displays the satellites list. buttons decrease or increase the volume. They are also used to change values for menu options. buttons switch to previous or next service.
-
Page 12: Setup
6 Setup Chapter 2 Setup 2.1 Unpacking Before going any further, check that you have received the following items with your digital receiver. • Remote control unit • Two batteries for the remote control (AAA 1.5 V) • User manual NOTE Accessories may vary according to your local area. - Page 13 2.2 Safety precautions 7 • The wall outlet should be near the equipment. Do not run an extension lead to the unit. • Do not expose the digital receiver to any moisture. The digital receiver is designed for use indoors only. Use dry cloth when cleaning the digital receiver.
-
Page 14: Rear Panel Connections
8 Setup 2.3 Rear panel connections The TF 6100 VI has some connections on the back. LNB IN R - AUDIO - L RF OUT RF IN RS-232 LNB OUT VIDEO S/PDIF Check what connections your television set has in comparison with the digital receiver. -
Page 15: Connecting Up Your Digital Receiver
2.4 Connecting up your digital receiver 9 RS-232 Serial port for firmware update and data transfer. Table 2.3: Connectors specifications VIDEO Composite video (CVBS) output AUDIO Left & right audio output CVB/RGB/YUV video output Left & right audio output CVBS video output Left &... -
Page 16: Connecting To Your Television
10 Setup send them to the digital receiver. However, the satellite an- tenna only sends the frequencies that it can catch with the LNB frequency and polarisation specified by the digital receiver. So if you have another digital receiver linked from the LNB OUT connector, you can only use it limitedly. - Page 17 2.4 Connecting up your digital receiver 11 output stereo audio. But if you use a conversion cable, such as SCART-to-Component, you have to make audio connections. To use the composite video connector You will need to obtain a composite video cable (RCA cable) to use the composite video connector.
-
Page 18: Connecting To Your Video Cassette Recorder
12 Setup In this case, you will need to connect a ca- ble from the RF OUT socket to the antenna connector on your television. To ensure your television can also pick up existing analogue channels as well, you will need to connect a cable from your television antenna to the RF IN connector. -
Page 19: Powering On And Checking Picture
2.5 Switching on for the first time 13 If the digital receiver no longer reacts properly to remote con- trol commands, the batteries may be flat. Be sure to remove used batteries. The manufacturer accepts no liability for the damage resulting from leaking batteries. NOTE Batteries, including those which contain no heavy metals, may not be disposed of with household waste. -
Page 20: Preference Settings
14 Preference Settings Chapter 3 Preference Settings 3.1 Language settings You can select the language in which the menu would be dis- played. In addition to that, you can select which language of au- dio track and of subtitle track should be output. -
Page 21: Video And Audio Settings
3.2 Video and audio settings 15 Subtitle language Set the Subtitle Language option to your desired language. When you watch a programme, the subtitle track of the selected language will be displayed if available. Apart from this setting, you can select a subtitle track with the button. -
Page 22: Colour Model
16 Preference Settings If you have a PAL television, you have to set the TV Type option to PAL. In that case, if you switch to a service of the NTSC standard, the digital receiver will presents the pictures converting into the PAL standard. However, it is inevitable to lose a little picture quality. -
Page 23: Television Aspect Ratio
3.2 Video and audio settings 17 playback. But if the option is set to External A/V, the digital receiver will not pass the video automatically. To pass it, you have to press the button. 3.2.4 Television aspect ratio If you have a wide-screen television, set the TV Aspect Ratio option to 16:9. -
Page 24: Radio Frequency Output
18 Preference Settings 3.2.6 Radio frequency output If you have connected your television to the RF OUT socket, you should configure the radio frequency output. The digital receiver can make analogue television from digital television and output it via the RF OUT socket. Set the RF Output option to the television standard that your country supports referring to Table 3.1. -
Page 25: Parental Control
3.4 Parental control 19 Select the System Setting Time Setting menu. You should see a screen like the left figure. You can set the clock manually or use the time signal, Green- wich Mean Time (GMT), carried as part of the digital television broadcast. - Page 26 20 Preference Settings Table 3.2: Time offset table Time offset City 12:00 Eniwetok, Kwajalein 11:00 Midway Island, Samoa 10:00 Hawaii 09:00 Alaska 08:00 Pacific Time US, Canada 07:00 Mountain Time US, Canada 06:00 Central Time US, Canada, Mexico City 05:00 Eastern Time US, Canada, Bogota, Lima 04:00 Atlantic Time Canada, La Paz...
-
Page 27: Adjusting The On-Screen Display
3.5 Adjusting the on-screen display 21 If you wish to block 15 or above rated programmes, set the Censorship option to 15 (age). NOTE If a programme does not have any programme classification information, your censorship setting will not take effect. If anyone is trying to watch a programme that is of or above the censorship setting, the person has to enter the personal identification number to override. - Page 28 22 Preference Settings Position option as you desire. Its available range is from 3 lines. The more high you set the option, the more low the information box will be positioned.
-
Page 29: Service Search
Chapter 4 Service Search After connecting up the digital receiver, you will need to per- form a service search. 4.1 Searching broadcasting services This digital receiver can be operated with both fixed antenna and motorized antenna. You have to configure antenna settings according to your antenna system in the following order: 1. - Page 30 24 Service Search The other is K band which ranges approximately from 12 to 18 GHz. The LNB (Low Noise Block converter) is used to take a wide band of relatively high frequencies, amplify and convert them to similar signals that is carried at a much lower frequency, which is called Intermediate Frequency (IF).
- Page 31 4.1 Searching broadcasting services 25 ever, if you have selected the Other entry at the Satellite Name option to specify a satellite that is not in the satellite list, you might have to fill in the correct LNB frequency. The absolute difference between a broadcasting frequency and its LNB fre- quency must be within 950 to 2150 MHz.
-
Page 32: Configuring Diseqc 1.2 Settings
26 Service Search 4.1.2 Configuring DiSEqC 1.2 settings Your motorized antenna will turn toward your desired satellites horizontally by DiSEqC 1.2. When you switch to an service, if the service is provided by a satellite other than current one, it will take longer time than usual because the antenna has to turn to its position. -
Page 33: Configuring Usals Settings
4.1 Searching broadcasting services 27 you had better check the receiving quality of every trans- ponder and choose the best one at the Transponder (or Frequency) option. It will be helpful to your fine tuning. 5. Finally set the Motor Control option to Store to save the tuned position when the receiving quality is best. -
Page 34: Searching Services
28 Service Search 2. Enter your location to the My Longitude option and the My Latitude option with the and numeric buttons. 3. Enter the position of your selected satellite to the Satellite Angle option if it is not correct. 4. - Page 35 4.1 Searching broadcasting services 29 • Searching every service of a SMATV (Satellite Master Antenna Television) system. Searching every service of a satellite To search every service of a satellite, perform the following steps: 1. Choose your desired satellite at the Satellite Name op- tion.
- Page 36 30 Service Search 1. Choose your desired satellite at the Satellite Name op- tion. 2. Set the Search Mode option to Advanced. 3. Choose your desired transponder at the Frequency op- tion or enter it with the numeric buttons. 4. Enter the symbol rate of your desired transponder to the Symbol Rate option with the numeric buttons.
-
Page 37: Editing The Transponder List
4.2 Editing the transponder list 31 completed, press the button to save found services. To stop at any time or to exit without saving, press the button. EXIT 4.2 Editing the transponder list You can add, delete or modify satellite or transponder informa- tion. -
Page 38: Resetting To Factory Settings
32 Service Search How to use on-screen keyboard You can move the highlight key horizontally with the buttons and vertically with the buttons. Pressing the button on a key enters its let- ter in the input line. To type a space, select the Space key. -
Page 39: Daily Usage
Chapter 5 Daily Usage 5.1 Volume control Use the buttons to alter the volume to a comfortable level. You may need to adjust the volume on your television set too. To temporarily switch off the sound, press the button. Press it again to restore the sound to previous level. 5.2 Watching television To change services, press the button. -
Page 40: Watching On Multi-Picture Screens
34 Daily Usage On the services list, you can see the service information: • Service number and name • Transmitting satellite • Transponder information A dollar sign ($) may be marked on some entries, indicating pay service. To watch pay services, you need the subscription card. -
Page 41: Viewing Programme Information
5.2 Watching television 35 It takes a few time to display all pictures of services. To watch a desired service among them, move the highlight frame on it and press the button. 5.2.3 Viewing programme information Pressing the button displays the information box, on which you can see all of the following: •... -
Page 42: Selecting Audio Tracks
36 Daily Usage • Lock symbol ( ) if the current service is locked. • Dollar symbol ($) if the current service is a pay service. • Multifeed symbol ( ) if the current programme is pro- vided as a multifeed programme. To use this feature, refer to §... -
Page 43: Viewing Electronic Programme Guide
5.3 Viewing electronic programme guide 37 Select a desired page to view by entering its page number with the numeric buttons. You can zoom into a teletext page with button, and adjust its transparency level with the button. To hide the teletext screen, press the button. -
Page 44: Watching Multifeed Programme
38 Daily Usage 2. Press the button to display its programme guide. 3. Select a programme you want with the button, then P is marked up on the entry. At the same time, a timer event with the selected programme will be made in the timer list. - Page 45 5.5 Making timer events 39 To input a timer recording, select the System Setting Timer Set- ting menu; then the timer list will be displayed. To add a new timer event, press button, and a box like the left figure appears. Take the following steps: 1.
- Page 46 40 Daily Usage 5. Set the Date option to a desired date, on which the digital receiver will turn on. The date format is day/month/year- day of the week. Set the Wakeup Time option to a desired time, at which the digital receiver will turn on.
-
Page 47: Firmware Update
Chapter 6 Firmware Update To check up whether there is a new variable firmware, select the Installation menu. If there is a new one, the System Soft- ware Upgrade menu will become enabled. If you select the System Software Upgrade menu, the digital receiver will ask you whether to start firmware update, displaying the infor- mation about the new firmware. -
Page 48: Index
42 INDEX Index 16:9, Electronic Programme Guide, 16:9 Display Format, Every Day, 22 kHz, Every Weekday, 4:3, Every Weekend, A/V Output Setting, Factory Setting, Access Control, Frequency, 27–31 Add new TP, FTA + CAS, Add Satellite, FTA only, Advanced, FTA/Scrambled, AUDIO L, AUDIO L/R, Goto,... - Page 49 Local Time, satellite list, Satellite Name, 24–27, 29–31 Manual, Search Mode, 29, Menu Language, Service, Mini A, Service Search, Mode, 19, services list, mono, SMATV, Motor Control, 26, SMATV, Motorized DiSEqC 1.2, Sound Mode, Motorized DiSEqC 1.3, Space, Move, specifications, 7, Movement, Start Search, multi-picture,...
- Page 50 44 INDEX Wakeup Time, Weekly, wide-screen television,...
- Page 52 Correct disposal of this product This marking shown on the product or its literature indicates that it should not be disposed with other household wastes at the end of its working life. To prevent possible harm to the environment or human health from uncontrolled waste disposal, please separate this from other types of wastes and recycle it responsibly to promote the sustainable reuse of material resources.
Need help?
Do you have a question about the TF 6100 VI and is the answer not in the manual?
Questions and answers