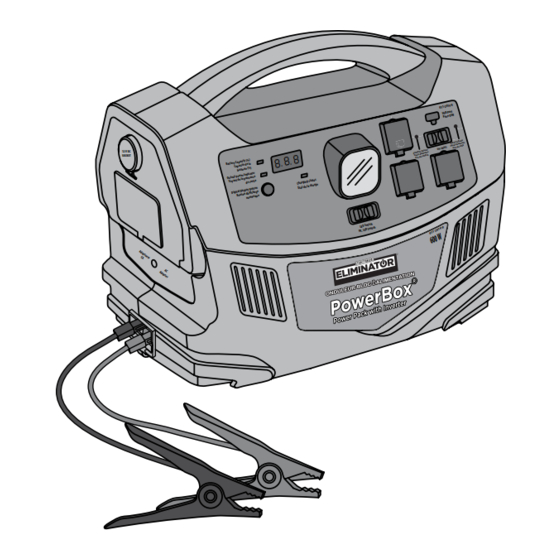
Summary of Contents for Eliminator 011-2014-0
- Page 1 011-2014-0 POWER PACK WITH INVERTER 12 V DC SOCKET INSTRUCTION IMPORTANT: MANUAL This manual contains important safety and operating instructions. Read all instructions and follow them with use of this product.
- Page 2 011-2014-0 | contact us 1-877-619-6321 TABLE OF CONTENTS Safety Information Key Parts List Important Information Operation Maintenance Troubleshooting Technical Specification Warranty DO NOT RETURN THIS PRODUCT TO THE STORE! QUESTIONS? CALL CUSTOMER SERVICE, HOTLINE: 1-877-619-6321...
- Page 3 011-2014-0 | contact us 1-877-619-6321 EXPLOSION AND FIRE This manual contains information • Do not use the power pack if it • Keep the power pack away from that relates to protecting personal is dropped, hit, worn, broken or...
- Page 4 011-2014-0 | contact us 1-877-619-6321 • Do not allow the clamps of • Do not expose the power pack SAFETY PRECAUTIONS • While removing the battery, the boosting cable to touch to temperatures over 104° F make sure to remove positive...
- Page 5 011-2014-0 | contact us 1-877-619-6321 • Make sure there is plenty of that is plugged into an AC • In case of difficulty in using your fresh water and soap near the receptacle and produces a low rechargeable appliance with the work area.
- Page 6 011-2014-0 | contact us 1-877-619-6321 FRONT PANEL SIDE PANEL AC/USB indicator Positive boosting cable 12 V DC outlet AC charging input port USB port Ventilation opening 250 A fuse Boosting cable port AC/USB switch Digital display button Output power indicator...
- Page 7 011-2014-0 | contact us 1-877-619-6321 AC/USB SWITCH - When this and negative battery terminals, GENERAL USE the internal circuits from being switch is slid to the right, respectively. damaged. The alarm also sounds The MotoMaster Eliminator power ®...
- Page 8 011-2014-0 | contact us 1-877-619-6321 DIGITAL DISPLAY - This feature AC CHARGING INPUT PORT - The TROUBLE LOADS • Metal halide arc (HMI) lights will displays the output power in port through which the AC be damaged. The output of this power pack...
- Page 9 011-2014-0 | contact us 1-877-619-6321 AC APPLIANCE RUN TIME POWER PACK LOCATION The power pack should be operated only in locations that meet the following AC APPLIANCE WATTS* HOURS requirements: Cordless telephone (stand by) 56 h** CONDITION DESCRIPTION...
- Page 10 011-2014-0 | contact us 1-877-619-6321 PACKAGING CONTENTS OPERATION OF AC 2. Open the AC outlet plastic APPLIANCES cover (1). Slide the AC /USB slide MATERIAL NAME QUANTITY ILLUSTRATION switch (2) to the left. The AC/USB Check battery capacity status by indicator (3) will glow (fig A).
- Page 11 011-2014-0 | contact us 1-877-619-6321 3. Plug the power cord (1) of the AC 4. Turn ON the AC appliance. OPERATION OF 12 V DC 3. Turn ON the DC appliance. appliance into the AC outlet (2) 5. Recharge the power pack APPLIANCES 4.
- Page 12 011-2014-0 | contact us 1-877-619-6321 OPERATION OF USB DEVICES OPERATION OF LED LIGHT JUMP STARTING AN 3. Slide the AC /USB slide switch (1) to the right. The USB power 1. Check battery capacity status to 1. Slide the LED switch (1) of the...
- Page 13 011-2014-0 | contact us 1-877-619-6321 3. Engage the park / emergency 7. Connect the ring terminal of the 6. Connect the ring terminal of the 5. Place the power pack on a flat, brake of the vehicle. negative (-) battery cable (black) to...
- Page 14 011-2014-0 | contact us 1-877-619-6321 Disconnect the cable clamps 11. Store the boosting cables CONNECTING TO AN EXTERNAL 2. Connect the positive (red) from the battery of the vehicle separately after use. BATTERY clamp (1) of the boosting cable to and replace the 250A fuse if the 12.
- Page 15 011-2014-0 | contact us 1-877-619-6321 3. Connect the negative (black) RECHARGING THE POWER PACK 4. Disconnect the cable RECHARGING THE POWER PACK clamp (1) of the boosting cable clamps from the battery and WITH AC CHARGER All rechargeable batteries gradually...
- Page 16 011-2014-0 | contact us 1-877-619-6321 2. Plug one end of 115 V AC RECHARGING THE POWER PACK 2. Insert the other plug of the DC charger (1) into charging input WITH DC CHARGING CABLE charging cable into 12 V DC port (2) of the power pack and accessory socket in vehicle..
- Page 17 011-2014-0 | contact us 1-877-619-6321 MAINTENANCE RECHARGING THE POWER PACK • Connect the power pack to an WITH REGULATED 12 V DC OUTLET auxiliary regulated 12 V DC The power pack will operate properly when maintained properly. OF A GENERATOR output of the generator.
- Page 18 011-2014-0 | contact us 1-877-619-6321 TROUBLESHOOTING PROBLEM POSSIBLE CAUSE SOLUTION PROBLEM POSSIBLE CAUSE SOLUTION The charging • The output of the AC • Replace the 115 V AC charger. The power pack cannot • The battery in the •...
- Page 19 011-2014-0 | contact us 1-877-619-6321 TELEVISION INTERFERENCE PROBLEM POSSIBLE CAUSE SOLUTION PROBLEM POSSIBLE CAUSE SOLUTION The run time for • The internal battery is • Recharge the power pack appliance is less not fully charged. using the AC charger until the...
- Page 20 011-2014-0 | contact us 1-877-619-6321 ELECTRICAL SPECIFICATION INTERNAL BATTERY CHARGING CONTROLLER SYSTEM AC charging bulk charging current 1000 mA 12 V DC SECTION Peak charging voltage (nominal) 14.2 ± 0.2 V Internal battery (capacity/type) 28 Ah/12 V sealed lead-acid battery Charging restart voltage (nominal) 12.9 ±...
- Page 21 011-2014-0 | contact us 1-877-619-6321 This MotoMaster Eliminator product carries a one (1) year limited warranty ® against defects in workmanship and materials. At its discretion, MotoMaster Canada agrees to have any defective part(s) repaired or replaced free of charge, within the stated warranty period, when returned by the original purchaser with proof of purchase.


Need help?
Do you have a question about the 011-2014-0 and is the answer not in the manual?
Questions and answers
Can you buy replacement cablels