Table of Contents
Advertisement
Quick Links
Advertisement
Table of Contents

Subscribe to Our Youtube Channel
Related Manuals for Adam Equipment AE 403


Summary of Contents for Adam Equipment AE 403
- Page 1 Adam Equipment AE 403 Indicator Software rev: V 1.00 & above ...
- Page 2 Easy Reference: Model name of the scale: Serial number of the unit: Software revision number (Displayed when power is first turned on): Date of Purchase: Name of the supplier and place: ...
-
Page 3: Table Of Contents
11.0 CALIBRATION ............................. 28 13.0 ERROR CODES ..........................29 14.0 REPLACEMENT PARTS AND ACCESSORIES ................. 30 15.0 SERVICE INFORMATION ........................30 WARRANTY STATEMENT ..........................31 ©Adam Equipment Co. 2018... -
Page 4: Introduction
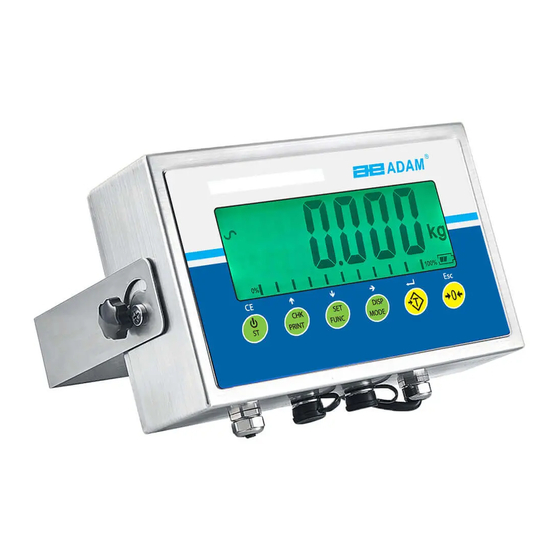
INTRODUCTION The AE 403 indicator provides the user with the electronics necessary to build an accurate, fast, versatile weighing system. Functions include, weighing, check weighing, parts counting, animal weighing and percent weighing. The system includes automatic zero tracking, audible alarm for check- weighing, semi-automatic tare and an accumulation facility that allows individual weights or counts to be stored and the total recalled. -
Page 5: Specifications
Accumulation, Animal weighing, Percent weighing, Peak hold Display 6 digits, 40mm digit height LCD digital display with backlight Weighing units Grams, Kilogram, pound, ounce, pound/ounce; Newton; Symbol indication battery; stable; net weight; zero set; Animal Weighing; Hold RS-232 bi-directional Interface Interface ©Adam Equipment Co. 2018... -
Page 6: Installation
Keep the indicator clean. Do not stack material on the indicator when not in use. LIST OF ACCESSORIES Your packet contains- AC adapter Indicator Wall mount bracket and mounting hardware Instruction manual ©Adam Equipment Co. 2018... -
Page 7: Setting Up The Scales
5: Pin -S -Sense As viewed from the back of the indicator Note: For 4 wire load cell, connect the load cell +Excitation and +Sense together at the connector and -Excitation and -Sense together at the connector. ©Adam Equipment Co. 2018... -
Page 8: Connection Of Load Cell To The Board
3.4.3 Connection of RS-232 to the board Please see figure 4 PIN TXD, Transmitted Data PIN GND, Signal Ground PIN RX, Received Data If there is no connector outside case you will have to connect the RS 232 directly to the board. ©Adam Equipment Co. 2018... -
Page 9: Connection Of Relay Drivers
PCB using the terminal strip P1. Load cell connection pins Connection to relay drivers Connection to serial port FIGURE 5 AE403 CIRCUIT BOARD The circuit to control the relays requires an external voltage compatible with the relays used. For more information see section 10. ©Adam Equipment Co. 2018... -
Page 10: Key Descriptions
A secondary function (ESC) is to return to normal operation when the scale is in a Parameter setting mode. / ST/ CE] To switch on and switch off the indicator. ST: Secondary function allows the user to store/ recall checkweighing limits. ©Adam Equipment Co. 2018... -
Page 11: Displays
The indicator has an automatic re-zeroing function to account for minor drifting or accumulation of material on the platform. However you may need to press the [0/Esc] key to re-zero the indicator if small amounts of weight are shown when the platform is empty. ©Adam Equipment Co. 2018... - Page 12 The “ZERO” indicator will be on to indicate that the platform is back to the same condition as it was when zero was last set. To delete a Tare value, press [0/Esc] when the pan is empty. ©Adam Equipment Co. 2018...
-
Page 13: Changing The Weighing Units
[Disp/Mode] key. The display will now show a flashing unit which can be increased or decreased using the ⭡ or ⭣ directional keys. Once you have set the desired sample size, press the [Tare/↵] key. ©Adam Equipment Co. 2018... -
Page 14: Check-Weighing
Once confirmed you will return to the normal weighing screen. Placing an object onto the scale will now turn the indicator display red, yellow or green depending on whether the value is within, under or over the set weight limits. ©Adam Equipment Co. 2018... - Page 15 This condition is not allowed. GREATER THAN HIGH NOTE: Weight must be more than 20 scale divisions for check weighing to operate. Below 20 scale divisions the LED’s will not light and the beeper will not be on. ©Adam Equipment Co. 2018...
-
Page 16: Accumulated Total
To clear the memory (set the value to zero) press the [Power/ST] key during the time the totals are being displayed, “Clear” will flash on the display for 2-3 seconds and then return to the usual weighing display. ©Adam Equipment Co. 2018... - Page 17 Press the [Func/Set] key to select a new weighing mode. NOTE: The display may jump by large numbers unexpectedly if small weights are used to set as 100% reference. The scale checks if the weight is too small and will show Error 7. ©Adam Equipment Co. 2018...
-
Page 18: Animal Weighing Procedure
When a stable reading is found, the display will show this value, and the display will be locked until the [0/Esc] key is pressed. The display will show the “Hold” symbol while the display is locked. ©Adam Equipment Co. 2018... -
Page 19: Hold/ Peak Function
Scroll through the list of functions using the ⭡ and ⭣ directional keys. Press [Tare/↵] to enter a parameter. Press [0/Esc] to exit the scale parameter section and return to normal weighing. This group of parameters is used to control the operation of the scale. ©Adam Equipment Co. 2018... - Page 20 Includes PC, command and print settings Print Rs 2 Brings up RS232 menu 2 S-id Set Scale ID To be entered manually 000000 U-id Set User ID To be entered manually 000000 rechar Indicates time to recharge ©Adam Equipment Co. 2018...
-
Page 21: Rs-232 Parameters
[Tare/↵] key to confirm. Press [0/Esc] to exit the scale parameter section and return to normal weighing. ©Adam Equipment Co. 2018... -
Page 22: Print Settings
[Line break] 1 Lfcr 1 Lfcr Select the number of line breaks between weight 2 Lfcr values on label. 3 Lfcr 4 Lfcr 5 Lfcr 6 Lfcr 7 Lfcr 8 Lfcr 9 Lfcr 10 Lfcr ©Adam Equipment Co. 2018... -
Page 23: Pc Settings
Int 0.5 a PC. Int 1 Int 2 7.2.3 Command settings Parameter Description Options Default Values or setting [baud rate] Baud Rate 1200 9600 2400 4800 9600 19200 38400 57600 115200 ©Adam Equipment Co. 2018... -
Page 24: Battery Operation
RS-232 INTERFACE The AE 403 indicator is supplied with bi-directional RS-232 interface as standard. The scale when connected to a printer or computer outputs the weight with the selected weighing unit through the RS-232 interface. Specifications: ... -
Page 25: Data Format - Complete Weight
If ID is zero, it is left blank Scale ID 123456 <cr><lf> User ID 234567 <cr><lf> <cr><lf> Net Wt. (or Gross Wt.) Net Wt 1.234 Kg <cr><lf> Tare Wt. 0.000kg Gross Wt. 1.234 Kg <cr><lf> <cr><lf> <cr><lf> <cr><lf> ©Adam Equipment Co. 2018... -
Page 26: Data Format - Hold
DATA FORMAT – PEAK HOLD <cr><lf> <cr><lf> Date 12/09/2006 <cr><lf> Time 14:56:27 <cr><lf> <cr><lf> Scale ID 123456 <cr><lf> User ID 234567 <cr><lf> <cr><lf> Peak Holt Wt. 1.500 Kg <cr><lf> <cr><lf> <cr><lf> <cr><lf> <cr><lf> ©Adam Equipment Co. 2018... -
Page 27: Data Format - Percent
DATA FORMAT – SIMPLE <cr><lf> <cr><lf> Net Wt. 1.500 Kg <cr><lf> <cr><lf> Hold Wt. 1000kg Peak holt wt. 1000kg Animal wt. 1000kg Ref. wt. 1000kg Percent 150.00% <cr><lf> Unit wt. 1.0234g Pieces 1000 <cr><lf> <cr><lf> <cr><lf> ©Adam Equipment Co. 2018... -
Page 28: Data Format- Continuous Output- Normal Weighing
Print date Date Date Datum Fecha Print time Time Heure Zeit Hora Scale ID number Scale ID Bal ID Waagen ID Bal ID User ID Number User ID Util ID Nutzer ID Usuario ID ©Adam Equipment Co. 2018... -
Page 29: Input Commands Format
Sets the zero point for all subsequent weighing. The display shows zero. P<cr><lf> Prints the results to a PC or printer using the RS-232 interface. It also adds the value to the accumulation memory if the accumulation function is not set to automatic. ©Adam Equipment Co. 2018... -
Page 30: Relay Interface
The AE 403 indicator is supplied with drivers to control external relays. The drivers could be used to control a number of different relays depending upon the users need. The relay drivers are isolated outputs requiring the use of an external power supply for the relays. -
Page 31: Calibration
11.0 CALIBRATION The AE 403 scales calibrate using either metric or pound weights, depending on the weighing unit in use before calibration. The display will show either "kg" or "lb" to identify the weights expected. The scale can be calibrated using the following procedure: ... -
Page 32: Error Codes
Improper calibration (should be within + 10% of the factory calibration). The old calibration data will be retained until the calibration process is complete. If the problem persists contact your dealer or Adam Equipment for assistance. ©Adam Equipment Co. 2018... -
Page 33: Replacement Parts And Accessories
(Displayed when power is first turned on): Date of Purchase: Name of the supplier and place: C. Brief description of the problem Include any recent history of the unit. For example: ‐Has it been working since it’s delivered ‐Has it been in contact with water ‐Damaged from a fire ‐Electrical Storms in the area ‐Dropped on the floor, etc. ©Adam Equipment Co. 2018... -
Page 34: Warranty Statement
Repairs carried out under the warranty do not extend the warranty period. Components removed during warranty repairs become company property. The statutory rights of the purchaser are not affected by this warranty. The terms of this warranty is governed by the UK law. For complete details on Warranty Information, see the terms and conditions of sale available on our web‐site. ©Adam Equipment Co. 2018... - Page 35 As we often update adaptor products to meet changing legislation it is not possible to refer to the exact model in this manual. Please contact us if you need specifications or safety information for your particular item. Do not attempt to connect or use an adaptor not supplied by us. ©Adam Equipment Co. 2018...
- Page 36 Fax + 86 (27) 59420388 e‐mail: e‐mail: e‐mail: sales@adamequipment.com.au sales@adamequipment.co.za info@adamequipment.com.cn © Copyright by Adam Equipment Co. All rights reserved. No part of this publication may be reprinted or translated in any form or by any means without the prior permission of Adam Equipment. Adam Equipment reserves the right to make changes to the technology, features, specifications and design of the equipment without notice. All information contained within this publication is to the best of our knowledge timely, complete and accurate when issued. However, we are not responsible for misinterpretations which may result from the reading of this material. The latest version of this publication can be found on our Website. www.adamequipment.com ©Adam Equipment Co. 2018...
Need help?
Do you have a question about the AE 403 and is the answer not in the manual?
Questions and answers