
Related Manuals for Retsch BB 51


Summary of Contents for Retsch BB 51
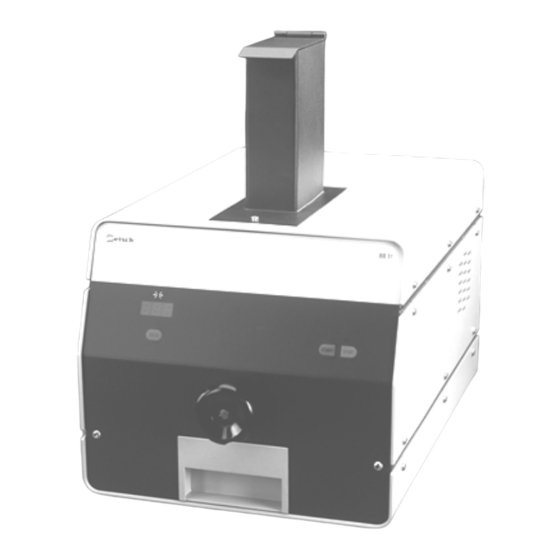
- Page 1 Jaw Crusher Type BB 51 Operating Instructions © Retsch GmbH, 42781 Haan, Rheinische Str.36, Germany, Doc. No. GB 98.056.9999...
-
Page 2: Notes On The Operating Instructions
Notes on the operating instructions These operating instructions for the jaw crusher type BB 51 provide all the necessary information on the topics listed in the table of contents. The guide the target group(s) defined for the relevant subjects in safe and proper handling of the BB 51. -
Page 3: Table Of Contents
Operation ........10 Controls and operation ......10 Schematic drawing of the controls: ....10 Overview of control elements ....11 Operation of the BB 51 ......12 Switching ON and OFF ......12 Set gap width to 00.0 ......12 Starting the crushing process .......13 Feeding in the input material .......13 Interrupting the crushing process ....14... -
Page 4: Safety
Target group: All persons dealing with the machine in any way The BB 51 is a modern, powerful product from Retsch GmbH. It re- flects the state of the art. When the machine is handled correctly by persons familiar with this technical documentation, it is completely safe and reliable in operation. -
Page 5: Warning Notes
Damage to property Repairs These operating instructions do not contain any instructions on re- pairs. For your own safety, only have repairs performed by Retsch GmbH or an authorised agent (service technicians). In such a case, please inform: The Retsch agency in your country... -
Page 6: Technical Data
0.1 mm. The BB 51 has a gap width adjustment mechanism 5 linked to a fixed crusher arm 4 and a moving crusher arm 3. Both crusher arms are fitted with replaceable jaws 2 between which comminution takes place by means of pressure. -
Page 7: Protective Devices
Protective devices The crusher chamber of the BB 51 is enclosed on all sides by a robust steel plate casing. The BB 51 can be safely started up even when the hopper lid is open and the output receptacle withdrawn, as its design in compliance with EN 294 precludes any inadvertent insertion of hands or objects. -
Page 8: Transport And Installation
When there are severe temperature fluctuations (e.g. during air transport) the BB 51 is to be protected from condensation. The electrical components may otherwise be damaged. Interim storage Also ensure that the BB 51 is stored in a dry location for interim peri- ods. Supply schedule •... -
Page 9: Parameters For The Installation Location
Site altitude: max. 2000 m above sea level Installation Place the BB 51 jaw crusher on an even and stable surface, eg. a labo- ratory bench. Electrical connection • Consult the type plate for the voltage and frequency of the BB •... -
Page 10: Operation
Schematic drawing of the controls: Front view ACHTUNG! VOR ÖFFNEN DES GEHÄUSES NETZSTECKER ZIEHEN! PRIOR TO ANY OPENING OF THE HOUSING DISCONNECT UNIT FROM MAINS! RETIRER LA PRISE AVANT L'OUVERTURE DU BOITIER! Rear view © 17.12.1998 Retsch GmbH Doc. No. GB 98.056.9999... -
Page 11: Overview Of Control Elements
STOP button Stops BB51. Red LED lights up when the machine is switched on. Puts the BB 51 in standby mode when pressed a second time. Gap width indicator Indicates the gap width set in mm. Turn clockwise to close the gap. Turn anti-clockwise to open Handwheel for setting gap the gap. -
Page 12: Operation Of The Bb 51
Operation of the BB 51 Target group: Operators Switching ON and OFF The main switch B. is located on the back of the BB 51 Fig.2 • Switch the main switch B on. The red LED above the STOP button D lights up. -
Page 13: Starting The Crushing Process
• Carry out adjustment as described in the preceding section. • Press the START button C. Fig.4 The green LED above button C lights up, the BB 51 starts up. • Set the desired gap width using the handwheel F. -
Page 14: Interrupting The Crushing Process
The crushing process can be continued at any time, provided that the BB 51 has not been switched off at the main switch on the back of the machine and the red LED above button D is lit up. -
Page 15: Notes On Working Procedures
Notes on working procedures Target group: Laboratory technicians General The BB 51 is a robust benchtop machine which can predominantly be used for preliminary pulverisation of hard or brittle materials. The performance data, throughput and achievable final fineness are dependent on the breakage behaviour and hardness of the process ma- terial, and on the gap width set. -
Page 16: Transport Handles
• Insert and tighten the tommy screws G together with the transport handle TG in the threaded borings (cf. arrow in Fig.8). The handles can be left on the BB 51. They increase the overall width of space required for the machine on the bench by approx. 115 mm. -
Page 17: Cleaning The Crushing Chamber
Fig.10 small brush or vacuum cleaner of the kind used on computers. Follow the same procedure in reverse to reassemble. Operation of the BB 51 with the feed hopper removed is not permis- sible. Risk of crushing fingers and hands! -
Page 18: Replacing Jaws
10 Nm. • Remove the shim K1. • Change the jaws B1. Follow the same procedure in reverse to reassemble. Operation of the BB 51 with the feed hopper removed is not permissible. Risk of crushing fingers and hands! ©... -
Page 19: Accessories
Copyright This documentation may only be duplicated or passed on to third par- ties, its contents passed on or otherwise used with the express approval of Retsch GmbH. Contraventions will give rise to liability for damages. Modifications We reserve the right to make technical modifications without notice. -
Page 20: Safety Regulations (Table)
The greater the load on the BB 51 and the harder and more abrasive the input material, the more often a zero point adjustment must be carried out in order to compensate for wear. -
Page 21: Warranty Conditions
Should he require further special work over and above the warranty work, these costs are also to be borne on the basis of our current prices. © 17.12.1998 Retsch GmbH Doc. No. GB 98.056.9999...
Need help?
Do you have a question about the BB 51 and is the answer not in the manual?
Questions and answers