
Subscribe to Our Youtube Channel
Related Manuals for Sandstorm SL-IBTB18


Summary of Contents for Sandstorm SL-IBTB18
-
Page 1: Spotify Connect
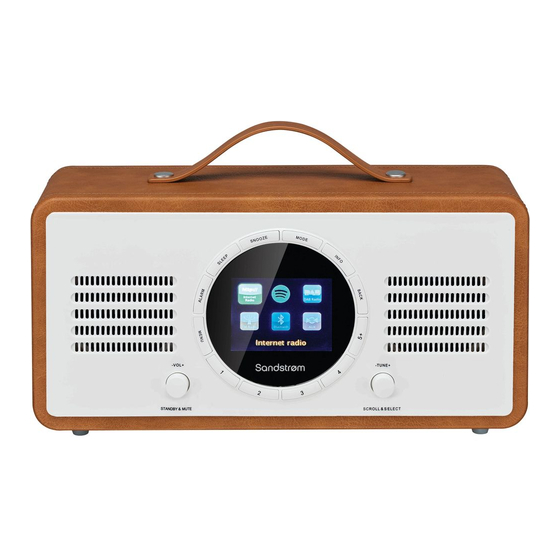
Internet Bluetooth® DAB Radio with Spotify Connect Instruction Manual SL-IBTB18 / SL-IBTC18... -
Page 3: Table Of Contents
Contents Safety Warnings ............................. 5 Unpacking .............................. 7 Product Overview ..........................8 Front View .....................................8 Rear View ....................................9 Connections ............................10 Using the AUX Connection............................10 Using Earphones ................................10 Turning the Radio On for the First Time .....................11 Charging from the USB CHARGING Port ........................11 Connecting To The Internet For The First Time ..................12 Using the WPS button on your Router ........................13 Using Your Wireless Network Password ........................14... - Page 4 Spotify ..............................30 DAB Operation .............................31 Secondary Services ................................32 Manually Tuning In DAB Radio Stations .........................32 Saving Preset Stations ..............................33 Recalling a Preset Station.............................33 DAB Display Modes ................................34 FM Operation ............................35 Auto Scan ...................................35 Manual Tune ..................................35 Scan Setting ..................................35 Audio Setting ...................................36 Saving Preset Stations ..............................36 Recalling a Preset Station.............................37 FM Display Modes ................................37...
-
Page 5: Safety Warnings
Safety Warnings • A minimum distance of 5cm around the unit Read all the instructions carefully before using should be maintained to allow for sufficient the unit and keep them for future reference. ventilation. • Retain the manual. If you pass the unit onto a • Do not install or place this unit in a bookcase, third party make sure to include this manual. - Page 6 Supervision • Dispose of batteries according to local regulations. Please recycle when possible. Do • Children should be supervised to ensure that not dispose as household waste or in a fire as they do not play with the unit. they may explode. • Never let anyone especially children push • Batteries may explode if damaged.
-
Page 7: Unpacking
Thank you for purchasing your new product. We recommend that you spend some time reading this instruction manual in order that you fully understand all the operational features it offers. You will also find some hints and tips to help you resolve any issues. -
Page 8: Product Overview
Product Overview Front View -TUNE+ -VOL+ STANDBY & MUTE SCROLL & SELECT 1. SPEAKER 9. –VOL+ / STANDBY & MUTE Dial • Press and hold to switch the unit ON. 2. ALARM Button • While the unit is ON, press to switch it Press to set the ALARM. -
Page 9: Rear View
Rear View DC IN 15V LAN OUTPUT RESET 2 3 4 5 6 1. DAB / FM Aerial 4. AUX IN Socket 2. RESET Button Headphones Socket 3. OUTPUT 5V 2A USB Port 6. DC IN 15V Socket For mobile devices charging. 7. -
Page 10: Connections
Connections Using the AUX Connection Connect the AUX IN socket at the rear of the unit to the line output sockets on the auxiliary equipment using a 3.5 mm to 3.5 mm stereo audio cable (included), as illustrated. Rear of the unit Auxiliary Equipment DC IN 15V LAN... -
Page 11: Turning The Radio On For The First Time
Turning the Radio On for the First Time 1. Fully extend the aerial before plugging the unit into the mains. 2. This unit is designed to operate with the built battery. 3. Connecting the unit to any other power source may damage the unit. Unwind the mains adapter cable to its full length. -
Page 12: Connecting To The Internet For The First Time
Connecting To The Internet For The First Time 1. When your radio is connected to power the splash screen (welcome message and then the unset time Welcome to clock) will appear. Digital Radio 2. Press and hold the –VOL+ / STANDBY & MUTE dial to switch on the unit, the display will show the “Privacy policy”... -
Page 13: Using The Wps Button On Your Router
The DAYLIGHT SAVINGS screen will now appear, here Daylight saving you can choose if the set daylight saving ON or OFF. 9. Turn SCROLL & SELECT dial to select ON or OFF. Daylight savings Then press SCROLL & SELECT to confirm. OFF* 10. -
Page 14: Using Your Wireless Network Password
2. Press the WPS button on your router. Check WPS setup your routers instruction manual if you are Push WPS button unsure which button is the WPS button. at the other end 3. Press the SCROLL & SELECT dial button. Your radio will now connect to your router, this may take a few seconds. -
Page 15: Basic Operation
Basic Operation Switching ON/OFF • Press and hold the –VOL+ / STANDBY & MUTE dial to switch the unit ON. • While the unit is ON, press the –VOL+ / STANDBY & MUTE dial to switch the unit into STANDBY mode. Remove the mains plug from the mains socket if you want to switch the unit off completely. -
Page 16: Alarm
Alarm Ensure the time and date is set before you can activate the alarm function. Setting the Alarm Your radio has two alarms (Alarm 1 and Alarm 2). This is handy so you can set one alarm for workdays and one for weekends. You set both alarms in the same way. 1. - Page 17 4. Turn SCROLL & SELECT dial to select TIME and Alarm 1 press SCROLL & SELECT dial to confirm. Then turn Enable: Daily SCROLL & SELECT dial to set Alarm time and press Time: 00:00 SCROLL & SELECT dial to confirm. Mode: Internet radio Preset: Last listened Volume: 8...
- Page 18 7. Turn SCROLL & SELECT dial to select VOLUME Alarm 1 and press SCROLL & SELECT dial to confirm. Then Enable: Daily turn SCROLL & SELECT dial to select your desired Time: 08:30 VOLUME for the alarm to sound and press SCROLL Mode: Internet radio &...
- Page 19 Cancel Alarm The alarm will automatically repeat at the selected time as long as the alarm icon is displayed. To cancel an alarm press the ALARM button repeatedly until the alarm symbols disappear from the display. Turning the Alarm Off when it Sounds When the alarm sounds, press the STANDBY &...
-
Page 20: General Settings
General Settings Setting a Sleep Timer This feature enables your radio to switch to standby mode by itself after a set sleep time. 1. To set the sleep timer, press the Sleep/Alarm key Internet radio 12:08 repeatedly to cycle through the sleep time options: BBC Radio 2 Sleep OFF, 15 MINS, 30 MINS, 45 MINS or 60 MINS. -
Page 21: Setting The Time And Date
Setting the Time and Date To access all the time and date menus press MENU then go to System settings - Time/ Date. Set Time/Date Here you can manually set the time and date. Auto update Choose how you want the time to be automatically updated. Update from DAB - FM - NETWORK or NO UPDATE. -
Page 22: Info
Info To see the Software version, Radio ID and Friendly Name of your radio go to INFO. Press MENU to go to System settings - Info. Privacy policy To see the Privacy policy page, press MENU to go to System Privacy policy settings - Privacy policy. -
Page 23: Network Settings
Network Settings The NETWORK SETTINGS menu has all the setting for connecting your radio to your Wi-Fi. So if you have to re-connect your radio at any time go into the NETWORK SETTINGS menu. Network wizard Selecting network wizard will start the search for Wi-Fi networks, choose your network then enter your Wi-Fi password to connect to that network. -
Page 24: Internet Radio Operation
Internet Radio Operation To listen to internet radio your radio must be connected to the internet. Try to position your radio as close as possible to your router to get the best connection speeds. Finding Local Radio Stations You can search for local radio station to the area you are located in e.g. if you are in the UK all of the UKs local radio stations will be listed. -
Page 25: Finding Radio Stations From Around The World
Finding Radio Stations From Around the World You can search for radio station from a particular country in the world. All you need to do is select the area in the world e.g. Europe then select the country e.g. Portugal. You will then be able to listen to any radio station from your selected country. -
Page 26: Searching For A Radio Station By Name
You can now select ALL STATIONS which will display Portugal a list of all the local radio stations in your location or All Stations > select a genre which will just display a list of stations Highlighted Stations > relating to your selected genre. Alternative >... -
Page 27: Searching For Newest Radio Stations
Searching for Newest Radio Stations Your radio has a list of the newest radio stations that have been added, these station could be from any country. 1. In INTERNET RADIO mode press the MENU button. Stations Location > 2. Select STATION LIST - STATIONS - NEW STATIONS, Genre >... -
Page 28: Recalling A Preset Station
Recalling a Preset Station Recall Presets 1 - 4 Recall from Preset 1. BBC Radio 2 To recall preset stations that are stored in positions 1-4 2. KISS FM just press the Presets 1-4 button. 3. BBC Radio 1 4. [Not set] Recall Presets 5-10 5. -
Page 29: Adding Favourite Radio Stations
Adding Favourite Radio Stations To make it easier to find the radio stations that you like, you can add them to the ‘My favourites’ list. You can add stations while listening to them or if you want to add multiple radio stations and create folders for your favourite stations then you need to go to www.wifiradio-frontier.com Adding a station while listening to it... -
Page 30: My Added Stations
3. You will find the radio station and group have now My favourites been added into the MY FAVOURITES folder. Algarve > Stations > The stations stored in MY FAVOURITES Richards folder > will NOT be deleted if you perform a FACTORY RESET. -
Page 31: Spotify
Spotify With Spotify, you can enjoy unlimited music on your new device. Thanks to the Spotify Connect feature, you can control all this music wirelessly from your mobile or tablet (iOS and Android) and hear it on your brand new speaker with no interruptions or range problems. -
Page 32: Dab Operation
DAB Operation The first time you use DAB make sure the aerial if fully extended before selecting DAB mode, because your radio will automatically scan for DAB radio stations. If the aerial is not fully extended your radio will not tune in properly. -TUNE+ -VOL+ STANDBY &... -
Page 33: Secondary Services
Secondary Services You may see a symbol after the name of the station, this indicates that there are secondary services available to that station. These secondary services contain extra services that are related to the primary station. e.g. a sports station may want to add extra commentaries. -
Page 34: Saving Preset Stations
Saving Preset Stations You can store up to 10 of your favourite stations to the memory. This will enable you to access your favourite stations quickly and easily. Presets 1 - 4 Save to Preset To store a preset, you must first be listening to the 1. -
Page 35: Dab Display Modes
DAB Display Modes Every time you press INFO on the unit, the display will cycle through the following display modes. The information is displayed on the lower segment of the display. DLS (Dynamic Label Segment) Dynamic label segment is a scrolling message that the broadcaster may include with their transmissions. -
Page 36: Fm Operation
FM Operation Press MODE to select FM radio. Auto Scan While listening to an FM station, press SCROLL & SELECT dial to perform auto scan. Once a station has been found, the scanning will stop automatically. Manual Tune To tune FM frequency manually, turn SCROLL & SELECT dial until your desired frequency is reached. -
Page 37: Audio Setting
Audio Setting If you find that the station you are listening is not clear, you can select to listen to it in MONO this can often clear up some of the static. 1. In FM mode, press MENU to display the FM menu. -
Page 38: Recalling A Preset Station
Recalling a Preset Station Recall Presets 1 - 4 Recall from Preset 1. 92.10MHz To recall preset stations that are stored in positions 2. 95.30MHz 1-4 just press the Presets 1-4 button. 3. 98.80MHz 4. 104.20MHz Recall Presets 5-10 5. [Not set] 1. -
Page 39: Bluetooth® Operation
This shows that the radio is in pairing mode. 2. Activate Bluetooth on your device i.e. mobile phone and look for your radios model number in the Bluetooth list (SL-IBTB18 / SL-IBTC18). Once selected the Bluetooth logo on the screen will stop flashing. You are now paired. -
Page 40: Aux In Operation
AUX IN Operation 1. Before connecting to the mains socket, use the 3.5 mm audio stereo cable (not included) to connect to your external audio device through the AUX IN socket at the rear of the unit. • When connecting the external audio device, refer to the owner’s manual of the external device, as well as this manual. -
Page 41: Hints And Tips
Bluetooth I cannot find • Ensure the Bluetooth function is activated on your “SL-IBTB18/SL-IBTC18” on my Bluetooth device. Bluetooth device. • Re-pair the unit with your Bluetooth device. Can’t hear the music • You may need to increase the volume on the radio... -
Page 42: Specifications
Specifications Model SL-IBTB18 / SL-IBTC18 Power Adapter (Use only power adapter listed below) Power Adapter Manufacturer Shenzhen Flypower Technology Co., Ltd. Power Adapter Model PS36A150K2400BD Input AC 100 - 240 V~ 50/60 Hz, 1.0 A Output DC 15 V 2.4A... - Page 43 Wifi Maximum transmitted 19 dBm power Wireless Standard 802.11 a/b/g/n Frequency band 2412-2472 MHz; 5180MHz- 5240MHz, 5260MHz-5320MHz, 5500MHz-5700MHz Speaker Output Power 5 W rms × 2 Working Environment - Temperature 0°C ~ 40°C Working Environment - Relative Humidity 5% ~ 80% <10% >65 dB(A) Play Mode...
- Page 44 For general information about this appliance and handy hints and tips, please visit: www.TeamKnowhow.com/discover or call 0344 561 1234 Visit Partmaster.co.uk today for the easiest way to buy electrical spares and accessories. With over 1 million spares and accessories available we can deliver direct to your door the very next day.
Need help?
Do you have a question about the SL-IBTB18 and is the answer not in the manual?
Questions and answers