Table of Contents
Advertisement
Advertisement
Table of Contents

Related Manuals for Thuraya X5-Touch


Summary of Contents for Thuraya X5-Touch
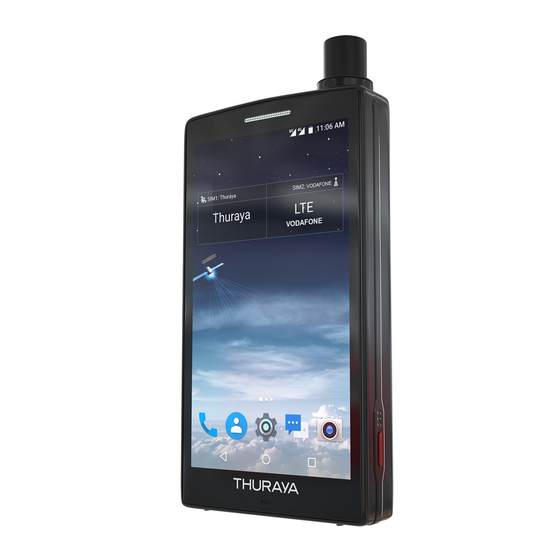
- Page 1 Thuraya X5-Touch User Guide...
-
Page 2: Table Of Contents
59 Multi-function button 18 Phone 59 Screen capture 26 Contacts 31 Messages 32 Memory card (microSD card) Appendix 60 Maintaining your Thuraya X5-Touch Apps and features 61 Troubleshooting 34 Installing or uninstalling apps 65 Thuraya Short Codes 35 Navigation 67 Frequency Bands... -
Page 3: Basics
The X5-Touch is a satellite and GSM phone with dual-SIM capability. Please make yourself familiar with the safety measures and user instructions in this manual before you start using your Thuraya X5-Touch. This will help you to get the most out of your phone. For your safety The following guidelines will help you to use your Thuraya X5-Touch safely. - Page 4 Genuine accessories Use only Thuraya approved accessories for your phone. • Please be aware of dangers when using accessories which are not certified by Thuraya. Differing electrical specifications can damage your Thuraya X5-Touch and such accessories may void your device’s warranty and can be potentially harmful.
- Page 5 Basics Taking care of your Thuraya X5-Touch The suggestions below will help you to maintain your phone in good condition and to protect your warranty coverage. • If your device gets wet inside, remove the battery immediately and allow the device to dry completely before replacing it.
- Page 6 Basics Precautions for Thuraya X5-Touch Your Thuraya X5-Touch is IP67 rated which means it is dust tight and submersible in water up to 1 meter. To ensure proper protection, make sure the following parts are assembled properly: • USB cover •...
- Page 7 USB-C adaptor If you want to use an external Micro-USB charger • You can purchase additional accessories from your local Thuraya retailer. Make sure they are compatible with the device before purchase. • Use only Thuraya-approved accessories. Using unapproved accessories may cause performance problems and malfunctions that are not covered by the warranty.
-
Page 8: Device Layout And Functions
Basics Device layout and functions Receiver Light sensor Power button ( ) Earphone jack LED indicator Front camera SAT antenna Multi-function button Volume + button Volume - button SOS button USB jack (type C) Speaker... - Page 9 Basics Antenna connector Flash LED Rear camera SD card slot NFC connect pin Nano-SIM card slot 1 Nano-SIM card slot 2 Direct current Battery Connectivity problems and battery drain may occur in the following situations: • If you attach metallic stickers on the antenna area of the device •...
-
Page 10: Notification Icons
Basics Notification icons Icon Meaning Icon Meaning Network signal strength Sending files No signal Downloading files Wi-Fi FM Radio Wi-Fi networks available Screen capture Personal Wi-Fi Hotspot Battery level Battery level low or battery Bluetooth temperature is too high/low No SIM card Earphone connected SD card Cast... -
Page 11: Battery
Basics Battery Charging the battery Charge the battery before using it for the first time or when it has been unused for extended periods. To save energy, unplug the charger from the electric socket when not in use. Connect the USB-C cable to the travel charger. Plug the cable into the device’s USB-C jack. - Page 12 Basics Optional: Fast charging The device has a built-in fast charging feature. You can charge the battery more quickly while the device or its screen is turned off. About Fast charging • Fast charging uses battery charging technology that charges the battery faster by increasing the charging power.
-
Page 13: Sim Cards
Basics SIM cards The dual-SIM capability of the X5-Touch allows you to insert nano-SIM cards for satellite services and GSM services. The phone can be used with one or two SIM cards, either in the SIM 1 slot, in the SIM 2 slot, or in both. - Page 14 Basics SIM card settings Activate your SAT SIM, GSM SIM or both and customize the SIM card settings. Turning SIM on and off By tapping the icon next to SAT and GSM, the SAT SIM, GSM SIM or both can be turned on and off.
- Page 15 SIM1 set to SAT, and a Vodafone SIM card in SIM2 set to GSM, you can swap it so that the Thuraya SIM card is used for GSM services and the Vodafone SIM card is used for SAT services. This is especially useful if you have just one GSM SIM card and wish to use it sometimes for GSM services and other times for roaming in satellite mode.
-
Page 16: Turning On And Connecting To The Network
To turn off the device, press and hold the Power button, and then tap Power off. Connecting to the network When the Thuraya X5-Touch is powered on, the phone will search for the network and acquire location information. Upon successful registration to the network, the phone will display the information on the home screen according to your chosen network mode. - Page 17 Basics If “Location update…” is flashing in the widget along with the satellite signal icon in the notification bar, the phone is yet to receive location information which is required for use in satellite mode. Once “Location update…” disappears and the flashing stops, you will be able to make/receive calls or send/receive messages in satellite mode.
-
Page 18: Phone
SAT call, or tap to make a GSM call. Throughout your X5-Touch, items related to the SAT network are denoted in Blue and items related to the GSM network are denoted in Green. - Page 19 Basics • To call a contact, tap the icon , select or search for the contact, and tap the icon to call them. Make a call Choose whether to make a SAT call or a GSM call. By ticking the checkbox Always use this for calls, you can set it so that all future calls to the contact will be made using the chosen network.
- Page 20 Basics To check or change the designated network for calling a contact: Launch Contacts app. Select the contact in the contact list. If you see next to the contact name, it has been set to always use the specific network to call that contact. If a network is not yet set, there will be no icon, and the contact will be called according to your selection.
- Page 21 Basics Receiving calls Answering a call When a call comes in, hold and drag to the right of the large circle. Rejecting a call When a call comes in, hold and drag to the left of the large circle. To reject an incoming call and send a message to the caller, drag to the top of the large circle and select the message to send.
- Page 22 Basics Conference calls While in an active call on the Thuraya X5-Touch, you can make calls to other numbers and even merge multiple ongoing calls into a conference call. During a call, tap the icon and either enter a phone number or select a contact from your contact list.
- Page 23 Basics By tapping Manage conference call during the conference call and then tapping icon you can speak with a user in private. All other calls are put on hold automatically. To disconnect a particular user tap the icon. You can include up to 6 users in the conference call by repeating steps 1 and 2. Satellite calls can be conferenced only with other satellite calls, and GSM calls can be conferenced only with other GSM calls.
- Page 24 Basics Swapping between calls • If you are in an active SAT call, your call screen will be outlined in Blue. • If you are in an active GSM call, your call screen will be outlined in Green. To swap between calls, click on the phone number or contact name of the person you wish to speak to, and all other calls will be put on hold automatically.
- Page 25 Options during calls The following actions are available: • : Turn speakerphone on or off. When using the speakerphone, keep the Thuraya X5- Touch away from your ears. • : Mute the microphone so that the other party cannot hear you.
-
Page 26: Contacts
Basics Contacts Introduction Create new contacts or manage contacts on your Thuraya X5-Touch. Adding contacts Creating a new contact Launch the Contacts app and tap , then select a storage location. Enter the contact information. Add an image Select a storage location... - Page 27 Basics Importing/Exporting contacts Add contacts by importing them from other locations to your Thuraya X5-Touch or backup contacts by exporting them from X5-Touch to other locations. Importing contacts Launch the Contacts app and tap Import/export. Select the storage location to import contacts from.
- Page 28 Basics Sharing contacts You can share contacts with others through various methods. Launch the Contacts app and tap Import/export Share all contacts. Select contacts and tap OK. Select a sharing method. Saving and sharing profile Save and share your profile information. Launch the Contacts app and tap Set up my profile.
- Page 29 Basics Merging duplicate contacts When you import contacts or sync contacts with other accounts, your contacts list may include duplicate contacts. Merge duplicate contacts into one to streamline your contacts list. Launch the Contacts app and tap Merge contacts. Tick contacts and tap Deleting contacts Launch the Contacts app.
- Page 30 Basics Adding favorites Register frequently used contacts as favorites. Launch the Contacts app. Select a contact and tap To see all favorites, tap FAVORITES. Creating groups Launch the Contacts app and tap GROUPS. Select a group and tap Edit and enter contact name to add members. to save the group information.
-
Page 31: Messages
Basics Messages Sending messages Launch the Messages app and tap the icon to send a new message. Add recipients, enter a message and choose if you want to send an SMS or Email. to send a SAT message or tap to send a GSM message. -
Page 32: Memory Card (Microsd Card)
Basics Memory card (microSD card) Installing a memory card Open the battery cover. Insert the microSD card fully into the slot with the gold-colored contacts facing downwards. Before removing the microSD card, make sure to unmount it first from the software settings or there is a risk of your data being corrupted. - Page 33 Basics Accessing the microSD card through the File Manager After inserting a memory card into the Thuraya X5-Touch, to explore its files go to File Manager SD card. Tap the File Manager. Tap the Tap SD card. The Thuraya X5-Touch supports memory cards of up to 32 GB size.
-
Page 34: Apps And Features
Apps and features Installing or uninstalling apps Installing apps In addition to the pre-installed apps you can install apps from the Google Play Store or from other sources. Once an app was installed it will appear on the homescreen of the phone. -
Page 35: Navigation
Apps and features Navigation The navigation feature on your Thuraya X5-Touch is a powerful tool that allows you to use location information in various ways. It supports GPS, BeiDou and Glonass for maximum accuracy and flexibility. To center the map to your current location tap on the center button. - Page 36 Apps and features Compass To use the built-in compass, select the compass button in the top right of the map. The compass uses a geomagnetic field sensor and shows the direction relative to the geographic cardinal directions where the red needle points northwards. North corresponds to 0°...
- Page 37 Apps and features Position logging Under Navigation Position logging you can log your position at chosen intervals while moving. The position logging data can be saved on the phone or PC according to your settings. Open the log list tab to see the position logging data. Tap on position logging button to log your position on a map at a preset interval ranging from once every second to once an hour.
- Page 38 Apps and features Waypoints A waypoint represents a specific location which can either be your current position or it can be manually entered in the form of coordinates to navigate to this waypoint. To manually add waypoints on your phone go to Navigation Waypoints and tap New.
- Page 39 To see the current sensitivity of the various navigation systems, go to GNSS signal. Find satellite To find the location of the nearest Thuraya satellite, go to Find satellite. Connect to PC To save the coordinates to a PC/laptop, go to Navigation Connect to PC.
-
Page 40: Sos
Apps and features The Thuraya X5-Touch allows you to make an SOS call and/or send SOS messages to pre-determined recipients either from the SOS app or directly from the SOS button on the side of the phone. In the SOS settings you can: •... - Page 41 3 minute to 24 hours Output format 1. DD.ddddd 2. DD/MM/SS.ss 3. DD/MM/SS 4. DD/MM.mm 5. MGRS 6. UTM 7. Google Maps You can activate SOS even when the X5-Touch is switched off by pressing and holding the SOS button for 3 seconds.
-
Page 42: Tracking
Apps and features Tracking The Thuraya X5-Touch can be used to send your coordinates to pre-defined numbers via SMS or email based on preset time intervals, amount of distance moved or when moving inside or outside of a preset geofence. - Page 43 Apps and features Tracking by Time Coordinates will be sent at preset time intervals. Choose frequency of outgoing messages (every 3 minutes to every 24 hours). Up to 10 recipients Message interval 3 minutes to 24 hours Output format 1. DD.ddddd 2.
- Page 44 Apps and features Tracking by Distance Coordinates will be sent based on the distance the user has moved. Choose distance interval for outgoing messages (every 100m to every 10,000km). Up to 10 recipients Distance 100m to 10,000km Output format 1. DD.ddddd 2.
- Page 45 Apps and features Tracking by Area (Geofence) Coordinates will be sent if the user moves in or out of a predesignated geofence. Choose the number of points to create the geofence (3 points to 7 points). Enter the coordinates in consecutive order to form a closed polygon. The coordinates can be chosen directly on the map by tapping and holding on the desired position, or they can be entered manually by choosing the ‘Manual’...
- Page 46 Apps and features How to use geofence: For example, you chose to set up a geofence with 7 coordinates to form the below shown polygon and activated Tracking by Area with the option ‘When outside geofence’. If you are inside the geofence, e.g. moving along the blue line, no coordinates will be sent. However, if you are outside the geofence, e.g.
-
Page 47: Other Apps
Apps and features Other apps Camera Take photos and record videos using various modes and settings. To launch the camera use the following methods: • Launch the Camera app from the home screen • Press the Power button twice • On the lock screen, drag the camera icon outside the circle Calendar Manage your schedule by entering upcoming events or tasks in your planner. -
Page 48: Settings
Settings Wi-Fi On the Settings screen, tap Wi-Fi and then tap the switch to activate it. Select a network from the Wi-Fi networks list. Networks that require a password appear with a lock icon, enter the password and tap CONNECT. Bluetooth On the Settings screen, tap Bluetooth and then tap the switch to activate it, the detected devices will be listed. -
Page 49: Data Services
Data services How to use data services on the phone In order to use data on your Thuraya X5-Touch for your apps and messaging you have to activate the data service first. Choose whether to use data via Thuraya GmPRS or terrestrial 4G/3G/2G on the phone. - Page 50 USB. Run the setup file; the required drivers will be installed. Connect the X5-Touch to a computer using a USB data cable. On the Settings screen, tap More, tap Tethering & Personal Hotspot and tap the USB tethering switch to activate it.
- Page 51 Via Dial-up network (also an alternative option for Thuraya GmPRS and terrestrial 4G/3G/2G which doesn’t share bandwidth with the X5-Touch): Step 1 • Download the latest Thuraya X5-Touch driver package from the Thuraya website or the included USB. • Run the setup file; the required drivers will be installed.
- Page 52 • Select or right click on Start and go to Control Panel Phone and Modem. • Go to the Modems tab, select the Thuraya X5-Touch HS-USB Modem and press OK. Step 3 Create a dial-up connection and in the dial-up phone number field, enter the access...
- Page 53 Settings For Windows 8/8.1: • Right click on Start and select Control Panel Network and Sharing Center. • Select and press Set up a new connection or network. • Select and press Set up dial-up connection and then Next. • Select and press Connect to the network and then Next. •...
- Page 54 On the Settings screen, tap More, tap Tethering & Personal Hotspot and tap the Personal Hotspot switch to activate it. Tap Set up Personal Hotspot to configure the hotspot name and password. Personal Hotspot can be used to access either Thuraya GmPRS or terrestrial 4G/3G/2G on the remote device.
- Page 55 Settings How to restrict data services and Wi-Fi To choose which apps can use data services and Wi-Fi or to restrict certain apps, tap SIM cards, tap Data management and tap to control Internet access for SAT, GSM and Wi-Fi.
- Page 56 Settings In order to restrict background data, go to Settings Mobile Data usage Data saver and tap the On switch to activate it. Once activated, apps will only use data if they are in the foreground. You can set data usage limits in Settings Mobile Data usage Billing cycle.
-
Page 57: Display
You can change your screen’s brightness, font size, rotation settings, and more. Select a screen mode suitable for viewing movies or images, or adjust the display colour to your preference. Your Thuraya X5-Touch display can even be used with gloves and if the screen is wet. -
Page 58: Software Update
SD card update Another way to update your device’s software is via SD card. Please download the latest Thuraya X5-Touch firmware from the Thuraya website and save it in the SD card root directory. Insert the SD card into the phone, go to Settings, tap About phone... -
Page 59: Multi-Function Button
Settings Multi-function button Assign the Multi-function button of your Thuraya X5-Touch to: Open the Camera Start Tracking Screen capture Press and hold the Volume Down button and the Power button simultaneously. Captured screenshots will be saved in File manager Pictures Screenshots. -
Page 60: Appendix
• Test the satellite connection of your Thuraya phone regularly, especially if you have not used it for some time: dial the free number 11 11 2 in satellite mode from your Thuraya X5-Touch to test if it is working properly (this number can only be accessed with Thuraya SIM cards). -
Page 61: Troubleshooting
Lock SIM card menu. • PUK: Your Thuraya SIM or GSM SIM card is blocked, usually as a result of entering your PIN incorrectly several times. To unblock, you must enter the PUK supplied by your service provider. - Page 62 • If the touchscreen is scratched or damaged, visit a Thuraya Service Centre. Your device freezes or encounters a fatal error Try the following solutions. If the problem is still not resolved, contact a Thuraya Service Centre. Restarting the device If your device freezes or hangs, you may need to close apps or turn off the device and turn it on again.
- Page 63 Data stored in the device has been lost Always make backup copies of all important data stored in the device. Otherwise, you cannot restore data if it is corrupted or lost. Thuraya is not responsible for the loss of data stored in the device.
- Page 64 Appendix The Thuraya X5-Touch shows ’No SIM’ • Check if the SIM card is dirty or damaged, and try to remove and reinsert the SIM card. • Check if the SIM card is deactivated or not provisioned for any services. Please contact your service provider for more details.
-
Page 65: Thuraya Short Codes
Prepaid credit balance and validity. information Enter 160 [scratch card PIN code] then tap Prepaid scratch card refill icon. Allows you to check if your Thuraya X5-Touch Thuraya Free Test Call 11112 is in working condition and if the subscription Service... - Page 66 1300 position and send it by SMS to 1300 to obtain location information of the satellite. Send a free notification to another person Thuraya Call Me Back to call you back. Send the number in the 1755 Service following format to 1755: # destination phone number #.
-
Page 67: Frequency Bands
Appendix Frequency Bands Item Frequency Ranges Tx: 1626.5–1660.5 MHz, Rx: 1525–1559 MHz Satellite Rated Power: 5 dBW 2.4–2.496 GHz Wi-Fi 4.9–5.85 GHz Bluetooth 2.402–2.480 GHz 13.35 MHz GPS: 1574.42 MHz GNSS GLONASS: 1602 MHz + K*562.5 KHz (K=-7,-6,...,5,6) BeiDou: 1561.098 MHz Specifications Item Frequency Ranges... -
Page 68: Certification / Compliance / Warranty
Certification / Compliance / Warranty SAR Information Your wireless Thuraya X5-Touch phone is a radio transmitter and receiver. It is designed and manufactured not to exceed the limits for exposure to radio frequency (RF) recommended by international guidelines (ICNIRP). These limits are part of comprehensive guidelines and establish permitted levels of RF energy for the general population. - Page 69 Product becomes defective in materials or workmanship and is returned at Buyer’s expense to a Thuraya Authorized Service Center during the Warranty Period, the Product will be repaired or replaced at no charge to the Buyer. The Buyer will be required to provide reasonable proof of date of purchase.
- Page 70 Thuraya with respect to the Product. There are no other liabilities of Thuraya arising from the sale of the Product whether based on warranty, contract, negligence or other theories of liability. No employee, agent, dealer,...
- Page 71 Appendix In no event shall Thuraya liability exceed the cost of correcting defects as provided herein. This Limited Warranty gives specific legal rights to Buyer, and Buyer also may have other rights which may vary from jurisdiction to jurisdiction, as this Limited Warranty does not affect the Buyer’s legal rights under the relevant applicable national laws in respect of...
- Page 72 Trademarks • THURAYA and the THURAYA logo are registered trademarks of Thuraya Telecommunications Company. ® • Bluetooth is a registered trademark of Bluetooth SIG, Inc. worldwide. ® • Wi-Fi and the Wi-Fi logo are registered trademarks of the Wi-Fi Alliance.
Need help?
Do you have a question about the X5-Touch and is the answer not in the manual?
Questions and answers
how can i unlock my thuraya x5 touch?
To unlock your Thuraya X5-Touch:
- If prompted for a Password, enter the password you set for the device. This appears when the device lock feature is enabled.
- If prompted for a PIN, enter the PIN supplied with your Thuraya SIM or GSM SIM card. You can disable this feature in the "Lock SIM card" menu.
- If prompted for a PUK, it means your SIM card is blocked due to incorrect PIN entries. You will need the PUK code to unblock it.
This answer is automatically generated