Table of Contents
Advertisement
Quick Links
Download this manual
See also:
User Manual
Advertisement
Table of Contents

Summary of Contents for Arcserve 9000 APPLIANCE SERIES
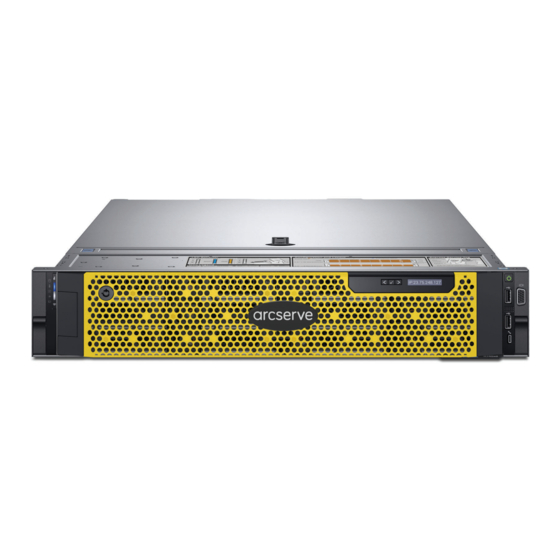
- Page 1 HARDWARE INSTALLATION GUIDE Arcserve Appliances 9000 Series Hardware Installation Guide...
-
Page 2: Table Of Contents
Run Arcserve Appliance Wizard ........ -
Page 3: Product Ratings
Install near appropriate AC outlets, and Ethernet hubs or individual jacks. Be sure to install an AC Power Disconnect for the entire rack assembly. The Power Disconnect must be clearly marked. Ground the rack assembly properly to avoid electrical shock. Arcserve Appliances 9000 Series Hardware Installation Guide... -
Page 4: Unpacking The Appliance
Rack NOTE: To remove the rails, open the front latch and disengage the rail from the flange. Pull the entire rail forward to release the rear end of the rail from the flange. Arcserve Appliances 9000 Series Hardware Installation Guide... -
Page 5: Securing The Rails To The Rack
J-slots on the rail with the standoffs Step 3 on the system and sliding forward on the system until they lock into place. J Slot (continued on the next page) Arcserve Appliances 9000 Series Hardware Installation Guide... -
Page 6: Securing The Appliance In The Rack
To remove the appliance from the rack, lift the slam latches and slide NOTE: the system out of the rack. If locked, use a Phillips #2 screwdriver to unscrew Slam Latches the captive screws securing the system in place. Arcserve Appliances 9000 Series Hardware Installation Guide... -
Page 7: Rear Panel Connections
(PSUs), indicated by the EPP label, on your system. For more information about EPP, see the Installation and Service NOTE: The PSU input connectors may vary depending on the Manual at Dell.com/poweredgemanuals. PSU type. Arcserve Appliances 9000 Series Hardware Installation Guide... -
Page 8: Cabling The Appliance
If two PSUs are used, they must be of the same type and have the same maximum output power. Combining AC and DC PSUs is not supported and triggers a mismatch. Arcserve Appliances 9000 Series Hardware Installation Guide... -
Page 9: Securing The Cables To The Rack
7.2k 7.2k 7.2k 7.2k SATA SATA SATA SATA AT T A 7.2k 7.2k 7.2k 7.2k 7.2k 7.2k 7.2k 7.2k System Information Tag System Information Tag System Information Tag (continued on the next page) Arcserve Appliances 9000 Series Hardware Installation Guide... -
Page 10: Front Panel Operation
Flashing Green (on for 2 seconds and Indicates that the laptop or tablet is recognized. iDRAC Direct iDRAC Direct off for 2 seconds) Turns Off Indicates that the laptop or tablet is unplugged. Arcserve Appliances 9000 Series Hardware Installation Guide... - Page 11 If the problem persists, refer to the Getting Help Section Dell.com/openmanagemanuals > OpenManage software. The LCD backlight remains off if the LCD is messaging is turned off using the iDRAC utility, the LCD panel, or other tools. Arcserve Appliances 9000 Series Hardware Installation Guide...
-
Page 12: Bezel Installation On The Appliance
7.2k 7.2k 7.2k 7.2k 7.2k Left* Top Right Bezel Tab* Bezel Tab* Bottom Left Bottom Right Bezel Tab* Bezel Tab* Bezel Lock Bezel Tabs are located behind each bezel end section as indicated Arcserve Appliances 9000 Series Hardware Installation Guide... -
Page 13: Run Arcserve Appliance Wizard
Run Arcserve Appliance Wizard When power is initially applied to the appliance, the Arcserve Appliance Wizard is launched. Navigate through each page of the wizard. For more information about the wizard, see the Arcserve Appliance User Guide (arcserve.com/udp-appliance-userguide). Note: After selecting the Operating System language, a screen to enter Windows license may come up. -
Page 14: Contact Support
Arcserve provides this document “as is” without warranty of any kind, including, without limitation, any implied warranties of merchantability, fitness for a particular purpose, or non-infringement. In no event will Arcserve be liable for any loss or damage, direct or indirect, from the use of this document, including, without limitation, lost profits, business interruption, goodwill or lost data, even if Arcserve is expressly advised in advance of the possibility of such damage.


Need help?
Do you have a question about the 9000 APPLIANCE SERIES and is the answer not in the manual?
Questions and answers