Agrident APR500 Operational Manual
Classic mode
Hide thumbs
Also See for APR500:
- Instruction manual (24 pages) ,
- User manual (21 pages) ,
- Manual (14 pages)

Related Manuals for Agrident APR500


Summary of Contents for Agrident APR500
- Page 1 Agrident GmbH, Steinklippenstrasse 10, D-30890 Barsinghausen Phone +49 5105 582573-10 - Fax +49 5105 582573-17 APR500 - Classic Mode Operational Manual V16/10/14 F o r F i r m w a r e V e r s i o n 4 . 0 8 a n d h i g h e r...
- Page 2 - electronic, mechanical, photocopying, recording, scanning or other, without the prior written permission of Agrident GmbH. Agrident GmbH reserves the right to make changes to any and all parts of this documentation without obligation to notify any person or entity of such changes.
-
Page 3: Table Of Contents
4.2 Getting Started ....................9 4.3 Main Screen and Acoustic Signals ..............11 4.4 Navigating through the menus ............... 12 4.5 Communication interfaces of the APR500 ............. 13 4.6 Battery management ..................15 Advanced Features of the APR500 ..............16 5.1 Alias ...................... - Page 4 APR500 – Classic Mode Warranty ......................41 10. International approvals ..................42 11. Annex A – Online mode output formats ............44 12. Glossary ......................45 13. Index ......................... 46 16.10.2014 Page 4 of 46...
-
Page 5: Introduction
The ACTION CODE PLUS offers the possibility to assign a numeric value in addition to an ACTION CODE – e.g. the weight, pen number, etc. (see chapter 5.2.2). The WEIGTH FROM SCALE feature enables the APR500 to import the weight from electronic scales via RS232 or Bluetooth (see chapter 5.3). -
Page 6: Apr500 Kit
1.2.1 APC500 USB cable The APC500 is an USB cable for the APR500 reader. It has to be connected to the top- mounted plug on the APR side and to an USB-A port on the PC side. It allows data transfer between reader and PC and the internal charging of the batteries, if the Agrident supplied rechargeable batteries are used. -
Page 7: Optional Accessories
The APR500 reader can be purchased with a wide range of optional accessories: 2.1 APC510 RS232 cable The APC510 is an RS232 interface cable for the APR500 reader. It has to be connected to the top-mounted plug on the APR side and to an RS232 port with a male 9pin D-Sub connector on the other side. -
Page 8: Security Advice
4. Basic Operations of the APR500 This chapter introduces the basic operations of the APR500. 4.1 Keys of Operation The APR500 has an ergonomic mobile phone style alphanumeric keyboard with 21 buttons for easy operation. The function of the buttons is described below. Hotkey A... -
Page 9: Getting Started
APR500 – Classic Mode 4.2 Getting Started Press the button in order to activate the APR500. The display will show the APR firmware version briefly… …before the main screen appears. In order to save battery capacity, the APR will switch off after a certain time – this is called “Switch off time”. - Page 10 APR500 – Classic Mode 4.2.2 Transponder Orientation The APR is using a ferrite antenna. Accordingly the flux lines of the electromagnetic field have the following characteristics: As a result of the flux line characteristics, there is a best reading orientation and a worst...
-
Page 11: Main Screen And Acoustic Signals
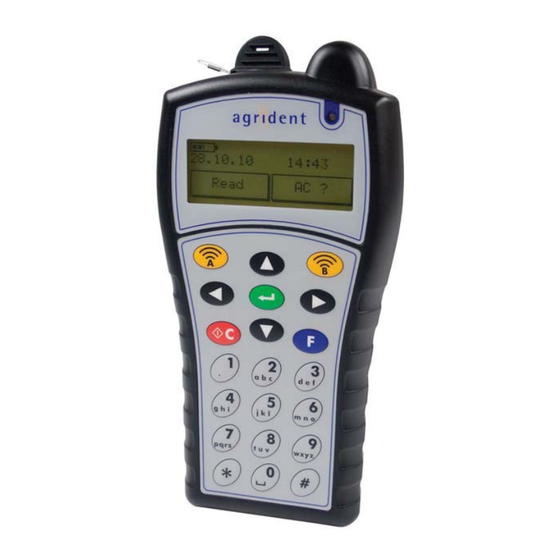
APR500 – Classic Mode 4.3 Main Screen and Acoustic Signals The APR500 has a large backlit graphic display and a buzzer for acoustical signals which can give a multitude of different information. 4.3.1 Main Screen If you switch on the APR500 by pushing the button, the display will switch to the main screen automatically. -
Page 12: Navigating Through The Menus
4.4 Navigating through the menus Button Description Switches the APR500 on and off, changes from a submenu to the next higher menu item and leaves settings in the lowest menu level unaltered. Enters the APRs menu. Scrolls up in the menu, increases numeric values in particular submenus. Changes to capital letters in text input fields. -
Page 13: Communication Interfaces Of The Apr500
APR to the PC via an interface. The APR500 has an USB and an RS232 interface at the top plug, available via the APC500 USB cable or the APC510 RS232 cable. At the bottom of the APR there are contact pins for connecting via the ADS500 docking station. - Page 14 When you connect the APR500 to a particular PC via USB the first time, Windows will detect the new device automatically and ask for a driver. Please choose to install the device manually and use the APR500.inf file from the APR product CD.
-
Page 15: Battery Management
Charging does only work in a temperature range between 0°C and 45°C. If you want to exchange the batteries of the APR500, please follow the instructions below: Turn the screw of the battery cover 90° counter clockwise. You might use a screwdriver or a small coin for that. -
Page 16: Advanced Features Of The Apr500
APR500 – Classic Mode 5. Advanced Features of the APR500 The APR500 can do much more than just simply reading transponders and saving the ID. This chapter explains the additional information that can be linked to the electronic ID. With the Hotkeys A and B you can access functions like Alias, Action Code and Weight from Scale fast and easy. - Page 17 APR500 – Classic Mode 5.1.3 Assignment with the APR using Null-Tags You can also assign the Alias in the field after reading a transponder with the APR using the Assign Ask mode or the Assign Ask Save mode. For this application you also have to create a Tag List on the PC first but you have to leave the ID blank, this is done by creating a Tag List with so called “Null-Tags”.
-
Page 18: Action Codes
APR500 – Classic Mode If you select a specific assigned Alias within the User Tag list by pressing , you can undo the user assignment by pressing . This Alias can be reassigned to any unassigned transponder again as described in chapter 5.1.3. - Page 19 APR500 – Classic Mode 5.2.2 AC Ask Plus mode The same like AC Ask but additionally to the Action Code you have to enter a numeric value: Use the alphanumeric keys in order to enter the value, use in order to delete one digit Confirm your input by pressing If the AC Plus format is set to “On”...
-
Page 20: Weight From Scale
The APR500 needs a serial connection to the scale, either RS232 (see APC510 chapter 2.1) or via Bluetooth. The APR500 has to be set up for the correct scale and interface (see chapter 6.5.4) and the appropriate Hotkey needs to be configured accordingly (see chapter 6.1.1.1). -
Page 21: Group Separator
The group separator feature is also available in Speed Mode and Race Mode. 5.5 Speed Mode If lots of animals have to be read within a short time, the APR500 Speed Mode is a useful feature. If this mode is activated, the reader will initiate continuous reading, whereby continuous means –... -
Page 22: The Apr500 Main Menu
The Speed Mode menu enters the APR500 continuous reading mode. The Race Mode menu item allows to use your Handheld as a data collector for an Agrident Stationary Reader. This feature can only be used if you have an ASR connected to the APR500 via RS232 or Bluetooth. -
Page 23: Operation Menu
APR500 – Classic Mode 6.1 Operation menu The Operation menu is mainly used for the configuration of the two Hotkeys. The Hotkeys can be programmed for performing more complex operations than just reading the EID. You can assign Aliases, Action Codes and weights from a scale to the EID after reading if the Hotkeys are set up correspondingly. - Page 24 AC auto plus: The same like AC Auto but additionally to the Action Code, you have to enter a numeric value. The info text above the Hotkey in the APR500 main screen is “AC auto +” and the first 10 characters of the selected Action Code in this case.
- Page 25 They also offer a kind of fallback plan in case of unintended change of single settings. Up to 10 different custom defined presets can be defined in APR500 at the same time. These are assembled and uploaded with the APR PC-Demo Software.
- Page 26 APR500 – Classic Mode 6.1.3 No Tag Mode menu If the No Tag mode is activated, it is possible to enter data manually if a reading attempt failed, e.g. in case of a lost or broken transponder or a transponder being out of reading range.
-
Page 27: Speed Mode Menu
For more detailed information regarding the Speed Mode, please read the separate Speed Mode manual. 6.3 Race Mode menu As already mentioned in this manual you require an Agrident Stationary Reader for using this feature. Please read the separate Race Mode Manual for further details. 16.10.2014... -
Page 28: Data Menu
APR500 – Classic Mode 6.4 Data menu The Data menu gives you access to the stored data and lists. You can watch the collected data and the Tag List, clear single lists or the complete memory, send the memory content directly to another device via the serial port and look for the remaining memory capacity. - Page 29 APR500 – Classic Mode When you select an entry via the button you can see the number within the list, the Alias, the assigned EID (unassigned Alias will display 000000000000000) and whether the assignment of Alias and EID was made prior to the Tag List upload (‘PC assigned’), assigned via the Hotkeys (‘User assigned’) or if it is still unassigned.
- Page 30 If several different interfaces are available you have to select one before the datasets are being sent. It is possible to send the data via RS232 (always available), via USB (only available if the APR500 is connected via USB) or via Bluetooth (only available if there is an active Bluetooth connection).
-
Page 31: Setup Menu
APR500 – Classic Mode 6.5 Setup Menu The Setup menu basically contains all settings concerning hardware. Here you will find configuration options for interface, display, time and date and the RFID module. 6.5.1 Display menu In this submenu various display settings can be adjusted. - Page 32 If you want to use the Weight from Scale feature (see chapter 5.3) you need to configure the APR500 to the corresponding scale type and interface. Scale Type: Here you can choose the scale type that you want to connect to for weighing data import.
- Page 33 (see chapter 4.6). 6.5.6 Software version menu In the Software version menu you can find information about the APR500 Firmware version, its serial number, boot loader version, the hardware revision and the version information for the internal RFID and BT modules. Scroll from one information to the next using the buttons.
- Page 34 – so the reader needs a threshold. We recommend not to change that setting without previous contact to Agrident in order to prevent reading problems. Double read: With the Double Read function you define, that the same transponder cannot be saved twice or more within a certain time. You can select values between OFF (disabled), 15, 30, 45 and 60 seconds.
- Page 35 APR500 – Classic Mode 6.5.8.3 Online Mode menu The Online mode allows sending an ID to other devices (e.g. a PC, PDA, scale) over the serial port immediately after it was saved. A PC or PDA requires corresponding software which is able to collect incoming data on the serial port. The “Online window” of the APR PC-Demo Software can be used for testing purposes.
- Page 36 APR500 – Classic Mode 6.5.8.4 Display format menu In this submenu you can choose how the EID is displayed and saved. ID Format: Here you can determine how the transponder ID is displayed, either in ISO-mode, which decodes the EID according to ISO 11784 or in HEX-mode where the ID is displayed as a hexadecimal string.
-
Page 37: Bluetooth Menu
Start BT Inquiry: Starts scanning for other BT devices. The discovered devices can be selected as the remote device for the APR500 – this is called “Pairing”. In Master Mode the APR500 will established the connection to the remote device automatically. -
Page 38: Menu Structure And Factory Defaults
APR500 – Classic Mode 6.7 Menu Structure and Factory Defaults For a detailed description of the menus, see the corresponding chapters 6.1 - 6.6. Operation Hotkey Configuration Hotkey A Factory Default Hotkey mode No Action Code Action Code list Search mode... - Page 39 APR500 – Classic Mode Factory Default Advanced Setup RFID Settings Read Length 7 seconds Transponder Types FDX+HDX Wireless Sync Sync Level 1600 mV Double Read No double check Baud Rate 9600 Online Mode Data short Display format ID Format Country Code...
-
Page 40: Technical Data
APR500 – Classic Mode 7. Technical Data Frequency 134.2 kHz Transponder types HDX (ISO 11784/5) FDX-B (ISO 11784/5) Optional H4002 and compatible Reading range Approx. 25 cm with HDX transponder of a 30 mm Up to 20 cm with FDX-B transponder... -
Page 41: Safety And Care
The manufacturer accepts no liability for damage resulting from improper use or use not consistent with that described in these operating instructions. The APR500 Reader contains no parts that can be repaired by the user. For this reason the Reader Electronic may only be repaired by authorized customer service personnel. -
Page 42: International Approvals
10. International approvals CE marking Hereby, Agrident BV declares that this equipment, if used according to the instructions, is in compliance with the essential requirements and other relevant provisions of the RTTE Directive 1999/5/EC. For use in all countries of the EU. - Page 43 Handheld Devices The APR500 has also passed the ICAR approval for synchronizing transceivers according This device was tested for typical handheld operation. Use only Agrident tested and approved to ISO11784/11785 and ISO24631-2 successfully. accessories to ensure FCC Compliance. The use of third-party accessories may not comply with FCC RF exposure compliance requirements, and should be avoided.
-
Page 44: Annex A - Online Mode Output Formats
The structure of the ISO 24631 format: The ISO 24631 uses “0x02” as the start character of the telegram. That´s why the APR500 is using this start character as factory default. Anyway you might also change for another start character. -
Page 45: Glossary
APR500 – Classic Mode 12. Glossary Action Code (AC) An Action Code is a string of up to 14 alphanumeric characters. Action Codes allow to assign events like sale, movement, disease or treatment to animal IDs. An Action Code can be combined with the transponder ID after reading. It can only be assembled and uploaded to the APR using appropriate software. -
Page 46: Index
APR500 – Classic Mode 13. Index AC Ask ........23 ISO Mode ........35 AC Ask Plus ........ 23 Keypad .......... 7 AC Auto ......... 23, 26 Language ........30 AC Auto Plus ......23, 26 Main menu ........21 AC Plus format ......
Need help?
Do you have a question about the APR500 and is the answer not in the manual?
Questions and answers