Table of Contents
Advertisement
Quick Links
aspenhome
ah
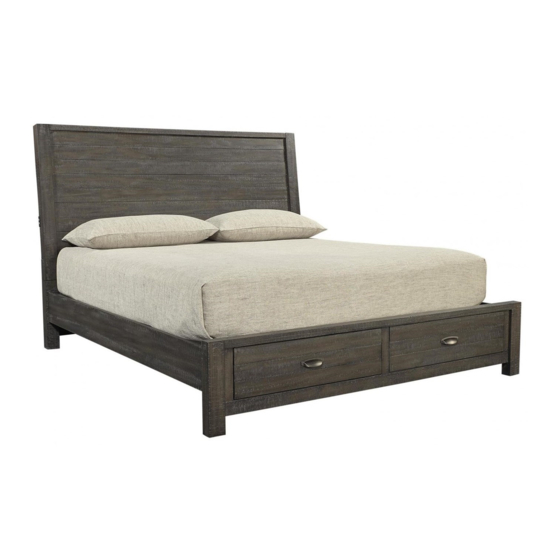
ITEM NO: I240-400-RIV
I240-402-RIV
I240-403D-RIV Queen Storage FB
Thank you for purchasing this quality product. Be sure to check all packing material carefully for
small parts that may come loose inside the carton during shipment.
I240-400
I240-402
HARDWARE LIST: I240-400
Description
No.
Bolt Ø5/16"*2-1/2"
A
Bolt Ø1/4"*1-1/2"
B
Lock Washer Ø5/16"
C
D Flat Washer Ø5/16" *3/4"
E
Allen Wrench 4mm
HARDWARE LIST: I240-402
Description
No.
Hanger Bolt Ø5/16"*3-3/8"
F
G
Half Moon Washer 5/16"
Lock Washer Ø5/16"
H
Hex Nut Ø5/16"
I
J
Hex Wrench 12mm
K
Wood Screw M4*1-1/4"
HARDWARE LIST: I240-403D
Description
No.
Bolt Ø1/4"*1-3/8"
L
M Bolt Ø1/4"*1-1/2"
N Lock Washer Ø1/4"
Flat Washer Ø1/4" *3/4"
O
P
Allen Wrench 4mm
Q
Wood Screw M4*13/16"
BEFORE USING THIS PRODUCT PLEASE READ, UNDERSTAND, AND FOLLOW THESE INSTRUCTIONS.
Save these instructions for future reference.
Page 1/4
Queen Sleigh HB
Queen Rails
UNIT SHOULD BE INSTALLED BY 2 OR MORE PERSONS.
I240-403D
Quantity
Sketch
6 PCS
8 PCS
14 PCS
14 PCS
1 PC
Quantity
Sketch
8 PCS
8 PCS
8 PCS
8 PCS
1 PC
8 PCS
Quantity
Sketch
4 PCS
8 PCS
12 PCS
12 PCS
1 PC
8 PCS
FOR INDOOR USE ONLY
MADE IN VIETNAM
ASSEMBLY INSTRUCTIONS
R
All Beds need to be set up in the exact final
location so that after full assembly it will not
need to be moved. Moving the bed will cause
the support legs to move out of perpendicular
(90 degree), weaken the support system, and
may allow the bed to collapse.
TOOLS REQUIRED (NOT PROVIDED)
PHILLIPS SCREWDRIVER
COMPONENTS LIST: I240-400
Description
No.
1
Headboard
Left Leg
2
Right Leg
3
4
Wood Stretcher
Center Support Leg
5
COMPONENTS LIST: I240-402
Description
No.
1
Bed rails
2
Slats
COMPONENTS LIST: I240-403D
Description
No.
1
Footboard
Support Leg (for center rail)
2
Support Leg (for pedestal)
3
Decking
4
5
Center rail
Quantity
Sketch
1 PC
1 PC
1 PC
1 PC
1 PC
Quantity
Sketch
2 PCS
4 PCS
Quantity
Sketch
1 PC
2 PCS
2 PCS
4 PCS
1 PCS
05-31-2017
Advertisement
Table of Contents

Summary of Contents for aspenhome I240-400-RIV
- Page 1 ASSEMBLY INSTRUCTIONS ITEM NO: I240-400-RIV Queen Sleigh HB I240-402-RIV Queen Rails I240-403D-RIV Queen Storage FB Thank you for purchasing this quality product. Be sure to check all packing material carefully for small parts that may come loose inside the carton during shipment.
- Page 2 ASSEMBLY INSTRUCTIONS ITEM NO: I240-400-RIV Queen Sleigh HB I240-402-RIV Queen Rails I240-403D-RIV Queen Storage FB STEP 1: Lay the headboard face down on a soft surface. Attach the left leg and right leg to headboard by using 6 bolts(A), lock washers(C) and flat washers(D).
- Page 3 ASSEMBLY INSTRUCTIONS ITEM NO: I240-400-RIV Queen Sleigh HB I240-402-RIV Queen Rails Slat bearer in I240-403D-RIV Queen Storage FB upper position Slat bearer in STEP 5: The side rails may be used on lower position either side. Arrange the side rails so the slat bearers are in UPPER POSITION prior to attachment in STEP 6.
- Page 4 ASSEMBLY INSTRUCTIONS ITEM NO: I240-400-RIV Queen Sleigh HB Center Rail I240-402-RIV Queen Rails I240-403D-RIV Queen Storage FB STEP 8: Attach 2 support legs (for center rail) to the center rail using 4 bolts(M), lock washers(N) and flat washers(O). Use the Allen Wrench (P) to tighten all of the bolts.


Need help?
Do you have a question about the I240-400-RIV and is the answer not in the manual?
Questions and answers