
Related Manuals for Elvaco CMe3100


Summary of Contents for Elvaco CMe3100
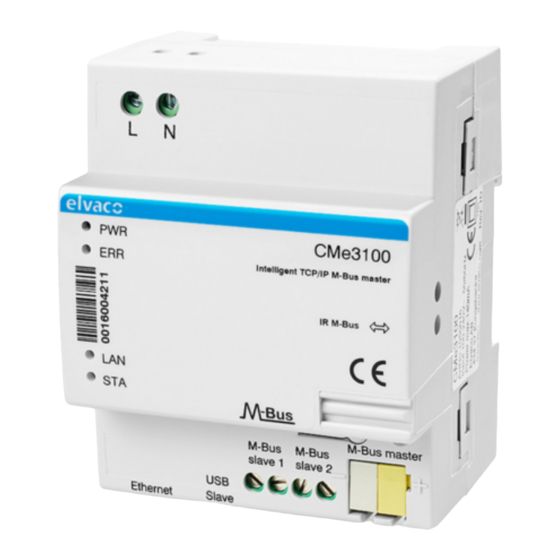
- Page 1 CMe3100 User's Manual English v 1.3 CMe3100 User's Manual English– Version 1.3...
-
Page 2: Table Of Contents
CMe3100 User's Manual English Content DOCUMENT NOTES ............................5 ..........................5 OPYRIGHT AND RADEMARK ................................ 5 ONTACTS IMPORTANT USAGE AND SAFETY INFORMATION ..................6 USING THIS MANUAL ............................ 7 ............................. 7 URPOSE AND AUDIENCE ............................7 NLINE RESOURCES ................................ 7 OTATION 3.3.1... - Page 3 CMe3100 User's Manual English 6.4.2 Change the hostname (optional) ......................20 6.4.3 Set the Domain Name Server ......................21 .............................. 21 NSTALL METERS 6.5.1 Create and install a list of Wired M-Bus meters ................. 23 6.5.2 Create and install a list of Wireless M-Bus meters ................23 6.5.3...
- Page 4 CMe3100 User's Manual English 6.24.1 Upload a certificate for device authentication ................... 55 6.24.2 Enable HTTPS to access web interface ....................56 6.24.3 Authenticate receiving servers of HTTPS/FTPS Push Reports.............. 57 6.24.4 Enable HTTPS/FTPS for individual Push Reports ................. 58 ..........................
-
Page 5: Document Notes
Copyright and Trademark © 2016, Elvaco AB. All rights reserved. No part of the contents of this manual may be transmitted or reproduced in any form by any means without the written permission of Elvaco AB. Printed in Sweden. -
Page 6: Important Usage And Safety Information
Failure to comply with these precautions violates safety standards of design, manufacture and intended use of the product. Elvaco AB assumes no liability for customer’s failure to comply with these precautions. -
Page 7: Using This Manual
3 Using this manual Purpose and audience This manual provides all information needed to mount, install, configure and use the CMe3100 M-Bus Metering Gateway, and is intended for field engineers and developers. The information is based on software version 1.8.0. Please note that other versions may exhibit slight differences in appearance and/or functionality. -
Page 8: Symbols
CMe3100 User's Manual English Example 2: To configure FTP Push Report default settings, go to Configuration > Push Reports > FTP settings. Symbols The following symbols are used throughout the manual to emphasize important information and useful tips: The Note symbol is used to mark information that is important to take into consideration for safety reasons or to assure correct operation of the Metering Gateway. -
Page 9: Introduction
Application description 4.2.1 Applications The CMe3100 is, directly out of the box, a very powerful and versatile M-Bus Metering Gateway. It can be extended in various ways using a flexible model for licence and add-on upgrades. While there are many ways to utilize the potential in the CMe3100, its three core application areas are: 1. -
Page 10: Metering And Local Integration With Plc/Dcs
CMe3100 without affecting its normal operation or having to communicate with the M-Bus meters directly. If the CMe3100 is used in a mixed application with metering reports and high demand for real-time meter values being supplied to a PLC or a DCS, there is an additional mode available, Continuous Readout Mode. -
Page 11: Product Features
M-Bus system. The key features of the product include: • An integrated M-Bus Master which can drive up to 32 unit loads (32T). By using an Elvaco M- Bus Master it is possible to extend this number up to 256 unit loads. -
Page 12: Integration With Other Products
4.4.2 Integration with other products The CMe3100 can be used in combination with an M-Bus Master from Elvaco to increase the number of slave devices it is able to drive (the device can by default drive up to 32 unit loads, where one load equals 1.5 mA). -
Page 13: Getting Started
15. Push button Mount the device The CMe3100 is mounted on a DIN-rail. The metallic clip on the bottom is used to attach and detach the CMe3100. For safety reasons, a DIN-rail enclosure must cover the terminals. Connect the device 5.4.1 Power supply... -
Page 14: M-Bus Master
5.4.4 Ethernet The CMe3100 is equipped with an Ethernet port to be able to connect to the local network. Use a cable of at least category 5e and connect it to the Ethernet port (9). On successful network connection, the yellow LED (6) will be permanently on or flashing, indicating active communication. -
Page 15: Wiring Diagram
Start up the device 5.5.1 Start-up When connected to a power supply, the CMe3100 will undergo a boot-up for approximately 20 seconds. Thereafter, the green LED (3) and the red LED (4) will begin to flash and the device is ready to use. -
Page 16: Access The Web Interface
5.6.1 Log in on the web interface from a browser The CMe3100 is configured through its web interface, which is easily reached via the local USB slave port (10). Connect the included USB cable between a computer and the Metering Gateway. After approximately 30 seconds, a new removable disk will be available on the computer. -
Page 17: Change The Default Administrator Password
CMe3100 User's Manual English 5.6.2 Change the default administrator password Use a strong password with at least 8 characters consisting of both letters and numbers. The password is case sensitive. Make sure to write your credentials down, since the only way of resetting the password is through a factory reset of the product. -
Page 18: Operations Guide
This chapter provides instructions on how to use the web interface to configure the most basic settings of the CMe3100. After executing each step of this chapter, the Metering Gateway will perform scheduled readouts of its installed meters, and deliver customized reports with meter values. Please read through each step carefully. - Page 19 CMe3100 User's Manual English a time synchronization attempt before interrupting the action. • Click Save. The time synchronizing schedule that should be used depends on how tightly clocks need to be synchronized. Assuming that the maximum accepted time drift is in the order of one...
-
Page 20: Configure Network Settings
If not changed, a default name based on the product name and serial number will be used, e.g. “cme3100–0016002383”. The hostname is ONLY used for network addressing and should not be confused with the product’s name, the latter is used to identify the product in e.g. Push Reports. For more information about how to configure the device name used in Push Reports, see section 6.34... -
Page 21: Set The Domain Name Server
CMe3100 User's Manual English 6.4.3 Set the Domain Name Server The Domain Name Server (DNS) is used to find and retrieve information about the IP address corresponding to a certain domain name. The DNS is added manually when using static IP assignment. If using the dynamic IP address option, DNS settings will be assigned automatically upon connection to the network. - Page 22 CMe3100 User's Manual English installation to help assure it was successful. Make sure that your licence matches the number of meters included in the Meter List. If you try to install more meters than your licence supports, some will be marked as “passive”.
-
Page 23: Create And Install A List Of Wired M-Bus Meters
When using Wireless M-Bus, the Metering Gateway communicates with meters through one or several Wireless M-Bus Receivers. Each Elvaco Wireless M-Bus Receiver will assign itself with an enhanced address and by combining it with the secondary address of the meter, the communication chain is specified. -
Page 24: Install Meters Through A Meter Search
CMe3100 User's Manual English • Click Install to upload the Meter List to the web interface, and install the included meters. Figure 6: Example file of wireless Meter List If conditions have changed since the last installation, for example if a meter has been moved, another Wireless M-Bus Receiver might be able to establish a clearer connection with that meter. -
Page 25: Schedule Meter Readouts
CMe3100 User's Manual English • Open the downloaded document. • There are four different tabs in the Commission Report. The first one provides an overview of the Metering Gateway settings, the second tab contains an overview of installed slave devices, the third tab displays the latest readout of each installed meter and the fourth tab provides an overview of what slave devices that have Modbus enabled. -
Page 26: Configure Push Report Default Settings
CMe3100 User's Manual English Configure Push Report Default settings Purpose When all meters have been installed and the readout schedule has been set, Push Reports can be enabled. The Push Reports structure the data from the meter readouts by a chosen template, and are delivered by a set schedule and protocol. -
Page 27: Configure Ftp Push Report Default Settings
Go to Configuration > Push Reports > FTP settings. • Set the address to a valid FTP server. • Add credentials for the CMe3100 to access the FTP server. • Click Save. CMe3100 User's Manual English page | 27 (91) -
Page 28: Configure Http Push Report Default Settings
Add a URL to a valid HTTP server where the Push Reports will be received. • Set the Authentication mode (basic or none). If using the basic mode, add credentials for the CMe3100 to access the HTTP server. • Click Save. -
Page 29: Schedule Push Reports And Event Reports
CMe3100 User's Manual English Schedule Push Reports and Event Reports Purpose After the Push Report default settings have been made, individual reports can be configured. By going to Configuration > Push Report, an overview of all available reports and their current status is provided. -
Page 30: Enable And Configure Push Reports
CMe3100 User's Manual English 6.9.1 Enable and configure Push Reports To configure Push Reports: • Go to Configuration > Push Report and click on an arbitrary Push Report. • Set what type of report to use (e-mail, FTP or HTTP) and the desired template. -
Page 31: Enable And Configure Event Reports
CMe3100 User's Manual English 6.9.2 Enable and configure Event Reports To enable and configure Event Reports: • Go to Configuration > Push Reports and select one of the Event Reports by clicking on it. • Set what type of report to use (e-mail, FTP or HTTP) and the desired template. - Page 32 CMe3100 User's Manual English CMe3100 User's Manual English page | 32 (91) 2018-02-22 Document id 19288 Version 1.3...
-
Page 33: Common Operations
Common operations Purpose At this point you should have gotten started with your CMe3100, and are receiving recurrent Push Reports with meter values. This chapter will present some common features, which will help you enhance the operation of your Metering Gateway even further. -
Page 34: Create A Backup File
CMe3100 User's Manual English Create a backup file Purpose A backup file contains all meter values stored by the Metering Gateway and all settings including device specific settings. By using a backup file, the settings and stored data of a device may be completely restored and is suitable for restoring a device if the hardware is replaced. -
Page 35: Check Device And Meter Settings
CMe3100 User's Manual English Check device and meter settings Purpose There are several different ways to use the web interface to check the current settings of the Metering Gateway and its installed meters. As three main sources you may use: •... -
Page 36: Check The Device Overview
CMe3100 User's Manual English 6.13.2 Check the device overview To check the device overview: • Go to Device > About. • The device overview will display Metering Gateway information and scheduled tasks. CMe3100 User's Manual English page | 36 (91) -
Page 37: Download A Meter Settings Report
CSV”. Click Execute to start the download. To learn more about the different log entries of the System Log and how they are interpreted, go to our support site, https://support.elvaco.com/hc/en-us, and download the document named “CMe3100 Guide to System Log”. -
Page 38: Set The Minimum Severity Level Of Logged Events
CMe3100 User's Manual English 6.14.2 Set the minimum severity level of logged events The minimum severity level for an event that gets stored in the System log is also configurable but should generally not be adjusted without good reasons as it may cause important information to be lost or the log to become very extensive. - Page 39 CMe3100 User's Manual English • Go to Meters and click on the secondary address of a meter. • Click Readings. Here, the status and time of recent readouts of that specific meter are displayed. • By setting a start and an end date, readings conducted over that specific time period will be displayed.
-
Page 40: Install Encryption Keys For Wireless Meters
Install encryption keys for wireless meters Purpose The CMe3100 has a built-in management system for wireless encryption keys. The meter encryption key is registered in the web interface and will be used by the Metering Gateway to enable decryption of incoming messages. -
Page 41: Add An Encryption Key Through A File Upload
CMe3100 User's Manual English Figure 7: Template of encryption key file Encryption key field Explanation Address This field contains the secondary address of the meter that the encryption key will be applied to. Set “-1” to exclude this field from the matching criteria. -
Page 42: Add An Encryption Key Directly In The Web Interface
CMe3100 User's Manual English Figure 8: Encryption key example file 6.15.2 Add an encryption key directly in the web interface To enter an encryption key directly in the web interface: • Go to Meters > Encryption keys. • Click Add new key. -
Page 43: Link An Encryption Key To An Individual Meter
CMe3100 User's Manual English 6.15.3 Link an encryption key to an individual meter The Metering Gateway supports linking encryption keys to individual meters. Using this option will make the device apply the key to decrypt information from the linked meters only. - Page 44 CMe3100 User's Manual English CMe3100 User's Manual English page | 44 (91) 2018-02-22 Document id 19288 Version 1.3...
-
Page 45: Configure Settings For An Individual Meter
CMe3100 User's Manual English Configure settings for an individual meter Purpose In some cases, it might be desired to configure individual settings of a specific meter. This might for example include changing the Measurement Object Identification (MOID), switching the state of the meter from active to passive (which will exclude it from the meter readout cycle) or changing the interface used by the Metering Gateway when communicating with the meter. -
Page 46: Configure Communication Settings Of An Individual Meter
CMe3100 User's Manual English 6.16.2 Configure communication settings of an individual meter Switching a meter’s status from active to passive means that it will no longer be included in the meter readout process. If more meters are installed than the software license supports, the latest installed meters will automatically be set to passive. - Page 47 CMe3100 User's Manual English CMe3100 User's Manual English page | 47 (91) 2018-02-22 Document id 19288 Version 1.3...
-
Page 48: Special Operations
Metering Gateway and the M-Bus system. Update software Purpose Elvaco regularly launches new software updates for products to enable continuous improvement and new functionality. New software can easily be installed using the web interface, simply by uploading the software file. -
Page 49: Administrate User Accounts
CMe3100 User's Manual English Administrate user accounts Purpose Through the web interface, user accounts to log in on the web interface can be added, edited or deleted. 6.19.1 Add a new user account To add a new user account: •... -
Page 50: Delete An Existing User Account
CMe3100 User's Manual English 6.19.3 Delete an existing user account To delete an existing user account: • Go to Configuration > Users. • Click the delete (trashcan) symbol in the “Options” column of the account to be deleted. • Click Yes. -
Page 51: Add A New License
Add a new license Purpose The CMe3100 is equipped with a flexible licensing scheme that allows its capabilities and feature set to be altered through the addition of license files. See section 4.4.1 for more information about the licensing scheme. A license file needs to be uploaded to the web interface before the new capabilities are implemented on the Metering Gateway. - Page 52 CMe3100 User's Manual English also be set to determine what addressing mode will be used if the first choice should not work. • Set the Interfaces to use to search for meters. Possible options include “integrated M-Bus master” (2-wire M-Bus), “TCP/IP” (Ethernet) or a combination of both. Click Add new to select an additional interface.
-
Page 53: Perform Manual Meter Readouts
CMe3100 User's Manual English Perform manual meter readouts Purpose The manual meter readout is most often used in troubleshooting purpose, to ensure that the readout process works the way it is supposed to. It will trigger a readout of one or all meters without having to wait for the scheduled readout cycle. -
Page 54: Activate The Continuous Readout Mode
CMe3100 User's Manual English • Select the desired meter and click the readout (floppy) symbol. • Click the update symbol and make sure that the latest readout was successful by checking the “Last readout” and the “Status” column. Activate the Continuous Readout Mode Purpose The Metering Gateway offers the possibility of performing meter readouts continuously. -
Page 55: Enable Security Features
CMe3100 User's Manual English • Go to Meters > Readout schedule. • Click on Activate Continuous readout mode. • Click Save. Enable security features Purpose The Metering Gateway supports HTTPS and FTPS, where a Secure Socket Layer (SSL) is used to encrypt data between the device and the HTTP/FTP server. -
Page 56: Enable Https To Access Web Interface
CMe3100 User's Manual English with the certificate. • Click Install. • Click Save. 6.24.2 Enable HTTPS to access web interface When enabling HTTPS for accessing the web interface, connecting clients will be authenticated by the Metering Gateway by using certificates uploaded in the device TrustStore. -
Page 57: Authenticate Receiving Servers Of Https/Ftps Push Reports
CMe3100 User's Manual English 6.24.3 Authenticate receiving servers of HTTPS/FTPS Push Reports CMe3100 supports transmission of Push Reports over HTTPS/FTPS. Server certificates uploaded in the TrustStore will then be used to authenticate a receiving server before sending a Push Report. By uploading a complete TrustStore, a list of trusted server certificates (for example Java standard TrustStore) can be uploaded and used by the device. -
Page 58: Enable Https/Ftps For Individual Push Reports
CMe3100 User's Manual English 6.24.4 Enable HTTPS/FTPS for individual Push Reports HTTPS/FTPS can be enabled for all Push Reports, without changing the default Push Report HTTP/FTP server of the device. To enable HTTPS/FTPS for an individual Push Report: • Go to Configuration > Push Reports. Select the Push Report you want to configure. -
Page 59: Configure M-Bus Time And Retry Settings
CMe3100 User's Manual English • Set the Addressing mode that will be used in the meter search. A priority order can also be set, determining what addressing mode to use if the first choice should not work. • Set the Interfaces to search for meters. If using “Integrated M-Bus”, meters will be accessed over the M-Bus interface. -
Page 60: Configure M-Bus Multi Telegram Settings
CMe3100 User's Manual English Metering Gateway. Table 7 provides a full description of possible customization options. To configure the M-Bus time and retry settings: • Go to Meters > M-Bus settings and check the Show advanced settings box. • Set the Response timeout, Readout retries, Selection retries, Initialization idle time, Collision idle time and Request idle time. -
Page 61: Configure M-Bus Settings Of An Individual Meter
CMe3100 User's Manual English will be read for each meter readout, regardless of if the meter is trying to send additional ones. The maximum amount of telegrams per readout is configured by setting the multi telegram read limit. To configure M-Bus multi telegram settings: •... -
Page 62: Access The M-Bus From A Master Device
CMe3100 User's Manual English • Go to Settings. • Set the Baud rate that will be used by the Metering Gateway to communicate with the meter. • Set the Addressing mode that will be used by the Metering Gateway to access the meter. If using the wireless addressing mode, you may select through which Wireless M-Bus Receiver the meter should be accessed. -
Page 63: Enable A Master Device To Communicate Directly On The M-Bus
CMe3100 User's Manual English completely bypassing the Metering Gateway. A maximum of two different Transparent M-Bus TCP/IP services with different baud rates can be enabled at the same time It is not recommended to enable the Transparent M-Bus service if other services that access the M-Bus, e.g. -
Page 64: Access Meter Readings From A Master Device
The Metering Gateway supports Virtual M-Bus communication over TCP/IP, which means that another master device can retrieve data directly from the database of the CMe3100. When using the Virtual M- Bus mode, the master device will never communicate directly on the M-Bus, but only with the Metering Gateway and its meter value database. - Page 65 CMe3100 User's Manual English without the need of reconnecting and also assures that a connection that is lost, automatically closes after the timeout period. It will work well in a majority of cases. However, the Idle timeout needs to be set to reflect the connection scheme of the master device.
-
Page 66: Use M-Bus Slave Ports For Virtual Or Transparent M-Bus
CMe3100 User's Manual English Use M-Bus slave ports for Virtual or Transparent M-Bus Purpose The Metering Gateway has two slave ports available, which can be used by a master device to access the Virtual or Transparent M-Bus services. Each port can be individually configured by setting the baud rate, packing interval and idle timeout settings. - Page 67 CMe3100 User's Manual English CMe3100 User's Manual English page | 67 (91) 2018-02-22 Document id 19288 Version 1.3...
-
Page 68: Allow A Master Device To Perform Readouts Over Modbus
CMe3100 User's Manual English Allow a master device to perform readouts over Modbus Purpose The Metering Gateway supports meter readouts by master devices over the Modbus protocol, which might for example be desired in a Digital Control System. The Modbus readout is performed by TCP/IP (Ethernet network). -
Page 69: Monitor Metering Status Using Snmp
Table 8: Aggregated status of meter readouts and Push Reports CMe3100 uses a MIB-file, which can be downloaded from the web interface, to structure lists that will present the SNMP manager with the status of the last meter readout and the last round of Push Reports. -
Page 70: Enable And Configure The Snmp Service
“1”. If it failed, the status code will be “3”. Status code “2” indicates that CMe3100 was unable to decrypt the last message from that specific meter or that the meter has never been read. -
Page 71: Set Recipients Of Snmp Traps (Optional)
Set Trap notification retries to determine the maximum number of retries the CMe3100 will perform when trying to notify a trap receiver. • Set “Trap timeout” to determine the maximum number of seconds the CMe3100 will wait for a response from the SNMP manager when sending a trap notification. •... -
Page 72: Enable Automatic Updates Of Configuration Settings
CMe3100 User's Manual English Enable automatic updates of configuration settings Purpose By activating the Auto Configuration service, the Metering Gateway will periodically check a URL for a settings command file (.cad file) which will be downloaded and parsed. The settings command file can include settings updates similar to what is possible using the command line interface. -
Page 73: Configure Advanced Push Report Settings
CMe3100 User's Manual English Configure advanced Push Report settings Purpose There is a group of more advanced Push Reports settings, configurable through the web interface of the Metering Gateway. These include: • The Adaptive Retries functionality, which adjust retry attempts for failed Push Reports to the schedule in use. -
Page 74: Disable Adaptive Retries
CMe3100 User's Manual English 6.32.1 Disable Adaptive Retries The Adaptive Retries ensure that all Push Report retry attempts are performed before the next scheduled Push Report is going to be sent. For example, if the Push Report schedule is set to every 16 minute, up to two retries will be attempted with 300 seconds between each one. -
Page 75: Configure The Value Period
CMe3100 User's Manual English 6.32.2 Configure the Value Period The Value Period of the Metering Gateway can be set to “Auto” or to a fixed number. Using the “Auto” settings will deliver all previously unsent meter values up to a max limit of 180 meter readouts. For... -
Page 76: Configure The Value Interval
CMe3100 User's Manual English 6.32.3 Configure the Value Interval To configure the Value Interval: • Go to Configuration > Push Reports. Select a Push Report by clicking on it. • Set the Value Interval to determine the time between each meter readout included in the Push Report. -
Page 77: Configure The Push Report Timeout Settings
CMe3100 User's Manual English 6.32.4 Configure the Push Report timeout settings To configure the Push Report timeout settings: • Go to Configuration > Services > Push Reports. • Set the desired Timeout for each protocol. Setting it to “-1” will disable the timeout functionality of the Metering Gateway, and instead let the server determine when a connection should be closed. -
Page 78: Configure Job Retry Settings
CMe3100 User's Manual English Configure Job retry settings Purpose The job retry settings determine how the Metering Gateway will perform retry attempts for scheduled and manual jobs, for example meter readouts, if failing the first time. If Adaptive Retries have been disabled for Push Reports, and no other retry settings have been configured for the Metering Gateway, these job retry settings will also affect the Push Report retry settings. -
Page 79: Access The Device Through A Console Application
CMe3100 User's Manual English Access the device through a console application Purpose The Metering Gateway can be accessed through a console application, i.e. by using a command-line interface. This is most often used for troubleshooting and advanced operations. To increase the security of the console application, the Metering Gateway supports the usage of passwords to access different levels of device functions. - Page 80 CMe3100 User's Manual English CMe3100 User's Manual English page | 80 (91) 2018-02-22 Document id 19288 Version 1.3...
-
Page 81: Use On Demand Reports
• Set the protocol to receive the report by and a report template. To learn more about the report templates available, please visit our support site https://support.elvaco.com/hc/en-us. • Add recipients of the On Demand Report. -
Page 82: Configure Identity Settings
CMe3100 User's Manual English Configure identity settings Purpose Configuring device identity settings includes assigning an identity for the Metering Gateway, which will be displayed as the sender of Push Reports, as well as contact information to be included in the Push Reports. -
Page 83: Configure Localization Settings For Push Reports
CMe3100 User's Manual English 6.36.2 Configure localization settings for Push Reports To configure localization settings for Push Reports: • Go to Configuration > Localization > Conventions. • Set Desired language, Decimal separator and First day of the week. The Character encoding should be set with respect to the operational system used to make sure that all characters of the Push Reports will be encoded correctly. -
Page 84: Perform A Reboot Of The Device
CMe3100 User's Manual English Perform a reboot of the device Purpose In rare cases, e.g. in case of troubleshooting, it might be desired to perform a reboot of the Metering Gateway. This can be done directly through the web interface. -
Page 85: Reset The Device To Factory Default Settings
CMe3100 User's Manual English Reset the device to factory default settings Purpose By performing a factory reset of the Metering Gateway, all settings will be reset to default and the meter value database and logs will be cleared. 6.38.1 Perform a factory reset To perform a factory reset: •... - Page 86 CMe3100 User's Manual English Cron pattern Description 15 * * * * Schedule a job 15 minutes past every hour, i.e. 00:15, 01:15, 02:15 etc. */15 * * * * Schedule a job every 15 minute, i.e. 00:00, 00:15, 00:30, etc.
-
Page 87: Technical Specifications
CMe3100 User's Manual English 7 Technical specifications Characteristics Type Value Unit Comments Mechanics Casing material Polyamide Protection class IP20 Dimensions (w x h x d) 70 x 90 x 64 4 DIN modules Weight Mounting DIN rail Mounted on DIN rail (DIN 50022) - Page 88 CMe3100 User's Manual English interface Virtual M-Bus TCP/IP and M- Bus 2-wire slave interface Decryption Integrated M-Bus Master M-Bus standard EN 13757 Full M-Bus decoder implemented M-Bus baud rate 300 and 2400 bit/s Nominal voltage Maximum unit loads 32/48 T/mA...
-
Page 89: Type Approvals
CMe3100 User's Manual English 8 Type approvals CMe3100 is designed to comply with the directives and standards listed below. Approval Description EN 61000-6-2, EN 61000-6-3 Safety EN 61010-1, CAT 3 Table 12: Type approvals CMe3100 User's Manual English page | 89 (91) -
Page 90: Document History
CMe3100 User's Manual English 9 Document History Versions Version Date Description Author 2016-11 Initial version Anton Larsson 2017-03 Added information about new Anton Larsson feature “SNMP” 2017-12 Added information about new Anton Larsson security feature “FTPS” 2018-02 Added links to new website... -
Page 91: References
CMe3100 User's Manual English 10 References Terms and abbreviations Abbreviation Description Certificate Authority Comma-Separated Values Digital Control System DHCP Dynamic Host Configuration Protocol Domain Name Server Media Access Control MOID Measurement Object Identification Network Time Protocol Programmable Logic Controller Secure Sockets Layer...
Need help?
Do you have a question about the CMe3100 and is the answer not in the manual?
Questions and answers