Table of Contents

Subscribe to Our Youtube Channel
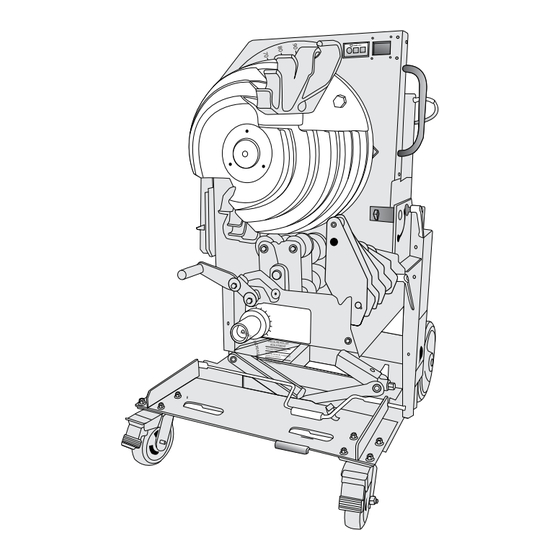
Related Manuals for Southwire BENDMAX


Summary of Contents for Southwire BENDMAX
- Page 1 Operating Instructions BEND Power Bender ™ (PB-2000) Read and understand all of the instructions and safety information in this manual before operating or servicing this tool. FAILURE TO OBSERVE THESE WARNINGS CAN RESULT IN SEVERE INJURY OR DEATH.
-
Page 2: Table Of Contents
BEFORE OPERATING THIS TOOL, READ AND UNDERSTAND ALL OF THE INSTRUCTIONS AND SAFETY INFORMATION IN THIS MANUAL TABLE OF CONTENTS Description..............Page 2 Safety................Page 2 Purpose of this Manual...........Page 2 Important Safety Information..........Pages 3-4 Grounding Instructions…………………………………..Page 5 .Pages 5-6 Features................Page 7 Transportation.............. -
Page 3: Description
• Intermediate Metallic Conduit • Rigid Conduit SAFETY Safety is essential in the use and maintenance of Southwire Tools and Equipment. This instruction manual and any markings on the tool provide information for avoiding hazards and unsafe practices related to the use of this tool. Observe all of the safety information provided. -
Page 4: Important Safety Information
IMPORTANT SAFETY INFORMATION SAFETY ALERT Read and understand all of the instructions and safety information in SYMBOL this manual before operating or servicing this tool. This symbol is used to call your attention to hazards Failure to observe this warning could result in severe injury or death. -
Page 5: Important Safety Information
• Conduit moves rapidly as it is bent. • Inspect the bender before use. Replace worn, The patch conduit must be clear of obstructions. damaged, or missing parts with Southwire replacement Be sure clearance is adequate before starting the bend. parts. A damaged or improperly assembled component could break and strike nearby personnel. -
Page 6: Grounding Instructions
GROUNDING INSTRUCTIONS Electrical Shock Hazard: • Do not modify the plug provided with the tool. • Connect this tool to a grounded receptacle on a 20 amp ground fault protected circuit. Failure to observe these warnings could result in severe injury or death. This tool must be grounded. - Page 7 IDENTIFICATION cont. FRONT VIEW BACK VIEW...
-
Page 8: Features
FEATURES • Single shoe bending of 3/4" to 2" EMT, IMC, and Rigid conduit. • Four large wheels for easy transportability. • Adjustable elevation control allows for ergonomic working height. • Squeeze adjustment allows for variations in conduit. • Back lite digital display for easy viewing. •... -
Page 9: Setup
SETUP Always use safety glasses. Everyday glasses only have impact resistant lenses; they are NOT safety glasses. When using in dusty enviornment, use face or dust mask. Failure to wear eye protection could result in serious eye injury from flying debris. Refer to the “Identification”... - Page 10 SETUP cont. CHANGING THE BENDING PLANE OF THE BEND ™ Refer to the “Identification” section of this manual. 1. Rotate the Locking Tilt Handle (15) counter clockwise to loosen and free up the bending platform (Fig 2). Place hand on Bender Support Handle (6) and allow the bender head platform to transition backwards.
-
Page 11: Operation
OPERATION Pinch points: Do not use this tool in a hazardous • Keep hands away from bending shoe, environment. Hazards include flammable rollers, and conduit when bender is in use. liquids, gases, or other materials. Using • Support conduit when unloading. this tool in a hazardous environment can Conduit can become loose and fall if result in a fire or explosion. - Page 12 OPERATION cont. CALIBRATING THE DIGITAL PROTRACTOR cont. Refer to the “Identification” section of this manual. ZERO AND SPRING BACK SET UP cont. 3. Locate Zero and Spring Back Set-up panel (4) and press the “SPRING BACK INCREASE OR SPRING BACK DECREASE” soft key until desired spring back is shown on top right corner of digital display (5) as shown in (Figs.
- Page 13 OPERATION cont. SQUEEZE ADJUSTMENT Refer to the “Identification” section of this manual. 1. When bending 1 ", or 2" EMT or IMC, the amount of squeeze applied to the conduit can be adjusted to compensate for conduit variations. The squeeze is adjustable by turning the squeeze adjustment knob (12) to increase or decrease the amount of tension needed to properly seat the conduit as shown in (Fig 11).
- Page 14 OPERATION cont. BENDING Refer to the “Identification” section of this manual. 1. Turn on bender by pressing on the green power switch (20). 2. Use the BEND, RETURN or JOG button on hand pendent (17) to orient the shoe so that the hooks of the conduit type to be bent are around the 7 o’clock (approximately –...
- Page 15 OPERATION cont. BENDING cont. 4. Bending the conduit 4A. For 3/4” through 1 ” EMT, IMC, or rigid conduit, ensure the 3/4”- 2” Rollers (7) ” - 2 ” rigid conduit are in the upright position, as shown in (Figs. 14, 15). For 1 sizes utilize the 3/4”- 2”...
-
Page 16: Operation
OPERATION cont. CONDUIT SUPPORT STAND Refer to the “Identification” section of this manual. 1. Each BEND MAX ™ Power Bender comes with a Conduit Support Stand (23) located on the back of the bender. 2. To use this stand, Remove it from its stored position by lifting stand off the frame mounted hooks and place to the right as viewed from the front of bender. -
Page 17: Troubleshooting
B. Portable band saw or other conduit cutting device C. Appropriate reamer or filing tool D. Tape measure E. Black marker F. Magnetic level (Southwire MCB Level) G. EMT, IMC or Rigid Conduit SPECIFICATIONS • Model #PB2000 • Stock # 59840601 •... -
Page 18: Warranty
Under Southwire’s Contractor Equipment 5-Year Limited Warranty, Southwire Company, LLC warrants that all Southwire Contractor Equipment will be free from manufacturer defects for a period of five (5) years from the date of the original end user’s purchase. The following products are excluded from this 5-Year Limited Warranty and are subject to separate warranty terms: rope, blades, dies, draw studs, grips, Southwire Contractor Equipment electronic components, and Material Boxes. - Page 19 1-855-SW-T00LS Toll Free Technical Help Contents Made in USA Product distributed by Southwire Company, LLC One Southwire Drive, Carrollton, GA 30119 ©2016 Southwire Company, LLC. All rights reserved. 05/16 PB-2000 Manual...
Need help?
Do you have a question about the BENDMAX and is the answer not in the manual?
Questions and answers