Table of Contents
Advertisement
Quick Links
Advertisement
Table of Contents
Troubleshooting

Subscribe to Our Youtube Channel
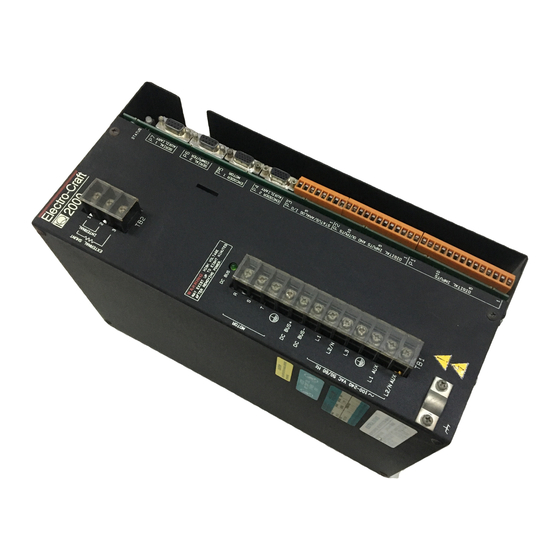
Related Manuals for ElectroCraft IQ 2000


Summary of Contents for ElectroCraft IQ 2000
- Page 1 IQ 2000/5000 Positioning Drive Modules Instruction Manual Electro-Craft A Rockwell Business Electro-Craft 6950 Washington Avenue South Eden Prairie, MN 55344 I G H T O M P A N Y I G H T O L U T I O N...
- Page 2 Unless specified otherwise, IQ 2000/5000 PDM are intended for use in a normal industrial environment, installed in a suitable electrical cabinet without exposure to excessive or corrosive moisture or abnormal ambient temperatures.
- Page 3 IQ 2000/5000 Positioning Drive Modules Instruction Manual P/N 0013-1027-005 Rev A Electro-Craft A Rockwell Business Electro-Craft 6950 Washington Avenue South Eden Prairie, MN 55344...
- Page 4 © 1998 Rockwell International Corporation. All rights reserved. Printed in the United States of America. Information contained in this manual is subject to change without notice. Electro-Craft is a trademark of Rockwell Automation. Other trademarks cited are the property of their respective owner. P/N 0013-1027-005 Rev A...
-
Page 5: Table Of Contents
Functional Description ........IQ 2000/5000 System Overview ........ - Page 6 Regulatory Requirements ........2-24 IQ 2000 Installation for European Directive Compliance....2-24 Electromagnetic Compatibility Directive .
- Page 7 Transformer Specifications ........Component Ordering Information HAPTER Our Warranty Help-1 Documentation Improvement Help-2 EU Directives Help-3 Index of Topics Help-7 Product Support Help-13 IQ 2000/5000 Installation Manual...
- Page 8 Intro-6 Contents P/N 0013-1027-005 Rev A...
-
Page 9: List Of Figures
HAPTER IQ 2000/5000 Product Family ....... . . IQ 2000/5000 System Components ...... - Page 10 Intro-8 List of Figures Enable and Ready Relay – Typical Internal Circuits ....3-13 Encoder Input Circuitry Example ......3-14 Encoder 1 Connections .
-
Page 11: List Of Tables
........7-3 IQ 2000/5000 Installation Manual... - Page 12 Intro-10 List of Tables Part Numbers of Motor Mating Connector Kits ......7-3 Part Numbers of Motor Shaft Seal Kits .
-
Page 13: Hapter
The IQ Master Instruction Manual describes the operation of the IQ Master executive software. This software package is used to software configure the IQ 2000/5000 products, which are shown in Figure 1.1. Refer to the IQ Master Instruction Manual for programming and software related issues. -
Page 14: Functional Description
Functional Description The IQ 2000/5000 system is for use as a servo drive and control system in industrial machinery. It is intended to be used as a system comprised of at least a motor and a PDM. The PDM is not intended for use with motors other than Electro-Craft motors as specified in this manual. -
Page 15: Iq 2000/5000 System Components
Getting Started IQ 2000/5000 System Components IGURE PDMs are manufactured in different packages which cover a wide range of power capability. The IQ-2000 Series PDMs incorporate an integral power supply in each PDM, and supply con- tinuous torques of 3 to 450 inch–pounds in combination with standard motors. The IQ-5000 Series PDMs use a separate power supply module, which can be shared among multiple PDMs, and provide continuous torques of 20 to 750 inch pounds with the standard motors. -
Page 16: Power Supply Module (Psm)
Module may be physically removed and transferred to another PDM if the replacement of a PDM is necessary to simplify servicing the machine. The Personality Module data can also be saved in a computer file and loaded into the IQ 2000/5000 using the File > Transfer dialog box in IQ Master. -
Page 17: Personal Computer (Pc)
Getting Started IQ 2000/5000 Operator Terminal IGURE Personal Computer (PC) A user supplied Personal Computer is required to run IQ Master software. The minimum com- puter requirements to run this software are contained in the IQ Master Instruction Manual. Option Cards Each PDM can have an option card mounted on its main control board, inside the PDM cover. -
Page 18: Accessories
Getting Started I/O Expansion Card Additional I/O may be added with an I/O Expansion Card. This board adds the following input and output capabilities to the PDM. 32 TTL Inputs 16 TTL Outputs NOTE: The digital inputs and outputs on the I/O expansion cards are 5 Volt TTL signals which are not optically isolated. -
Page 19: Hapter
Optional components of the system are an IQ 2000/5000 Operator Terminal, a transformer, an Auxiliary power supply for the IQ-5000, an external shunt for the IQ-2000, and any IQ 2000/ 5000 option cards. -
Page 20: Installation Fusing Requirements
Installation Fusing Requirements Fusing for the IQ-5000 differs from the IQ-2000 in that the IQ-5000 utilizes a separate power supply. Since the power supply can provide power to up to six drives, the “4 times motor FLA” rule does not apply. IQ-2000 Short Circuit Protection In the United States, the National Electrical Code (NEC) specifies that fuse selection must be based on the motor full load amperage (FLA), which is not to be confused with the drive input... -
Page 21: Personality Module Installation
The Personality Module is already installed on the IQ 2000/5000. The following procedure is to be used if the Personality Module needs to be changed for machine servicing. Refer to Figure 2.1 for the location of the Personality Module on the IQ 2000/5000 logic board. Location of Personality Module... -
Page 22: Installing The Personality Module (Pm)
4. Install the PDM cover (IQ-5000 only). System Firmware Installation All IQ 2000/5000 controllers come with the system firmware installed. Therefore, unless you are upgrading your PDM to a newer version of firmware, you will not need to install system firmware. -
Page 23: Installing The Firmware Eproms
Refer to “Networking the IQ Operator Terminal” on page 3-20 for more information. Refer to Figure 2.3 for the locations of jumpers W3, W4, and dip switch SW1 on the PDM logic board. Location of Jumper and DIP Switch IGURE IQ 2000/5000 Installation Manual... -
Page 24: Option Card Installation
Installation Option Card Installation Option cards should be installed before the PDM is mounted. Ensure that power to the PDM is OFF before installing. IQ-2000 Figure 2.4 illustrates the IQ-2000 option card. Follow these steps to install the card on the PDM logic board: 1. -
Page 25: Iq-5000 Option Card Installation
3. Install ribbon cable E between logic board and option card. 4. Install cover A back onto drive module. NOTE: Mating connectors are provided with the option card for customer connections to the option card connectors. IQ-5000 Option Card Installation IGURE IQ 2000/5000 Installation Manual... -
Page 26: Mounting
Installation Mounting Before mounting the PDM, any installation of option cards, Personality Modules, and system firmware should be completed. Other operations such as removing jumpers on the logic board should also be performed before mounting the system. CAUTION: Complete all drilling, cutting, welding, etc., before mounting the equipment. -
Page 27: Transformer Sizing
To size a transformer for an IQ 2000 or IQ 5000, the power output (KVA) of each axis must be known. This can be derived by calculating the horsepower for each axis and converting that horsepower into units f watts. -
Page 28: Iq-2000 Pdm-10, Pdm-20 And Pdm-30 Mounting
4.10 8.93 [104.1] [226.8] 1.00 [25.4] CLEARANCE HOLES FOR #10 1.00 EXHAUST [25.4] (M5) MOUNTING SCREWS. 1.05 [26.6] 0.25 [6.4] STATUS WARNING: HIGH VOLTAGE MAY EXIST UP TO FIVE MINUTES AFTER REMOVING POWER. DC BUS 14.20 13.75 [360.6] [349.3] DC BUS+ DC BUS- L2/N L1 AUX... -
Page 29: Iq-2000 Pdm-75 Mounting
5.97 8.84 [151.7] [224.5] 1.99 1.00 [50.5] 0.27 [25.4] [7.0] AIR EXHAUST STATUS WARNING: HIGH VOLTAGE MAY EXIST UP TO EIGHT MINUTES AFTER REMOVING POWER. DC BUS 14.20 13.75 [360.7] [349.3] DC BUS+ DC BUS- L2/N L1 AUX L2/N 1.00 [25.4] NOTES: 1. -
Page 30: Iq-2000 Pdm-150B Mounting
8.00 8.89 [203.2] [225.8] 1.25 2.75 2.75 [31.8] [69.9] [69.9] 0.27 [7.0] AIR EXHAUST STATUS WARNING: HIGH VOLTAGE DC BUS MAY EXIST UP TO FIFTEEN MINUTES AFTER REMOVING POWER. 14.20 13.75 [360.7] [349.3] DC BUS+ DC BUS- L1 AUX L2/N AUX 1.25 5.50 [31.8]... -
Page 31: Iq-5000 Positioning Drive Module And Power Supply Module
VIEW A NOTES: 1. MUST CONFORM TO SPEC. 7058-9978. "A"= 4.00(102.0)MINIMUM FOR AIRFLOW,ABOVE AND BELOW UNIT. "B"= 0.50(13.0)MINIMUM FOR AIRFLOW BOTH SIDES OR BETWEEN ADJACENT UNITS. "C"=11.00(280) CLEARANCE FOR CABLES. IQ-5000 PDM & PSM Mounting IGURE IQ 2000/5000 Installation Manual... -
Page 32: Psm Auxiliary Transformers
2-14 Installation PSM Auxiliary Transformers Figure 2.10 illustrates mounting dimensions for the PSM Auxiliary Transformer. PSM Auxiliary Transformer Mounting 2.10 IGURE Motors Motor outline drawings which illustrate the mounting dimensions for the F-Series, H-Series, N-Series, W-Series, and I-Series motors are available in the Electro-Craft catalog and electronic files in DXF format are available on the BBS for Electro-Craft products. -
Page 33: Operator Terminal
COMM ENTER MODE CLEAR 10.00 GASKET SUPPLIED WITH UNIT [254.0] 0.20 [5.1] 9.60 [243.8] 5.10 [129.5] 5.50 [139.7] 0.12 RADIUS MAX [3.0] RECOMMENDED PANEL CUTOUT DIMENSIONS 0.20 [5.1] 0.203 DIA (4) Operator Terminal, Dimensions 2.11 IGURE IQ 2000/5000 Installation Manual... -
Page 34: 24Vdc Sourcing I/O Conversion Card
Figure 2.12 illustrates the dimensions of the I/O conversion card and the DIN mounting panel. All dimensions are in millimeters (inches are approximate conversions). The conversion card must be mounted in the same enclosure as the IQ 2000/5000 PDM to comply with the EU LVD directive. -
Page 35: System Installation For Electromagnetic Compatibility
The EMI model provides only three options for eliminating the EMC problem: reduce the EMI at the source, increase the victim’s immunity to EMI (harden the victim), reduce the EMI at the victim (eliminate the coupling mechanism). IQ 2000/5000 Installation Manual... -
Page 36: Filtering
2-18 Installation In the case of servo drives, reducing the EMI source requires slowing power semiconductor switching speeds. However, this adversely affects drive performance with respect to heat dis- sipation and speed/torque regulation. Hardening the victim equipment may not be possible or practical. -
Page 37: Ac Line Filter Selection
Filter capacitors retain high voltages after power removal. Before han- dling the equipment, voltages should be measured to determine safe levels. Failure to observe this precaution could result in severe bodily injury. IQ 2000/5000 Installation Manual... -
Page 38: Grounding
2-20 Installation The only reasonable filtering at the drive output terminals is the use of inductance. Capacitors would slow the output switching and deteriorate the drive performance. A common mode choke can be used to reduce the drive emissions. This will reduce emission coupling through the drive back to the AC line. - Page 39 360° connection (per the cable assembly diagram) otherwise noise on the encoder signals can cause faults in the drive. IQ 2000/5000 Installation Manual...
-
Page 40: Torroid Encoder Shielding Method For Brushless Servo Motors
SHIELD Recommended raw cable for building your own cable Elec- Belden Part No. Carol Part No. IQ 2000/ 8337 C0625 Torroid Encoder Shielding Method for Brushless Servo Motors 2.16 IGURE 2. Suppress each switched inductive device that is near the servo amplifier. This includes solenoids, relay coils, starter coils and AC motors (such as in motor driven mechanical timers). -
Page 41: Bonding Your System
Improper bonding blocks that direct exit path and allows high-frequency energy to travel elsewhere in the cabinet. Excessive high-frequency energy can effect the oper- ation of other microprocessor controlled equipment. Recommended bonding practices 2.18 IGURE IQ 2000/5000 Installation Manual... -
Page 42: Bonding Multiple Sub Panels
IQ 2000 Installation for European Directive Compliance This section specifies installation requirements for compliance to the Low Voltage Directive (LVD) and the Electromagnetic Compatibility (EMC) Directive for the IQ 2000 drive. The infor- mation below is based on successful testing using the specified installation methods. -
Page 43: Recommended Iq-2000 Installation For Emc
Filter capaci- tors retain high voltages after power is removed. Before handling the equipment, voltages should be measured to determine safe levels. Failure to observer this precaution could result in severe bodily injury. IQ 2000/5000 Installation Manual... -
Page 44: Motors And Cables
The shielded cables have a 0.5” portion of the cable jacket stripped off, exposing the shield approximately 12” from the drive end of the cable. This stripped area is to be clamped onto the chassis for shield termination when used with the IQ 2000/5000 drives. Table 2.6 lists the part numbers of shielded cables. -
Page 45: Low Voltage Directive
These connections should never be made or broken while the drive is energized. The IQ 2000 has sinking (active low) I/O which is common in the US, but sourcing (active high) I/Os are preferred in Europe. Rockwell Automation offers a DIN rail mounted card which converts the I/O from sinking to sourcing. -
Page 46: Emergency Stop Contactor Wiring
2-28 Installation Resistor Resistor Resistor Drive Motor Isolated terminal Unbraided shield Grounded terminal or stud Enclosure wall Emergency Stop Contactor Wiring 2.21 IGURE P/N 0013-1027-005 Rev A... - Page 47 2Installation IQ-5000 Transformer Outline Diagram 2.22 IGURE...
-
Page 48: Iq-5000 Transformer Load Regulation Curve
IQ-5000 Transformer Load Regulation Curve 2.23 IGURE... - Page 49 PSM-AUX Outline and Connection Diagram 2.24 IGURE...
- Page 50 NOTES: 1. DIMENSIONS ARE IN INCHES (mm) 2 RING OR SPADE LUG CONNECTORS (NOT PROVIDED) 1/4-20 GROUND STUD SECONDARY CONNECTIONS ARE REQUIRED FOR WIRING CONNECTIONS TO (6.35 DIA) 8-32 THD BOLTS TRANSFORMER TERMINAL STRIPS. (TRANSFORMER CHASSIS) (4.17 DIA) CONNECTION INSTRUCTIONS PRIMARY CONNECTIONS 8-32 THD BOLTS (4.17 DIA)
-
Page 51: Iq-2000 Transformer Load Regulation Curve
IQ-2000 Transformer Load Regulation Curve 2.26 IGURE... - Page 52 2-34 Installation Intro External Shunt Mounting and Connection Diagram 2.27 IGURE Intro 1X Shunt Resistance 4X Shunt Resistance 9X Shunt Resistance up to 200 Watts up to 1000 Watts up to 2.4 kWatts TB2-1 TB2-1 TB2-1 TB2-3 NOTES: 1. A single resistor of equivalent total resistance may replace multiple TB2-3 resistors.
- Page 53 24V Sourcing I/O Conversion Card 2.29 IGURE...
- Page 54 2-36 Installation P/N 0013-1027-005 Rev A...
-
Page 55: Hapter
Wiring HAPTER This chapter explains the wiring requirements of an IQ 2000/5000 system. Refer to the drawings listed below for assistance. Figure Part Number Title Page 3.25 9101-0411 IQ-5000 Power Wiring 3-25 3.26 9101-0132\4 PSM-AUX Connections 3-26 3.27 9101-2195 IQ-2000 Power Wiring for PDM-10, -20 and -30 3-27 3.28... -
Page 56: Iq-5000 Pdm
Wiring These drawings show an optional AC line filter, and shielded motor cable. These can be used in conjunction with the grounded metal enclosure to meet the Electromagnetic Compatibility requirements of the European Machinery Directive. A discussion of EMC can be found in “Sys- tem Installation for Electromagnetic Compatibility”... -
Page 57: Psm Interface - Internal Circuit Examples
Figure 3.2 shows external connections of the PDMs. PSM Interface Signals ABLE PSM Connector Pin # Signal Name Status- General Status + Purpose PSM Enable- Inputs/Outputs PSM Enable + PSM Interface – Internal Circuit Examples IGURE IQ 2000/5000 Installation Manual... -
Page 58: Psm Interface - External Connection Examples
Wiring PSM Interface – External Connection Examples IGURE Status The Status outputs are the contacts of a normally open relay, which closes to indicate that the PSM is operating properly. An open relay signals that no AC power is applied to the PSM or that a PSM fault has occurred. -
Page 59: Power Supply Module Jumper Location
2. Remove the shunt fuse and test with an ohmmeter. WARNING: When replacing the PSM 50 and PSM 125 shunt fuse a DC rated fuse must be used. 3. Replace the shunt fuse. Shunt Fuse Location IGURE 4. Install the PSM cover. IQ 2000/5000 Installation Manual... -
Page 60: Operator Terminal
Wire colors shown reflect cables supplied by Electro-Craft Motor Power Connections IGURE WARNING: High voltage may be present on terminals of the IQ 2000/5000 Positioning Drive Module. Remove power and dis- connect the power cable before making or removing any connection. P/N 0013-1027-005 Rev A... -
Page 61: Motor Power Emc Shield Connection
Motor Power EMC Shield Connection IGURE Drawings which illustrate the power connections for specific F-Series, H-Series, N-Series, S-Series, W-Series, and I-Series motors are supplied with the motors and are available in the Electro-Craft catalog or via the Electro-Craft BBS. IQ 2000/5000 Installation Manual... -
Page 62: Control Connections
Wiring 3Wiring Control Connections This section covers the control and interface connections between the PDM and the rest of the system. This includes: Digital I/O, Analog I/O, Relay Outputs, Encoders, Step and direction Inputs, and Serial Ports. Figure 3.8 illustrates all control connections to the PDM. PDM Control Connections IGURE P/N 0013-1027-005 Rev A... -
Page 63: Digital Inputs And Outputs
Wiring Digital Inputs and Outputs Figure 3.9 illustrates the IQ 2000/5000 PDM, which provides 16 optically isolated inputs and eight optically isolated outputs for machine control and interface. General purpose I/O uses a 24 volt DC supply voltage. The PDM has an internal 24 VDC @ 500 mA power supply for this purpose, isolated from the logic common. -
Page 64: Digital Inputs
3-10 Wiring The IQ 2000/5000 has sinking (active low) I/O which is common in the US, but sourcing (active high) I/O is preferred in Europe. Electro-Craft offers a DIN rail mounted interface board which converts the I/O from sinking to sourcing (active high). This interface board must be mounted in the same enclosure as the drive. -
Page 65: Digital Outputs
Output O5 may be enabled as an At Home output. WARNING: External circuitry must be used to ensure the state of digital outputs in an emergency stop situation. The IQ 2000/5000 will not automatically turn outputs OFF. Digital Outputs and Assignable Functions... -
Page 66: Analog Input
3-12 Wiring Analog Input Figure 3.10 illustrates the Analog to Digital converter (ADC) input, ADC1. Located on P3-5, it may be used to read any analog signal with a range of ±10V. The analog signal ground must be connected to the Analog Common on connector P3-4. The Analog Common is tied to earth ground internally. -
Page 67: Analog Output
This contact is rated 0.3 A at 24 VDC. The Ready output will open if a system fault occurs. Ready Relay Output and Signal Name ABLE Connector Pin Signal Name 1 Ready (Relay output) Analog I/O and status 3 Relay Common – Enable and Ready Relay Typical Internal Circuits 3.11 IGURE IQ 2000/5000 Installation Manual... -
Page 68: Enabled Relay Output
This contact is rated 0.3 A at 24 VDC. WARNING: External circuitry must be used to ensure the state of digital outputs in an emergency stop situation. The IQ 2000/5000 will not automatically turn outputs OFF. Enabled Relay Output and Signal Name... -
Page 69: Encoder 1 Connections
The function of the Encoder 2 port is selected as input or output in the Parameter menu, Feedback Configuration dialog box. Refer to the IQ Master Instruction Manual for detailed information. IQ 2000/5000 Installation Manual... -
Page 70: Encoder 2 Connections
IGURE Slaving One IQ to Another In applications where an IQ needs to “follow” another IQ 2000/5000 controller using electronic gearing, the P4 connections may be used to provide a simple method of wiring the motor encoder signals from the master IQ to the Encoder 2 input of the follower (slave) IQ. The master IQ needs to be configured to output its motor encoder signals on P4. -
Page 71: Step And Direction Inputs
The signal wires from the indexer should be shielded, and the shield connected to the chassis of the device generating the signals. In some cases it may be necessary to connect the shield at the PDM end of the cable, at P4-15. IQ 2000/5000 Installation Manual... -
Page 72: Serial Ports
One or more IQs may be installed on an RS-422 multi-drop network or an RS-232C daisy-chain network. If more than one IQ is in the network, each must have a unique address selected on the SW1 dip switch. Refer to“Networking IQ 2000/5000 Controls” on page 3-21 for more information. -
Page 73: Personal Computer Rs-232C Connections
Personal Computer RS-232C Connections 3.16 IGURE For RS-422 connections between an IQ and the host computer, refer to “Networking IQ 2000/ 5000 Controls” on page 3-21. Establishing Communications between IQ Master and the PDM 1. Connect the serial cable between PDM connector P6 and a serial communications port on the PC. -
Page 74: Iq Operator Terminal Rs-232 Connections
3-20 Wiring Operator Terminal The optional Operator Terminal connects to the PDM through serial port 1 on P7. The cable connects to the COM1 connector on the back of the Operator terminal. The COM1 connector is a twenty-five pin male D connector. The IQ Operator Terminal may be wired using RS-232C for distances up to 15.2 meter (50 feet). -
Page 75: Iq Operator Terminal Rs-422 Connections
IQ Operator Terminal RS-422 Multi-Drop Connections 3.19 IGURE Networking IQ 2000/5000 Controls One or more PDM may be installed on an RS-422 multi-drop network or an RS-232C daisy-chain network. If more than one PDM is on the network, each PDM must have a unique address selected on the SW1 DIP switch panel, which is illustrated in Figure 3.20. -
Page 76: Dip Switch Sw1-7 Set On For Daisy-Chain Mode Example
3-22 Wiring Figure 3.22 illustrates the setting of SW1-7 ON for the daisy-chain mode. Switch SW1-7 is used to select the mode of operation of the serial port 1. If SW1-7 is OFF, serial port 1 functions as an independent serial port. If SW1-7 is ON, serial port 1 and serial port 2 are linked together (daisy- chained). -
Page 77: Expansion I/O And Memory
P1-37 Input 27 P2-37 Input 43 P1-39 Input 28 P2-39 Input 44 P1-41 Input 29 P2-41 Input 45 P1-43 Input 30 P2-43 Input 46 P1-45 Input 31 P2-45 Input 47 P1-47 Input 32 P2-47 Input 48 IQ 2000/5000 Installation Manual... -
Page 78: P3 Pins On Expansion Card
3-24 Wiring Crimp connectors and a connector housing for expanded analog signals are included in the expansion card kit. Use 0.34-0.08 mm (22-28 AWG) stranded wire. Noise sensitive applications may require twisted shielded wire pairs, in which case the shield is grounded at one end only. Table 3.16 defines the relationship between P3 user-crimped leads and the housing supplied with the kit. -
Page 79: Iq-5000 Power Wiring
3Wiring IQ-5000 Power Wiring 3.25 IGURE... -
Page 80: Psm-Aux Connections
PSM-AUX Connections 3.26 IGURE... - Page 81 IQ-2000 Power Wiring for PDM-10, -20 and -30 3.27 IGURE...
- Page 82 IQ-2000 Power Wiring for PDM-75 3.28 IGURE...
- Page 83 INPUT POWER WIRES DRIVE MODULE INPUT CURRENT REQUIREMENTS MOTOR POWER WIRES R,S,T,GND MOTOR POWER CONNECTOR IQ TERMINALS CURRENT REQUIREMENT, MAXIMUM (AMPS AC RMS) MINIMUM RECOMMENDED SIGNAL MOTOR POWER 1.0 Amps AC at 115 Volts AC DRIVE POWER WIRE RECOMMENDED TERMINAL(S) L1 AUX,L2/N AUX MATING CONNECTOR MOTOR...
- Page 84 NOTES: 1. P1 & P2 ARE DESIGNED TO CONNECT TO A 24 CHANNEL OPTO 22 GENERATION 4 I/O MOUNTING RACK THROUGH A 50 PIN RIBBON CABLE. THE FIRST EIGHT POSITIONS ARE WIRED AS OUTPUTS, THE LAST 16 POSITIONS ARE WIRED AS INPUTS. USE 4.7K(16) 4.7K(16) OPTO 22 GENERATION 4 I/O MODULES OR EQUIVALENT DESIGNED...
-
Page 85: Cables
Refer to Table 7.3 on page 7-2 for ordering information about these and other cables. IQ P7 to Operator Terminal (P/N 9101-2025) 3.31 IGURE IQ P6 to PC Serial Port (9 pin) (P/N 9101-2024) 3.32 IGURE IQ 2000/5000 Installation Manual... -
Page 86: Iq P4 Or P5 To Auxiliary Encoder (Unterminated) (P/N 9101-2031)
3-32 Wiring Note: This cable may be used on the P5 connector (to motor feedback), with the following differences: • Pin 8 is unused • Pin 11 and 12 are TS- and TS+, respectively • Pin 13 is ABS Reference “Encoder 1” on page 3-15. IQ P4 or P5 to Auxiliary Encoder (Unterminated) (P/N 9101-2031) 3.33 IGURE... -
Page 87: Iq P4 To P4, 2 Foot (P/N 9101-2127)
Wiring 3-33 IQ P4 to P4, 2 foot (P/N 9101-2127) 3.34 IGURE IQ P5 to S-, H-, or F-Series Motor Encoder (P/N 9101-2027) 3.35 IGURE IQ 2000/5000 Installation Manual... - Page 88 3-34 Wiring P/N 0013-1027-005 Rev A...
-
Page 89: Hapter
6. Choose File >Initialize Personality Module to display Figure 4.1. Initialize Personality Module Factory Default Initialization IQ Series IQ 550 Drive Type PDM-10 Motor Type H-3007-N-H Motor 2000 Lines/rev Encoder Size Percent complete: 0% Update PM Close Initialize PM Dialog Box for IQ-2000 IGURE IQ 2000/5000 Installation Manual... -
Page 90: Applying Power For The First Time
Applying Power for the First Time 7. Click the IQ Series tab. 8. Highlight the appropriate drive model from the Drive Type list box. 9. Select the appropriate motor model from the Motor Type list box. Verify the Encoder selection is correct. The last letter of the Motor Type defines the encoder resolution (encoder lines per revolution). -
Page 91: Start-Up Procedure For Iq-5000
5. Double-click the IQ Master icon to run the IQ Master software. 6. Choose File > Initialize Personality Module to display Figure 4.2. 7. Click the IQ Series tab. 8. Highlight the appropriate drive model from the Drive Type list box. IQ 2000/5000 Installation Manual... -
Page 92: Initialize Pm Dialog Box For Iq-5000
Applying Power for the First Time Initialize Personality Module Factory Default Initialization IQ Series IQ 550 Drive Type PDM-10 Motor Type H-3007-N-H Motor 2000 Lines/rev Encoder Size Percent complete: 0% Update PM Close Initialize PM Dialog Box for IQ-5000 IGURE 9. -
Page 93: Motor Start-Up Procedure
After correctly setting up the system, back up the contents of the Personality Module (NVRAM) to a file on your PC, using File Transfer. Refer to the IQ Master Instruction Manual, Chapter 2, File menu > Transfer for details. IQ 2000/5000 Installation Manual... -
Page 94: Applying Power For The First Time
Applying Power for the First Time P/N 0013-1027-005 Rev A... -
Page 95: Hapter
(OFF). Green The LED on the IQ 2000/5000 PDM indicates the present status of the PDM. During normal operation, when no fault conditions exist, this LED is green. This LED turns red to indicate that the PDM has detected a fault. -
Page 96: Operator Terminal
Diagnostics/Troubleshooting Power Supply Module LEDs (IQ-5000 systems only) ABLE LED Label LED Color Description PHASE LOSS OFF = OK (Normal Operation) ON = Loss of one phase of incoming AC power. The PSM will continue to run on two phases and the fault LED ON. -
Page 97: Personality Module Default Initialization
Some faults, however, can only be cleared by an HRESET com- mand. These faults include numbers 42, 45–54, 68, 69, 73, and 74. Refer to Table 5.3 for a description of each fault. IQ 2000/5000 Installation Manual... -
Page 98: Error Messages
Diagnostics/Troubleshooting On some machines you may want the IQ to continue running even after some faults occur. This is accomplished by setting Disable on Fault to Partial. In this case, the following faults are disabled: Iavg fault, Motor Overtemperature, Soft Forward Limit, and Soft Reverse Limit. All faults will cause the Error output to turn ON (if enabled). - Page 99 A limit input activated (hard limit). If the error is a soft limit, a software travel limit has been exceeded. The Jog inputs can be used to move the PDM off the limit (in Hard Forward the opposite direction). Hard Reverse Soft Forward Soft Reverse IQ 2000/5000 Installation Manual...
- Page 100 74 NVRAM Compatibility The program directory structure (stored in the NVRAM) is incompatible with the current version of the IQ 2000/5000 firmware. Perform a Hard Reset to delete all programs and update the directory structure. P/N 0013-1027-005 Rev A...
-
Page 101: Hapter
(5 kg) (5 kg) 10 kg 14 kg Operating Temperature 32°–140°F (0°–50°C) Storage Temperature -40°–176°F (-40°–80°C) Relative humidity 5% to 95% non-condensing External Shunt Resistor P/N 9101-1079 Continuous Shunt Power 200 W Peak Shunt Power 6000 W IQ 2000/5000 Installation Manual... -
Page 102: Iq-5000 Series
Specifications IQ-5000 Series PDM-25, PDM-50, PDM-100, and PDM-150/150X Specifications ABLE Positioning Drive Module PDM-25 PDM-50 PDM-100 PDM-150 PDM-150X Peak Output 25 amps 50 amps 100 amps 150 amps 150 amps Current/Phase Continuous Output 20 amps 40 amps 50 amps 65 amps 85 amps Current/Phase Continuous Output... -
Page 103: Transformer Specifications
115/ 230 VAC RMS Ambient temperature 32°-122°F (0°-50°C) a. Three phase input and output (50/60 Hz) Refer to Figure 2.22 on page 2-29 and Figure 2.23 on page 2-30 for transformer outline drawings and load regulation data. IQ 2000/5000 Installation Manual... - Page 104 Specifications P/N 0013-1027-005 Rev A...
-
Page 105: Component Ordering Information
IQ 2000/5000 Operator Terminal, 110/240 VAC 9101-2064 IQ 2000/5000 Operator Terminal, 24 Volt 9101-2073 IQ 2000/5000 I/O Expansion Card 9101-2038 IQ 2000/5000 Memory and I/O Expansion Card Part Numbers of Power Supply Modules ABLE Part Number Description 9101-3000 PSM-50 Power Supply Module... -
Page 106: Part Numbers Of Cables
9101-2179-XXX IQ-2000/S- or H-6000/F-6000 Motor Power Cable 44-0141-003 IQ 2000/5000 to I/O Conversion Card, 3-foot Cable 44-0141-010 IQ 2000/5000 to I/O Conversion Card, 10-foot Cable 1. Standard cable lengths are 010 = 3m (10 ft), 025 = 7.68 m (25 ft), 050 = 15 m (50 ft), 075 = 23 m (75 ft), 100 = 30 m (100 ft). -
Page 107: Motor Identification Codes
Motor power connector kit, All 6000 motors MS3106F24-22S connector 9101-0328 Motor power connector kit, All 8000 motors MS3106F32-17S connector 9101-0329 Encoder connector kit, H-Series, S-Series and F-Series motors MS3106F20-29S connector) 9101-0330 Brake connector kit, H-Series, S-Series and F-Series motors MS3106F12S-3S connector IQ 2000/5000 Installation Manual... -
Page 108: Component Ordering Information
Component Ordering Information Part Numbers of Motor Shaft Seal Kits ABLE Part Number Description 0041-5056 Shaft seal kit, H-2000 and S-2000 motor 22 mm outside diameter 12 mm inside diameter 7 mm width 0041-5057 Shaft seal kit, H-3000 and S-3000 motor 28 mm outside diameter 15 mm inside diameter 7 mm width... -
Page 109: Our Warranty
Each Electro-Craft IQ 2000/5000 Positioning Drive Module is warranted against defects in mate- rial and assembly. Limitations to warranty coverage are detailed in “Returned Goods and Field Service Policy.”... -
Page 110: Documentation Improvement
What improvements will this suggestion provide? ____________________________________________________________________________ ____________________________________________________________________________________________________________________ ____________________________________________________________________________________________________________________ ____________________________________________________________________________________________________________________ ____________________________________________________________________________________________________________________ Originator:_____________________________________ City: ___________________ State: _______ Zip: ____________________________ Company: _____________________________________ Phone: _______________________________________________________________ Address: ______________________________________ Date: ________________________________________________________________ Thank you for your comments. Technical Writing Internal Use: Follow-Up Action IQ 2000/5000 Installation Manual... -
Page 111: Eu Directives
When installed in accordance with the installation instructions, contained in the “IQ-2000 Installation Requirements for Compliance to European Directives” conforms to the following standard. EN 60204-1 Signed: (John Durrant, Technical Manager) Date: Electro-Craft, Ltd, Fourth Avenue, Crewe, Cheshire, CW1 1XL, UK IQ 2000/5000 Installation Manual... -
Page 112: Help
Help-4 EU Directives European Union - Electromagnetic Compatibility Directive Declaration of Incorporation by the Manufacturer Application of Council Directive 89/336/EEC, 92/31/EEC, 93/68/EEC Manufacturer: Reliance Motion Control Address: 6950 Washington Avenue South Eden Prairie, Minnesota 55344, USA A registered ISO 9001 Company Herewith declares All products sold or distributed by Reliance Motion Control or Electro-Craft Ltd., under the ®... -
Page 113: Help
(CISPR 11) Group 1 class A Immunity EN 50082-2: 1995 Electrostatic Discharge EN 61000-4-2 Radiated RF IEC 801-3 Electrical Fast Transient EN 61000-4-4 Conducted RF ENV 50141 Magnetic Fields EN 61000-4-8 Electro-Craft, Ltd, Fourth Avenue, Crewe, Cheshire, CW1 1XL, UK IQ 2000/5000 Installation Manual... -
Page 114: Help
Help-6 EU Directives P/N 0013-1027-005 Rev A... -
Page 115: Index Of Topics
LOOP Count Out of Range Dip Switches 2-5 LOOP Variable Range Divide by Zero 5-4 Math Overflow Drawing Motor Overtemperature 24V Sourcing I/O Conversion NVRAM Compatibility 2-35 Card NVRAM R/W Fault External Shunt Mounting and Parameter Checksum IQ 2000/5000 Installation Manual... - Page 116 Help-8 Index of Topics Peak Overcurrent Personality Fault I/O Conversion Card POS Track Overflow 2-16 Mounting Power Module Fault I/O Expansion Card 1-5, 1-6 PRECISION Out of Range Profile Calculation I/O Interface Card 1-6 Program Directory Iavg Fault 5-4 Program File Illegal Pgm Number 5-6 RAM R/W Fault Indexer Inputs,...
-
Page 117: Specifications
2-15 Mounting 3-20 Networking Power Connections 3-20 Serial Port RAM R/W Fault 5-5 Specifications Start-up Ready Relay Output 3-13 Status Screen Reentrancy Fault 5-4 Option Card Regulatory requirements 2-24 Expansion Return Procedure Help-1 Installation Memory Outputs IQ 2000/5000 Installation Manual... -
Page 118: Specifications
Help-10 Index of Topics S-Curve Calculation 5-4 Serial Port #2 Busy 5-5 Serial Ports 3-18 3-22 Daisy-chain 3-18 Host Computer 3-21 Networking 3-20 Operator Terminal 3-18 Personal Computer 3-22 RS422 Multi-Drop Short Circuit, see Fuse 2-2 Shunt Fuse 3-4 Shunt Resistor 2-34 2-34 Connection Diagram 2-34... -
Page 119: Product Support
If you have a modem, you can reach the Electro-Craft BBS 24 hours a day, 7 days a week at 1-612-942-3618. The following services are available through the BBS: Example application programs. Technical bulletins. Leave messages and files for the application engineers. Help with your application. IQ 2000/5000 Installation Manual... - Page 120 IQ 2000/5000 Electro-Craft Positioning Drive Modules Installation Manual A Rockwell Business Electro-Craft 6950 Washington Avenue South P/N 0013-1027-005 Rev A Eden Prairie, MN 55344 3600 – main 3636 – fax 3983 – technical support...
Need help?
Do you have a question about the IQ 2000 and is the answer not in the manual?
Questions and answers