
Subscribe to Our Youtube Channel
Related Manuals for REMEHA Quinta Ace SCB-01


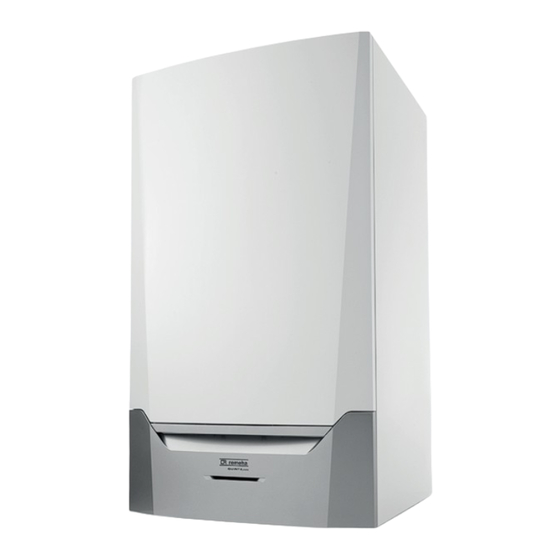
Summary of Contents for REMEHA Quinta Ace SCB-01
- Page 1 United Kingdom Installation and User Manual Control panel & PCB Quinta Ace HMI S-control SCB-01...
- Page 2 Dear Customer, Thank you very much for buying this appliance. Please read through the manual carefully before using the product, and keep it in a safe place for later reference. In order to ensure continued safe and efficient operation we recommend that the product is serviced regularly. Our service and customer service organisation can assist with this.
-
Page 3: Table Of Contents
Contents Contents Safety ................... . 4 Liabilities . -
Page 4: Safety
1 Safety Safety Liabilities 1.1.1 Manufacturer's liability Our products are manufactured in compliance with the requirements of the various Directives applicable. They are therefore delivered with the marking and any documents necessary. In the interests of the quality of our products, we strive constantly to improve them. We therefore reserve the right to modify the specifications given in this document. - Page 5 1 Safety Have the required inspections and maintenance carried out by a qualified installer. Keep the instruction manuals in good condition close to the appliance. 7698983 - v.02 - 17102018...
-
Page 6: About This Manual
2 About this manual About this manual Symbols used in the manual This manual contains special instructions, marked with specific symbols. Please pay extra attention when these symbols are used. Caution Risk of material damage. Important Please note: important information. Reference to other manuals or pages in this manual. -
Page 7: Description Of The Product
3 Description of the product Description of the product The Quinta Ace boiler is delivered with a combination of the control panel, control unit and extension PCB. The contents of this manual are based on the following software and navigation information: Tab.1 Software and navigation information Name visible in display... -
Page 8: Description Of The Scb-01 Pcb
3 Description of the product DHW operation is switched off. The solar boiler is on and its heat level is displayed. System water pressure display. The holiday program is enabled. Frost protection operation is enabled. CH operation is enabled. DHW operation is enabled. Displaying the selected PCB. -
Page 9: User Instructions
4 User instructions User instructions Use of the control panel 4.1.1 Browsing in the menus Important Depending on the devices or control PCBs connected, the control panel shows selection options in some menus. First, select a device, control PCB or zone to view or amend a setting. -
Page 10: Setting The Language And Time
4 User instructions Fig.10 Step 8 8. Press the key to go back to the main display. Important The screen will return to stand-by if no key is pressed for three MW-3000305-01 minutes. Setting the language and time Important First set the desired language, then the correct time, day and date before further use of the control panel. -
Page 11: Changing The Central Heating Flow Temperature
4 User instructions Fig.19 Step 2 2. Press the key to open the counter menu. MW-3000320-01 Fig.20 Step 3 3. Keep pressing the key until the Time display menu is displayed. MW-3000393-01 Fig.21 Step 4 4. Press the key to access the hours. MW-3000353-01 Fig.22 Step 5... -
Page 12: Changing The Dhw Temperature
4 User instructions Fig.29 Step 3 3. Press the key for the required CH flow temperature. MW-3000368-01 Fig.30 Step 4 4. Press the key to confirm the value. MW-3000369-01 Fig.31 Step 5 5. Press the key to go back to the main display. Important The flow temperature is matched automatically when using a: MW-3000370-01... - Page 13 4 User instructions Fig.37 Step 4 4. Press the key to confirm the selection. The icons dedicated to the days of the week all flash at the same time: MW-3000405-01 Fig.38 Step 5 5. Select the required day number by keeping the key pressed until the icon for the required day flashes.
-
Page 14: Changing User Parameters
4 User instructions Tab.7 Example Times Monday Tuesday Wednes Thursday Friday Saturday Sunday 06:00 C1 = ON C1 = ON C1 = ON C1 = ON C1 = ECO C1 = ECO C1 = ON 08:00 10:00 C2 = ECO C2 = ECO C2 = ECO C2 = ON... - Page 15 4 User instructions Fig.50 Step 8 8. Press the key to confirm the value. MW-3000335-01 Fig.51 Step 9 9. Press the key multiple times to go back to the main display. MW-3000311-01 7698983 - v.02 - 17102018...
-
Page 16: Installer Instructions
5 Installer instructions Installer instructions Changing installer parameters The parameters in the Installer Menu must only be changed by a qualified professional. Code must be entered in order to change the parameters. Important First, select a device, control PCB or zone to view or amend a setting. -
Page 17: Adjusting Advanced Parameters
5 Installer instructions Fig.61 Step 11 11. Press the key multiple times to go back to the main display. MW-3000316-01 Adjusting advanced parameters The advanced parameters at installer level may only be changed by a qualified professional. Code must be entered in order to change the parameters. -
Page 18: Carrying Out An Auto-Detect
5 Installer instructions Fig.70 Step 10 10. Press the key to confirm the value. MW-3000338-01 Fig.71 Step 11 11. Press the key multiple times to go back to the main display. MW-3000316-01 Carrying out an auto-detect Carry out an auto-detect after removing or replacing an (optional) control PCB. -
Page 19: Chimney Sweep Mode (Forced Full Load Or Part Load)
5 Installer instructions Fig.80 Step 3 3. Keep pressing the key until the code is displayed. MW-3000313-01 Fig.81 Step 4 4. Press the key to confirm opening the menu. MW-3000314-01 Fig.82 Step 5 5. Keep pressing the key until the required device or PCB is displayed. -
Page 20: Resetting The Maintenance Message
5 Installer instructions Fig.91 Step 2 2. Press the key twice. The device is now running at full load. Wait until appears on the display. MW-3000326-01 Fig.92 Step 3 3. Press the key to go back to the main display. MW-3000327-01 Resetting the maintenance message Reset the maintenance message once the stated maintenance service... -
Page 21: Connected Control Pcbs
5 Installer instructions Connected control PCBs 1. Navigate to the control PCB menu. Fig.102 Step 2 2. Press the key to open the menu. MW-3000339-01 Fig.103 Step 3 3. To see which control PCBs are connected, press the key. MW-3000340-01 Fig.104 Step 4 4. -
Page 22: Switching Off Dhw Production
5 Installer instructions Fig.111 Step 3 3. Press the key to change the current CH status. MW-3000330-01 Fig.112 Step 4 4. Press the key to confirm the changed status. The heating has been switched off. The main display appears, together with the symbol. -
Page 23: Reading Out Current Values
5 Installer instructions Fig.120 Step 4 4. Press the key to navigate through the counters. Tab.8 Counter menu Value Description MW-3000355-01 Resetting service hours Fig.121 Step 5 5. Press the key multiple times to go back to the main display. For more information, see Counters - SCB-01, page 28 MW-3000441-01... -
Page 24: Installation
6 Installation Installation Electrical connections 6.1.1 Connecting status notifications The two potential-free contacts, Status, can be configured as required. Depending on the setting, a particular status can be transmitted by the boiler. Fig.125 Status notifications Connect a relais as follows: Nc Normally closed contact. -
Page 25: Operation
7 Operation Operation Setting the heating curve Fig.127 Internal heating curve 1 Setting point (parameter CP010) 2 Comfort base point (parameter CP210) 3 Gradient (parameter CP230) F Heating curve Outside temp Flow temperature AD-0000871-02 Cascade control Up to 7 boilers equipped with the HMI S-control can be managed in cascade with the HMI T-control mounted in the master boiler. - Page 26 7 Operation Fig.130 Parallel cascade control 1 All boilers in cascade start running when system temperature is management 3°C below set point. 2 First boiler stops running when system temperature is 3°C above set point. 3 After 4 minutes the second boiler stops running if ΔT< 6K and the system temperature is still more than 3°C above set point.
-
Page 27: Settings
8 Settings Settings List of parameters The code of the parameters always contain two letters and three numbers. The letters stand for: Appliance related parameters Zone related parameters Domestic hot water related parameters Smart Solutions related parameters Gas-fired heat engine related parameters Central heating related parameters Important All possible options are indicated in the adjustment range. -
Page 28: List Of Measured Values
8 Settings List of measured values 8.2.1 Counters - SCB-01 Tab.11 > SCB-01 - Counters at installer level Code Description Range AC001 Number of hours that the appliance has been on mains power 0 Hours - 4294967295 Hours 8.2.2 Signals - SCB-01 Tab.12 >... - Page 29 8 Settings Status Halted Device Mode Tab.14 Sub-status numbers Sub-status Standby AntiCycling CloseHydraulicValve ClosePump WaitingForStartCond. CloseExtGasValve StartToGlueGasValve CloseFlueGasValve FanToPrePurge WaitForReleaseSignal BurnerOnCommandToSu VpsTest PreIgnition Ignition FlameCheck Interpurge Normal Int.Setpoint Limited Int.Setpoint NormalPowerControl GradLevel1PowerCtrl GradLevel2PowerCtrl GradLevel3PowerCtrl ProtectFlamePwrCtrl StabilizationTime ColdStart ChResume SuRemoveBurner FanToPostPurge OpenExt&FlueGasValve StopFanToFlueGVRpm StopFan...
-
Page 30: Troubleshooting
9 Troubleshooting Troubleshooting Error memory The control panel includes an error memory in which the last 32 errors are stored. Details of the error are stored with the error codes. Included are the status, sub-status, flow temperature, return temperature, fan rotation speed and the ionisation current. - Page 31 9 Troubleshooting Fig.140 Step 3 3. Keep pressing the key until the required device, control PCB or zone is displayed. MW-3000374-02 Fig.141 Step 4 4. Press the key to confirm the selection. MW-3000454-01 Fig.142 Step 5 5. Keep pressing the key until the clear error memory menu is displayed.
- Page 32 9 Troubleshooting 7698983 - v.02 - 17102018...
- Page 33 9 Troubleshooting 7698983 - v.02 - 17102018...
- Page 34 9 Troubleshooting 7698983 - v.02 - 17102018...
- Page 35 © Copyright All technical and technological information contained in these technical instructions, as well as any drawings and technical descriptions supplied, remain our property and shall not be multiplied without our prior consent in writing. Subject to alterations.
- Page 36 T +44 (0)118 978 3434 F +44 (0)118 978 6977 E boilers@remeha.co.uk Remeha Commercial UK Innovations House 3 Oaklands Business Centre Oaklands Park RG41 2FD Wokingham 7698983 - v.02 - 17102018 7698983...
Need help?
Do you have a question about the Quinta Ace SCB-01 and is the answer not in the manual?
Questions and answers