
Related Manuals for Magic Chef MCSDRY35W


Summary of Contents for Magic Chef MCSDRY35W
- Page 1 3.5 Cu. Ft. Compact Dryer User’s Manual Model MCSDRY35W PLEASE READ THIS MANUAL CAREFULLY BEFORE USING YOUR DRYER AND KEEP IT FOR FUTURE REFERENCE.
-
Page 2: Product Registration
PRODUCT REGISTRATION Thank you for purchasing this Magic Chef® product. The first step to protect your new product is to complete the product registration on our website: www.mcappliance.com/register. The benefits of registering your product include the following: Registering your product will allow us to contact you regarding a safety notification or product update. -
Page 3: Table Of Contents
CONTENTS PRODUCT REGISTRATION ........... . . 2 PRECAUTIONS . -
Page 4: Precautions
The user guide is intended to help you operate and maintain your new appliance properly. Keep it handy to answer your questions. If you do not understand certain aspects or you need additional help, call Magic Chef® Customer Service: 1-888-775-0202. Keep proof of the original purchase date (i.e. sales receipt) with this guide to establish the warranty period. -
Page 5: Important Safety Instructions
IMPORTANT SAFETY INSTRUCTIONS WARNING: To reduce the risk of fire, electric shock, and/or injury to persons, basic safety precautions should ALWAYS be followed when using electrical appliances. When using electrical appliances, basic safety precautions should be followed, including the following: Read all instructions before using the appliance. - Page 6 22. DO NOT excessively bend, stretch, twist, or bind the power cord or place heavy objects on it. It is not recommended to use an extension cord with this product. 24. DO NOT install in a tight fitting cabinet. DO NOT overload the dryer. 26.
-
Page 7: Specifications
SPECIFICATIONS Figure 2 32.3” (820 mm) 21.5” (545 mm) 23.6” (600 mm) Height 32.3” (820 mm) Width 23.6” (600 mm) Depth 21.5” (545 mm) Weight 53 lbs. (24.0 kg) Power Supply 110 V / 60 Hz Capacity 3.5 Cu. Ft. Rated Power 1500 W * Due to continuing product development, specifications and design may be subject to change without prior notice. -
Page 8: Parts And Features
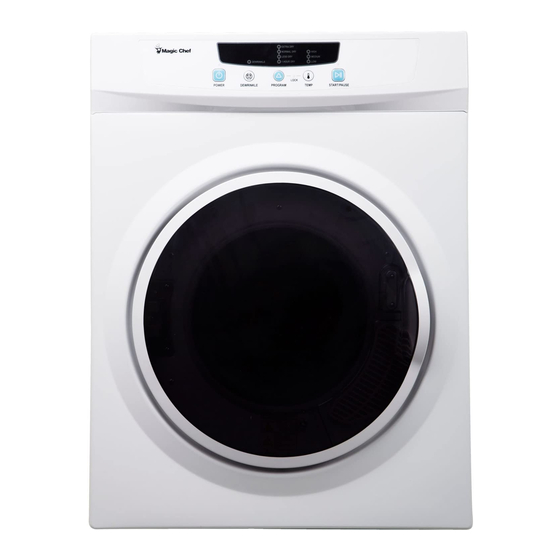
PARTS AND FEATURES FRONT Figure 3 The appearance of your model may slightly differ from the illustrations in this manual. Door Window Control Panel Door Gasket Drum Lint Filter Air Intake Shroud BACK Figure 4 The appearance of your model may slightly differ from the illustrations in this manual. -
Page 9: Installation Instructions
INSTALLATION INSTRUCTIONS LOCATION Examine the dryer after unpacking. Check for damage such as a misaligned door, broken door or dent in the cavity. If any damage is visible, DO NOT install, and notify your dealer immediately. Check to ensure that you have the wall-mounting kit and four (4) legs. Install the dryer on a flat, level surface. - Page 10 WALL-MOUNTING INSTRUCTIONS Tools and Parts Required for Plaster Wall-Mounting Kit (Includes) and/or Wood Installation (Not Included) Drill & 3mm Bit Wall-Mounting Hooks Phillips Head Screwdriver 1” Phillips Head Screws Expanding Wall Anchor Bolts 2" Plastic Spacers Wooden Slats 22.3" (L) 3.0" (H) x 1.0" (D) ½”...
- Page 11 Install the four (4) wood screws to the bottom wooden slat. Wood Screws Section 1 Exhaust Connector Install the exhaust connector as shown in the illustration using the (3) ½” Phillips round Section 2 head screws included. • For downward exhaust, refer to Section 1. • For upward exhaust, refer to Section 2. Install the lower wall spacers (included) using the (2) ½”...
-
Page 12: Operation Instructions
OPERATION INSTRUCTIONS CONTROL PANEL Figure 6 POWER: Turn the power on by pressing the “Power” button. The unit will beep and the light above the button will come on, indicating power is being supplied to the dryer. The default settings (Extra Dry and Medium) will be selected. - Page 13 the door is opened when the drying program is paused, the “Start/Pause” button must be pressed again to start the program from where it left off. LOCK: When the dryer is running, press the “Program” and “Temp” buttons simultaneously and hold for 3 seconds to lock all buttons.
- Page 14 • DRYING TIME: The drying time depends on many factors, such as the type of fabric. In addition, the drying duration is dependent on how dry you want the laundry to be when taken out of the dryer. • DRYER ADDED FABRIC SOFTENERS: Certain dryer added fabric softeners may cause damage to automatic dryers.
-
Page 15: Care And Maintenance
CARE AND MAINTENANCE UNIT The dryer should be cleaned regularly, including the control panel, with a soft cloth and nonabrasive household detergents. The use of harsh detergent or abrasives is not recommended. DO NOT pour water on the dryer or control panel. Use a soft cloth to dry the surfaces. Failure to maintain the dryer in a clean condition could lead to deterioration of the surface which could adversely affect the life of the appliance and possibly result in a hazardous situation. - Page 16 AIR INTAKE FILTER The dryer should be cleaned regularly, including the air intake filter. Refer to the Air Intake Filter Assembly chart when cleaning the filter. NOTE: Unplug the power cord before cleaning any part of the dryer. Air Intake Filter Assembly Remove by pulling outwards, holding the upper and lower ends of the air intake shroud.
-
Page 17: Troubleshooting
Ensure the items are not knotted or bulked together. The dryer is not located in a properly ventilated area. Ensure your washer's spin cycle is extracting water properly. NOTE: If the problem persists, contact Magic Chef® Customer Service: 1-888-775-0202 for assistance. -
Page 18: Limited Warranty
This warranty gives you specific legal rights, and you may also have other rights which vary from state to state. Model Parts Labor Type of Service MCSDRY35W One Year One Year Carry In For Service or Assistance please call 888-775-0202 or visit us on the web at www.mcappliance.com to request warranty service... - Page 19 CNA International, Inc. d/b/a MC Appliance Corporation. All rights reserved. Magic Chef® logo is a registered trademark of CNA International, Inc. www.mcappliance.com Printed in China...
- Page 21 Secadora compacta de 1.6 pies cúbicos Manual del usuario Modelo MCSDRY16W LEA ESTE MANUAL ANTES DE UTILIZAR SU SECADORA Y GUÁRDELO PARA FUTURA REFERENCIA.
-
Page 22: Registro Del Producto
REGISTRACIóN DEL PRODUCTO Gracias por comprar el producto Magic Chef®. El primer paso para proteger su nuevo producto es completar la forma de registración en nuestra pagina web: www.mcappliance.com/register. Los beneficios de registrar su producto incluyen lo siguiente: Al registrar su producto nos permite contactarle para notificarle de un cambio de seguridad o actualización del producto. - Page 23 íNDICE REGISTRO DEL PRODUCTO ........... 22 PRECAUCIONES .
-
Page 24: Precauciones
Téngalo a mano a fin de responder preguntas. Si no comprende determinados aspectos o necesita ayuda adicional, comuníquese con el Servicio al cliente de Magic Chef®: 1-888- 775-0202. Conserve la prueba de la fecha de compra original (p. ej., recibo de compra) con este manual, a fin de determinar el período de garantía. -
Page 25: Instrucciones De Seguridad Importantes
INSTRUCCIONES DE SEGURIDAD IMPORTANTES ADVERTENCIA: A fin de reducir el riesgo de incendio, descarga eléctrica y/o lesiones personales, deben seguirse siempre las precauciones básicas de seguridad al utilizar electrodomésticos. Cuando se usan equipos eléctricos deben seguirse ciertas reglas básicas de seguridad, incluyendo lo siguiente: Lea todas las Instrucciones antes de usar el equipo. - Page 26 NO sostenga el aparato por el cable ni tire de él para desconectarlo del tomacorriente. Para desconectarlo, sujete el enchufe y tire. 22. NO doble, estire, gire ni ate excesivamente el cable eléctrico, ni coloque objetos pesados sobre el mismo. No se recomienda usar un cable de extensión con este producto.
-
Page 27: Especificaciones
ESPECIFICACIONES Figura 2 820 mm (32.3”) 545 mm (21.5”) 600 mm (23.6”) Altura 820 mm (32.3”) Ancho 600 mm (23.6”) Profundidad 545 mm (21.5”) Peso 24.0 kg (53 lbs.) Suministro eléctrico 110 V / 60 Hz Capacidad 3.5 Cu. Ft. Voltaje nominal 1500 W * Debido al desarrollo continuo de productos, las especificaciones y el diseño pueden estar sujetos a cambios sin... -
Page 28: Partes Y Funciones
PARTES Y FUNCIONES PARTE DELANTERA Figura 3 El aspecto de su modelo puede variar levemente con respecto a las ilustraciones del manual. Puerta Ventana Panel de control Junta de la puerta Tambor Filtro de pelusas Cubierta de la entrada de aire PARTE TRASERA Figura 4 El aspecto de su modelo puede... -
Page 29: Instrucciones De Instalación
INSTRUCCIONES DE INSTALACIóN UBICACIÓN Revise la secadora después de desempacarla. Verifique si hay algún daño tal como una puerta desalineada, rota, o una abolladura en la cavidad. Si tiene daños visibles, NO instale la secadora y notifique a su distribuidor inmediatamente. Verifique que tenga el kit de montaje en la pared y cuatro (4) patas. - Page 30 INSTRUCCIONES DE MONTAJE EN LA PARED Herramientas y partes necesarias Kit de montaje en pared (incluido) para la instalación en yeso y/o madera (no se incluyen) Taladro y broca de 3mm Ganchos para montaje en pared Destornillador de cabeza Phillips (estrella) Tornillos Phillips (estrella) de 1”...
- Page 31 Coloque los cuatro (4) tornillos para madera en la lámina de madera inferior. Tornillos para madera Sección 1 Conector de Coloque el conector de escape como se tubo de escape muestra en la imagen, usando los tres (3) tornillos Phillips (estrella) de cabeza redonda de ½”...
-
Page 32: Instrucciones De Funcionamiento
INSTRUCCIONES DE FUNCIONAMIENTO PANEL DE CONTROL Figura 6 ENCENDER: Encienda la secadora presionando el botón “Encender”. El equipo emitirá un sonido, y se encenderá la luz ubicada sobre el botón, indicando que se le suministra energía a la secadora. Se seleccionarán los ajustes predeterminados (Extra seco y Medio). - Page 33 • Media: la secadora usa dos ajustes de elementos de calor durante 10 minutos y luego usa un ajuste durante otros 10 minutos, alternando entre uno y otro. • Baja: la secadora usa un ajuste de elementos de calor, proporcionando el flujo de calor más débil. ENCENDER/DETENER: Presione el botón para encender el programa de secado ajustado.
- Page 34 NOTA: NO use suavizantes de ropa o productos relacionados que ayuden a eliminar la estática, a menos que el fabricante del suavizante o de productos relacionados lo recomiende. CUIDADO DE LA TELA • Para obtener mejores resultados, cargue la secadora con ropa de telas, pesos y fabricación similares. •...
- Page 35 No planchar Limpieza en seco con cualquier solvente Limpieza en seco con percloruro, combustible para encendedores, alcohol puro o R113 solamente Limpieza en combustible de aviación, alcohol puro o R113 solamente No limpiar en seco Secar plano Puede colgarse para secar Secar colgado en tendedero Centrifugado, calor normal Centrifugado, calor reducido...
-
Page 36: Cuidado Y Mantenimiento
CUIDADO Y MANTENIMIENTO UNIDAD La secadora debe limpiarse de manera regular, incluido el panel de control, con un paño suave y detergentes domésticos no abrasivos. No se recomienda el uso de detergentes fuertes o abrasivos. No vierta agua en la secadora ni en el panel de control. - Page 37 FILTRO DE TOMA DE AIRE La secadora debe limpiarse con regularidad, incluyendo el filtro de toma de aire. Consulte la tabla del filtro de toma de aire cuando limpie el filtro. NOTA: Desconecte el cable eléctrico antes de limpiar cualquier parte de la secadora. Montaje del filtro de toma de aire Retire tirando hacia afuera, sosteniendo los extremos superior e inferior de la cubierta de la toma de aire.
-
Page 38: Solución De Problemas
Asegúrese de que las prendas no estén anudadas o amontonadas. La secadora no está ubicada en un área debidamente ventilada. Garantizar su lavadora de ciclo está extrayendo la agua adecuadamente. NOTA: Si el problema persiste, comuníquese con el Servicio al cliente de Magic Chef®: 1-888-775-0202 para recibir asistencia. -
Page 39: Garantía Limitada
Esta garantía le otorga a usted derechos legales específicos, y usted puede también tener otros derechos que varían según la entidad federa!va donde se encuentre. Modelo Piezas Trabajo Tipo de servicio MCSDRY35W Uno año Uno año Lleve adentro Para servicio o asistencia, llame por favor al 888-775-0202. O visítenos en www.mcappliance.com para solicitar el servicio de garantía o repuestos. - Page 40 CNA International, Inc. realiza negocios bajo el nombre de MC Appliance Corporation. Derechos reservados. El logotipo Magic Chef® es una marca registrada de CNA International, Inc. www.mcappliance.com Impreso en China...
Need help?
Do you have a question about the MCSDRY35W and is the answer not in the manual?
Questions and answers
The dryer is new and it won’t power on. Please help!
The Magic Chef MCSDRY35W dryer may not power on due to the following reasons:
1. A circuit breaker has tripped or a fuse has blown. Check and reset the breaker or replace the fuse.
2. The main circuit breaker in the house is tripped. Verify and reset if necessary.
3. The door is not properly closed. Ensure it is fully shut.
4. There is an issue with the power supply. Ensure the dryer is plugged in and receiving power.
If the problem persists, contact Magic Chef® Customer Service at 1-888-775-0202 for assistance.
This answer is automatically generated