Advertisement
Quick Links
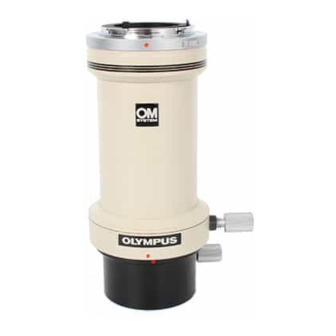
OM-MOUNT PHOTOMICRO ADAPTER L
For photomicrography with the OM-1 SLR Camera, this adapter is used to mount an eyepiece to
the camera. In this use, the eyepieces require special eyepiece adapters FK, P or G in conjunction
with an Olympus microscope except the Universal Research Microscope VANOX and the Photo-
micrographic Stand PM-PSS. For 20X objectives or lower, the adapter L directly connects to either
of these three eyepiece adapters, while the VANOX and PM-PSS do not require any eyepiece
adapter for photomicrography with the OM-1 through the whole range of magnification.
Advertisement

Related Manuals for Olympus OM-MOUNT PHOTOMICRO ADAPTER L


Summary of Contents for Olympus OM-MOUNT PHOTOMICRO ADAPTER L
- Page 1 In this use, the eyepieces require special eyepiece adapters FK, P or G in conjunction with an Olympus microscope except the Universal Research Microscope VANOX and the Photo- micrographic Stand PM-PSS. For 20X objectives or lower, the adapter L directly connects to either of these three eyepiece adapters, while the VANOX and PM-PSS do not require any eyepiece adapter for photomicrography with the OM-1 through the whole range of magnification.
- Page 2 • For Use with an Olympus Microscope 1. Attach the adapter L to the OM-1. The adapter L is attached on the camera in the same manner as the taking lens is attached. 2. Determine the magnification. Picture magnification is determined by the formula below:...
- Page 3 3. Olympus microscopes require special eyepices FK, P or G, as above. mentioned to be used with the OM-1 and adapter L for photomicrography. Their various cornbinations available are summarized as follows: MICROSCOPES EYEPIECES Universal Research Microscope VANOX Biological Microscopes E&Fseries...
- Page 4 NOTE: The VANOX and PM-PSS do not require any eyepiece adapter. 5. Mount the adapter L with camera on the microscope. After selection of the eyepiece/ eyepiece adapter combination, mount the entire camera assembly on the microscope in the following procedure: •...
- Page 5 • For P eyepiece (Fig. 2) 1) Attach the P eyepiece adapter to the photo tube all the way down (Fig. 2-(1) ). 2) Insert the P eyepiece into the photo tube (Fig. 2-(2) ). 3) Pressing down the eyepiece against the photo tube slightly, raise the eyepiece adapter until it is in contact with the eyepiece flange (be careful the eyepiece flange is in contact with both the photo tube and eyepiece adapter) and lock the adapter firmly with clamping screw.
- Page 6 • For G1OX eyepiece (Fig. 3) 1) Unscrew the upper part of the G eyepiece adapter (Fig 3-CD), insert the G1OX into the lower part (Fig. 3- (2) ), and rescrew the removed part of the adapter (Fig. 3-(3) ). 2) Attach the eyepiece/eyepiece adapter combination to the adapter L, and clamp (Fig.
- Page 7 • For G15X and G2OX eyepieces (Fig. 4) 1) Attach the G eyepiece adapter to the eyepiece sleeve, and clamp (Fig.4-(1))- 2) Insert the G15X or 20X into the G eyepiece adapter (Fig. 4- (2)). 3) Put the adapter L over the eyepiece adapter all the way down (Fig. 4-(3)), and clamp the entire camera assembly.
- Page 8 7. Focus 1) Focusing with the OM-System Focusing Screen (Cross Hairs-clear type No. 1-12) (1) Use the OM-System Dioptric Correction Lens or the Varimagni Finder (optional) so that the double cross line within the field of view can be clearly recognized as two lines. (2) Use the coarse and fine adjustment controls of the microscope to bring the specimen in focus.
- Page 10 Then raise the collar to support the arm. Mount the OM-1 on the adapter L. Focus and exposure. Refer to Para. 1 for “Use with an Olympus Microscope.” OCR’D & REFORMATTED FROM ORIGINAL OLYMPUS DOCUMENTS T.Hughes rev1.01 3/2001...
Need help?
Do you have a question about the OM-MOUNT PHOTOMICRO ADAPTER L and is the answer not in the manual?
Questions and answers