Advertisement
Quick Links
Advertisement

Related Manuals for ADWA AD 3000


Summary of Contents for ADWA AD 3000
- Page 1 USER MANUAL AD 3000 EC/TDS/Temperature Bench Meter ADWA INSTRUMENTS Kft. Alsókikötõ sor 11, 6726 Szeged, Hungary Tel. +36 62 317 878 Fax +36 62 550 610 e-mail: sales@adwainstruments.com www.adwainstruments.com w w w . a d w a i n s t r u m e n t s . c o m...
- Page 2 Adwa will not be held responsible for any accident whether directly or indi- rectly, caused by the use of this instrument.
-
Page 3: Table Of Contents
PROBE MAINTENANCE TABLE OF CONTENTS After measurements, rinse the probe with clean water. Introduction ............4 If a more thorough cleaning is required, remove the probe Technical Data ............. 6 sleeve and clean the probe with a cloth or a non-abra- Front and Rear Panels .......... -
Page 4: Introduction
INTRODUCTION Note: Press SHIFT+HOLD keys to escape without deleting data. If no samples are stored in memory and a dele- AD3000 is a bench microprocessor-based conductivity, tion is attempted, the meter shows the "Zero" TDS and temperature meter. message and then returns to measurement mode. The autoranging feature of the EC and TDS ranges automatically sets the instrument to the scale with the highest resolution. - Page 5 TO DELETE STORED DATA The meter allows to delete a single sample or all the This model is supplied complete with: memory at one time. • To delete a single sample proceed as follows: A76309 conductivity probe with built-in temperature sensor and 1 m cable •...
-
Page 6: Technical Data
TECHNICAL DATA • time Range 0.00 to 19.99 µS/cm; 0.00 to 9.99 ppm 20.0 to 199.9 µS/cm; 10.0 to 99.9 ppm to 1999 µS/cm; 100 to 999 ppm 2.00 to 19.99 mS/cm; 1.00 to 9.99 ppt • EC or TDS reading 20.0 to 199.9 mS/cm;... - Page 7 TO VIEW STORED DATA To retrieve the memorized infor- Reference Temperature mation, press SHIFT+RECALL Selectable from 15.0 to 30.0°C keys. Log-on-demand Up to 250 samples The primary LCD displays the date (day and month) Probe (included) A76309 EC probe and the secondary LCD shows the last stored sample with built-in temperature sensor number.
-
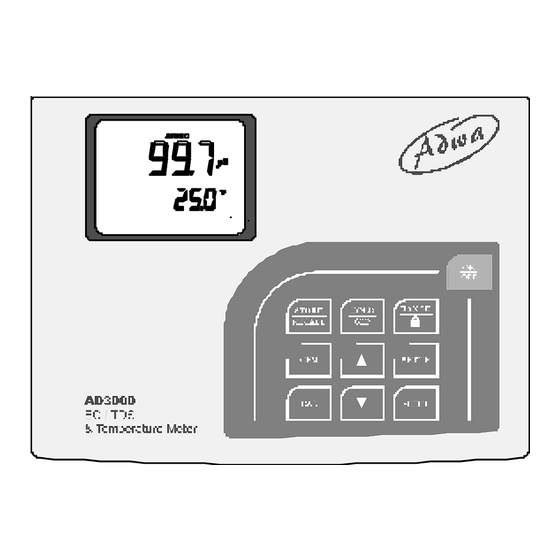
Page 8: Front And Rear Panels
FRONT AND REAR PANEL LOG-ON-DEMAND To store the current reading into Front Panel memory, press STORE key while in measurement mode. The LCD will display for a few seconds the "Stor" mes- sage together with the "LOG" tag and the sample num- ber. - Page 9 If RANGE is pressed when the last parameter is dis- 1. Liquid Crystal Display (LCD) played, the meter returns to measurement mode. 2. STORE/RECALL key, to store measurements and recall stored data 3. CFM key, to confirm values Notes: 4. CAL key, to enter/exit calibration mode •...
-
Page 10: Operational Guide
OPERATIONAL GUIDE Cell constant value (K): CONNECTIONS • Plug the 12 Vdc adapter into the power supply socket. Note: These instruments use non volatile memory to retain the calibration parameters and all other settings even when unplugged. If standard calibration solution was used: •... - Page 11 Last calibration date (day and month): TAKING MEASUREMENTS • Immerse the probe into the solu- Last calibration date (year): tion to be tested. The sleeve holes must be completely submerged. • Tap the probe repeatedly to remove any air bubbles that may be trapped inside the sleeve.
- Page 12 Notes: GOOD LABORATORY PRACTICE • If the meter displays only dashes "----", the read- Good Laboratory Practice (GLP) is a set of functions ing is out of range. that allows storage and retrieval of data regarding the • If the stability indicator (hourglass symbol) blinks, status of the system.
-
Page 13: Autoranging
The following table lists the setup items, their valid range AUTORANGING and the factory settings (default): The EC and TDS scales are autoranging. The meter automatically sets the scale with the highest possible Description Item Valid values Default resolution. Temp.compensation coeff. By pressing SHIFT and ”lock”... -
Page 14: Temperature Compensation
TEMPERATURE COMPENSATION Three options are available for temperature compen- sation: 1. Automatic (ATC): the EC probe features a built-in temperature sensor, which provides the temperature Press the arrow keys to change the value. reading to automatically compensate the EC/TDS measurement (from -9.9 to 120.0°C), also using the selected reference temperature. - Page 15 SETUP • If the temperature compensation is active, mea- surements are compensated using the tempera- Setup mode allows to view and modify the instrument ture coefficient (default value 1.90 %/°C). parameters. To change the temperature coefficient, enter the To enter setup mode, press SETUP key from measure- setup mode and select the “tc”...
-
Page 16: Ec Calibration
EC CALIBRATION TEMPERATURE ADJUSTMENT The temperature reading can be manually fine-tuned fol- STANDARD CALIBRATION lowing the next procedure. EC calibration is a one-point procedure. Selectable cali- Press SHIFT and CAL keys to en- bration points are: 0.00, 84.0 and 1413 µS/cm, 5.00, 12.88, ter the temperature adjustment 80.0 and 111.8 mS/cm. - Page 17 Notes: • The primary LCD displays the not calibrated EC read- ing, while the secondary LCD shows one of the avail- • Zero calibration is not allowed in custom mode. able standard values. The hourglass symbol blinks. • The calibrated custom value is considered the value of the calibration solution at the selected reference temperature.
- Page 18 Notes: • The "CAL", "BUFFER" and "Cal Point Custom" tags light up. The primary LCD displays the not calibrated • If the temperature is out of range, the "WRONG temperature compensated EC reading, while the sec- BUFFER TEMP" message blinks on the LCD. If the ondary LCD shows the temperature compensated EC reading is too far from the expected value, "WRONG reading, factory calibrated with k=1.
Need help?
Do you have a question about the AD 3000 and is the answer not in the manual?
Questions and answers