Parrot AR.Drone 2.0 Quick Start Manual
Hide thumbs
Also See for AR.Drone 2.0:
- Quick start manual (204 pages) ,
- User manual (12 pages) ,
- User manual (39 pages)

Related Manuals for Parrot AR.Drone 2.0


Summary of Contents for Parrot AR.Drone 2.0
- Page 1 Quick start guide Guide de démarrage rapide Guía de instalación rápida Bedienungsanleitung Guida all’uso Gebruikershandleiding Manual do utilizador クイ ック スタート ガイド 使用說明書...
- Page 3 AR.Drone 2.0 p.11 English ..........p.33 Français .......... p.55 Español ........... p.77 Deutsch .......... p.99 Italiano ..........p.121 Nederlands ........p.143 Portuguese ........日本語 ..........p.165 p.185 繁體中文 ........p.203 ........简体中文 www.parrot.com http://ardrone.parrot.com...
- Page 4 Pictures are not contractual / Visuels non contractuels / Imágenes no contractuales / Unverbindliche Displays / Visual non contrattuali Niet-contractuele beelden / Visuais não contratuais / イ ラス ト と実際 の製品とは異なる場合があります。 / 非合同圖像 / 非合同图像...
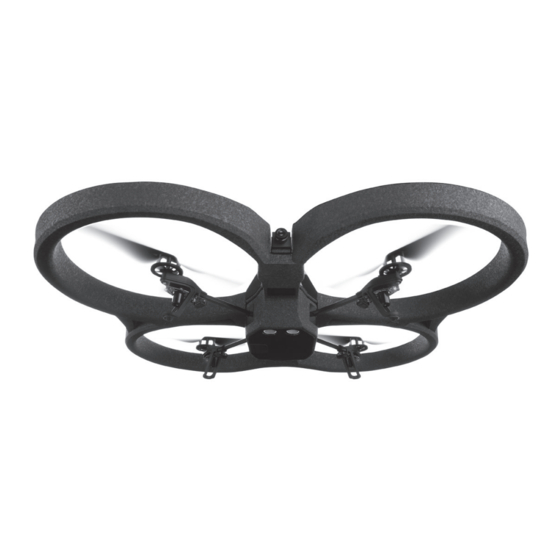
- Page 5 AR.Drone 2.0 Hull with apertures (indoor use) / Carène avec arceaux (utilisation en extérieur) / Quilla extraíble con anillas (utilización en exteriores) / Abnehmbare Verkleidung mit Rotoren / Carenatura asportabile con le protezioni anulari / Kiel met hoepels (buitengebruik) / Carena com arcos (utilização no exterior) / 屋内用ハル/ 不含圓框的可拆卸...
- Page 7 Do not discard the provided stickers. To play the multi-player game AR.Flying Ace, these stickers must be stuck on the internal hull surface at the locations indicated on the diagrams below. Ne jetez pas les autocollants fournis ! Pour jouer au jeu multi-joueurs AR.FlyingAce, ces stickers doivent être impérativement collés sur la carène intérieure No tire los autoadhesivos suministrados.
- Page 10 ABSOLUTE CONTROL ABSOLUTE CONTROL...
-
Page 11: Table Of Contents
Parrot prefers to put user documents online rather than print them out. This simplified guide to the AR.Drone 2.0 is therefore limited to providing you with the main instructions that will make it easy for you to use the device. -
Page 12: Health And Safety Precautions
The AR.Drone 2.0 is a model aircraft designed only for recreation, entertainment, and competitions between model aircraft (*). The pilot must directly control the flight path of his or her AR.Drone 2.0 at all times in order to avoid any obstacles, and must take care only to use it in suitable locations chosen to ensure that people, animals and property remain safe at all times. - Page 13 Use and maintenance The AR.Drone 2.0 is not suitable for use by children under 14 years of age. To fly the AR.Drone 2.0 indoors install the hull in order to protect the AR.Drone 2.0 in case of collision with any object.
- Page 14 This may create interferences that could reduce the performance of the AR.Drone 2.0. Avoid flying the AR.Drone 2.0 at high altitude: it could get drawn by an airstream. Keep in mind that the wind strength that you encounter where you are piloting the AR.Drone 2.0 may well be different from the wind strength where the AR.Drone 2.0 is actually flying.
- Page 15 Do not circulate a degrading image or one which could undermine the reputation or dignity of an individual. The use of the AR.Drone 2.0 for surveillance or espionage is strictly forbidden and could result in your prosecution under the law. Check that your use of the cameras on board the AR.Drone 2.0 complies with the legal provisions on the protection...
- Page 16 Never charge the device immediately after use while it is still hot. Let it cool down to room temperature. Do not charge the battery while it is still connected to the AR.Drone 2.0. Batteries are only to be charged under adult supervision.
- Page 17 Remove the battery when you are not using the device. Disconnect the charger when you are not charging the battery. Battery disposal Discarding batteries in your general household waste can be harmful to the environment. Damaged or unusable batteries must be disposed of in a container specially reserved for this purpose. When disposing of the battery, follow appropriate local guidelines and regulations.
-
Page 18: Getting Started
The AR.Drone 2.0 batteries work with the AR.Drone and the AR.Drone batteries work with the AR.Drone 2.0. However, the AR.Drone 2.0 charger does not allow the batteries of the AR.Drone to be charged, and the AR.Drone charger does not allow the batteries for the AR.Drone 2.0 to be charged. - Page 19 Downloading the application Note : The AR.FreeFlight 2 application allowing you to use the AR.Drone 2.0 with an Android phone or tablet PC will be available in 2012. Login to the App Store or the Android Market and download the free application AR.FreeFlight 2.
- Page 20 In case of problem during the connection process between the smartphone and the AR.Drone 2.0 : Check the color of the LED on the bottom side of the AR.Drone 2.0. If it is red or orange, restart the AR.Drone 2.0. To do so, disconnect and reconnect the battery. Wait until the LED turns green.
-
Page 21: Freeflight
FreeFlight We recommend you check out our flying tutorials on www.parrot.com before your first flight. Indoor usage Place the AR.Drone 2.0 in the middle of a room (4m x 4m minimum) without obstacles. Step back to a distance of 1 metre behind the device (the front of the device is easy to identify because of the camera). - Page 22 Make sure the AR.Drone 2.0 is on a flat area then tap the button. b. Select the hull that is currently installed on the AR.Drone 2.0 (internal or external) and then the type of flight (internal or external) that you wish to make.
- Page 23 Note: To fly the AR.Drone 2.0 more intuitively, we recommend you activate the Magneto option in the AR.Drone 2.0 settings. This option allows you to fly the AR.Drone 2.0 in your frame of reference and not in the drone one.
- Page 24 Switching cameras Press the button to change the view of the AR.Drone 2.0 and switch between the front camera and vertical camera. Photos Press the button to take a picture. Select Photos / Videos from the main menu of the AR.FreeFlight 2.0 application to view and man- age your photos.
- Page 25 AR.Drone 2.0 in due time the autopilot will land the AR.Drone 2.0 automatically. We recommend you to land your AR.Drone 2.0 as soon as the battery level indicator becomes red in order to avoid any injury to any person, property or animal.
- Page 26 Press the Emergency button only in case of emergency ! If you press the Emergency button, the engines will shut off and the AR.Drone 2.0 will fall out of the air. In most cases, landing the AR.Drone 2.0 is a better solution.
-
Page 27: Technical Specification
45,2 x 45,2 cm Video frequency: 60fps Resolution: 320x240 pixels (QVGA) Battery Lithium polymer battery (3 cells, 11.1V, AR.Drone 2.0 operating temperature 1000 mAh) 0°C - 55°C Charging time: 1h30 Running time: 12 mn Embedded computer system... -
Page 28: General Information
AR.Drone 2.0 in any way that could interfere with any other person’s privacy. Parrot’s warranty does not cover:... - Page 29 Changes to this Quick Start Guide Parrot, in particular, the use of batteries not The explanations and specifications in this guide are given for information only and may be modi- approved by Parrot (genuine Parrot batteries can be identified by their hologram);...
- Page 30 This equipment your AR.Drone 2.0 – he might have put in place generates, uses and can radiate radio frequency energy and, if not installed and used in accor- recycling services or he may be part of a specific...
- Page 31 Trademarks Parrot and the Parrot logo are registered NEVER use anything EXCEPT a LiPo trademarks of PARROT SA; AR.Drone 2.0 is a approved charger. trademark of Parrot SA; ALWAYS use a LiPo cell balancing charger or iPhone ®...
- Page 32 Caution: Exposure to Radio Frequency 6. Follow all instructions. Radiation 7. Do not use this apparatus near water. The installer of this radio equipment must en- 8. Clean only with dry cloth. sure that the antenna is located or pointed 9.
Need help?
Do you have a question about the AR.Drone 2.0 and is the answer not in the manual?
Questions and answers