
Subscribe to Our Youtube Channel
Related Manuals for Allen-Bradley XM-124


Summary of Contents for Allen-Bradley XM-124
- Page 1 User Manual Original Instructions XM-124 Standard Dynamic Measurement Module Catalog Numbers 1440-SDM02-01RA, 1440-TB-A/C...
- Page 2 Important User Information Read this document and the documents listed in the additional resources section about installation, configuration, and operation of this equipment before you install, configure, operate, or maintain this product. Users are required to familiarize themselves with installation and wiring instructions in addition to requirements of all applicable codes, laws, and standards.
-
Page 3: Table Of Contents
Additional Resources ......... . 11 Chapter 1 Install the XM-124 Standard European Hazardous Location Approval ....15 North American Hazardous Location Approval. - Page 4 Invalid Configuration Errors ........105 XM-124 Module I/O Message Formats ......105 Poll Message Format .
- Page 5 Table of Contents Appendix B CIP Objects Identity Object (Class Code 01H) ......120 Class Attributes .
- Page 6 Table of Contents Instances..........140 Instance Attributes .
- Page 7 Table of Contents 4…20 mA Output Object (Class ID 32AH) ....161 Class Attributes ......... . 161 Instances.
- Page 8 Table of Contents Notes: Rockwell Automation Publication 1440-UM001D-EN-P - September 2016...
-
Page 9: Summary Of Changes
Summary of Changes This manual contains new and updated information as indicated in the following table. Topic Page Updated the Terminal Block Assignments table Added Table for Transducer Power Setting and Output Range Added FMAX Options Table to Spectrum/Waveform Measurement Options Rockwell Automation Publication 1440-UM001D-EN-P - September 2016... - Page 10 Summary of Changes Notes: Rockwell Automation Publication 1440-UM001D-EN-P - September 2016...
-
Page 11: Preface
These documents contain additional information concerning related products from Rockwell Automation. Resource Description XM-124 Standard Dynamic Measurement Installation Provides general guidelines for installing the XM-124 Instructions, publication 1440-IN001 Standard Dynamic Measurement module. XM-120 Eccentricity Module User Guide, Provides instructions for the use of the XM-120... - Page 12 Preface Notes: Rockwell Automation Publication 1440-UM001D-EN-P - September 2016...
-
Page 13: Install The Xm-124 Standard Dynamic Measurement Module
Chapter Install the XM-124 Standard Dynamic Measurement Module This chapter discusses how to install and wire the XM-124 Standard Dynamic Measurement module (catalog numbers 1440-SDM02-01RA and 1440-TB-A/C). It also describes the module indicators and the basic operations of the module. - Page 14 Chapter 1 Install the XM-124 Standard Dynamic Measurement Module ATTENTION: Environment and Enclosure This equipment is intended for use in a Pollution Degree 2 industrial environment, in overvoltage Category II applications (as defined in IEC 60664-1), at altitudes up to 2000 m (6562 ft) without derating.
-
Page 15: European Hazardous Location Approval
ATTENTION: This equipment is not resistant to sunlight or other sources of UV radiation. WARNING: The following warnings apply to installations of the XM-124. • This equipment must be installed in an enclosure providing at least IP54 protection when applied in Zone 2 environments. -
Page 16: North American Hazardous Location Approval
The module provides onboard processing of critical vibration parameters and advanced alarm and relay logic. The XM-124 module can act independently, or it can serve data to integrated automation and control systems. These systems can then help protect machinery from failures or inform operators of abnormal conditions or faults. -
Page 17: Module Components
XM vibration modules, including the XM-124 module. IMPORTANT XM-124 module certifications are valid only when used with the 1440-TB-A/C revision of the terminal base. • XM-124 Standard Dynamic Measurement Modules - The modules mount on the XM-940 terminal base via a keyswitch and a 96-pin connector. -
Page 18: Xm Installation Requirements
Additional Resources on page The XM-124 module is designed so that it can be used to replace an XM-120 or XM-121 module, revisions D01 or later. If an earlier revision of an XM-120/ XM-121 module is being replaced, changes to wiring can be required. See the XM-120/XM-121 User Manual for details. -
Page 19: Power Requirements
Install the XM-124 Standard Dynamic Measurement Module Chapter 1 Power Requirements Before you install the module, calculate the power requirements of all modules that are interconnected via their side connectors. The total current draw through the side connector cannot exceed 3 A. See the specifications for the individual module for power requirements. -
Page 20: Grounding Requirements
Hold-up Time As required (typically 50 ms at full rated load) (1) When a fused supply is used, the fuse must be a 5 A, listed, fast-acting fuse such as provided by Allen-Bradley part number 1440-5AFUSEKIT. IMPORTANT See XM the Power Supply Solutions Application Technique, publication ICM-AP005, for guidance in designing power supplies for XM systems. - Page 21 Install the XM-124 Standard Dynamic Measurement Module Chapter 1 Figure 4 - XM System DIN Rail Grounding Ground bus Use 8.4 mm (8 AWG) wire. Grounding - Electrode Conductor to Grounding-Electrode System Use 2.1 mm (14 AWG) wire 1440-VST02-01RA 1440-REX00-04RD...
- Page 22 Chapter 1 Install the XM-124 Standard Dynamic Measurement Module Figure 5 - Grounding Screw on XM Terminal Base Screw hole for Screw hole for Grounding screw panel/wall panel/wall hole for panel/wall mounting mounting mounting Rockwell Automation Publication 1440-UM001D-EN-P - September 2016...
- Page 23 Install the XM-124 Standard Dynamic Measurement Module Chapter 1 Figure 6 - Panel/Wall Mount Grounding Ground bus Grounding - Electrode Conductor to Grounding-Electrode System Use 8.4 mm (8 AWG) wire. Use 2.1 mm (14 AWG) wire. If it is desired to isolate the power...
-
Page 24: Mount The Terminal Base Unit
Install the XM-124 Standard Dynamic Measurement Module DeviceNet Grounding The XM-124 and XM-940 are able to use an external DeviceNet power supply. If DeviceNet V- is not grounded elsewhere, connect DeviceNet V- to earth ground at one of the XM modules, as shown in... -
Page 25: Mount The Terminal Base Unit On A Din Rail
Install the XM-124 Standard Dynamic Measurement Module Chapter 1 IMPORTANT XM-124 module certifications are valid only when used with the 1440-TB-A/C revision of the terminal base. Mount the Terminal Base Unit on a DIN Rail Use these steps to mount the terminal base unit on a DIN rail (Allen-Bradley catalog no. -
Page 26: Interconnect Terminal Base Units
Chapter 1 Install the XM-124 Standard Dynamic Measurement Module 4. To lock the terminal base on the DIN rail, press down on the terminal base unit. If the terminal base does not lock into place, use a screwdriver or similar device to open the locking tab. -
Page 27: Wire The Terminal Base Unit
Wiring to the module is made through the terminal base unit on which the Wire the Terminal Base Unit module mounts. The XM-124 module is compatible only with the XM-940 terminal base unit, catalog number 1440-TB-A. Rockwell Automation Publication 1440-UM001D-EN-P - September 2016... -
Page 28: Terminal Block Assignments
Row B Row C XM-940 (catalog number 1440-TB-A) Terminal Block Assignments The terminal block assignments for the XM-124 standard dynamic measurement module are described in this section. ATTENTION: The terminal block assignments are different for different XM modules. Table 2 on page 29 applies only to the XM-124 module. - Page 29 Install the XM-124 Standard Dynamic Measurement Module Chapter 1 Table 2 - Terminal Block Assignments Name Description Xducer 1 (+) Vibration transducer 1 connection Xducer 2 (+) Vibration transducer 2 connection Buffer 1 (+) Vibration signal 1 buffered output Buffer 2 (+)
-
Page 30: Connecting Power
Chapter 1 Install the XM-124 Standard Dynamic Measurement Module Table 2 - Terminal Block Assignments Name Description Chassis Connection to DIN rail ground spring or panel mounting hole Chassis Connection to DIN rail ground spring or panel mounting hole SetPtMult... -
Page 31: Connect The Relay
See the installation instructions for your specific XM module for complete wiring information. Connect the Relay The XM-124 module has Normally Open relay contacts, which close when the control output is energized. The alarms that are associated with the relay and whether the relay is normally de-energized (non-failsafe) or normally energized (failsafe) depends on the configuration of the module. - Page 32 Chapter 1 Install the XM-124 Standard Dynamic Measurement Module Table 3 - Relay Connections for the XM-124 Module Configured for Failsafe Operation Wire Contacts Relay Terminals Nonalarm Alarm Closed Opened Configured for Non-Failsafe Operation Wire Contacts Relay Terminals Contact Nonalarm...
-
Page 33: Connect The Tachometer Signal
Install the XM-124 Standard Dynamic Measurement Module Chapter 1 Connect the Tachometer Signal The XM-124 module provides one tachometer input signal. The signal processing that is performed on the tachometer signal depends on the configuration of the module. See page 83 for a description of the tachometer parameters. - Page 34 Chapter 1 Install the XM-124 Standard Dynamic Measurement Module Connecting a Hall Effect Tachometer Sensor Figure 13 shows the wiring of a Hall Effect Tachometer Sensor, catalog number 44395, to the terminal base unit. Figure 12 - Hall Effect Tachometer Signal Connection...
-
Page 35: Connect The Buffered Outputs
The Transducer Power Type parameter described in Table 4 controls the range of the buffered output signal. The XM-124 module can accept inputs from any Allen-Bradley non-contact eddy current probe, a standard IEPE accelerometer, a velocity transducer, AC voltage output, or a DC voltage output measurement device. - Page 36 0…+24 Volt range.) Figure 15 - IEPE Accelerometer to Channel 1 Wiring TYPICAL WIRING FOR IEPE ACCELEROMETER TO XM-124 STANDARD DYNAMIC MEASUREMENT MODULE CHANNEL 1 Pin A - Signal Pin B - Common Cable shield not...
- Page 37 Install the XM-124 Standard Dynamic Measurement Module Chapter 1 Figure 16 - IEPE Accelerometer to Channel 2 Wiring TYPICAL WIRING FOR IEPE ACCELEROMETER TO XM-124 STANDARD DYNAMIC MEASUREMENT MODULE CHANNEL 2 Pin A - Signal Pin B - Common Cable shield not...
- Page 38 Chapter 1 Install the XM-124 Standard Dynamic Measurement Module Figure 17 - Non-contact Sensor to Channel 1 Wiring TYPICAL WIRING FOR NON-CONTACT SENSOR TO XM-124 STANDARD DYNAMIC MEASUREMENT MODULE CHANNEL 1 Isolated Sensor Driver Shield Floating Signal Common Channel 1 Input Signal...
- Page 39 IMPORTANT The module does not power the sensor. It measures only the input voltage. Figure 19 - Velocity Sensor to Channel 1 Wiring TYPICAL WIRING FOR COIL-BASED VELOCITY SENSOR TO XM-124 STANDARD DYNAMIC MEASUREMENT MODULE CHANNEL 1 Pin A - Common Pin B - Signal Cable shield not...
- Page 40 Install the XM-124 Standard Dynamic Measurement Module Figure 20 - Velocity Sensor to Channel 2 Wiring TYPICAL WIRING FOR COIL-BASED VELOCITY SENSOR TO XM-124 STANDARD DYNAMIC MEASUREMENT MODULE CHANNEL 2 Pin A - Common Pin B - Signal Cable shield not...
- Page 41 Install the XM-124 Standard Dynamic Measurement Module Chapter 1 Figure 21 - Powered Sensor to Channel 1 Wiring TYPICAL WIRING FOR MODEL 580 VIBRATION PICKUP TO XM-124 STANDARD DYNAMIC MEASUREMENT MODULE CHANNEL 1 +24V DC Common Signal Cable shield not...
- Page 42 IMPORTANT The module does not power the sensor. It measures only the input voltage. Figure 23 - DC Voltage Signal to Channel 1 Wiring TYPICAL WIRING FOR PROCESS DC VOLTAGE SIGNAL TO XM-124 STANDARD DYNAMIC MEASUREMENT MODULE CHANNEL 1 Process DC Source Cable shield not...
- Page 43 Install the XM-124 Standard Dynamic Measurement Module Chapter 1 Figure 24 - DC Voltage Signal to Channel 2 Wiring TYPICAL WIRING FOR PROCESS DC VOLTAGE SIGNAL TO XM-124 STANDARD DYNAMIC MEASUREMENT MODULE CHANNEL 2 Process DC Source Cable shield not...
- Page 44 Chapter 1 Install the XM-124 Standard Dynamic Measurement Module Figure 25 - IEPE Accelerometer and Non-contact Sensor Wiring TYPICAL WIRING FOR IFPF ACCELEROMETER AND NON-CONTACT SENSOR TO XM-124 STANDARD DYNAMIC MEASUREMENT MODULE Pin A - Signal Pin B - Common...
- Page 45 IMPORTANT Transducer DC bias is monitored on all signals. Figure 26 - Two IEPE Accelerometers and a Non-contact Sensor Wiring TYPICAL WIRING FOR TWO IFPF ACCELEROMETERS AND NON-CONTACT SENSOR TO XM-124 STANDARD DYNAMIC MEASUREMENT MODULE Pin A - Signal Pin A - Signal...
- Page 46 -24…0 Volts. Figure 27 - Velocity Sensor and Two Non-contact Sensor Wiring TYPICAL WIRING FOR COIL-BASED VELOCITY SENSOR AND TWO NON-CONTACT SENSORS TO XM-124 STANDARD DYNAMIC MEASUREMENT MODULE Pin A - Common Pin B - Signal Cable shield not...
-
Page 47: Connect The Remote Relay Reset Signal
This option includes latched relays in the Expansion Relay module when it is attached to the XM-124 module. TIP If you set a module relay to latching, make sure that any linked relays, such as relays in an XM-440 Master Relay Module, are not configured as latching. -
Page 48: Connect The Setpoint Multiplication Switch
Chapter 1 Install the XM-124 Standard Dynamic Measurement Module Figure 29 - Typical Multiple XM Modules Remote Relay Reset Signal Connection XM-124 Terminal Base #1 XM-124 Terminal Base #2 40 41 Momentary Switch Connect the Setpoint Multiplication Switch You can configure the module to multiply the alarm setpoints, or inhibit the alarms during the start-up period. -
Page 49: Connect The 4
Install the XM-124 Standard Dynamic Measurement Module Chapter 1 Connect the 4…20 mA Outputs The modules include an isolated 4…20 mA per channel output into a maximum load of 300 ohms. The measurements that the 4…20 mA output tracks and the signal levels that correspond to the 4 mA and 20 mA are configurable. -
Page 50: Serial Port Connection
Chapter 1 Install the XM-124 Standard Dynamic Measurement Module Serial Port Connection The XM-124 module includes a serial port connection that lets you connect a personal computer to it and configure the module parameters via the Serial Configuration software utility. -
Page 51: Devicenet Connection
The DeviceNet network is an open, global, industry-standard communication network that is designed to provide an interface through one cable from a programmable controller to a smart device such as the XM-124 module. As multiple XM modules are interconnected, the DeviceNet network also serves as the communication bus and protocol that efficiently transfers data between the XM modules. - Page 52 Chapter 1 Install the XM-124 Standard Dynamic Measurement Module ATTENTION: You must ground the DeviceNet shield at only one location. Connecting the DeviceNet shield to terminal 10 grounds the DeviceNet shield at the XM module. If you intend to terminate the shield elsewhere, do not connect the shield to terminal 10.
-
Page 53: Mount The Module
Install the XM-124 Standard Dynamic Measurement Module Chapter 1 Mount the Module The XM-124 standard dynamic measurement module (catalog number 1440-SDM02-01RA) is used only with the 1440-TB-A/C terminal base. WARNING: If you insert or remove the module while backplane power is on, an electric arc can occur. This arc could cause an explosion in hazardous location installations. -
Page 54: Set The Module Dip Switch
The switches are number from left to right and applied as shown in Figure 34 and in Table Figure 33 - XM-124 Module DIP Switch Bank Down Position = 0 Up Position = 1 DIP Switch Enable/Disable Normal Mode (on)/... -
Page 55: Switch 1 - Dip Switch Enable (0) / Disable (1)
BUS OFF condition can result. IMPORTANT When DIP switch #2 is set to Normal mode (ON), the XM-124 module behaves per the DeviceNet standard and does not communicate when power is not present on DeviceNet V+. - Page 56 Chapter 1 Install the XM-124 Standard Dynamic Measurement Module Communication Rate SW 3 SW 4 125 Kbps 250 Kbps 500 Kbps Auto Communication Rockwell Automation Publication 1440-UM001D-EN-P - September 2016...
-
Page 57: Switches 5
Install the XM-124 Standard Dynamic Measurement Module Chapter 1 Switches 5…10 - Set DeviceNet Address Follow these steps to set the node address. 1. See DeviceNet Node Addresses on page 59 for the switch settings of a specific address. 2. Using a pointed tool, slide switches 5…10 to the appropriate positions (1 or 0). - Page 58 Chapter 1 Install the XM-124 Standard Dynamic Measurement Module Table 6 - DeviceNet Node Addresses Node SW5 SW6 SW7 SW8 SW9 SW1 Node SW5 SW6 SW7 SW8 SW9 SW1 Addr Addr Rockwell Automation Publication 1440-UM001D-EN-P - September 2016...
-
Page 59: Electronic Data Sheets
See your DeviceNet documentation for instructions on registering the EDS files. ADR for XM Modules Automatic Device Replacement (ADR) is a feature of an Allen-Bradley DeviceNet scanner. It provides a means for replacing a failed device with a new unit, and having the device configuration data set automatically. Upon replacing a failed device with a new unit, the ADR scanner automatically downloads the configuration data and sets the node address. - Page 60 Chapter 1 Install the XM-124 Standard Dynamic Measurement Module • The ADR scanner cannot download the configuration data to an XM module if the module has a saved configuration in its nonvolatile memory. This happens because the saved configuration is restored and the module enters Run mode when the power is cycled.
-
Page 61: Power Up The Module
Install the XM-124 Standard Dynamic Measurement Module Chapter 1 • The ADR and trigger group functions cannot be used together. A module can have only one primary master so a module cannot be both configured for ADR and included in a trigger group. The ADR scanner must be the primary master for the modules configured for ADR. - Page 62 Chapter 1 Install the XM-124 Standard Dynamic Measurement Module Rockwell Automation Publication 1440-UM001D-EN-P - September 2016...
-
Page 63: Xm Serial Configuration Utility Software
Chapter Configure the XM-124 Standard Dynamic Measurement Module The XM-124 module is configured by using the XM® Serial Configuration Utility software. This section details the configuration process and associated parameters. Topic Page XM Serial Configuration Utility Software Configuring the XM-124 Standard Dynamic Measurement Module... -
Page 64: Module Selection And Connection
The XM Serial Configuration Utility welcome screen is shown in Figure The software version that is used for the XM-124 module can vary from the figure, but the release number must be at least 7.0.0. Figure 36 - 1XM Serial Configuration Utility Main Dialog Box A closed connector icon indicates a computer connection to an XM-124 module, and the application allows only configuration of that specific module. -
Page 65: Passwords And Access
Configure the XM-124 Standard Dynamic Measurement Module Chapter 2 Passwords and Access The XM Serial Configuration Utility includes a function that enables you to create and manage passwords for Administrator and Maintenance-level access. IMPORTANT The password function is optional, but once a password is defined for either the Administrator or Maintenance accounts, the utility requires that password to configure an XM-124 module. - Page 66 The XM Serial Configuration Utility stores XM module configurations in files having type extensions that match the model of the module. For example, configuration files for the XM-124 module end with the type extension ‘.124’ . Use the functions in the File Menu to open, close, and save these files.
-
Page 67: Configuring The Xm-124 Standard Dynamic Measurement Module
Configure the Channel Properties Use the Channel tab to define the characteristics of the transducer and the signal processing that is performed on the input signals. The XM-124 module has two input channels. 1. From the Module Properties dialog box, click the Channel tab. - Page 68 Chapter 2 Configure the XM-124 Standard Dynamic Measurement Module Table 7 - Transducer parameters (Continued) In this field Values are Comments Nominal Sensitivity Choose the sensitivity of the transducer. Your choice controls the list of possible full scale selections. Quantity of Measure Nominal Sensitivity The default is 200.0 mV/mil (displacement).
- Page 69 1X magnitude and phase, 2X magnitude and phase, 3X magnitude, Not 1X, and Sum Harmonics. The XM-120 Dynamic Measurement module performs the same measurements. The XM-124 V6 firmware also performs the same set of measurements while the Thrust Position measurement is not enabled.
- Page 70 Standard measurement mode measurements. This functionality contains the same set of measurements that are performed by the XM-124 V6 firmware while the Thrust Position measurement is enabled. This functionality is also like the position measurement that is performed by the XM-320 Position module when it is configured in its Normal mode.
- Page 71 Configure the XM-124 Standard Dynamic Measurement Module Chapter 2 Table 9 - Signal processing parameters In this field Values are Comments Full Scale Choose the maximum signal level that is expected to be processed by the The default value and the available values depend on the channel.
- Page 72 Chapter 2 Configure the XM-124 Standard Dynamic Measurement Module Spectrum/Waveform Measurement Options The Spectrum/Waveform Measurement options apply to the Standard, Alternating gSE, Tracking Filter, Band Pass Filter, and Thrust Position measurement modes. These settings affect the standard FFT and TWF measurements.
- Page 73 Configure the XM-124 Standard Dynamic Measurement Module Chapter 2 Table 10 - Spectrum/Waveform Measurement parameters (Continued) In this field Values are Comments Frequency Maximum The maximum frequency or order for the spectrum measurement. The sampling mode determines whether the frequency maximum is specified in Hz or orders.
- Page 74 Chapter 2 Configure the XM-124 Standard Dynamic Measurement Module Table 10 - Spectrum/Waveform Measurement parameters (Continued) In this field Values are Comments Number of Averages Enter the number of individual data sets to be incorporated into the In Asynchronous mode, the spectrum is averaged. In average calculation.
- Page 75 Configure the XM-124 Standard Dynamic Measurement Module Chapter 2 Band Measurement Options The Band measurement options apply to the Standard, Alternating gSE, Continuous gSE, and Thrust Position measurement modes. These settings affect the Band measurements that are derived from the FFT. There are four Band measurements for each channel.
- Page 76 Chapter 2 Configure the XM-124 Standard Dynamic Measurement Module Table 11 - Band measurement parameters (Continued) In this field Values are Comments Frequency Maximum Enter the upper limit of the range of spectrum bins to be included in the This value must be greater than the Band Frequency band measurement, and the frequency units (Hz or Orders).
- Page 77 Configure the XM-124 Standard Dynamic Measurement Module Chapter 2 gSE Measurement Options The gSE Measurement options apply to the Alternating gSE and Continuous gSE measurement modes. These settings affect the gSE Overall or gSE FFT measurements. Table 12 - gSE Measurement Parameters...
- Page 78 Chapter 2 Configure the XM-124 Standard Dynamic Measurement Module Table 12 - gSE Measurement Parameters (Continued) In this field Values are Comments Window type Choose the type of window to be applied to the waveform measurement before computing the spectrum: •...
- Page 79 Configure the XM-124 Standard Dynamic Measurement Module Chapter 2 Band Pass Filter Options The Band Pass Filter options apply to the Band Pass Filter measurement mode and affect the Band Pass Filter measurement. In this field Values are Comments Min Frequency 25…1000 Hz...
- Page 80 The radial movement is then subtracted from the position measurement performed by the first sensor. (1) Head-to-Head and Radial Cancel modes are not available in the XM-124. See IMPORTANT note, above. Rockwell Automation Publication 1440-UM001D-EN-P - September 2016...
- Page 81 When using this mode, the module uses straight targets, angled targets, or mixed target types, as shown in Figure Figure 38 - Normal Mode NORMAL MODE (straight targets) (angled targets) (mixed targets) The XM-124 provides monitoring facilities only for axial (thrust) measurements. Rockwell Automation Publication 1440-UM001D-EN-P - September 2016...
-
Page 82: Configure The Tachometer Properties
Chapter 2 Configure the XM-124 Standard Dynamic Measurement Module Eccentricity Measurement Options The Eccentricity options apply to the Eccentricity measurement mode and affect the Eccentricity measurement. In this field Values are Comments Output data Select mil or μm. The units of the Eccentricity measurement value. - Page 83 Configure the XM-124 Standard Dynamic Measurement Module Chapter 2 Table 14 - Tachometer parameters In this field Values are Comments Enable Auto Trigger Check to enable Auto Trigger mode. The minimum signal amplitude for Using Auto Trigger mode can cause the tachometer to trigger triggering is 2V peak-to-peak and the minimum frequency is 6 CPM (0.1...
-
Page 84: Alarm, Relay, And 4
Sets the alarm to be configured in the XM Serial Configuration Utility. Select a number from 1…16. Utility only) There are 16 alarms in the XM-124 module. The alarms are not restricted to a channel. Name (XM Serial Configuration Utility only) - Page 85 Configure the XM-124 Standard Dynamic Measurement Module Chapter 2 Table 15 - Alarm Parameters (Continued) Parameter Name Description Values/Comments Alert Threshold (High) The threshold value for the alert (alarm) condition. Same measurement unit as Output Data Unit selection for the specified channel except when IMPORTANT: This parameter is the greater threshold value when measurement/alarm type is phase (vector).
-
Page 86: Relay Parameters
Chapter 2 Configure the XM-124 Standard Dynamic Measurement Module Table 15 - Alarm Parameters (Continued) Parameter Name Description Values/Comments Speed Range Enable Controls whether the selected alarm is enabled only when the measured speed is within a machine speed range. Enter the machine... - Page 87 Configure the XM-124 Standard Dynamic Measurement Module Chapter 2 Table 16 - Relay Parameters (Continued) Parameter Name Description Options/Comments Enable Enable/disable the selected relay. XM Configuration EDS File IMPORTANT: The Relay Current Status is set to ‘Not Activated’ when the Utility relay is disabled.
- Page 88 Chapter 2 Configure the XM-124 Standard Dynamic Measurement Module Table 16 - Relay Parameters (Continued) Parameter Name Description Options/Comments Relay Installed Indicates whether the relay is a physical relay on a module or a virtual relay. If the relay is a physical relay, then you can set the Failsafe...
-
Page 89: Ma Output Parameters
Configure the XM-124 Standard Dynamic Measurement Module Chapter 2 4…20 mA Output Parameters The 4…20 mA output parameters define the characteristics of the two 4…20 mA output signals. The parameters are the same for each output. Table 17 - 4…20 mA Parameters... -
Page 90: Triggered Trend Parameters
Configure the XM-124 Standard Dynamic Measurement Module Triggered Trend Parameters The XM-124 module can collect a triggered trend. A triggered trend is a time- based trend that is collected when a relay on the XM module is activated, or the module receives a trigger event. -
Page 91: Su/Cd Trend Parameters
Displays a plot of the collected spectrum or waveform data. SU/CD Trend Parameters The XM-124 module can collect start-up or coast-down trend data when the machine speed passes into a defined speed range. A tachometer input is required to collect the start-up/coast-down trend. - Page 92 Chapter 2 Configure the XM-124 Standard Dynamic Measurement Module The SU/CD trend parameters define the trend data that is collected by the module during the start-up or coast-down of a machine. Use these parameters to configure the measurements included in the start-up and coast-down trend records, the interval between trend records, and the minimum and maximum speed limits at which record collection starts and stops.
-
Page 93: I/O Data Tab
Configure the XM-124 Standard Dynamic Measurement Module Chapter 2 Table 19 - SU/CD Trend Parameters (Continued) Parameter Name Description Values/Comments Status Shows the status of the trend data. Possible status values: • Not collected - No trend data is collected. - Page 94 Chapter 2 Configure the XM-124 Standard Dynamic Measurement Module Defined Assembly The Configuration Utility lets you define the Output Table contents either by uniquely defining a Custom Assembly. or by using the predefined assembly instance, 101. Figure 40 - 1 Pre-defined Assembly Instances The pre-defined assembly instance 101 appears as shown.
- Page 95 Configure the XM-124 Standard Dynamic Measurement Module Chapter 2 The importance of this is that it lets you: • Limit the amount of data that is transmitted to just that which is necessary for the application. This limit minimizes the network loading on the DeviceNet network.
-
Page 96: Module
Chapter 2 Configure the XM-124 Standard Dynamic Measurement Module 1. To move the desired parameters to the ‘Custom assembly’ pane (right side), click the left and right arrows between the panes. 2. To change the order of the parameters, click the up and down arrows. -
Page 97: Firmware Update
Configure the XM-124 Standard Dynamic Measurement Module Chapter 2 DeviceNet Network The DeviceNet section shows the current setting of a connected modules DeviceNet address and communication rate. If no module is connected, these values display ‘Node address: 63’ and ‘Communication rate: AutoBaud’ . - Page 98 Chapter 2 Configure the XM-124 Standard Dynamic Measurement Module Monitor Data Parameters Table 20 - Monitor Data Parameters Parameter Name Description Values/Comments States whether a transducer fault exists on the associated channel. Possible status values: XM Configuration EDS File • No Fault If a fault exists, the overall and gap values are not always accurate.
- Page 99 Configure the XM-124 Standard Dynamic Measurement Module Chapter 2 Table 20 - Monitor Data Parameters (Continued) Parameter Name Description Values/Comments Ch1/Ch2 Spectrum/Waveform Status (XM Serial States whether a fault condition exists on the associated channel. If a Configuration Utility only) fault exists, the spectrum/waveform data is not always accurate.
- Page 100 Chapter 2 Configure the XM-124 Standard Dynamic Measurement Module Alarm and Relay Status Parameters Table 21 - Alarm and Relay Status Parameters Parameter Name Description Values/Comments Alarm Status States the current status of the alarm. Possible status values: • Normal - The alarm is enabled, the device is in...
-
Page 101: Module Inputs
A tachometer input is also provided. The XM-124 module provides an active buffer for each of the vibration Module Outputs transducer inputs. The module also provides a resistive buffer for the tachometer input, and two isolated, analog 4…20 mA outputs independently... -
Page 102: Modes
Program mode and Run mode without user interaction. Transition to Program Mode Parameter values can only be downloaded to the XM-124 module while the module is in Program mode. Any attempt to download a parameter value while the module is in Run mode results in a Device State Conflict error. -
Page 103: Transition To Run Mode
TIP You can also use the Start service to transition to Run mode. Reset Switch The XM-124 module has an external reset switch on top of the module. The Reset switch can be used to reset all latched relays in the Relay Expansion module when it is attached to the XM-124 module. -
Page 104: Xm Services
Operate the Module XM Services Table 22 defines services the XM-124 module supports. The table includes the service codes, classes, instances, and attributes by their appropriate hexadecimal codes. Use the Class Instance Editor in RSNetWorx™ software to execute these services, as illustrated in this example. -
Page 105: Invalid Configuration Errors
Operate the Module Chapter 3 Invalid Configuration Errors A Start or Save service request to the XM-124 module can return an Invalid Device Configuration error when there is a conflict among the configuration settings. The general error code for the Invalid Device Configuration error is D0 . -
Page 106: Poll Message Format
Operate the Module Poll Message Format The XM-124 module Poll request message contains no data. The Poll response message can contain up to 44 REAL values for a total of 176 bytes. The XM-124 module provides one pre-defined (static) data format of the Poll response, which is defined in Assembly Instance 101. - Page 107 Operate the Module Chapter 3 Table 24 - XM-124 Module Assembly Instance 101 Data Format Byte Definition 72…75 Channel 1 2X Vector Magnitude measurement value 76…79 Channel 1 2X Vector Phase measurement value 80…83 Channel 2 2X Vector Magnitude measurement value 84…87...
-
Page 108: Cos Message Format
Chapter 3 Operate the Module COS Message Format The XM-124 module COS message contains 8 bytes of data as defined in Table 25. The COS data can also be requested explicitly through Assembly Object (Class ID 0x4), Instance 100 (0x64), Data Attribute (3). - Page 109 Operate the Module Chapter 3 Table 27 - Setpoint Multiplier Status Descriptions Setpoint Multiplier Status Value Description Not Activated Activated Table 28 - Relay Status Descriptions Relay Status Value Description Not Activated Activated Table 29 - Transducer Status Descriptions Relay Status Value Description No Fault Transducer Fault...
-
Page 110: Bit-Strobe Message Format
Figure Figure 45 - Bit-Strobe Command The XM-124 module uses the bit received in a Bit-Strobe connection as a trigger event. When the bit number corresponding to the module node address is set, the module collects the triggered trend data and stores the spectrum or waveform data. -
Page 111: Triggered
Triggered SU/CD Triggered The XM-124 module can collect a triggered trend. A triggered trend is a time- based trend that is collected when a relay on the module is activated, or when the module receives a trigger event. Once the triggered trend is configured, the XM-124 module continuously monitors the trended measurements. - Page 112 Chapter 4 Trends Table 30 - Triggered Trend Parameters (Continued) Parameter Name Description Values/Comments Latch Enable Determines whether the triggered trend is latched or unlatched. Check means latched Latched means that subsequent triggers are ignored after the initial Clear means unlatched trigger.
-
Page 113: Su/Cd
Trends Chapter 4 SU/CD The XM-124 module can collect start-up or coast-down trend data when the machine speed passes into a defined speed range. A tachometer input is required to collect the start-up/coast-down trend. The XM-124 module collects a start-up trend when the machine speed rises through the Minimum Speed plus 8 rpm, and stops when the machine speed crosses either the Minimum Speed or the Maximum Speed. - Page 114 Chapter 4 Trends Table 31 - SU/CD Trend Parameters (Continued) Parameter Name Description Values/Comments Maximum Trend Span The maximum change in speed that can be covered by the trend data (Number of Records x Record Interval). IMPORTANT: If you edit the Trend Span, the Record Interval is automatically updated.
-
Page 115: Status Indicators
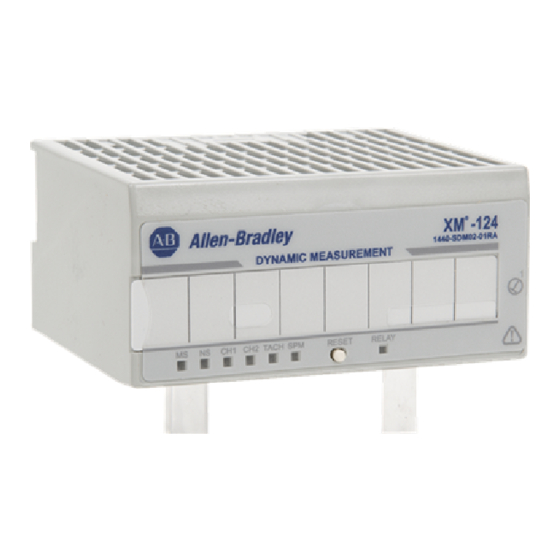
Appendix Status Indicators This chapter details the visible status indicators of the XM-124 standard dynamic measurement module. Topic Page Status Indicators Module Status (MS) Indicators Relay Indicator Network Status (NS) Indicator Channel 1 and Channel 2 Status Indicators Tachometer Status Indicators... -
Page 116: Module Status (Ms) Indicators
Appendix A Status Indicators Module Status (MS) This table describes the module status indicators. Indicators State Probable Cause No power applied to the module. Alternating Red/Green Module performing power-up self-test. Flashing Red • Application firmware is invalid or not loaded. Download firmware to the module. -
Page 117: Channel 1 And Channel 2 Status Indicators
Status Indicators Appendix A Channel 1 and Channel 2 This table describes the channel indicators. Status Indicators State Probable Cause • Normal operation within alarm limits on the channel. • No power applied to the module. Examine module status indicator. Solid Yellow An alarm that is associated with this channel is in Alert. - Page 118 Appendix A Status Indicators Notes: Rockwell Automation Publication 1440-UM001D-EN-P - September 2016...
- Page 119 Appendix CIP Objects This appendix defines the specific CIP Objects, Instances, Attributes, and Services that the Standard Dynamic Measurement Module supports. Topic Page Identity Object (Class Code 01H) DeviceNet Object (Class Code 03H) Assembly Object (Class Code 04H) Connection Object (Class ID 05H) Discrete Input Point Object (Class ID 08H) Analog Input Point (Class ID 0AH) Parameter Object (Class ID 0FH)
-
Page 120: Identity Object (Class Code 01H)
Value varies with each firmware reversion. Status WORD Serial Number UDINT Product Name SHORT_ XM-124 standard dynamic measurement module STRING Status The Status is a 16-bit value. Table 33 lists the bits that are implemented. Table 33 - Identity Object Status... -
Page 121: Services
10%. range. In all cases the XM-124 attempts to continue making measurements, monitoring alarms and managing its relays regardless of the Major Fault Indication or its cause. Major Unrecoverable Fault Set when there is a module status fault (module status indicator is solid red). -
Page 122: Devicenet Object (Class Code 03H)
Appendix B CIP Objects DeviceNet Object The DeviceNet Object is used to provide the configuration and status of a physical attachment to DeviceNet. (Class Code 03 Class Attributes Table 35 - DeviceNet Object Class Attributes Attribute Access Name Data Type Default Value Revision UINT... -
Page 123: Assembly Object (Class Code 04H)
The Assembly Object binds attributes of multiple objects to allow data to or from each object to be sent or received in one message. (Class Code 04 The XM-124 module provides both static and dynamic assemblies. Class Attribute Table 38 - Assembly Object Class Attributes... -
Page 124: Assembly Instance Attribute Data Format
Appendix B CIP Objects Assembly Instance Attribute Data Format Instance 100 - Alarm and Relay Status This assembly is sent using COS messaging when any of the Alarm or Relay Status values change. Table 41 - Instance 100 Data Format (Alarm and Relay Status Values Assembly) Byte Bit 7 Bit 6... - Page 125 CIP Objects Appendix B Table 42 - Instance 101 Data Format (Measurement Values Assembly) (Continued) Byte Bit 7 Bit 6 Bit 5 Bit 4 Bit 3 Bit 2 Bit 1 Bit 0 60…63 Channel 1 Vector 1 Phase value 64…67 Channel 2 Vector 1 Magnitude value 68…71 Channel 2 Vector 1 Phase value...
- Page 126 Appendix B CIP Objects The dynamic Assembly can include all measurement values that are included in Assembly Instance 101. In addition, the dynamic Assembly can include these configuration parameters. Table 43 - Instance 199 Component Mapping EPATH (Where ii = Instance Number) Class Name Class Number Instance...
-
Page 127: Services
CIP Objects Appendix B Services Table 44 - Assembly Object Services Service Code Class/Instance Usage Name Class/Instance Get_Attribute_Single Instance Set_Attribute_Single Class Create Instance Delete Connection Object The Connection Object allocates and manages the internal resources that are associated with both I/O and Explicit Messaging Connections. (Class ID 05H) Class Attributes The Connection Object provides no class attributes. -
Page 128: Instance Attributes
Appendix B CIP Objects Instance Attributes Table 46 - Connection Object Instance Attributes Attribute ID Access Rule Name Data Type Description State USINT State of the object. Instance Type USINT Indicates either I/O or Messaging Connection. Transport Class Trigger BYTE Defines behavior of the Connection. -
Page 129: Discrete Input Point Object (Class Id 08H)
CIP Objects Appendix B Discrete Input Point Object The Discrete Input Point Object stores information about the value of the Setpoint Multiplier signal. (Class ID 08H) Class Attributes Table 48 - Discrete Input Object Class Attributes Attribute Access Name Data Type Description Semantics Rule... -
Page 130: Analog Input Point (Class Id 0Ah)
Appendix B CIP Objects Analog Input Point The Analog Input Point Object models simple analog measurements that the Standard Dynamic Measurement Module performs. (Class ID 0A Class Attributes Table 51 - Analog Input Point Object Class Attributes Attribute Access Name Data Type Description Semantics... -
Page 131: Instance Attributes
CIP Objects Appendix B Instance Attributes Table 53 - Analog Input Point Object Class Attributes Attribute ID Access Rule Name Data Type Description Semantics Value REAL Status BOOL Indicates if a fault or alarm has 0 = Operating without alarms or faults occurred. -
Page 132: Class Attributes
Appendix B CIP Objects Class Attributes Table 55 - Parameter Object Class Attributes Attribute Access Name Data Type Description Semantics Rule Max Instance UINT Maximum instance Total number of parameter number of an object object instances. in this class. Parameter WORD Bits that describe the Bit 0 Supports Parameter... - Page 133 CIP Objects Appendix B Table 56 - Parameter Object Instances (Continued) Instance Read Name Data Type Valid Values Default Value Only 4…20 mA Output 1 Measurement USINT 0 = CH 1 Overall Identifier 1 = CH 2 Overall 2 = CH 1 Gap 4…20 mA Output 2 Measurement USINT 3 = CH 2 Gap...
- Page 134 Appendix B CIP Objects Table 56 - Parameter Object Instances (Continued) Instance Read Name Data Type Valid Values Default Value Only Alarm 1 Measurement ID USINT 0 = CH 1 Overall 1 = CH 2 Overall Alarm 2 Measurement ID USINT 2 = CH 1 Gap Alarm 3 Measurement ID...
- Page 135 CIP Objects Appendix B Table 56 - Parameter Object Instances (Continued) Instance Read Name Data Type Valid Values Default Value Only Relay 1 Alarm Identifier A USINT 0 = Alarm 1 1 = Alarm 2 Relay 2 Alarm Identifier A USINT 2 = Alarm 3 Relay 3 Alarm Identifier A...
-
Page 136: Instance Attributes
Appendix B CIP Objects Table 56 - Parameter Object Instances (Continued) Instance Read Name Data Type Valid Values Default Value Only Band 1 Spectrum Option USINT 0 = Standard Spectrum 1 = gSE Spectrum Band 2 Spectrum Option USINT Band 3 Spectrum Option USINT Band 4 Spectrum Option USINT... -
Page 137: Services
CIP Objects Appendix B Services Table 58 - Parameter Object Services Service Class/Instance Usage Name Description Code Class/Instance Get_Attribute_Single Returns the contents of the specified attribute. Class Set_Attribute_Single Sets the contents of the specified attribute. (1) Attributes can only be set while the device is in Program mode. See the description of the Device Mode Object for more information. -
Page 138: Services
Appendix B CIP Objects Services Table 60 - Acknowledge Handler Object Services Service Code Class/Instance Usage Name Instance Get_Attribute_Single Instance Set_Attribute_Single Alarm Object (Class ID 31DH) The Alarm Object mode is a two-stage (alert and danger levels) alarm. Class Attributes Table 61 - Alarm Object Class Attributes Attribute Access... - Page 139 CIP Objects Appendix B Table 62 - Alarm Object Instance Attributes (Continued) Attribute Access Rule Name Data Type Description Semantics Get/Set AlarmHAlertLimit REAL The threshold value for the alert state of the alarm. (For range conditions, this is the greater threshold value.) Get/Set AlarmHDangerLimit...
-
Page 140: Services
Appendix B CIP Objects Services Table 63 - Alarm Object Services Service Class/Instance Usage Name Description Code Instance Get_Attribute_Single Returns one attribute. Instance Set_Attribute_Single Sets one attribute. (1) Attributes can only be set while the device is in Program mode. See the description of the Device Mode Object for more information. -
Page 141: Instance Attributes
CIP Objects Appendix B Instance Attributes Table 65 - Band Measurement Object Instance Attributes Attribute Access Rule Name Data Type Description Semantics Band Value REAL The measured band value. See Data Units Status BOOL Indicates if a fault or alarm has occurred. 0 = Operating without alarms or faults 1 = Alarm or fault condition exists, the Band Value attribute does not always match the actual field value. -
Page 142: Channel Object (Class Id 31Fh)
Appendix B CIP Objects Channel Object The Channel Object models front-end processing that is performed on an input signal before specific measurements are performed. This processing (Class ID 31F typically includes gain, filtering, and/or integration. Channel Attributes The Channel Object provides no class attributes. Instances There are four instances of this object. -
Page 143: Services
CIP Objects Appendix B Table 67 - Channel Object Instance Attributes (Continued) Attribute Access Rule Name Data Type Description Semantics Get/Set Internal Gear Teeth UINT The number of gear teeth on the shaft of The Internal/External Gear Teeth values are used interest. -
Page 144: Device Mode Object (Class Id 320H)
Appendix B CIP Objects Device Mode Object The Device Mode object is used to control access to the configuration parameters in the module. The Device Mode attribute for this object must be (Class ID 320 in Program mode to allow configuration parameters to be Set for the module (see Services). -
Page 145: Services
CIP Objects Appendix B Services Table 70 - Device Mode Object Services Service Code Class/Instance Usage Name Description Instance Get_Attribute_Single Return the value of one attribute. Instance Set_Attribute_Single Set the value of one attribute. Instance Stop Transitions from Run to the Program state. Instance Start Validate the device configuration settings and transition to the Run state if OK. -
Page 146: Instance Attributes
Appendix B CIP Objects Instance Attributes Table 71 - Overall Measurement Object Instance Attributes Attribute Access Rule Name Data Type Description Semantics Overall Value REAL Measured value The output value of the measurement that the Overall Measurement Object performs on the input signal. -
Page 147: Services
CIP Objects Appendix B Services Table 72 - Overall Measurement Object Services Service Code Class/Instance Usage Name Description Instance Get_Attribute_Single Returns one attribute. Instance Set_Attribute_Single Sets one attribute. (1) Attributes can only be set while the device is in Program mode. See the description of the Device Mode Object for more information. Relay Object (Class ID 323 The Relay Object models a relay (actual or virtual). - Page 148 Appendix B CIP Objects Table 74 - Relay Object Instance Attributes (Continued) Attribute ID Access Rule Name Data Type Description Semantics Get/Set Failsafe Enable BOOL Indicates whether this relay is 0 = Non-failsafe (not normally energized) normally energized (activated during 1 = Failsafe (normally energized) power loss).
-
Page 149: Services
CIP Objects Appendix B Services Table 75 - Relay Object Services Service Class/Instance Usage Name Description Code Class/Instance Reset Resets latched relay. Class/Instance Get_Attribute_Single Returns one attribute. Class/Instance Set_Attribute_Single Sets one attribute. (1) Attributes can only be set while the device is in Program mode. See the description of the Device Mode Object for more information. -
Page 150: Instance Attributes
Appendix B CIP Objects Instance Attributes Table 76 - Spectrum Waveform Measurement Object Instance Attributes Attribute Access Name Data Description Semantics Rule Type Status BOOL Indicates if a fault or alarm has occurred. 0 = Operating without alarms or faults. 1 = Alarm or fault condition exists. -
Page 151: Services
CIP Objects Appendix B Table 76 - Spectrum Waveform Measurement Object Instance Attributes (Continued) Attribute Access Name Data Description Semantics Rule Type Get/Set Number of Averages UINT The number of individual data sets to be incorporated 0 = Invalid into the average calculation. 1 = No averaging >... - Page 152 Appendix B CIP Objects attribute. In all cases, the spectrum data array values are normalized and must be converted to floating point to obtain the true values. Table 78 - Spectrum Data Structure Byte (DWORD) Offset Structure Member Data Type Description Within Structure 0 (0)
- Page 153 CIP Objects Appendix B Normalized Data 2n Imaginary Data n Amplitude Reference -------------------------------------------------------------------- 32768 The Real Data and Imaginary Data values are converted into magnitude and phase values with these equations: Magnitude Data n Real Data n Imaginary Data n ...
- Page 154 Appendix B CIP Objects Where Float Data is the value for the nth waveform point, and 0 £ n £ Number of Waveform Points. The Get_Spectrum_Chunk and Get_Waveform_Chunk services use the same request and response parameters. Table 80 - Get_Spectrum_Chunk/Get_Waveform_Chunk Request Parameters Name Data Type Description of Request Parameters...
-
Page 155: Speed Measurement Object (Class Id 325H)
CIP Objects Appendix B Speed Measurement The Speed Measurement Object models a speed measurement of a tachometer signal. Object (Class ID 325 Class Attributes The Speed Measurement Object provides no class attributes. Instance Attributes Table 82 - Speed Measurement Object Instance Attributes Attribute ID Access Rule Name... -
Page 156: Measurement Parameters
Appendix B CIP Objects Measurement Parameters Table 84 - Thrust Position Measurement Parameters Parameter Name Description Values/Comments Target Angle Sets the angle between the shaft and the target surface. The target surface moves with the shaft. The degrees transducer is mounted perpendicular to the target surface. Upscale Sets the movement of the target relative to the transducer that is considered positive displacement. -
Page 157: Tachometer Channel Object (Class Id 326H)
CIP Objects Appendix B Tachometer Channel The Tachometer Channel Object models front end processing that is performed on a tachometer signal before specific measurements are performed. Object (Class ID 326 Class Attributes The Tachometer Channel Object provides no class attributes. Instance Attributes Table 85 - Tachometer Channel Object Instance Attributes Attribute ID Access Rule... -
Page 158: Transducer Object (Class Id 328H)
Appendix B CIP Objects Transducer Object The Transducer Object models a transducer. (Class ID 328 Class Attributes The Transducer Object provides no class attributes. Instances There are three instances of this object. Table 87 - Band Measurement Object Instances Instance Descriptions Vibration Channel 0 Vibration Channel 1... -
Page 159: Services
CIP Objects Appendix B Table 88 - Transducer Object Instance Attributes (Continued) Attribute ID Access Rule Name Data Type Description Semantics Get/Set Power Type USINT Indicates the type of power that is 0 = Off supplied to the transducer. 1 = IEPE (externally supplied) 2 = 24V (externally applied) 3 = -24V (externally applied from terminal base) -
Page 160: Instance Attributes
Appendix B CIP Objects Table 90 - Vector Measurement Object Instances Instance Description Channel 2 3X Vector Measurement Channel 1 Tracking Measurement Channel 2 Tracking Measurement Instance Attributes Table 91 - Vector Measurement Object Instance Attributes Attribute ID Access Rule Name Data Type Description... -
Page 161: Ma Output Object (Class Id 32Ah)
CIP Objects Appendix B 4…20 mA Output The 4…20 mA Output Object models the configuration of a 4…20 mA output signal. Object (Class ID 32A Class Attributes The 4…20 mA Output Object provides no class attributes. Instances There are two instances of this object. Instance Attributes Table 93 - 4…20 mA Output Object Instance Attributes Attribute ID Access Rule... - Page 162 Appendix B CIP Objects Notes: Rockwell Automation Publication 1440-UM001D-EN-P - September 2016...
-
Page 163: Index
Index Numerics CIP objects 117 acknowledge handler 135 1440-DYN02-01RJ alarm 136 install on terminal base 53 analog input point 128 1440-TBS-J assembly 121 install 24 band measurement 138 24V common grounding requirements 23 channel 140 connection 125 4-20mA Output Object 159 device mode 142 4-20mA output parameters 87 DeviceNet 120... - Page 164 Index Dynamic Measurement module CIP objects 117 data parameters 95 grounding requirements 20 1X Magnitude Value 96 indicators 113 1X Phase Value 96 install module 53 2X Magnitude Value 96 install terminal base 24 2X Phase Value 96 self-test 60 3X Magnitude Value 96 wiring requirements 18 4-20 mA Output A 97...
- Page 165 Index Not1X measurements 96 Spectrum/Waveform measurement options speed measurement object 153 SU/CD trend parameters 90 operating mode Enable SU/CD Trend 90 program mode 100 Latch Enable 90 run mode 100 Maximum Speed 90 overall measurement object 143 Maximum Trend Span 90 Minimum Speed 90 Number of Records 90 Record Interval 90...
- Page 166 Index vector measurements 96 wiring to separate power connections 19 to terminal base 28 wiring connections 4-20mA outputs 49 buffered outputs 35 DeviceNet 51 power supply 30 remote relay reset signal 47 serial port 50 setpoint multiplication switch 48 tachometer 33 transducers 35 wiring requirements 18 XM Services 102...
- Page 168 How Are We Doing? form at http://literature.rockwellautomation.com/idc/groups/literature/documents/du/ra-du002_-en-e.pdf. Rockwell Automation maintains current product environmental information on its website at http://www.rockwellautomation.com/rockwellautomation/about-us/sustainability-ethics/product-environmental-compliance.page. Allen-Bradley, Rockwell Automation, Rockwell Software, and XM are trademarks of Rockwell Automation, Inc. Trademarks not belonging to Rockwell Automation are property of their respective companies.
Need help?
Do you have a question about the XM-124 and is the answer not in the manual?
Questions and answers