
Related Manuals for Theralux Theratherm


Summary of Contents for Theralux Theratherm
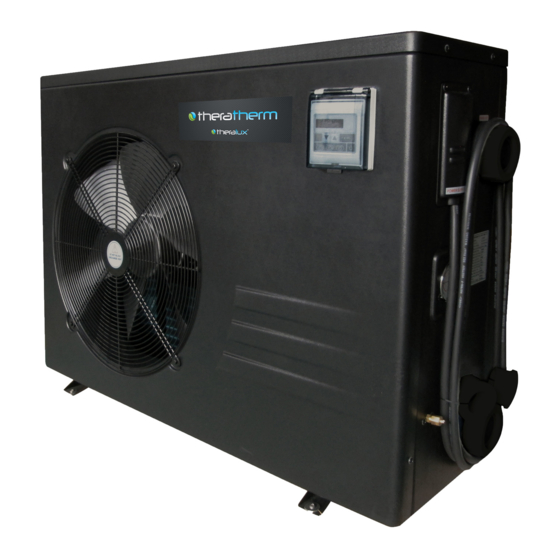
- Page 1 Theratherm Swimming Pool/Spa Heat Pump User and Service manual - 1 - A Division of:...
-
Page 2: Table Of Contents
9. Maintenance 10. Warranty Thank you for purchasing a Theratherm Heat Pump for your pool or spa heating. Heat Pumps use the ambient air temperature to heat your pool or spa water efficiently. Heat Pumps perform better with warmer ambient temperatures & it will heat your water and maintain constant temperature whilst the ambient air temperature is between -7 to 40℃. -
Page 3: Specifications
1. Specifications Horizontal design, R410A, Heating only Theratherm Theratherm Theratherm Theratherm 25 Model 13.5 18.5 Heating Capacity at Air 27℃, Water 27℃, Humidity 80% Heat Output (kW) 13.5 18.5 Power consumption (kW) 1.53 2.14 2.94 4.10 Heating Capacity at Air 15℃, Water 26℃, Humidity 70% Heat Output (kW) 13.5... -
Page 4: Installation And Connection
3.1 Notes Upon purchase you will receive your complete Heat Pump. All other components, including a bypass, must be provided by the user or the installer. (Bypass Recommended on all Theratherm heat pumps) Attention: Please observe the following rules when installing the heat pump: 1. -
Page 5: Dimension
2. Any addition of automated chemicals must take place in the piping located downstream from the heat pump. 3. Install the heat pump above the water level of the swimming pool. 4. Always place the heat pump on a solid foundation and use the included rubber mounts to avoid vibration and noise. - Page 6 3.4 Check-valve installation Note: If automatic dosing equipment for chlorine and acid (pH) is used, it is essential to protect the heat pump against excessively high chemical concentrations which may corrode the heat exchanger. For this reason, equipment of this sort must always be fitted in the piping on the downstream side of the heat pump, and it is recommended to install a check-valve to prevent reverse flow in the absence of water circulation.
- Page 7 Note: This arrangement is only an illustrative example. Adjusting the bypass assembly Use the following procedure to adjust the bypass: • On start-up fully open all two valves • slowly close valve 1 into the heat pump until water pressure is increased by approximately 100 to 200 g (refer to pressure gauge) •...
- Page 8 A second terminal block marked ‘WATER PUMP ’ is located next to the first one. If you are using a secondary pump to circulate water from the pool to the heat pump this pump can be connected to the second terminal block here.
-
Page 9: Accessories
3.10 Pressure gauge display (R410A) Examine the pressure gauge which indicates the refrigerant gas pressure of the unit, the below table shows the normal value of the gas pressure (R410A) when the machine is powered off or in running mode. Unit Condition Power Off Running... - Page 10 Anti-vibration base, 4 pcs Draining jet, 2 pcs Waterproof box, 1 pc 10M Signal wire, 1 pc Water connection assembly, 2 sets 4.2 Accessories Installation Anti-vibration bases Take out 4 Anti-vibration bases Put them one by one on the bottom of machine feet like the picture.
- Page 11 Water Inlet & outlet junction 1. Use the pipe tape to connect the water Inlet & outlet junction onto the heat pump Install the two joints like the picture shows Screw them onto the water Inlet & outlet junction Extension cable wiring Please refer to the photo Secondary pump connection wiring...
-
Page 12: Electrical Wiring
5. Electrical Wiring 5.1 Electrical wiring diagram for Theratherm 9.5 - 12 - A Division of:... - Page 13 5.2 Electrical wiring diagram for Theratherm 13.5 - 13 - A Division of:...
- Page 14 Electrical wiring diagram for Theratherm 18.5 & Theratherm 25 NOTE: (1)Above electrical wiring diagram is only for your reference, please consult the manufacturer for repair advice. (2)The swimming pool heat pump must be connected to earth, although the units heat exchanger is electrically isolated from the rest of the unit .Grounding the unit is still required to protect you against short...
-
Page 15: Display Controller Operation
5.2 Installation of the control panel & external cable extension (to be completed prior to electrical connection). Photo (1) Photo (2) Photo (3) - Control panel can be removed & disconnected from the heat pump (photo1). - Control panel wiring can be disconnected from the heat pump by the quick release connector (photo 2). - The control panel can be connected to the 10mtr extension cable for external mounting of the control panel (photo 3). - Page 16 Press to start the heat pump unit, the LED display shows the desired water temperature for 5 seconds, then shows the inlet water temperature. Press to stop the heat pump unit. 6.3 Setting the real time On standby or running mode, hold the button for 10 seconds, then press to adjust hour/minute.
-
Page 17: Troubleshooting
7. Troubleshooting 7.1 Error code display on LED wire controller Malfunction Error code Reason Solution Inlet water temperature The sensor in open or short Check or change the sensor sensor failure circuit Outlet water temperature The sensor in open or short Check or change the sensor sensor failure circuit... - Page 18 Inlet and outlet water Water flow volume is not Check water flow rate, temperature difference enough ,water pressure backwash filter & empty baskets malfunction difference is too low Communication failure Wire connection is not good Check the wire connection 7.2 Other Malfunctions and Solutions (No display on LED controller) Malfunctions Observing Reasons...
-
Page 19: Exploded Diagram
No action. Check the titanium 1. Concreting. Water stains on heat pump water stains heat exchanger carefully unit. 2. Water leakage. for any leaks. 1. Check the location of heat pump unit, and eliminate all obstacles to Too much ice on Too much ice on make good air ventilation. - Page 20 Name of parts Name of parts Pillar Electric terminal block Side grill Cable fixing clamp Fan motor bracket Water pump terminal block Pillar Water pump terminal block stand Fan motor Terminal block box Fan blade Water-out temperature sensor clip Front grill Water flow switch Front panel Water-out temperature sensor...
-
Page 21: Maintenance
(5) When the unit is running, there will always be a little water discharge under the unit – this is normal. Warranty Theratherm Heat Pump warranty is a structured warranty. It particularly covers manufacturing faults & is set out as below:... - Page 22 From the team at, Theralux. - 22 - A Division of:...
Need help?
Do you have a question about the Theratherm and is the answer not in the manual?
Questions and answers