Table of Contents
Advertisement
Quick Links
Advertisement
Table of Contents

Related Manuals for Pyle PRJLEDLP205


Summary of Contents for Pyle PRJLEDLP205
- Page 1 DIGITAL PROJECTOR INSTRUCTION MANUAL Model: PRJLEDLP205...
- Page 2 FCC Notice This equipment has been tested and found to comply with the limits for a Class B digital device, pursuant to part 15 of the FCC Rules. These limits are designed to provide reasonable protection against harmful interference in residential installation. This equipment generates, uses and can radiate radio frequency energy and if not installed and used in accordance with the instructions, may cause harmful interference to radio communications.
- Page 3 Safety Instructions Read all of these instructions before you operate your projector and save for future reference. 1. Read instructions All the safety and operating instructions should be read before the appliance is operated. 2. Notes and warnings All notes and warnings in the operating instructions should be adhered to. 3.
- Page 4 Notes on the AC Power Cord AC Power Cord must meet the requirement of countries where you use this projector. Please confirm your AC plug type with the graphics below and ensure that the proper AC Power Cord is used. If the supplied AC Power Cord does not match your AC outlet, please contact your sales dealer.
-
Page 5: Table Of Contents
Contents Introduction .................... 5 Projector Features ..........................5 Projector Overview..........................6 Using the Product .................. 8 Control Panel ............................8 Connection Ports ............................ 9 Remote Control............................. 10 Installing the Batteries........................... 13 Remote Control Operation ........................14 Connection ................... 15 Connecting a computer ........................16 Connecting Video source devices...................... -
Page 6: Introduction
Introduction Projector Features The projector integrates high-performance optical engine projection and a user - friendly design to deliver high reliability and ease of use. The projector offers the following features: • Single chip 0.55" Texas Instruments DLP technology • XGA (1024 x 768 pixels) •... -
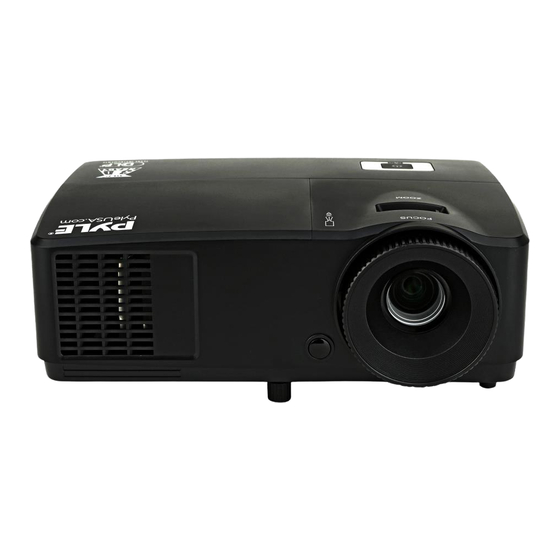
Page 7: Projector Overview
Projector Overview Front View 1. Front IR remote control sensor 2. Elevator foot l i t EN-6... - Page 8 Rear View 1. AC power socke Bottom View y t i n i l Note This projector can be used with a ceiling mount for support. The ceiling mount is not • included in the package. • Contact your dealer for information to mount the projector on a ceiling. EN-7...
-
Page 9: Using The Product
Using the Product Control Panel TEMP LAMP 电源 (Power) Turn the projector on or off 电源 (Pow ) (Power LED indicator) Refer to “LED Indicator Messages”. 温度 (Temp) (Temp LED indicator) Refer to "LED Indicator Messages”. 4. 灯泡 (Lamp) (Lamp LED indicator) Refer to "LED Indicator Messages”. -
Page 10: Connection Ports
Connection Ports 1. RS-232 When operating the projector via a computer, connect this to the controlling computer's RS-232C port. 2. VIDEO Connect composite video output from video equipment to this jack. 3. TYPE B USB This connector is for firmware update. 4. -
Page 11: Remote Control
Remote Control 1. Power Turn the projector on or off. 2. VGA1 Display COMPUTER IN 1 signal. 3. Source Display the source selection bar. 4. Keystone/Arrow keys ( /Up, /Down) Manually correct distorted images resulting from an angled projection. Left When the On-Screen Display (OSD) menu is activated, the #4, #5, and #20 keys are used as directional arrows to select the desired menu items and to make adjustments. - Page 12 10. Mouse No function. Lock No function. 12. Pattern No function. 13. Blank Hide the screen picture. 14. Eco Decreases the power consumption of the lamp by up to 70%. Note: It takes some time to initiate this function. Make sure the projector has been turned on for more than 4 minutes.
- Page 13 28. Aspect Select the display aspect ratio. 29. Timer Activate P-Timer OSD menu. Using the remote mouse control Connect the projector to your PC or notebook with a USB cable prior to using the paging the paging function. You can operate your display software program (on a connected PC) which responds to page up/down commands (like Microsoft PowerPoint) by pressing Page Up/Down on the remote control.
-
Page 14: Installing The Batteries
Installing the Batteries 1. Open the battery cover in the direction shown. 2. Install batteries as indicated by the diagram inside the compartment. 3. Close the battery cover into position. Caution • Risk of explosion if battery is replaced by an incorrect type. •... -
Page 15: Remote Control Operation
Remote Control Operation Point the remote control at the infrared remote sensor and press a button. • Operating the projector from the front Note • The remote control may not operate when there is sunlight or other strong light such as a fluorescent lamp shining on the remote sensor. -
Page 16: Connection
Connection When connecting a signal source to the projector, be sure to: 1. Turn all equipment off before making any connections. 2. Use the correct signal cables for each source. 3. Ensure the cables are firmly inserted. 1. VGA cable 2. -
Page 17: Connecting A Computer
Connecting a computer or monitor Connecting a computer The projector provides two VGA input sockets that allow you to connect them to both ® compatibles and Macintosh computers. A Mac adapter is needed if you are ® connecting legacy version Macintosh computers. To connect the projector to a notebook or desktop computer: 1. - Page 18 Connecting a Component Video source device Examine your Video source device to determine if it has a set of unused output jacks available: • If so, you can continue with this procedure. • If not, you will need to reassess which method you can use to connect to the device.
-
Page 19: Operation
Operation Powering On/Off the Projector Powering On the Projector: 1. Complete the AC power cord and peripheral signal cable(s) connections. 2. Press to turn on the projector. The projector takes a minute or so to warm up. 3. Turn on your source (computer, notebook, DVD, etc.). The projector automatically detects your source. -
Page 20: Adjusting The Projector Height
Adjusting the Projector Height Elevator foot The projector is equipped with an elevator foot to adjust the image height. To raise or lower the image, turn the elevator foot to fine-tune the height. Adjusting the Projector Zoom and Focus Zoom ring Focus ring 1. -
Page 21: Adjusting Projection Image Size
Adjusting Projection Image Size Refer to the graphic and table below to determine the screen size and projection distance. Maximum zoom Minimum zoom Screen Center of lens Vertical offset Projection distance The screen aspect ratio is 4:3 and the projected picture is 4:3 Screen size Projection distance (mm) Diagonal... -
Page 22: Menu Operation
Menu Operation The projector has multilingual on-screen display menus that allow you to make image adjustments and change a variety of settings. How to operate 1. Press the Menu button to open the OSD menu. 2. When OSD is displayed, use to select any feature in the main menu. - Page 23 Dynamic /Presentation /sRGB/Cinema / Picture Mode User 1 /User 2 Reference Mode Dynamic /Presentation /sRGB/Cinema Brightness Contrast Sharpness Tint Color Cool/Normal /Warm Temperature Color R Gain/G Gain/B Gain/R Offset/G Temperature Offset/B Offset PICTURE Fine Tuning Primary Color R/G/B/C/M/Y 3D Color Management Saturation Gain...
- Page 24 Timer Period 1~240 minutes Always /3 min/2 min/1 min/ Timer Display Never Top-Left /Bottom-Left/Top- Timer Position Right/Bottom-Right Presentation Timer Timer Counting Count Down /Count Up Direction Language Front Table /Rear Table/Rear Projector Installation Ceiling/Front Ceiling Menu Display 5 sec/10 sec/ 20 sec/30 sec/ SYSTEM Time Always...
- Page 25 High Altitude On/Off Yes/No Mode Lamp Mode Normal/Economic/ SmartEco Lamp Spa On /Off Mode Lamp Settings Reset lamp Reset /Cancel timer Equivalent lamp hour Change Password Security SYSTEM Change Settings Power On Lock SETUP: Security Advanced 2400/4800/9600/14400/19200/ Baud Rate 38400/57600/ 115200 Test Pattern On/Off Closed Caption...
- Page 26 DISPLAY Wall Corlor Brighten or darken the image. Aspect Ratio Select how the picture fits on the screen: • Auto : Scales an image proportionally to fit the projector's native resolution in its horizontal or vertical width. • Real: Minimizes the aspect ratio distortion by maintaining close to the original aspect ratio in the center of the image and distributing the majority of distortion at the edges of the displayed image.
- Page 27 3D Settings This projector features a 3D function which enables you to enjoy the 3D movies, vid- eos, and sporting events in a more realistic way by presenting the depth of the images. You need to wear a pair of 3D glasses to view the 3D images. 3D Format Use this function to choose an appropriate 3D format if the projector cannot recognize the 3D format.
- Page 28 PC graphic and drawing applications such as AutoCAD. • Cinema mode : Is appropriate for playing colorful movies, video clips from digital cameras or DVs through the PC input for best viewing in a blackened (little light) environment. Brightness Brighten or darken the image. Contrast Set the difference between light and dark areas.
- Page 29 • Menu Position: Choose the menu location on the display screen. • Menu Display Time: Duration of OSD menu display countly starts (at idle state by second). Opration Setting Direct Power On • On: The projector will turn on in 3 seconds. •...
-
Page 30: Maintenance
Maintenance The projector needs proper maintenance. You should keep the lens clean as dust, dirt or spots will project on the screen and diminish image quality. If any other parts need replacing, contact your dealer or qualified service personnel. When cleaning any part of the projector, always switch off and unplug the projector first. -
Page 31: Replacing The Lamp
Replacing the Lamp As the projector operates over time, the brightness of the projector lamp gradually decreases and the lamp becomes more susceptible to breakage. We recommend replacing the lamp if a warning message is displayed. Do not attempt to replace the lamp yourself. - Page 32 1. Turn off the projector. 2. If the projector is installed in a ceiling mount, remove it 3. Unplug the power cord. 4. Loosen the screw in the side of the lamp cover and remove the cover. 5. Remove the screws from the lamp module, raise the handle, and lift out the module.
-
Page 33: Specifications
Specifications Display system Single 0.55" DLP panel Resolution (1024 x 768 pixels) Zoom 1.1X 2.5 - 2.7 F/No. Focal length 22.08 - 24.28mm Screen size 30" - 300" Lamp 190W Input terminal D-Sub 15-pin x 1, Video x 1, Output terminal RS-232 x 1, USB B type x1 (supports firmware upgrade) Control terminal Speaker... -
Page 34: Dimensions
Dimensions 285 mm (W) x 208 mm (D) x 116 mm (H) TEMP LAMP Ceiling mount installation Ceiling mount screws: M4 x 8 (Max. L = 8mm) Unit: mm EN-33... -
Page 35: Appendix
Appendix LED Indicator Messages Description 电源 LED 温度 LED (Red) 灯泡 LED (Red) Power Events Solid Orange Stand-by 1Hz Green Blinking Powering up Solid Green Normal operation 1Hz Orange Blinking Normal power-down cooling Lamp Error Message Solid First Lamp-lit error cooling Blinking 1 Hz Lamp error in normal operation Thermal Error Message... -
Page 36: Compatibility Modes
Compatibility Modes Computer: 640 x 480 720 x 400 800 x 600 1024 x 768 1280 x 960 Video: Compatibility Resolution H-Sync [KHz] V-Sync [Hz] EN-35... -
Page 37: Troubleshooting
Troubleshooting Refer to the symptoms and measures listed below before sending the projector for repairs. If the problem persists, contact your local reseller or service center. Please refer to "LED Indicator Messages" as well. Start-up problems no lights turn on: •... -
Page 38: Rs-232 Command And Configuration
RS-232 Command and Configuration D-Sub 9 pin Wire List 1 CD COLOR Black Brown Orange Yellow Green Blue Purple White SHELL SHELL 2400/4800/9600/14400/19200/38400/57600/115200 y t i EN-37... -
Page 39: Ir Control Table
IR Control Table Customer code: 0X2626 Format : NEC EN-38... - Page 40 Auto Sync Color Mode Up / Keystne+ Down / Keystone- My Button(Function) t i x Mouse left Mouse right Mouse Page Up Mouse Page Down Lock(Key pad) Pattern Magnify + Timer (Presentation) Volume+ Volume- EN-39...
Need help?
Do you have a question about the PRJLEDLP205 and is the answer not in the manual?
Questions and answers