
Related Manuals for BONKOTE PATRIOT


Summary of Contents for BONKOTE PATRIOT
- Page 1 PATRIOT M12 LA type soldering iron controller Instruction manual Date prepared: April 2018 The 9 edition JAPAN BONKOTE CO., LTD.
-
Page 2: Table Of Contents
Contents page 1 Preface ············································································································ 1 2 Notes for safety ································································································ 1 3 Auto Tuning before use ····················································································· 1 4 Notes for installation and use ············································································ 2 5 How to use M12 controller (A) Contents ································································································· 3 (B) Name of the body ····················································································· 3 (C) How to assemble ······················································································... -
Page 3: 2 Notes For Safety
1. Preface Thank you very much for purchasing M12 CONTROLLER. Please read this Notes for safety before use, and use this machine properly. After read this manual, please keep it 2. Notes for safety ! CAUTION Be sure to read this manual before using this machine. ... -
Page 4: 4 Notes For Installation And Use
4. Notes for installation and use This machine is designed with earth specification. Make sure to use an earth equipped receptacle. If you do not have such receptacle, install an earth separately. Use this machine on a neat bench on which a conducive mat is put. ... -
Page 5: (B) Name Of The Body
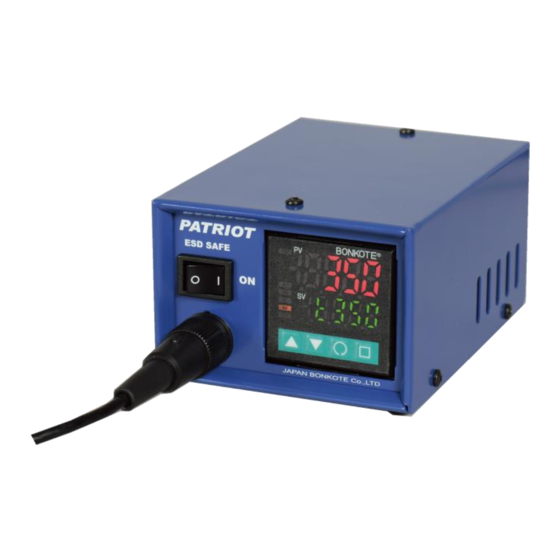
5. How to use 5-A:Contents of soldering station set 3P Power cord ※ ① M12 Controller ② BON-11 Iron stand ③ ③ TB-170J Soldering iron ④ ② ① NOTE: This picture is M12-TB-170J station set. ※ 3PCHI plug cord for 100V, or 3EPV plug cord for 220V comes with a controller. - Page 6 5-C:How to assemble ① ② ① Insert the power cord into the 3 pin inlet at the back face. ② Connect the soldering iron to 5 pin connector at the front, and turn the connector housing clockwise to lock it in place. ③...
- Page 7 5-D:How to use ① Turn on power Insert the power plug into the receptacle. Confirm each input voltage of the soldering iron and the controller is the same, then turn on the power. ※ Do not use a 100V soldering iron with 220V power source. Failure to do so may damage the heater.
- Page 8 How to set the sensor type ②-2 Ⅰ:At the operation mode, press key approx. 3 seconds while pressing ▽ key. is indicated at PV display. Ⅱ:Enter suitable sensor type by △ key or ▽ key, then push mode. Operation modee Input screen Select sensor type Operation modee...
-
Page 9: (A) Alarm Function Upper Limit Setting
after reach to the set temperature ⑤ Start Auto Tuning Ⅰ:At the operation mode, press for 3 seconds while pressing △ key, and is indicated at PV display. Ⅱ:Push △ key once, and is indicated at SV display, too. key to start Auto Tuning. (“AT” lamp starts blinking. ) Ⅲ:Push Auto Tuning function completes in about 2 minutes. -
Page 10: (B) Alarm Function Lower Limit Setting
6-B:Alarm function Lower limit setting Set the lower limit of operation temperature range Default:0℃ Ⅰ:At the operation mode, press for 3 seconds while pressing △ key, and indicated at PV display. is indicated at PV display. Ⅱ:Push Ⅲ:Enter the desired value by △ or ▽ key at SV display, then push the operation mode. - Page 11 6-E:Manipulated output value Monitoring the output amount of heater Ⅰ:At the operation mode, press key about 3 seconds , and operation output amount (0~100%) is indicated at SV display. key to return to the operation mode. Ⅱ:Push Operation mode Output amount Operation mode ⇒...
- Page 12 6-G:Anti reset wind up setting Control the overshooting Default:18% Setting range:0 ~ 100% Ⅰ:At the operation modee, press for 3 seconds while pressing key. △ indicated at PV display. 4 times , and is indicated at PV display. Ⅱ:Push Ⅲ:Enter the desired value by △ key or ▽ key at SV display. 3 times to return to the operation mode.
- Page 13 ① Auto Power Down time Default:30 minutes Setting range:0 ~ 120 minutes Ⅰ:At the operation mode, press seconds while pressing key. ▽ is indicated at PV display. is indicated at PV display. Ⅱ:Push Ⅲ:Enter the desired value by △ key or ▽ key at SV display. Ⅳ:After entering the value, push key 3 times to return to the operation mode.
- Page 14 ③ Auto Power Off time Default:30 minutes Setting range:0~120 minutes Ⅰ:At the operation mode, press seconds while pressing key. ▽ is indicated at PV display. indicated at PV display. Ⅱ:Push Ⅲ:Enter the desired value by △ key or ▽ key at SV display. Ⅳ:After entering the value, push mode.
- Page 15 6-I:PID value manual setting M12 controller is basically unnecessary PID setting because it comes standard with Auto Tuning function. In case of Overshoot or special soldering work, you can set PID value by manual. Please use PID manual setting with your convenience. ①...
- Page 16 ③ Derivative time Default:8 seconds Setting range:0 ~ 1800 seconds Lower set value can reduce overshoot, however, it makes temperature recovery time longer. This value is supposed to be set or adjusted after value “P” and “I” are almost fixed. Ⅰ:At the Operation mode, press for 3 seconds while pressing △...
-
Page 17: (F) Lock Function
7. Character List △ key + ▽ key + ↓ ↓ ↓ Auto Tuning Input screen Setting temperature ↓ ↓ Proportional band Lock function □ key ↓ ↓ ↓ Integration time Upper limit temp. Recovery speed ↓ ↓ Derivative time Compensation screen key long press ↓... -
Page 18: 8 How To Maintenance
8. How to maintenance How to replace a fuse Loosen a fuse holder and remove it. Check the fuse if it needs to be replaced to a new one. Model No. Specification Fuse 3A Glass fuse 250Ⅴ 3A(φ5.2×20mm) 9. Standard specification Input voltage 100VAC ~... -
Page 19: 10. Guarantee And After Sales Service
10. Guarantee and after sales service 10-A:Trouble shooting Symptom Probable cause Measures page “----” is blinking at Tip sensor is disconnected or comes off Replace iron tips the iron unit. PV display Soldering iron does not ※ No power to controller heat Power cord is NOT connected with the Check the power cord or power switch... - Page 20 JAPAN BONKOTE CO., LTD. ® 600-14 Kasahara, Mito, Ibaraki, 310-0852 JAPAN TEL : +81-29-241-2725 FAX : +81-29-241-2726 http://bonkote.co.jp Email: info@bonkote.co.jp...
Need help?
Do you have a question about the PATRIOT and is the answer not in the manual?
Questions and answers