Table of Contents
Advertisement
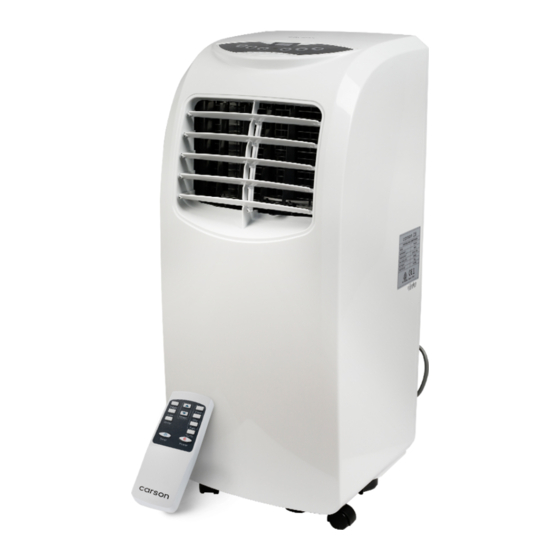
Portable Air Conditioner - PA250 II
User Manual
[Revision 1.0 October 2018]
READ THIS MANUAL CAREFULLY BEFORE USE – FAILURE TO DO SO MAY RESULT IN INJURY, PROPERTY
DAMAGE AND MAY VOID WARRANTY. • KEEP THIS MANUAL FOR FUTURE REFERENCE. • Products covered by
this manual may vary in appearance, assembly, inclusions, specifications, description and packaging.
E&OE
© 2018 Carson
Advertisement
Table of Contents

Subscribe to Our Youtube Channel
Related Manuals for Carson PA250 II


Summary of Contents for Carson PA250 II
- Page 1 Portable Air Conditioner - PA250 II User Manual [Revision 1.0 October 2018] READ THIS MANUAL CAREFULLY BEFORE USE – FAILURE TO DO SO MAY RESULT IN INJURY, PROPERTY DAMAGE AND MAY VOID WARRANTY. • KEEP THIS MANUAL FOR FUTURE REFERENCE. • Products covered by this manual may vary in appearance, assembly, inclusions, specifications, description and packaging.
-
Page 2: Safety
Portable Air Conditioner - PA250 II Safety Safety messages are designed to alert you to possible dangers or hazards that could cause death, injury or equipment or property damage if not understood or followed. Safety messages have the following symbols:... - Page 3 Portable Air Conditioner - PA250 II General Electrical Safety General Electrical Safety General Service Information • Inspect electrical equipment, extension • Electrically grounded equipment must • The equipment must be serviced or cords, power bars, and electrical fittings have an approved cord and plug and repaired at authorised service centres for damage or wear before each use.
-
Page 4: Safety Symbols
Portable Air Conditioner - PA250 II Safety Symbols The product may have safety warning labels attached to it, explained below. Understand the symbols on your product and their meanings. If any stickers become unreadable, unattached etc, replace them. Flammable Material Hazard... - Page 5 Portable Air Conditioner - PA250 II Carbon-Monoxide Hazard Pull Hazard Slope / Fall Injury Hazard "Slam Dunk" Warning Do not use the product in Be aware that the product Be aware that using the Do NOT attempt "slam dunk" confined areas or without...
-
Page 6: Table Of Contents
Portable Air Conditioner - PA250 II Table of Contents Safety ..............................2 Safety Symbols ............................4 Parts Identification ..........................7 Assembly and Set-Up ........................8 Operation ............................11 Control Panel ............................11 Remote Control ............................11 Water Drainage ............................12 Manual Drainage .......................... -
Page 7: Parts Identification
Portable Air Conditioner - PA250 II Parts Identification Name Name C-shape buckle of the heat exhaust Control panel hose snap Horizontal louvre Power cord Vertical louvre Lower air duct bottom Air outlet frame Wire-winding post Vertical Louvre connecting lever Drain cap... -
Page 8: Assembly And Set-Up
Portable Air Conditioner - PA250 II Assembly and Set-Up Leave the mobile air-conditioner in an upright position for at least 2 hours before first use. This air-conditioner may be moved indoor conveniently; leave the air-conditioner in an upright position while moving it. The air-conditioner should be placed on a flat, stable surface. Do not install or operate this air-conditioner in a bathroom or other wet environments. - Page 9 Portable Air Conditioner - PA250 II Installation of the Heat Exhaust Hose Assembly and Unit 1. Pull the end of the heat exhaust hose apart by several turns. 2. Hold the end handle of the C-shape buckle of the heat exhaust hose with the left hand and the heat...
- Page 10 Portable Air Conditioner - PA250 II Installation of the Unit 1. Move the machine with the heat exhaust hose assembly installed before the window and keep the unit at least 50cm away from the walls or other objects. (As shown in the figure above).
-
Page 11: Operation
Portable Air Conditioner - PA250 II Operation Control Panel Remote Control • High: Press this button to select high fan speed (except in Dry and Sleep modes). • Low: Press this button to select low fan speed. • Sleep: Press this button to select Sleep mode. -
Page 12: Water Drainage
Portable Air Conditioner - PA250 II Water Drainage Manual Drainage 1. Once the unit shuts down when the water level is full, turn OFF the power of the unit and then unplug the power plug. NOTE: Move the unit carefully to avoid spillage of water in the water tray at the bottom of the unit. -
Page 13: Continuous Drain
Portable Air Conditioner - PA250 II Continuous Drain 1. Screw off the water cap in the direction shown by the arrow above and unplug the water plug. 2. Insert the OD 13mm PVC drain hose 8-10mm into the water outlet (see right side of figure above). -
Page 14: Maintenance
Portable Air Conditioner - PA250 II Maintenance Prior to maintenance and servicing of the unit, turn OFF the power and remove the plug from the socket. Surface Cleaning Clean the surface of the unit with a wet, soft cloth. Do not use chemical solvents such as alcohol and gasoline;... - Page 15 Portable Air Conditioner - PA250 II Installation of the Filter Frame and Mesh NOTE: Install the filter mesh first and then the filter frame. 1. To install the evaporator filter mesh and condenser filter mesh, point the back end of the filter mesh towards the socket and then push the filter mesh evenly and gently into the socket.
-
Page 16: Handling The Unit
Portable Air Conditioner - PA250 II Handling the Unit Handling and Moving the Unit 1. To handle or move the unit, hold the top of the air outlet of the front shell with one hand and the handle position at the top of the back shell with another hand, and leave the unit in an upright position. - Page 17 Portable Air Conditioner - PA250 II 6. Take out the batteries of the remote control and store them properly. NOTE: Ensure that the unit is stored in a cool, dry place. All accessories of the unit should be protected properly.
-
Page 18: Troubleshooting
Portable Air Conditioner - PA250 II Troubleshooting Never repair or remove parts of the air-conditioner yourself. Disqualified repair will void the warranty and may cause harm to the user and property. If you encounter any of the problems listed in the table below or the recommended remedy does not work, contact an authorised service centre. -
Page 19: Specifications
Portable Air Conditioner - PA250 II Specifications Model PA250 II Noise level Max 52dB Refrigerant/Charge R410A/480g Cooling Capacity 4.4kW (16000BTU) Cooling Input 1400W Airflow Volume 450m³/h Operating Pressure 1.8MPa/4.5MPa Max Pressure 2.0MPa/5.5MPa Input voltage 240V AC Power Plug 10Amp, Australian Standard *The frequency of emptying water is dependent on the level of humidity in the air and the mode the unit is operating in e.g. - Page 20 ©2018 Carson. All rights reserved. No part of this document, including descriptive content, concepts, ideas, diagrams or images may be reproduced or transmitted in any form or by any means, electronic or mechanical, including photocopying, scanning or recording, or any information storage and retrieval system,...
Need help?
Do you have a question about the PA250 II and is the answer not in the manual?
Questions and answers