
Summary of Contents for PTI VP
- Page 1 VP Keypad Access Device Installation and Operation Manual www.ptisecurity.com 800.523.9504 114A3868 revision.E- July 2017...
- Page 2 VP Keypad Access Device Thank you for purchasing the VP Keypad Access Device. While every effort has been made to ensure the accuracy of the information in this document, PTI Security Systems assumes no liability for any inaccuracies contained herein. We reserve the right to change the information contained herein at any time and without notice.
- Page 3 PTI Security Systems products are installed. PTI Security Systems does not authorize the use of its products in applications affecting life safety.
-
Page 4: Table Of Contents
VP Keypad Access Device Contents Technical Specifications ............Installation ................Introduction ..................2 Mounting Access Devices ...............3 Installing VP Series Keypads ............7 Installation Instructions ..............9 Connecting Additional Features (not on all models) ..............Intercom ..................14 Gate Operators ................16 Pinhole camera................17 Testing the Keypad ................18... -
Page 5: Technical Specifications
VP Keypad Access Device Technical Specifications Power Supply: Voltage: 12 – 18 VDC or AC Current Consumption: 300mA Maximum Relay Specifications: Maximum Switching Voltage*: 30 VAC / 24VDC Maximum Switching Current*: 1A (NO / NC) * Resistive Load Environmental: Ambient Temperature: -40°C to +85°C... -
Page 6: Installation
For drive up access, install the device where it can be reached from a vehicle’s driver door. If the VP is used for walk up access, install it where it can be accessed by a person on foot. -
Page 7: Mounting Access Devices
Walk Up Accessibility When the VP is used for walk up access, it can be mounted on a stand or attached to a wall. It can also be surface mounted so that it protrudes from the wall. - Page 8 VP Keypad Access Device If the VP is installed on an exterior wall, seal the contact point between the housing and the wall with a silicone sealant rated for outdoor use. This prevents moisture and insects from getting into the housing.
- Page 9 45 inches from driveway level to the ‘5’ button on the touchpad for vehicular access. If the VP is installed on an exterior wall, seal the contact point between the housing and the wall with a silicone sealant rated for outdoor use.
- Page 10 • The screws and screwholes provided on the aluminum plate match up with the VP keyhole mounting pattern. Single Bollard A bollard is an attractive and functional stand for keypads. It helps protect the keypad from vehicle damage.
-
Page 11: Installing Vp Series Keypads
18 AWG, 4-conductor shielded cable. Some installations will require larger gauge wire. See “Drawing 5: Wiring for VP keypad” on page 8 for details on connecting the wiring to the VP device. With the RS485 communication scheme, a keypad can be located as far as 4000 feet from the controller, therefore shielded twisted pair cable with ground wire is required for optimal operation. - Page 12 VP Keypad Access Device DC– DC– SHLD D– 114A3868.E rev. 7-2017...
-
Page 13: Installation Instructions
Each keypad should have the following wires as shown in “Drawing 7: Wires for the VP keypad” on page 10: rev. 7-2017 114A3868.E... - Page 14 Drawing 7: Wires for the VP keypad 8-32 x 3/8" Screws (qty 3) Cover hole with silicone Chassis Ground (connected to keypad) RG 59U Camera Cable (If optional camera is part of this device) Chassis Ground (connect to Earth Ground...
- Page 15 VP Keypad Access Device - One of 18 AWG, 2-conductor, shielded cable coming from the intercom base station if intercoms are being used. - One of RG59U video cable if a pinhole camera is being used. - One of 18 AWG, 2-conductor cable for the presence sensor if it is being used.
- Page 16 VP Keypad Access Device Ensure that both wires are seated all the way inside the slot. Use a flathead precision screwdriver to tighten down the terminal screw. Verify that the terminal slot has tightened down on the copper wire and not on the rubber insulation. There should be no copper wire showing outside of the terminal slot.
- Page 17 VP Keypad Access Device Refer to the gate or door strike manufacturer’s instructions to determine whether it needs to be connected to the normally open and common or to the normally closed and common. An earth ground must be supplied either: - Through the mounting of the keypad to a conductive surface with an earth ground.
-
Page 18: Connecting Additional Features (Not On All Models)
LEF Single Master Station, LEF Multiple Master Station, or NEM type intercom. Refer to the manufacturer’s instructions. The VP with Intercom can be connected to an Aiphone LEF or Aiphone NEM intercom. •... - Page 19 rev. 7-2017 114A3868.E...
-
Page 20: Gate Operators
Do not place a diode across AC strikes as it will short out the power supply for the strike. • The VP has a presence sensor function that allows the keypad to be connected to a loop detector, or pressure mat requiring a ‘presence’ in order to use the keypad. This function prevent users from walking to, and using, the keypad in a driveway area where they may be in danger from vehicles or the gate. -
Page 21: Pinhole Camera
rev. 7-2017 114A3868.E... -
Page 22: Testing The Keypad
VP Keypad Access Device Testing the Keypad Test the display by supplying power to the keypad. • The default date and time should appear on the display. If the controller is configured correctly, it will update the date and time on the keypad display automatically. The controller updates the date and time once-a-minute. - Page 23 VP Keypad Access Device Test for communications with the controller - Power up the controller. The date and time at the controller will automatically update on the keypad and appear in the display. This verifies communications from the controller to the keypad.
-
Page 24: Operation
VP Keypad Access Device Operation VP Keypad Setup Function To enter setup mode: To enter setup mode: *, 0 1. Press the simultaneously 8898 2. Enter the factory password 3. Press the In the event the password is changed and then forgotten, you can disconnect power from the keypad and then hold the program button while reconnecting power. -
Page 25: Setup Parameters/Functions
VP Keypad Access Device Setup Parameters/Functions Setup parameters in the order displayed by the VP access device are: Restore Defaults *=Yes #=No This prompt only occurs if the program button is held while powering the device. Pressing the key to select will restore all of the factory defaults. -
Page 26: Optional Setup Functions
VP Keypad Access Device Optional Setup Functions At this point, the basic parameters required for operation have been entered. If no other options are active or required, you can exit the setup mode. Following are optional parameters to customize the feel of the site. - Page 27 VP Keypad Access Device Beep with Access Enabled Causes the internal buzzer to sound when an access is granted. A valid access will cause the buzzer to sound one long beep. All other attempts will cause the buzzer to sound four short beeps.
- Page 28 VP Keypad Access Device Time Format 12 Hour 2 Hour Controls how the time is displayed. Options are 1 Hour HH:MM:SS . The 12-hour displays the time as followed by 12:00:00 am 11:59:59 . The hour will be displayed as HH:MM:SS .
- Page 29 VP Keypad Access Device Trip Relay NoCom Disabled Access After any code has been entered the display will read Granted and the relay will be tripped to allow access. When Enabled , the keypad will allow the relay to be triggered when the communications are offline.
-
Page 30: Standard Display Messages
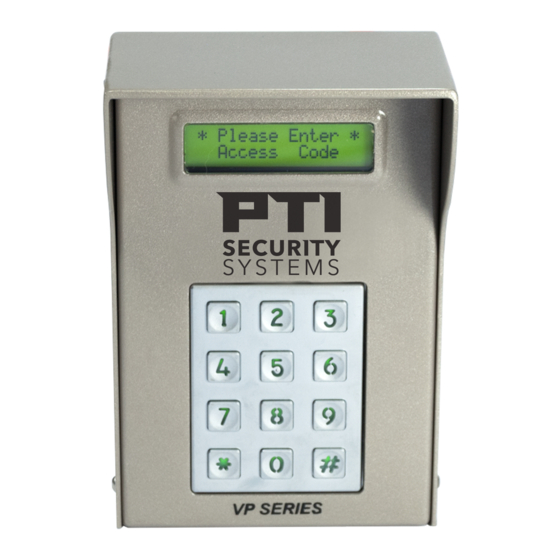
VP Keypad Access Device Standard Display Messages The standard display message for the VP keypad when no keys have been pressed is the date and time as shown. Fri, 08 / 01 / 08 12 : 13 Depending on how the system is configured, the user will have an access code to enter, or a magnetic stripe card to swipe. - Page 31 Access Response Messages section. Security Checks The VP performs a series of security checks before allowing entrance. These checks are used to prevent unauthorized access attempts. When a customer uses an access code, the checks are performed as soon as the code is entered.
- Page 32 If the feature is set to a value between 1-10, the VP will check to see if the user has tried a code more than the permitted number of times. If not, the VP will allow the user to enter an access code.
-
Page 33: Access Response Messages
Access Granted Access Response Messages There are several standard messages built in to the VP. The types of messages the VP receives in response to an access request vary depending on the conditions. The following briefly describes the conditions and the displayed message. - Page 34 VP Keypad Access Device When the customer’s code has expired: Sorry – Code Expired When the customer’s card has expired: Sorry – Card Expired When the customer has been suspended: Sorry – Access Suspended When the code the customer entered is not valid: Sorry –...
-
Page 35: System Maintenance
Periodic Visual Inspection The VP should be inspected monthly. When performing the visual inspection, look for the following items: • Damage caused by contact with vehicles, vandalism, etc. - Page 36 VP Keypad Access Device Remove the VP from the housing to inspect and clean the inside of the unit. When inspecting the inside of the housing and the VP, look for the following items: • Dirt or dust that has collected on the inside of the housing and the circuit board •...
-
Page 37: Troubleshooting
VP Keypad Access Device Troubleshooting For a new installation, typical problems are related to the installation or configuration process. Start at step 1 in the Troubleshooting Steps section and proceed until the problem is found and resolved. For an existing installation (previously working), determine whether anything has been changed at the site. -
Page 38: Test Power And Communication
Test Power and Communication Does the VP Access Device have Power? Check the display of the VP. If the display is on, or if any of the LEDs on the board are on, the board has power. If there is no indication of power from the display or LEDs, use a volt meter to check for the presence of voltage on connector P1 pins 1 &... - Page 39 VP Keypad Access Device Is the voltage at the VP, connector P1 pins 1 & 3 (1 & 2 for AC), greater than 18 Volts? (Use a volt meter to measure the voltage). Create a voltage map of the site by sketching out the locations of every AI device on the site.
- Page 40 If neither of the LEDs are blinking, proceed to step 6. PROGRAM – LEF Single All Others SPKR SPKR NORM. TERM. PRES. SENSOR NORMAL GROUNDED Drawing 12: VP board diagram 114A3868.E rev. 7-2017...
- Page 41 Falcon XT Setup In Storlogic ver.4.1 - look at Falcon XT Setup In Storlogic ver.5.0 - look at If the value is lower than the address of the VP, the controller will not try to communicate with it. – Change –...
-
Page 42: Test Individual Devices, Card And Code Input
VP Keypad Access Device Test Individual Devices, Card and Code Input Use the following steps for troubleshooting individual devices or keypads. Keep thorough notes during troubleshooting to compare against and to help find problems, prevent confusion, and save time if site service by a technician is required. -
Page 43: Test Multiple Devices Or Entire Site
VP Keypad Access Device Test multiple devices or entire site Generally, multiple problems are a sign of wiring issues, either from bad splices, pinched or nicked wires, radio frequency interference, water in the conduit, or incorrect wire type. To check the entire site for problems, use the following procedure: Allow for customer access and open all device housings. - Page 44 Drawing 13: : Wiring Diagram of VP Keypad System SEE INTERCOM JUMPER LEF SINGLE-MASTER STATION CONFIGURATION TABLE FOR AND ALL NEM INTERCOM PROPER JUMPER PLACEMENT TYPES WIRING OFFICE – PROGRAM - OR - – LEF Single TO SPEAKER AND OFFICE –...
-
Page 45: Warranty & Disclaimer
This warranty is exclusive and in lieu of all other warranties, expressed or implied, including but not limited to the implied warranties of merchantability and fitness for a particular purpose. PTI Security Systems will not be liable to anyone for any consequential or incidental damages for breach of this warranty or any other warranties. -
Page 46: For Technical Support, Please Visit
For Technical Support, Please Visit: tickets.ptisecurity.com 114A3868 revision.E- July 2017...
Need help?
Do you have a question about the VP and is the answer not in the manual?
Questions and answers
What are the two trigger wires that open the gate operator? We’re converting from an old guillotine gate to a CSL 24 Liftmaster We got everything programmed and the keypad is powered up with the correct date and everything but when we enter the code, we can’t seem to find the two trigger wires.