Dryer Master DM510 Installation Manual
Computerized
grain drying control system
Hide thumbs
Also See for DM510:
- Quick manual (2 pages) ,
- User manual (82 pages) ,
- Commissioning manual (42 pages)
Table of Contents
Advertisement
Quick Links
Advertisement
Table of Contents

Related Manuals for Dryer Master DM510

Summary of Contents for Dryer Master DM510
- Page 1 INSTALLATION GUIDE...
- Page 2 USA and Canada – Toll free at 1-888-318-0009 E-mail: info@dryermaster.com Reminder Remember to register your DM510 at dryermaster.com Simply by registering your new DM510 you automatically extend your warranty from 1 year to 2 years. February 28, 2015 January 15, 2016...
- Page 3 Installation Manual What is in this guide In this guide you will find the information you will need in order to install a Dryer Master DM510. There is information on both the physical installation and the wiring connections. Before you start the installation, review the information in this manual as there are a few key decisions you should make before starting the actual installation.
-
Page 4: Table Of Contents
Index .......................... 4 Table of figures ..........................6 Dryer Moisture Systems Inc. – About Us ..............8 DM510 - A Brief Description ..................9 DM510 - How it Works ....................9 System Components ....................10 DM510 Control Panel including I/O:....................10 Printer (optional): ........................... - Page 5 Multi-Cable Specifications ........................45 Typical System Multi-Cable Requirements ..................46 Installing Conduit and Pulling Wires ....................47 Wiring Instructions (Cable Terminations) ............48 Tools Required ............................48 General Wiring Procedure ........................48 Overview: Typical DM510 wiring connections: .................. 49 Page | 5...
-
Page 6: Table Of Figures
Appendix 4. Round Cell Sensor ................75 Table of figures FIGURE 1- INSTALLATION SCHEMATIC – DM510 W/ INTEGRATED I/O AND APT SENSOR ....11 FIGURE 2 - INSTALLATION SCHEMATIC - DM510 WITH REMOTE I/O ............12 FIGURE 3- APPLICATION SCHEMATIC ....................... 13 FIGURE 4 - FIN TYPE MOISTURE SENSOR (FRONT AND BACK VIEWS) ............ - Page 7 FIGURE 47 - REMOTE ALARM ..........................64 FIGURE 48 - DM510 TO MITSUBISHI FR-D700 ....................65 FIGURE 49 - DM510 TO GENERIC VFD (O-10 VDC) ................... 66 FIGURE 50 - DM510 TO ALLEN BRADLEY POWERFLEX40 ................66 FIGURE 51 - DM510 TO BALDOR SERIES H2 ...................... 67 FIGURE 52 - DM510 TO ALTIVAR 31 ........................
-
Page 8: Dryer Moisture Systems Inc. - About Us
The Dryer Master DM510 from DMSI continues the commitment to excellence that has made the Dryer Master name the industry standard in grain drying technologies. With your assistance, the... -
Page 9: Dm510 - A Brief Description
With this information, the DM510 does not have to wait to react to changes in the outlet moisture. It is able to adjust the discharge rate as the incoming moisture changes. For example, as wetter grain comes into the dryer, the DM510 begins to slow down the discharge rate just as the wetter grain reaches the hot zone. -
Page 10: System Components
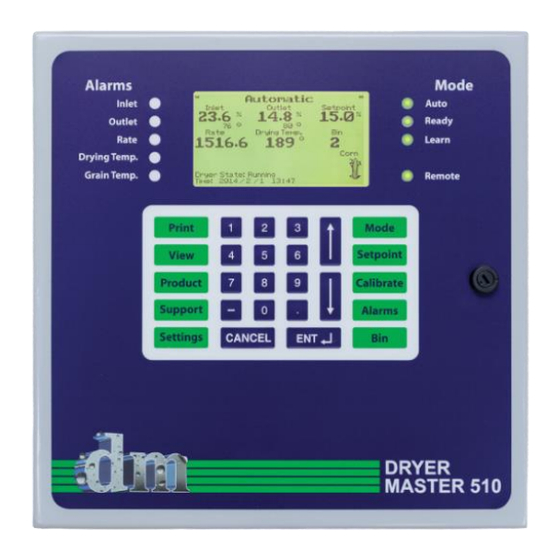
An optional printer for continuous reporting of dryer operation and results is also available. DM510 Control Panel including I/O: The DM510 is a computer system complete with user interface keypad and the display screen, I/O system and the capability to provide real time information through an internet connection to a network capable device. -
Page 11: Installation Configurations (Printer Optional)
5) Rate Sense and Rate Control 6) Local/Remote Control andLocal/Remote Status 7) Fan Status 8) Spare Moisture Sample Start Button Dryer Control Panel (Discharge Speed) Outlet Moisture & Temperature Sensor Figure 1- Installation Schematic – DM510 w/ Integrated I/O and APT sensor Page | 11... -
Page 12: Configuration With Remote I/O And Apt Sensor
10) Communications and Power Wire 11) Spare Communications and Power Wire Remote I/O Box Moisture Sample Start Dryer Control Panel Button (Discharge Speed) Instrumentation cables Outlet Moisture & Temperature Sensor Figure 2 - Installation Schematic - DM510 with Remote I/O Page | 12... -
Page 13: Configuration With Integrated I/O And Temperature Signal Converter
Dryer Master DM510 Installation Manual Configuration with Integrated I/O and Temperature Signal Converter Inlet Moisture & Temperature Sensor DM510 Control Panel DRYER Ground cables Internet connected router or wireless access point (WAP) Instrumentation cables Printer 1) Inlet Sensor 2) Outlet Sensor... -
Page 14: Project Manager Guide And Checklist
If at any time you have any questions with either the details in this document or the installation please contact the Dryer Master Support Centre toll free at 1-888-318-0009 If you are installing the DM510 on a new dryer refer to situation #1. For all other situations please refer to situation #2. -
Page 15: Situation 2 Overview: Retrofit Onto An Existing Dryer
DM510 cabinet) To mount the DM510 panel • To install conduit and run wiring from the DM510 panel to the Dryer Master I/O system (If • applicable) To install conduit and run wiring from the field devices to the Dryer Master I/O system •... -
Page 16: Installation Checklist
Dryer Master I/O system The Dryer Master I/O system can be left in the DM510 panel or it can be separately mounted in a “NON HAZARDOUS” environment. The I/O board can be installed in the dryer control panel or an electrical enclosure in close proximity to the dryer control panel. -
Page 17: Inlet Moisture Sensor
Sample Station should be placed in close proximity to the outlet Moisture Sensor. The purpose of the station is to signal the DM510 control panel that a moisture sample has been taken and to tell the operator for how long to take a sample. -
Page 18: Temperature Signal Converter (Temperature Option B)
Speed Control Interface (Motor Speed Control Option B) A number of installations of the DM510 on older dryers with DC drives require the use of the DM510 motor speed control interface. The interface provides isolation and signal conditioning between the DM510 and the speed control. -
Page 19: Electrical Installation Guidelines
10. Once continuity testing has been done successfully, power can be applied to the panel Wiring Eight (8) 4-wire instrumentation cables need to be pulled from the dryer to the DM510 I/O panel to the field instrumentation for the integrated I/O solution. Three (3) 16 AWG (minimum) ground wires should be pulled from the DM510 chassis ground to specific field instrumentation and Dryer’s... - Page 20 I/O panel to DM510 panel if configured this way The conduit must enter the DM510 control panel through the supplied entry plug on the bottom right, or bottom, of the cabinet. Any other entry may damage equipment and void warranty.
-
Page 21: Component Summary
Dryer Master DM510 Installation Manual Component Summary DMSI supplied components and services Control Panel DM510 Display panel, Ethernet cable Printer (optional), power supply and cable, Sensors DMSI Inlet Moisture sensor DMSI Outlet Moisture sensor Sample Station (Calibration Push Button) Air Plenum Temperature Sensor or Temperature Signal Converter... -
Page 22: Dryer Master Moisture Sensors
Welding on or welding near the sensor while it is mounted will invalidate the warranty Sensor Types The vast majority of new Dryer Master DM510 installations use the Fin Type moisture sensor at both the inlet and outlet to the dryer. The two sensors provided with a standard system are identical and can be used interchangeably. -
Page 23: Inlet Moisture Sensor Installation
Dryer Master DM510 Installation Manual Inlet Moisture Sensor Installation Sensor Location The Inlet Sensor should be placed vertically at the inlet to the grain dryer (in or near the garner bin). See Figure 7 - Alternate location for inlet sensor on column dryer and Figure 8 - Round dryer installation location for details. -
Page 24: Sensor Installation
Locate the sensor where it is in constant contact with the compacted grain. If the sensor is not in constant contact with compacted grain and becomes empty or becomes partially empty, the DM510 will trigger an alarm condition. The DM510 may (as a result of the alarm) relinquish automatic control. -
Page 25: Figure 6 - Sensor And Mounting Plate Dimensions
Dryer Master DM510 Installation Manual 6 “ Inlet Sensor 8 1/2 Inlet Sensor Dimensions 10 “ Mounting Plate Mounting Frame Dimensions Figure 6 - Sensor and mounting plate dimensions Page | 25... -
Page 26: Figure 7 - Alternate Location For Inlet Sensor On Column Dryer
Dryer Master DM510 Installation Manual Additional Sensor Location Diagrams Figure 7 - Alternate location for inlet sensor on column dryer Figure 8 - Round dryer installation location Page | 26... -
Page 27: Outlet Moisture Sensor Installation
Round Cell Sensor) This may be appropriate for some installations. If you are in doubt about which sensor to use call us at the Dryer Master Support Center and we will go over the pros and cons of each option with you. -
Page 28: Outlet Sensor Installation Options
The installation of the outlet sensor is critical. A poorly installed outlet sensor will reduce the effectiveness of the DM510. Locate the sensor where it will stay full. If the sensor becomes empty, incorrect moisture will be recorded, resulting in poor control of the drying process. -
Page 29: Figure 10 - By-Pass With Rotary Metering
Inaccurate or false readings of the outlet sensor will adversely affect control of the dryer by the Dryer Master. Locate the Sensor so it can be safely accessed for cleaning and taking grain samples. -
Page 30: Figure 11 - Example Installations Of By-Pass With Rotary Metering
Dryer Master DM510 Installation Manual See also Appendix 3 for additional information on the Dryer Master bypass chute with rotary feed installation. Figure 11 – Example installations of By- Pass with rotary metering Page | 30... -
Page 31: Option 1A - Bypass Using Sampling Auger
Inaccurate or false readings of the outlet sensor will adversely affect control of the dryer by the Dryer Master. 4. The flow of grain through the chute should be approximately ½ inches per second or about 50 cubic feet, 1.4 cubic meters per hour. -
Page 32: Figure 12 - By-Pass Auger Installation
Dryer Master DM510 Installation Manual 9. Run grain through the sampling chute and ensure the grain flows evenly past the fin. Also ensure that the auger is drawing grain from all areas of the chute. Figure 12 - By-Pass auger installation... -
Page 33: Option 2 In-Line Method - Details
Option 2 In-Line Method – Details The Dryer Master In-Line chute with rotary feed is designed so that the moisture of the grain can be measured without having to divert a portion into a bypass. (see Appendix 3, Option 2.) Some dryer manufacturers can supply a chute that will fit under their dryer to accommodate an outlet fin sensor to get a similar effect. -
Page 34: Figure 16 - Dryer Master Rotary Feed Chute - Inline Version
Installation Manual Do not cut holes in the outlet sensor. Use only the existing wire entry location. Entry at any other location voids the warranty. Figure 16 – Dryer Master rotary feed chute – inline version Figure 17 – Example of... -
Page 35: Dm510 Control Panel Installation
• The bottom of the display screen (LCD) is slightly above average eye level. • Locate DM510 in a room where the dryer operators will spend most of their time or will be • processing moisture samples. If the DM510 is mounted against an uninsulated outside wall, provide ½" (12.7mm) insulating •... -
Page 36: Figure 18 - Dm510 Product Dimensions
Installation Manual Caution Do not cut holes in the DM510 Control Panel. Cuttings getting inside the panel can cause serious damage. Use only existing wire entry locations. The warranty is void if additional holes are made in the DM510 Control Panel. -
Page 37: I/O Panel Installation
Dryer Master DM510 Installation Manual I/O Panel Installation The DM510 may be operated with the I/O panel remotely located. Mounting the DM510 I/O panel in a remote enclosure creates a remote I/O panel. Mount this panel in such a way that: The wiring from the sensors can be easily completed without discomfort. -
Page 38: Figure 20 - Communications Wire Layout
Installation Manual The cables required between the DM510 and I/O panel are 2 Multi-cables. One for communications, one for a spare and a minimum 16-gauge green ground wire from the DM510 chassis ground to the DM510 I/O Panel chassis ground. -
Page 39: Power And Grounding Requirements
DM510 Control Panel Power The DM510 can be powered with 85 to 264 VAC, 47 to 440 Hz or 120 to 370 VDC. The Dryer Master requires less than 175 watts that should be provided with a dedicated, isolated grounded circuit. -
Page 40: Figure 21 - Star Point Grounding System
Dryer Master DM510 Installation Manual Star Point Grounding Inlet Moisture & Temperature Sensor DM510 Control Panel Drying Air Temperature Sensor Dryer Control Panel (Discharge Speed) Ground Rod Moisture Sample Start Button Outlet Moisture & Temperature Sensor Figure 21 - Star Point Grounding System If all the devices in an electrical system are connected to a common point from which a cable runs to ground, the result is a star-point earth ground system. -
Page 41: Figure 22 - Effects Of Surge Current In A Star Point Ground System
Dryer Master DM510 Installation Manual Surge Current Inlet Moisture & Temperature Sensor DM510 Control Panel Drying Air Temperature Sensor Dryer Control Panel (Discharge Speed) Ground Rod Moisture Sample Start Button Outlet Moisture & Temperature Sensor Figure 22 - Effects of surge current in a Star Point ground system The purpose of any ground system is to keep all connected equipment at the same ground potential. -
Page 42: Figure 23 - Effects Of Surge Current In A Conventional Ground System
Dryer Master DM510 Installation Manual Surge Current Equipment V=i(Z Equipment Equipment Equipment Equipment Figure 23 - Effects of surge current in a conventional ground system When ground connections are made at various points along a ground conductor the effect is much different. -
Page 43: Figure 24 - Dryer Master Internal Grounding
DM510. This is done to enhance the grounding capabilities by connecting the ground wires that power the remote sensors to the ground lug in the DM510 chassis. It is important that these wires remain in place along with the new wires placed at these locations during the installation process. -
Page 44: Moisture Sensors
Discharge Rate Monitoring The Motor Speed Control Interface converts the 0 to 90/180 VDC output from the motor speed control to an isolated 0 to 5 V signal for the DM510 Discharge Rate Sense input. Note: This method is used for non-isolated DC speed controls only. -
Page 45: Control Wiring Requirements
Interface and the motor speed controller. 16-gauge wire is sufficient for all ground wires. Multi-Cable Specifications One multi-cable with the following specifications is required between each sensor and the DM510 Control Panel. See below for details. Two-pair shielded, minimum 22 AWG (.644 mm or 23 SWG) stranded tinned copper •... -
Page 46: Typical System Multi-Cable Requirements
See Figure 26 - Wire placement for a list of the multi-cable requirements and wire placement for a DM510 system with ALL options. To accommodate this number of cables (10 cables at .170” or 4.318 mm diameter) a ¾ “, 19.05mm conduit is required. There are two cable entry locations at the bottom right hand side of the cabinet sized for a ¾... -
Page 47: Installing Conduit And Pulling Wires
Caution Warranty Information Entry through any other way voids the warranty, and may allow condensation from the conduit to drip into the DM510 Control Panel, or metal shavings may cause a short circuit on the DM510 system board Remember that it is easy to damage Multi-Cable when pulling into a conduit. Careful installation when doing this will save time and money. -
Page 48: Wiring Instructions (Cable Terminations)
4. Use the side cutters to trim the jacket, ripcord and foil shield. DO NOT CUT OFF THE DRAIN WIRE at the DM510 Control Panel end. Use the side cutters to cut the rest of the wires to a uniform length. -
Page 49: Overview: Typical Dm510 Wiring Connections
Input and wire nut to drain wire Input Input Spare provided in vertical cable Output Output tray Black Output Output Black Sensor Ground wires Output Output Output Output Signal Ground Figure 28 - DM510 typical wiring connections Page | 49... - Page 50 4. Strip ½" (7mm) and twist (colour to colour) and crimp to the wires exposed in the moisture sensor using the crimp connectors provided in the sensor. 5. Join the ground wire in the moisture sensor to the ground wire from the DM510 Control Panel using a wire nut.
-
Page 51: Figure 29 - Sensor Hook-Up Physical
Dryer Master DM510 Installation Manual DM510 Control Panel Dryer Master Control Panel Moisture Sensor GREEN Moisture +24 VDC BLACK Ground WHITE Temperature Green Wire Nut White Black ground cable to Shield ground wire To pigtail in vertical in Sensor wire tray... -
Page 52: I/O Board Jumper Locations And Functions
Dryer Master DM510 Installation Manual I/O board Jumper locations and functions These jumpers are found on the I/O board next to the terminal connections. These Jumpers are in the correct position by default. No adjustments are required for standard configurations. -
Page 53: Figure 34 - I/O Board Analog Input Jumper Configuration Description
Dryer Master DM510 Installation Manual Analog Input Configuration Jumpers. Shown in default 10V position for the first 7 channels. Channel 8 the temperature channel is in the 5V position by default. Figure 34 – I/O board Analog Input jumper configuration description. -
Page 54: Motor Speed Control Interface Wiring Instructions (For Dc Drives)
Figure 35- DM510 to MSC Interface The DM510 Speed Sense must be set to 0-5 VDC or 0-10 VDC depending what is being sent from the Dryers speed control. Most frequency drives output 0-10 volts as a speed signal. Changing the range is accomplished by placing the jumper on J26. -
Page 55: Figure 36 - Dm510 To Msc Interface
Dryer Master DM510 Installation Manual DM510 to Motor Speed Control Interface Wiring Dryer Master DM510 MOTOR SPEED CONTROL INTERFACE GREEN Rate IN RATE IN Rate Sense Out Adjustment WHITE (Clockwise To Increase) +24VDC +24VDC Temp TEMP GREEN Rate Rate Out... -
Page 56: Local/Remote Status Wiring Instructions
The Motor Speed Control Interface provides a local/remote switching facility that can disconnect the manual speed dial on the dryer and allow the DM510 to control the discharge rate. It is necessary for the DM510 to understand the status of this functionality. This is achieved by wiring up the spare dry contact from the local/remote relay used to switch local control signal and the DM 510 speed input in the case of an AC motor. -
Page 57: Figure 39 - Local/Remote Status Wiring
If it is used the software must be Black configured to use this signal. NO/NC Output Figure 39 - Local/Remote Status Wiring If you are using the Dryer Master Motor Speed Control Interface, the local/remote status function is provided at T10 and T11 Page | 57... -
Page 58: Fan Status Wiring Instructions
Fan Status Wiring Instructions It is necessary for the DM510 to realize the status of the Dryer Fans. This is to inform the Dryer Master what drying state the dryer is operating in. This is achieved by wiring up a spare dry contact... -
Page 59: Drying Air Temperature Wiring Instructions
There are three options for providing the DM510 with a drying air temperature reading. In most cases the decision about which option to use is made at the time of ordering the DM510 system. 1. A Dryer Master Air Plenum Temperature Sensor to be located in the dryer 2. -
Page 60: Figure 43 - Drying Air Temperature Sensor Wiring
Drying Air Temperature Sensor supplied with the DM510. For both options remember to attach the Multi-cable shield to ground at Dryer Master end and insulate it on the other end. -
Page 61: Connecting To A Drying Air Temperature Controller
First is a direct analog connection and second is a RS485 connection. Consult your Temperature Controller manual to determine which one you have. Run one Multi-cable between the Dryer Master and the Temperature Controller. Check the temperature controller manual for the correct termination. -
Page 62: Figure 45 - Dm510 To Signal Converter Wiring
Channel 2 Input 9 10 11 12 Existing Plenum Temperature Controler Channel 1 Input White 13 14 15 16 Existing J-type Thermocouple Figure 45 - DM510 to signal converter wiring For complete programming and install instructions see Appendix 2. Page | 62... -
Page 63: Calibration Button Wiring Instructions
The operators should be able to see the light while they are taking the manual sample. Run one multi-cable between the button and the Dryer Master and terminate as per the above diagram. -
Page 64: Remote Alarm Control
Figure 47 - Remote Alarm DM510 Control Panel supplies a set of relay contacts to be used if an external alarm is desired. Run one multi-cable between the 24 VDC control relay and the Dryer Master and terminate as in Figure 47 - Remote Alarm. -
Page 65: Appendix 1: Motor Speed Control Wiring Diagrams
5. Altivar 31 DM 510 Dryer Master to Mitsubishi FR-D700 series inverter Moisture Note: The Dryer Master speed setting signal is wired into +24V the same terminal as the manual speed setting potentiometer, The relay serves to connect either the... -
Page 66: Figure 49 - Dm510 To Generic Vfd (O-10 Vdc)
Figure 49 - DM510 to Generic VFD (O-10 vdc) DM 510 Dryer Master to Allen Bradley PowerFlex 40 series inverter ® Note: The Dryer Master speed setting signal is wired into the same Moisture +24V terminal as the manual speed setting potentiometer, The relay... -
Page 67: Figure 51 - Dm510 To Baldor Series H2
Output DO 2 NO/NC Output DO 3 DM510 to Baldor Series H2 Variable Frequency Drive Wiring Schematic Output NO/NC DO 4 Figure 51 - DM510 to Baldor Series H2 Altivar 31 Moisture +24V Temp Moisture White +24V Temp Green Rate In... -
Page 68: Appendix 2: Complete Instructions For Programming And Wiring Omega Txdin70-24V Signal Converter
3) Use the supplied USB cable to connect the display to the converter. 4) Use instrumentation cable to connect the converter signal output (terminal 5 (+), terminal 6 (-)) and power wires (terminal 1 (+), terminal 2 (-)) to the Dryer Master as shown in figure 1. -
Page 69: Figure 53 - Wiring Diagram For Signal Converter Connections
Twist the leads of all four resistors together to get 250Ω and install the resistors as instructed above. This may introduce a small error in the reading at the dryer master but should be reasonably close. Page | 69... - Page 70 Dryer Master DM510 Installation Manual Programming: The following instructions will setup both channels identically. Should channel 1 fail for any reason, simply moving the appropriate wires to channel 2 will restore operation. Note: If, when displaying a parameter there is inactivity on the keypad for more than about 20 seconds, the display exits the parameter setup.
- Page 71 The Dryer Master should now read the same temperature as the dryer panel. When drying, if there is an error greater than 2-3 degrees change the offset value on the Dryer Master so the temperature displayed matches the dryer panel reading.
-
Page 72: Appendix 3. Sensor Chutes W/ Rotary Feed
Dryer Master DM510 Installation Manual Appendix 3. Sensor Chutes w/ Rotary Feed Option 1: Bypass Method Sensor Slide gate to close off Housing flow for cleaning The sensor chute is designed to be used in a bypass Sampling type installation of the outlet moisture sensor. In a... -
Page 73: Figure 55 - Inline Chute Description
Dryer Master DM510 Installation Manual Option 2: In-Line Method 6” X 6” chute Slide gate to The sensor chute is designed to be used in an close off flow inline type installation of the outlet moisture sensor. In an inline type installation a portion of the... -
Page 74: Figure 58 - Chute Motor Rotation Change Graphic
Dryer Master DM510 Installation Manual The motor can run either clockwise (CW) or counter clockwise (CCW). Move the black wire to change the direction of rotation Figure 58 – Chute motor rotation change Graphic Page | 74... -
Page 75: Appendix 4. Round Cell Sensor
Dryer Master DM510 Installation Manual Appendix 4. Round Cell Sensor In some cases a round cell sensor may be the most appropriate sensor choice. This may be the case where there is limited space for the standard fin sensor installation with a chute and slide gate or rotary valve.
Need help?
Do you have a question about the DM510 and is the answer not in the manual?
Questions and answers