Table of Contents
Advertisement
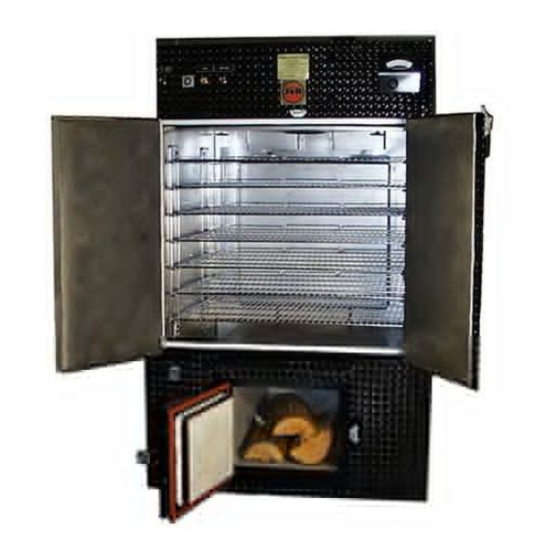
SMOKE-MASTER
THE LITTLE RED
J&R M
ANUFACTURING
820 W. Kearney, Suite B
P. O. Box 850522
Mesquite, TX 75185-0522
250R-FS
SMOKEHOUSE
250FS & 250 FSE
OPERATIONS AND
SERVICE MA NUAL
CE VERSION
, I
.
NC
(972) 285-4855
(Texas)
(800) 527-4831
(All 50 States & Canada)
(972) 289-0801
(Parts & Service)
(972) 288-9488
(Fax)
Advertisement
Table of Contents
Troubleshooting

Related Manuals for J&R MANUFACTURING 250R-FS

Summary of Contents for J&R MANUFACTURING 250R-FS
- Page 1 SMOKE-MASTER 250R-FS THE LITTLE RED SMOKEHOUSE 250FS & 250 FSE OPERATIONS AND SERVICE MA NUAL CE VERSION J&R M ANUFACTURING (972) 285-4855 (Texas) 820 W. Kearney, Suite B (800) 527-4831 (All 50 States & Canada) (972) 289-0801 P. O. Box 850522 (Parts &...
- Page 2 SN _______________...
- Page 3 Original (English Language) Instructions SMOKE-MASTER Model 250R-FS THE LITTLE RED SMOKEHOUSE Model 250FSE OPERATIONS AND SERVICE MANUAL CE Version MANUFACTURED BY: J & R MANUFACTURING, INC. 820-B West Kearney Mesquite, Texas Rev. 08-18...
- Page 4 WARNINGS! Disposal of Ashes Ashes should be placed in a metal container with a tight-fitting lid. J&R offers ash carts suitable for this purpose. The closed container of ashes should be placed on a noncombustible floor or on the ground, well away from all combustible materials, pending final disposal.
- Page 5 February 12, 2018...
-
Page 7: Table Of Contents
CONTENTS MODELS 250R-FS, 250 FS, 250 FSE ..........INSTALLATION INSTRUCTIONS ............. 2 DESIGN ..................OPERATIONAL SEQUENCING ............6 OPERATING PROCEDURES............. 7 M AINTENANCE AND CLEANING............. 11 TIMER INSTRUCTIONS ..............13 TROUBLESHOOTING..............14 MODEL 250 NOMENCLATURE AND IMAGES ......... 17 ELECTRICAL DRAWINGS............... 31 THERMOSTAT INSTRUCTIONS ............ - Page 9 MODELS 250 R-FS; 250 FSE These machines are solid-fuel fired meat smokers. They are intended to cook and smoke meat from the raw state to the fully cooked state. They are intended to be used in indoors- commercial settings, such as restaurants, institutions, and catering kitchens. The operation of these units is identical.
-
Page 10: Installation Instructions
INSTALLATION INSTRUCTIONS Your unit will be shipped fully assembled. It can be handled with a 4000 pound capacity forklift. Uncrate and inspect for concealed shipping damage. Install the casters (packed inside the unit). Move unit into position. Vent according to venting instructions on the following pages. Clearances: (in cm.) From Any Combustibles: Above Top From Front... -
Page 11: Design
Venting Requirements Our barbecue ovens are listed under multiple standards, including U.L. 737 (Fireplace Stoves), U.L. 2162 (Commercial Wood-Fired Baking Ovens), and U.L. 391 (Solid-Fuel and Combination-Fuel Central and Supplementary Furnaces. These listing provide two alternatives for exhausting our units: direct venting and exhaust hood venting. In all cases, it is imperative to obtain the approval of the AHJ (Authority Having Jurisdiction). - Page 12 Option Two: Exhaust Hood Venting U.L. 2162 cites NFPA 96 (Standard for Ventilation Control and Fire Protection for Commercial Cooking Operations) as its ventilation standard. While NFPA 96 allows direct ventilation with factory-built grease ducts or properly constructed welded ducts (with fire-rated enclosures), it also permits the exhaust hood ventilation option for our units.
- Page 13 DESIGN EMPERATURE ONTROL A thermostat activates and controls the combustion air supply to the firebox and the exhaust from the pit through the flue damper. If the unit is equipped with an electrical heating element, the thermostat also controls it. Heat and smoke flow through refractory lined flues into the cooking chamber and are circulated by a convection fan system.
-
Page 14: Operational Sequencing
OPERATIONAL SEQUENCING Convection fan and EVAC fan are on. The primary (operator adjustable) thermostat energizes and is in control. When this thermostat requires additional temperature (sensed inside oven) to satisfy the set point, its contacts close thereby energizing the flue damper motor (item 16) and the combustion air delay timer (item 13A). -
Page 15: Operating Procedures
Be sure to set the temperature indicator (red arrow) at your desired cooking temperature (see 3 Cook Operation and 4 Cook and Hold Operation). b. Model 250R-FS Smoke-Master. Same procedure as 1 through 4 above, except this unit has seven racks instead of ten. Page 7 of 43... - Page 16 “C ” O PERATION a. Set the Selector switch in the “Cook” position and set the thermostat to the desired cooking temperature. If the unit is equipped with an electric heating element turn HTR ELEM on as desired. “C ” O OOK AND PERATION a.
- Page 17 EMOVAL OF Racks can be pulled out to access and remove the meat. HANDLING OF RENDERED GREASE Grease that collects in the bottom of the cooking chamber should be drained by threading the grease drain extension nipple onto the drain valve fitting and draining the grease into a suitable receptacle.
-
Page 18: Troubleshooting
EMPERATURE ROTECTION a. This pit is equipped with a safety thermostat control that will close dampers, deactivate fans, etc. if the interior oven temperature reaches 450 degrees. b. If the pit stops (lights go off, etc.) and the front door feels excessively hot to the touch, DO NOT OPEN THE PIT as there may be a grease fire inside. - Page 19 12. C OOKING IMES AND EMPERATURE a. The Barbecue Recipe Book gives times and temperatures for non- convection ovens. b. This unit is a Convection Oven and consequently cooks faster than ordinary ovens. c. We recommend that you cook as follows: PRODUCT TEMPERATURE TIME...
- Page 20 PREVENTIVE MAINTENANCE – CLEANING MONTHLY: The interior fan cowling area should be cleaned. Remove the convection cowling (25), clean, and reinstall. Clean the convection fan impeller (26) at the same time. ANNUALLY: Remove the rear upper exterior skin panel. Remove the bolts that secure the hinged access cover (22) over the rear dampers and open the cover.
- Page 21 USING YOUR “COOK & HOLD” FEATURE The Cook & Hold timer will reset the oven temperature to 145 degrees F at the end of the time set on timer. However, it will take about 2 hours for the oven to cool down from 250 degrees to 145 degrees. So, cut about 2 hours off the time you want it to cook.
- Page 22 TROUBLESHOOTING Always de-energize the unit or the component in the unit before servicing and tag switches to warn others that service is in progress. OWER NOTHING WILL ENERGIZE Check the power supply to the unit. If no supply voltage or improper voltage, then check the breaker box.
- Page 23 OMBUSTION OTOR OMBUSTION AMPER OTOR NOPERATIVE Check the fuse and high limit thermostat. The combustion air fan (12) and the Combustion Air Damper Motor (13) are energized when the unit is in either the “COOK”, “COOK and HOLD”, or “EVAC” modes and the appropriate thermostat is calling for a temperature increase (recall the 60 second delay for this fan after the thermostat contacts close).
- Page 24 MOKE EAKS Check for proper EVAC fan function. Has the unit been cleaned as per the schedule in the cleaning maintenance section? Check the gaskets for proper seal (see the cleaning maintenance section for adjustment details). If gaskets are to be replaced it is important to remove all old gasket material and mastic material and clean with solvent to degrease before installing a new gasket.
- Page 25 MODEL 250 SERIES NOMENCLATURE COOK – OFF -- COOK and HOLD Switch Timer EVAC Switch Heater Element Switch Oven Control Primary Thermostat J Box for Secondary and High Limit Thermostats. Secondary (or Hold) Thermostat High Limit Thermostat 6 Amp Slow Blow Fuse Cabinet Cooling Fan Convection Blower Motor EVAC (or Stack) Blower Motor...
- Page 26 MODEL 250 SERIES NOMENCLATURE Continued Hinged Damper Access Cover 22A. Hinged Stack Plenum Access Cover Oven Heat Outlet (1 of 2) Oven Heat Inlet Convection Cowling 25A. Convection Cowling “T” Bolts (1 of 2) 25B. Convection Cowling Retainer Clips (1 of 2) Convection Blower Impeller Electric Heater Element 27A.
- Page 27 CONTROL PANEL INSIDE CONTROL PANEL HIGH LIMIT AND HOLD THERMOSTATS Page 19 of 43...
- Page 28 RESETTING OVERLOADS HERE Page 20 of 43...
- Page 29 INTERIOR VIEW WITH ALL BAFFLES IN PLACE INTERIOR VIEW WITH MOST BAFFLES REMOVED Page 21 of 43...
- Page 30 Page 22 of 43...
- Page 31 INTERIOR VIEW COWLING REMOVED FIREBOX DOOR Page 23 of 43...
- Page 32 Page 24 of 43...
- Page 33 SIDE VIEW SHOWING COMBUSTION AIR ASSEMBLY FRESH AIR INLET SHOWN WITH DAMPER OPEN TOP VIEW Page 25 of 43...
- Page 34 Page 26 of 43...
- Page 35 REAR VIEW WITH EXTERIOR PANELS REMOVED REAR VIEW WITH ACCESS PANELS OPEN STACK JET NOZZLE AND STACK CONNECTOR Page 27 of 43...
- Page 36 Page 28 of 43...
- Page 37 ALL DAMPERS OPEN (EVAC POSITION) * NOTE: DAMPERS ARE HIGHLIGHTED FOR ILLUSTRATION PURPOSES FLUE DAMPER OPEN Page 29 of 43...
- Page 38 Page 30 of 43...
- Page 39 Page 31 of 43...
- Page 40 Page 32 of 43...
- Page 41 Page 33 of 43...
- Page 42 Page 34 of 43...
- Page 43 Page 35 of 43...
- Page 44 Page 36 of 43...
- Page 45 Page 37 of 43...
- Page 46 Page 38 of 43...
- Page 47 Page 39 of 43...
- Page 48 Page 40 of 43...
- Page 49 H3CR H3CR Solid-State Timer H3CR RANGE SELECTION Operating mode display window Power indicator (green LED) flashes when timer operates, Operation mode selector lit when timer ON-delay stops operating Repeat cycle/signal OFF start B2: Repeat cycle/signal ON start Output indicator C: Signal ON/OFF-delay (red LED) D: Signal OFF-delay E: Interval...
-
Page 50: Warranty
Revised 04-01-2017 WARRANTY J & R MANUFACTURING, INC. warrants its equipment against defective parts and workmanship under normal use and when installed in accordance with manufacturer’s recommendations for a period (after date of shipment*) of twelve ( 12 ) months on parts and ninty (9 0) days on labor with the following provisions: 1. - Page 51 Remember to contact J&R for any additional information you need or to order replacement parts or accessories. Accessories include: Ash Carts Wood Carts Ash Rakes Contact J&R: 972-285-4855 (Main) 972-289-0801 (Parts and Service) 800-527-4831 (Toll Free-U.S and Canada) sales@jrmanufacturing.com www. jrmanufacturing.com For firewood, we recommend: Arnold Bros.
Need help?
Do you have a question about the 250R-FS and is the answer not in the manual?
Questions and answers