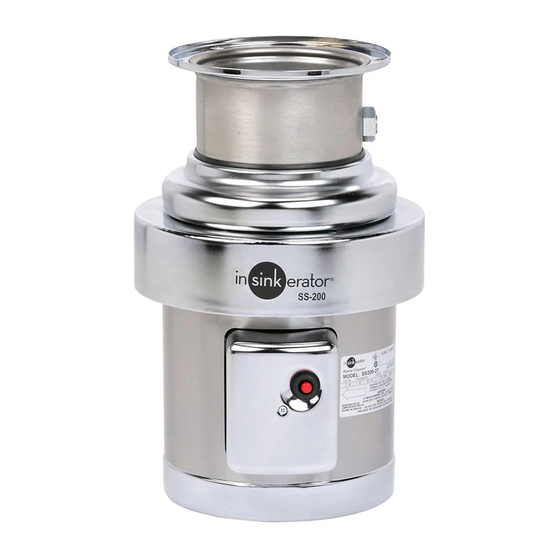
InSinkErator SS-200 Installation Manual
Foodservice disposer
Hide thumbs
Also See for SS-200:
- Service manual (44 pages) ,
- Installation, care & use manual (19 pages) ,
- Installation manual (16 pages)
Table of Contents
Advertisement
www.insinkerator.com/foodservice
FOODSERVICE DISPOSER
Installation Manual
The Danger signal indicates an immediately hazardous situation which, if not
avoided, will result in death or serious injury.
The Warning signal alerts you to potential hazards or unsafe practices which,
if not avoided, could result in severe personal injury or death.
The Caution signal alerts you to hazards of unsafe practices which, if not avoided,
may result in minor personal injury or property damage.
Please be certain that the person who installs or uses this appliance carefully reads
and understands the Safety Instructions contained in this manual.
Part No. 13954 Rev.A
Advertisement
Table of Contents

Subscribe to Our Youtube Channel
Related Manuals for InSinkErator SS-200


Summary of Contents for InSinkErator SS-200
- Page 1 The Caution signal alerts you to hazards of unsafe practices which, if not avoided, may result in minor personal injury or property damage. Please be certain that the person who installs or uses this appliance carefully reads and understands the Safety Instructions contained in this manual. www.insinkerator.com/foodservice Part No. 13954 Rev.A...
-
Page 2: Table Of Contents
The warranty includes parts and labor, provided the service is performed by an InSinkErator Factory Authorized Service Center. This warranty does not apply if failure is due to: faulty or improper electrical installation, faulty or improper plumbing installation, product abuse or misuse, accidental damage, grinding elements jammed by foreign objects, clogged drain lines, or an improperly sized unit (as specified by InSinkErator). -
Page 3: Introduction
Introduction INTRODUCTION TYPICAL INSTALLATION The InSinkErator Foodservice food waste disposer is A typical Foodservice disposer installation incorporates and CSA Listed when installed in conjunction with the following connections (see Figures 1 and/or 9): ® ® InSinkErator mounting adaptors and controls (see Figure •... -
Page 4: Installing The Disposer
SS-150 to SS-200 SS-300 to SS-1000 Figure 2. Distance from Table Top to Mounting Flange MOUNTING ADAPTORS There are two adaptor categories for mounting InSinkErator disposers: Standard & Special Mountings. Table 1 displays the approved disposer/mounting adaptor combinations. Adaptor SS-50... -
Page 5: Standard Insinkerator Mountings
Standard InSinkErator Mountings #5 MOUNTING ASSEMBLY Follow these instructions to install a #5 sink flange to a (1) Stopper standard 3-1/2 to 4 inch sink opening. 1. Unscrew the three backup screws (6) until they are (2) Strainer Flange flush with the upper mounting flange (5) surface. Pry... -
Page 6: 6, 7, And Sink Bowl Mounting Assemblies
Figure 5. #7 or Sink Bowl Mounting Assembly Special InSinkErator Mountings When installing an InSinkErator Foodservice disposer to a non-InSinkErator sink bowl, a special mounting adaptor kit is required. The special mountings are described in the Mounting Adaptor Selection Guide (for more information, call 1-800-845-8345, or go to www.insinkerator.com). -
Page 7: Plumbing Connections
NOTE: A syphon breaker must be installed above the is not experienced in plumbing installation, sink flood plane per local plumbing codes. InSinkErator recommends that competent professional assistance is sought. Damage to the disposer or accessories as a result of... -
Page 8: Standard Motor Connection Wiring Diagrams
Standard Motor Connection Wiring Diagrams NOTE: The diagrams below show standard motor connection wiring for a manual switch operation. For alternate controls, please refer to the control panel installation manual. MOTOR LEAD WIRE# MOTOR LEAD WIRE# Figure 10. Incoming 115V Single Phase Line Power Figure 11. -
Page 9: Electrical Connections
• The magnetic and manual starters supplied by voltage instructions. InSinkErator do not require heaters to complete the circuit. InSinkErator disposers are equipped with • Ensure the disposer motor voltage and phase overload protectors. -
Page 10: Operating Instructions
Operating Instructions OPERATING THE DISPOSER 1. Make sure there are no foreign objects in the disposer grind chamber. Do not pre-load the FIRE HAZARD disposer with food waste prior to starting. To minimize the possibility of fire, do not store flammable items near the disposer. -
Page 11: Troubleshooting
Press red reset button to reset overload protector. Never strike reset button with objects. 5. If disposer remains inoperative after following these steps, contact nearest InSinkErator Factory Authorized Service Center (call 1-800-845-8345 to find Service Center nearest you). Disposer motor stops while •...
Need help?
Do you have a question about the SS-200 and is the answer not in the manual?
Questions and answers