Table of Contents
Advertisement
SNOWDOG REPAIR
MANUAL
1 Contents
������������������������������������������������������������
�����������������������������������������������������
�����������������������������������������������
�������������������������������������������������������������
��������������������������������������������������
������������������������������������������������������
������������������������������������������������
��������������������������������������������������������������
�������������������������������������������
����������������������������������������������������
�����������������������������������������������������
�����������������������������������������������������
������������������������������������������
�����������������������������������
�������������������������������
������������������������������������������
��������������������������������������
������������������
���������������������
���������������
�������������������
�������������������������
��������������������������������������
��������������������������������
��������������������������������
�������������������������������������������������������������
2
2
2
2
2
3
3
3
3
4
4
4
4
4
5
5
5
6
����������
6
6
7
7
8
9
9
10
����������������������������������������
����������������������������������������������������
�����������������������������������������������������
���������������������������������������������������
��������������������������������������������������
��������������������������������
����������������������������������������������
����������������������������������������������
��������������������������������
���������������������������������������������������
���������������������������������������������������������
����������������������������������
���������������������������������������������������
11
11
��
12
16
16
16
17
������������
17
����������������
18
19
����������
19
21
21
����������������
21
������������������
22
23
�������������������
23
��������������������
23
������������������
23
24
����
24
�����������
24
24
24
24
��������������
25
������������������������
25
1
Advertisement
Table of Contents

Subscribe to Our Youtube Channel
Related Manuals for SNOWDOG Snowdog COMPACT


Summary of Contents for SNOWDOG Snowdog COMPACT
-
Page 1: Table Of Contents
8.1 Comet CVT (ZM184) ����������������������������������������������������� 1�1 Precautions �� 8.2 CVT Safari. Inspection, maintenance, adjustment ����������������������������������� 2 Description of SNOWDOG ���������������������������������������������������� 9 Reverse gear ������������������������������� 2�1 Key elements of SNOWDOG ����������������������������������������������������� 9.1 Oil change ������������������������������������������ 2�2 SNOWDOG controls 9.2 Removal, disassembly, assembly and installation of 2.3 SNOWDOG identification, model designation and the ��������������������������������������������������� the reverse gear �������������������������������������� place of information labels ��������������������������������������������������... -
Page 2: General
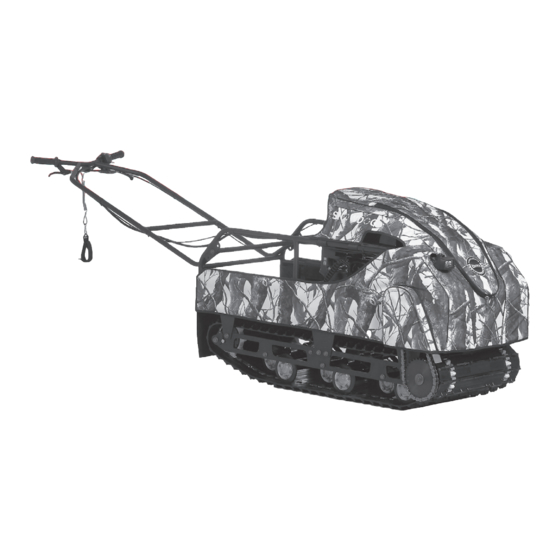
Introduction 2 Description of SNOWDOG The Manual for using the SNOWDOG equipment is prepared 2.1 Key elements of SNOWDOG specifically for the company dealers and their qualified mechanics and specialists with the skills and understanding of the repair and maintenance of the SNOWDOG. Repair and maintenance of the equipment by non-professionals may cause serious damage to both SNOWDOG and users including anybody else being around. The SNOWDOG company constantly updates and improves its entire range of equipment, so the equipment described in the ... -
Page 3: Snowdog Identification, Model Designation And The Place Of Information Labels
The joined components should be assembled again in the same composition or replaced. 4� During SNOWDOG dismantling, clean all parts and place them in containers indicating disassembled 2.4 Manufacturing number of SNOWDOG mechanisms. This will speed up the assembly time ... -
Page 4: Tooling
DO NOT USE HEADS FOR HAND TOOLS IN damage of SNOWDOG. WORKING WITH PNEUMATIC TOOLS. THISMAY 12� It is much easier to repair SNOWDOG if you wash CAUSE THEIR DESTRUCTION AND INJURY. it before starting repairs. Use a degreasing agent. USE EYE PROTECTION WHEN WORKING WITH Before its use, consult the instructions for use. -
Page 5: Threaded Joint Tightening Torque Chart
10% of the total number of lugs (the number of lugs Allowed are scratches and marks on the seating surfaces of the is equal to the number of rods). outer and inner rings, chippings and dents without impeding the 5� Separation and rupture of lugs along the track edges smooth rotation of the bearing as well as the mat surface of in portions of 30 mm or more from one or both sides ground threads and rolling elements. of the track in an amount of 10% of the total number Before testing the ease of rotation, the bearing is immersed in of lugs. kerosene or diesel fuel (gasoline with 10% of engine oil possible) 6� Transverse rupture of track with the length of 50 mm and then wiped with a clean cloth outside. or more in the amount of 1 pieces and more. 7� Separation of tracks in cord fabric layers with a length of 100 mm or more and a depth of 50 mm or more in the amount of 1 pc or more. 8� Separation and rupture of a fragment of the fabric and (or) the track rubber with a length of 100 mm or more in an amount of 1 pc. or more. The track elongation exceeds the track adjustment on SNOWDOG. -
Page 6: Checking Track Tension
To check the parallelism of the track shafts, measure the distance Before every movement check the condition of the track and between the shafts on both sides of SNOWDOG. The distance its tension. Over tension leads to engine power loss in the should be the same. In case of discrepancy adjust with the ... -
Page 7: Assembling The Suspension
5 remove the required suspension element. If the full dismantling � of the suspension is necessary, remove all the bolts of the second side plate and disassemble the suspension into components and 6.6 Suspension bogies parts� The SNOWDOG suspension is based on bogies, two or three depending on the model. Rubber wheel rollers fail when operated with high loads, colliding with obstacles and storing under the load. When springs wear out, SNOWDOG sags, becomes softer, the range of the track adjuster is insufficient to ensure tension. The worn-out spring should be replaced. The bogie springs differ by the direction of winding. 6.5 Assembling the suspension To ... -
Page 8: Track Shafts
If there is any difficulty, loosen the fasteners. 2� Remove the sidewall of the disc and the sprocket. 6.7 Track shafts 3� Remove the retaining ring. Track shafts are an essential element of the transmission. In the SNOWDOG of the model year 2016-2017 used are track shafts of two types� 1. The shafts are rigidly fixed to the side plates. The sprockets rotate on bearings. The shafts are those driven only� 2. The shafts mounted on bearings. The sprockets are ... -
Page 9: Transmission
You should ensure that the driven sprocket and shaft are not damaged. Collision with obstacles leads to bending of and damage to the sprocket and shaft. The driving sprocket wears slightly faster than the driven one but it is not subjected to shocks when driving over obstacles. Chains with gland packing 1 O-ring can be mounted on SNOWDOG�... -
Page 10: Chain Maintenance
After each journey and every 10 hours of movement it is pressure and the use of solvents may damage the seal. Use only necessary to lubricate the chain. kerosene to clean the drive chain. Every 50 engine hours of SNOWDOG or at the end of each season, whichever comes first, it is necessary to maintain the NOTE chain. Follow the steps: USE THE CHAIN LUBRICANT SUITABLE FOR 1�... -
Page 11: Clutch
8 Clutch 8.1.1 Inspection and maintenance 1� Remove the cover from SNOWDOG. CVT is a continuously variable automatic V-belt transmission. 2� Remove the belt from the cvt. The cvt consists of two pulleys, a driving one (hereinafter the centrifugal adjuster) and a driven one (the driven pulley). The cvt regulates the transmission ratio by two parameters, ... -
Page 12: Cvt Safari. Inspection, Maintenance, Adjustment
7� L ubricate with the ice-free lithium grease (for 8.2.1 Design and operation of the CVT drive pulley example, TEXACO STARPLEX EP 2) rollers and the places of rolling of rollers� 8� Assemble the cvt in the reverse sequence. 9� Set the cvt on the crankshaft of the engine, set the washer and tighten the bolt using the strong fixing thread locker. 10� Set the cvt belt. WARNING KEEP CLEAN THE WORKING SURFACE OF THE CVT, IF THERE IS ANY GREASE ON THEM, IMMEDIATELY CLEAN THEM. - Page 13 2200 rpm. A further increase in the engine rotational rate results in the seizure by the cones of the belt and increase in its compression and tension forces from zero to the working value sufficient for torque transmission and overcoming the motion resistance force At the end of each season or every 100 engine hours (whichever of SNOWDOG� comes first) check the status of bushes on the axes of governor weights and the condition of liners. The wear of the bushes of 8.2.2 Adjustment, disassembly and assembly of the governor weights can be evaluated by the value of the radial cvt pulleys backlash of governor weights. The allowable backlash magnitude ...
- Page 14 8.2.4 Assembly and disassembly of the driven pulley of Fix the thrust washer onto the shaft. the cvt Before assembly of the driven pulley, the shaft should be lubricated with grease. Then, set the key bolt and the fixed pulley cone, and for the model with the engine 15 hp set the bushing of 20 mm. Secure with the bolt and a washer. Insert sleeve - for the engine 9 hp - 3 mm, for the engine 15 hp - 3 mm and 20 mm. Then, set the key bolt and coupling half with the spring as shown in the photo.
- Page 15 8.2.5 Assembly and disassembly of the drive pulley of The support is screwed with an anaerobic thread-lock, so before the cvt loosening, heat it with a hot air gun. Unscrew anti-clockwise. To disassemble the drive pulley, unscrew the bolt holding the pulley� Unscrew the six bolts securing the cover to the movable cone. In loosening the last two bolts it is necessary to hold the cover to avoid the spring’s ‘shooting’. Secure the crankshaft by getting the flywheel locked (or, if the centrifugal adjuster has a mounting hole, use it). It is convenient to fix cvt models with a hole on the shaft, for example, with a screwdriver. When disassembling the support, remove the inserts, wash axes and rollers in kerosene, lubricate them with grease and assemble the support with new inserts. Assemble the adjuster in the reverse sequence. The support torque on the shaft 7 to 8 kg/m.
-
Page 16: Reverse Gear
9 Reverse gear 3� Unscrew the breather adapter. 9.1 Oil change 1� Place under the gear unit case a suitable container for oil collection, then unscrew the oil drain bolt with a washer. 4� Fill with new oil through the breather adapter hole, then screw the breather adapter with the torque of 21 Nm� 9.2 Removal, disassembly, assembly and installation of the reverse gear NOTE BEFORE REMOVING THE REVERSE GEAR, FULLY DRAIN IT. -
Page 17: Parking Brake
4� Remove the four bolts 1 holding the gear unit WARNING mounting brackets to the engine mount. WHEN INSTALLING THE COVER OF THE GEAR UNIT, USE A SEALANT. Fill the gear unit with oil. WARNING IT IS RECOMMENDED TO FILL THE REVERSE GEAR WITH THE ENGINE OIL. THE REQUIRED AMOUNT OFOIL IN THE GEAR UNIT IS 200 ML. 10 Parking brake The parking brake consists of a brake caliper with pads, a brake ... -
Page 18: Brake Caliper. Checking, Maintenance
10.2 Brake caliper. Checking, maintenance 10.2.1 Adjusting the brake caliper Fully loosen the tension of the brake cable on the lever, as described in� 10.1 on page 17. Before setting up the caliper, loosen the brake cable as much as possible as specified in 10.1 on page 17. Ensure ease of pushing and return to the starting position of the lever and the parking brake cable. To adjust the brake caliper, remove the cover using a cross At the complicated movement of the parking brake lever, lubricate ... -
Page 19: Disassembling The Caliper
4� Spring brake pads are worn-out, replace them. 5� Caliper cover 6� Bolts of the caliper cover If the brake pads are in order, set and adjust the brake caliper as described in 10.2.1 on page 18� 10.4 Brake discs. Check, removal, installation Check the disс without removing from SNOWDOG. The disc should not have any deviations from the plane, signs of overheating in the form of darkening, blueing. Allowed is the brake pads’ touching the disc, if its rotation is not obstructed� WARNING BE VERY CAREFUL IN WORKING WITH THE PARKING BRAKE. THE ROTATING DISC IS SHARP ENOUGH TO SEVERELY INJUR YOU. - Page 20 WARNING Remove the bolt holding the driven pulley of the cvt. Remove the KEEP THE DISC AND BRAKE PADS FREE FROM driven pulley� OIL OR GREASE. DO NOT TOUCH THE DISC WITH HANDS. REPLACE THE PADS, IF OIL OR LUBRICANT ARE ON THEM. CLEAN THE BRAKE DISC WITH THE AEROSOL CLEANER FOR BRAKES, IF THERE IS ANY OIL OR GREASE ON IT.
-
Page 21: Electrical System
11 Electrical system 11.2 Battery. Inspection and maintenance Depending on the model, the battery is in a plastic box on the deck of the tow in the middle on the left side of the direction of 11.1 Circuit diagram travel, or is attached with a bracket at the same place� To check the battery, remove the cover of SNOWDOG. To check the battery a voltmeter or a multimeter will be needed. Measure the voltage on the battery when the engine is stopped and all power users are turned off (headlights, heated grips etc.). A fault-free battery should show at least 12.4 volts. If the battery voltage is less, it should be recharged. To check the battery capacity a discharge tester should be used. If you cannot use a discharge tester, contact the battery service center� Enabling users for a long time in the idling rpm mode can lead to battery discharge. When you turn off the engine, power users may remain turned on. Therefore, after the engine is off, check all power users. The users, which are on, will discharge the battery and make it impossible to start with the electric starter. Storage of SNOWDOG with the discharged battery will lead to the ... -
Page 22: Emergency Engine Switch, Checking
WARNING IN CASE OF CONTACT OF ELECTROLYTE WITH EYES RINSE IT WITH CLEAN WATER DURING AT LEAST 15 MINUTES, OBTAIN MEDICAL ATTENTION The driver of SNOWDOG should always be operate with a WITHOUT DELAY. cotter key on his/her arm. If during movement the driver leaves SNOWDOG, the cotter key falls from the button thereby stopping ELECTROLYTE IS TOXIC! IF YOU ACCIDENTALLY the engine:... -
Page 23: Steering Switch, Checking
Steering switch components: The equipment package of some engines includes the oil level control system� In the fall of level of engine oil in the engine case to the minimum level, the system connects to the ground the primary circuit of the ignition coil thereby blocking the operation of the engine. NOTE THE PROTECTION SYSTEM MAY TRIGGER AT THE CRITICAL ANGLES OF GRADIENT OF SNOWDOG, FOR EXAMPLE, WHEN CLIMBING UP STEEP SLOPES OR MOVING INCLINED. Check the engine protection system for oil level as follows: 1� Check the engine oil level, top up if necessary. 1� The electric starter switch button. If the button is 2� Set the brake in parking position. pressed, the electric starter operates, and the engine ... -
Page 24: Maintenance
12 months, subject to storage rules. 4� Adjust the free travel of the throttle lever arm and At the end of 12 months to prepare SNOWDOG for parking brake (5 - 7 mm). operation, start the engine for a few minutes. If ... -
Page 25: Frequency Of Maintenance Of Snowdog
14 Frequency of maintenance of SNOWDOG Fixing the trailer Fixing side plates Fixing suspension bogies Fuel Fixing bearing wheels* Operation of the electric Fixing the engine starter* Fixing the gear unit* Operation of the mechanical starter Fixing the cvt bracket* Tickover Fixing the engine mount* Engine reaction to the Transmission shaft bearings throttle lever arm position Bogie bearings Unusual sounds with the engine running C - checking; M - maintenance; R – replacement Travel of the throttle lever * Not for all models and complete sets of SNOWDOG ** The complicated operating conditions are Cleaning the carburetor controls from snow described in Chapter 15 on page 25 of the Lubrication of the throttle Manual cable *** to be performed by the dealer... - Page 26 Kaliningrad Motor Factory Kaliningrad Motor Factory All rights reserved� All information contained in Russia, Kaliningrad, Oktyabrskaya the Manual may not be reproduced Street 8 or used without authorization, without the prior permission of the E-mail: warranty@snowdog.club manufacturer, the Kaliningrad Motor www.snowdog.club Factory Limited Liability Company...
Need help?
Do you have a question about the Snowdog COMPACT and is the answer not in the manual?
Questions and answers