Table of Contents
Advertisement
Advertisement
Table of Contents

Subscribe to Our Youtube Channel
Related Manuals for JNH MG115HB


Summary of Contents for JNH MG115HB
-
Page 1: Assembly Instructions
Assembly Instructions MODEL NUMBER:MG115HB/MG115RB... - Page 2 OVERVIEW DRAWING 2 36 USE Copper Wrie Only...
- Page 3 PARTS LIST Description Description Bottom Panel Switch Rear Panel LED Light Left Panel Cable for Oxygen Ionizer Right Panel Speaker Front Panel Fixed Part Top Panel 3 x16 Screw Bench Support Panel Power Cord Cover Bench Panel Vent Heater 4 x 16 Screw Glass Door 4 x 40 Screw Glass Window...
- Page 4 LABEL PURPOSE For Power Box PMW4*16 (27) TM4*40 For Heater (28) KA3*16 For Seat Bench (24) For Seat Bench (23) KA4*40 For Roof Panel (29) NOTE For any installation questions please contact JNH Technical Support at 800 3110 option 2...
-
Page 5: Bottom Panel 1
OVERVIEW Your Sauna will arrive in 3 boxes: What is included in each box: Box 1: BOTTOM PANEL TOP PANEL (Bird’s-eye View) USE Copper Wrie Only Hardware Packs POWER BOX Power Box... - Page 6 Box 1: BENCH SUPPORT PANEL BENCH PANEL HEATER...
-
Page 7: Rear Panel 1
Box 2: REAR PANEL (Interior View) FRONT PANEL (Exterior View) -
Page 8: Left Panel 1
Box 3: LEFT PANEL (Interior View) RIGHT PANEL (Interior View) - Page 9 Step-By-Step Assembly Instructions for MG115HB/MG115RB: Place the bottom panel on dry and level ground. BOTTOM PANEL (In Box 1) Attach the rear panel to the bottom panel using latches pre-attached to the walls. REAR PANEL (In Box 2) Latches (Exterior View)
-
Page 10: Right Panel 1
Attach the left panel to the rear and bottom panels using latches. LEFT PANEL (In Box 3) REAR PANEL Left panel BOTTOM PANEL (LEFT VIEW) Attach the right panel to the rear and bottom panels using latches. RIGHT PANEL (In Box 3) REAR PANEL RIGHT PANEL (RIGHT VIEW) - Page 11 Place power box at designated space and tighten in place using two (2) PMW4*16 screws. REAR PANEL (In t er i o r Vi ew ) Rotate cover to minimize opening. PMW4*16 POWER SUPPLY USE Copper Wrie Only (In Box 1) (Ex t er i o r Vi ew ) BOTTOM PANEL Attach a heater to the rear panel using TM4*40 screws.
-
Page 12: Bench Support Panel 1
Attach two (2) heaters to both the left and right panels using TM4*40 screws, lean a heater panel against the front of the left and right panels as shown below. Do not fasten with screws. Connect heater cords to power box. REAR PANEL Align groove HEATER... -
Page 13: Bench Panel 1
Slide the bench support panel in place and connect heater cords to power box. REAR PANEL HEATER Bench Support Panel USE Copper Wrie Only BOTTOM PANEL Place bench panel in place. Right Panel Rear Panel Bench Panel Bench Panel (In Box 1) Bench Support Panel Left View (The left panel is hidden) -
Page 14: Heater 6
⑪ Place heater in place and fasten with two (2) TM4*40 screws. Fasten with REAR PANEL two (2) TM4*40 screws. HEATER HEATER (In Box 1) USE Copper Wrie Only TM4*40 BOTTOM PANEL ⑫ Screw brackets to the front of the bench panel, securing the bench support panel to the bench panel. - Page 15 ⑬ Attach the front panel to the unit and secure with latches. Left Panel Front Panel (In Box 2) Rear Panel (Left View) ⑭ Use the screwdriver to remove the glass protectors on the glass panel.
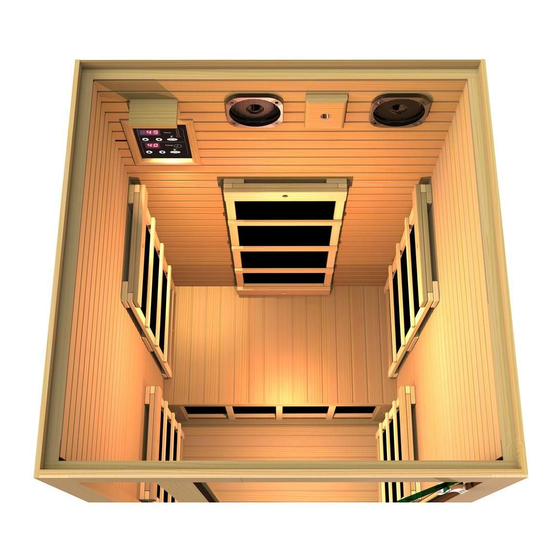
- Page 16 ⑮ Drop the top panel in place (ensure the top panel is centered correctly). TOP PANEL (In Box 1) (Oblique View) ⑯ Please ensure the top panel is placed in the center. The clearance distance of L1, L2, L3 and L4 should all be the same.
-
Page 17: Door Handle 1
⑰ Secure the top panel using twelve (12) KA4*40 screws. The vent should be in the front KA4*40 of the unit. (Oblique View) ⑱ Install door knob (place inside of the sauna, tighten with LONG SCREW) and door handle (place outside of sauna, tighten with SHORT SCREW). - Page 18 Your sauna is ready to use. Please read the user manual for instructions on operating your sauna.
Need help?
Do you have a question about the MG115HB and is the answer not in the manual?
Questions and answers
We have connected the power but it won’t power on or we can’t see the temperature