Samsung GH052EAM Service Manual
System air conditioner
Hide thumbs
Also See for GH052EAM:
- Owner's instructions manual (16 pages) ,
- Installation manual (26 pages)

Related Manuals for Samsung GH052EAM


Summary of Contents for Samsung GH052EAM
-
Page 1: Table Of Contents
SYSTEM AIR CONDITIONER INDOOR UNIT OUTDOOR UNIT GH052EAM UH052EAMT GH070EAM UH070EAMT Manual SERVICE SYSTEM AIR CONDITIONER CONTENTS 1. Product Specifications 2. Disassembly and Reassembly 3. Set Up the Model Option 4. Troubleshooting 5. Exploded Views and Parts List 6. Block Diagram 7. -
Page 2: Product Specifications
1. Product Specifications 1-1 Table INDOOR UNIT GH052EAM GH070EAM UH052EAMT UH070EAMT MODEL OUTDOOR UNIT PG103M, PG103M1, PG103M2 PANEL BTU/hr 18,700 23,900 Cooling Watts 5,500 7,000 Capacity BTU/hr 20,400 26,300 Heating Watts 6,000 7,700 Power Supply 1ø, 220~240V~, 50Hz 1ø, 220~240V~, 50Hz... - Page 3 Table(cont.) INDOOR UNIT GH052EAM GH070EAM OUTDOOR UNIT UH052EAMT UH070EAMT MODEL PANEL PG103M, PG103M1, PG103M2 648 / 749 648 / 749 Dimension 880 / 1,079 880 / 1,079 (Net / Gross) Outdoor Unit 310 / 418 310 / 418 Weight Net / Gross...
-
Page 4: Disassembly And Reassembly
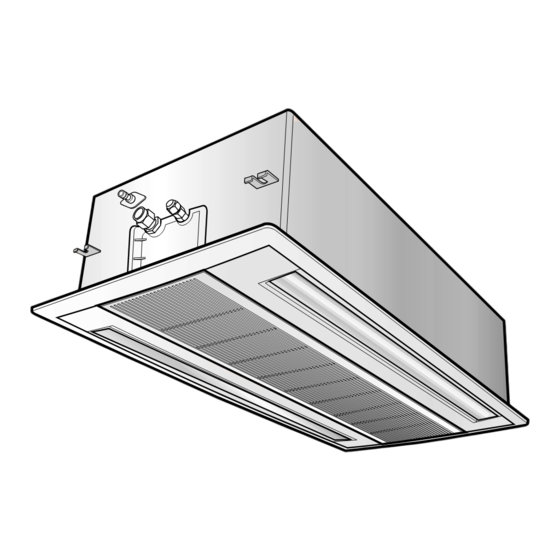
_ Dust-Collecting Filter 2) Front Grille Disassembly (1) Open the Front Grille and pull it up to the direction in the picture. (2) Detach the Safe Ring. 3) Filter Disassembly (1) Detach the Filter by disassembling the Grille hook. Samsung Electronics... - Page 5 6) Detach the connection wires of Step Motor and the receive part from the wire of a Main Body. 7) Widen the both hooks of panel hooked with the Main Body to both sides, and detach the Panel from the Indoor Unit. Samsung Electronics...
- Page 6 Terminal. 4) Detach the Fan Motor connection wire, Heat Exchanger Sensor connection wire, and the Drain Pump Float S/W connection wire from the connecter. 5) Detach the Control Box from the main body. Samsung Electronics...
- Page 7 3) Unscrew 16 screws connected to the Drain Pan and the main body.(Mark point) 4) Detach the Drain Pan from the main body. 5) Unscrew 4 Heat Exchanger screws connected to the cabinet body and cover Evap Guide. Samsung Electronics...
- Page 8 Evap Guide connected to the Case Motor. Motor 2) After detaching the Cover Motor by pushing the hook, detach the Cover Evap Guide. 3) Detach the Motor and Fan from the case. (Use M3 wrench when detaching the Motor from the Fan.) Samsung Electronics...
- Page 9 2) Unscrew 4 screws connected to the Holder Pump and Drain Pump. 3) After connector detaching, detach the Drain Pump from the holder. 1) In case of the other parts, detach it like a Other Parts picture when necessary. Samsung Electronics...
- Page 10 2) Unscrew 2 screws of the Step-Motor, and detach the Step-Motor from the Panel. 3) Detach the cable clamp screw. 4) Push the hook of case PCB to the both sides and detach the case from the Panel. Samsung Electronics...
- Page 11 6) When detaching the blade, detach the opposite side first of Step Motor after turning over the guide on the Panel. 7) When detaching the Blade V, after detaching the link by pushing, detach the blade with pushing to the direction of arrow. Samsung Electronics...
- Page 12 3) Loosen the fixing screws and separate the Upper Cabinet. 4) Loosen the fixing screws and separate the Front Cabinet. 5) Loosen 2 screws and pull up the Control Box. 6) Separate the terminal cover and separate the Comp lead wire. Samsung Electronics...
- Page 13 Disassembly and Reassembly Parts Procedure Remark 7) Loosen the fixing screws and separate the Cabinet Side. 1) Loosen the fixing bolt and separate & the Fan. Motor 2) Loosen 4 fixing bolts to separate the Motor. Samsung Electronics...
- Page 14 1) Release the refrigerant at first. 2) Disassemble the inlet and outlet pipe & by welding. Compressor 3) Loosen the fixing screws of the Heat Exchanger. 4) Separate the Heat Exchanger. 5) Loosen four bolts of the Compressor. 6) Separate the Compressor. Samsung Electronics...
-
Page 15: Set Up The Model Option
. . . repeatedly. Setting is not required if you must Push the button to set the display panel to a value which has a default. Every time you push the button, the display panel reads . . . repeatedly. Samsung Electronics... - Page 16 If all lamps of indoor unit are flickering, Plug out, plug in power plug again and press ON/OFF key to retry. If the unit is not working properly or all lamps are continuously flickering after setting the option code, see if the correct option code is set up for its model. Samsung Electronics...
- Page 17 Set up the Model Option OPTION ITEMS REMOTE CONTROL SEG1 SEG2 SEG3 SEG4 SEG5 SEG6 SEG7 SEG8 SEG9 SEG10 SEG11 SEG12 MODEL GH052EAM GH070EAM Samsung Electronics...
-
Page 18: Troubleshooting
- If you turn off the air conditioner when the LED is flickering, the LED is also turned off. : On : Flickering : Off - If you re-operate the air conditioner, it operates normally at first, then detect an error again. Samsung Electronics... - Page 19 The order of priority : E1 → E2 → E4 → P0 → P1 → P5 → P6 → t1 → t2 → t3 → tu → to → G4 → G5 → E3 → qx → rx → vx → K1, K2, K3, K4, K5 The order of priority : - In case that the same error displays from multi-indoor units, the one having the faster address has the priority. Samsung Electronics...
- Page 20 The order of priority : EA → Eb → Cx → dx → ox → qx → rx → tx → Ux → Eo - In case that the same error displays from multi-indoor units, the one having the faster address has the priority. Samsung Electronics...
- Page 21 K4 3 times. At this time, is occurred the difference between the out temp. and data? PCB and sensor are normal. To perform the test operation by use of K2 Reoperation after PCB replacement Samsung Electronics...
- Page 22 K4 2 times. At this time, is occurred the difference PCB and sensor are between the out temp. and data? normal. To perform the test operation by one of K2 Reoperation after PCB replacement Samsung Electronics...
- Page 23 K4 1 times. At this time, is occurred the difference between the out temp. and data? PCB and sensor are normal. To perform the test operation by use of K2 Reoperation after PCB replacement Samsung Electronics...
- Page 24 PCB, and find the indoor unit preventing communication through connecting the communication connectors each by each, and then replace the indoor unit PCB after line check. Good +0.7V -0.7V Samsung Electronics...
- Page 25 PCB after line check Samsung Electronics...
- Page 26 PCB about AC 220V? Does the water level decrease? Replace the drain pump Replace the indoor unit PCB Normal operation Note : E3 error should be released when Replace the drain pump indoor unit power is reset. Samsung Electronics...
-
Page 27: Exploded Views And Parts List
5. Exploded Views and Parts List 5-1 Indoor Unit You can search for the updated part code number through the ITSELF. URL : http://itself.sec.samsung.co.kr Samsung Electronics... - Page 28 Exploded Views and Parts List Parts List Q'TY Code No. Description Specification GH052EAM GH070EAM DB93-01811A ASS'Y CONTROL BOX IN ASS'Y DB61-01482A CASE CONTROL PS(V0), BLK DB61-01236A BASE TERMINAL SGCC-M DB93-01480A ASS'Y MAIN PCB ASS'Y PCB DB93-01481A SUB PCB DB26-10065B TRANS POWER...
- Page 29 5-2 Panel Samsung Electronics...
- Page 30 C/W MOTOR STEP LONG UL1007 DB39-00874B C/W MOTOR STEP SHORT UL1007 DB93-01666A PCB DISPLAY DB39-00875A C/W DISPLAY UL1007 DB64-00745A INLAY WINDOW DB64-00746A INLAY BUTTON DB61-01238A CASE LED PCB CABLE CLAMP DB97-00871D ASS'Y WIRED REMOCON WIRED DB97-00387F ASS'Y WIRELESS REMOCON WIRELESS Samsung Electronics...
- Page 31 5-3 Outdoor Unit Samsung Electronics...
- Page 32 ASS'Y EEV VALVE ASS'Y DB96-02896B ASS'Y EEV VALVE ASS'Y DB63-00613A GUARD-COND SECC-P,T1.6 DB61-01221A GUIDE-SCREEN P.E.H 100%,T2.5,1015x615,BLK DB63-00320A GUARD-FAN HSWR,460 DB96-02849A ASS'Y COND UNIT UH070EAMT,UH052EAMT DB96-02936A ASS'Y COLLECTOR IN ASS'Y DB96-02937A ASS'Y COLLECTOR OUT ASS'Y DB90-01291A ASS'Y CABINET BASE OUT ASS'Y Samsung Electronics...
-
Page 33: Block Diagram
- EEPROM option saving and blackout restoring function - Left and right FAN MOTOR phase control - Power-comm line misconnection prevention function - Cost saving related sub-option separation between indoor unit communication part - Option part sub-development according to the SVC structure Samsung Electronics... -
Page 34: Wiring Diagram
7. Wiring Diagram 7-1 Indoor Unit Code No : DB98-09029A This Document can not be used without Samsung's authorization. Samsung Electronics... - Page 35 7-2 Outdoor Unit UH052EAMT Code No : DB98-14410A This Document can not be used without Samsung's authorization. Samsung Electronics...
- Page 36 Wiring Diagram UH070EAMT Code No : DB98-14410B This Document can not be used without Samsung's authorization. Samsung Electronics...
-
Page 37: Schematic Diagram
8. Schematic Diagram 8-1 Indoor Unit This Document can not be used without Samsung's authorization. Samsung Electronics... - Page 38 8-2 Outdoor Unit UH052EAMT This Document can not be used without Samsung's authorization. Samsung Electronics...
- Page 39 Schematic Diagram UH070EAMT This Document can not be used without Samsung's authorization. Samsung Electronics...
- Page 40 MEMO Samsung Electronics...
- Page 41 MEMO Samsung Electronics...
- Page 42 ELECTRONICS © Samsung Electronics Co., Ltd. May. 2004. This Service Manual is a property of Samsung Electronics Co., Ltd. Any unauthorized use of Manual can be punished under applicable Printed in Korea. International and/or domestic law. Code No. DB98-16284A(2)
Need help?
Do you have a question about the GH052EAM and is the answer not in the manual?
Questions and answers