Table of Contents
Advertisement
EN
Original instruction manual
- translated from the German
instruction manual
Instruction Manual
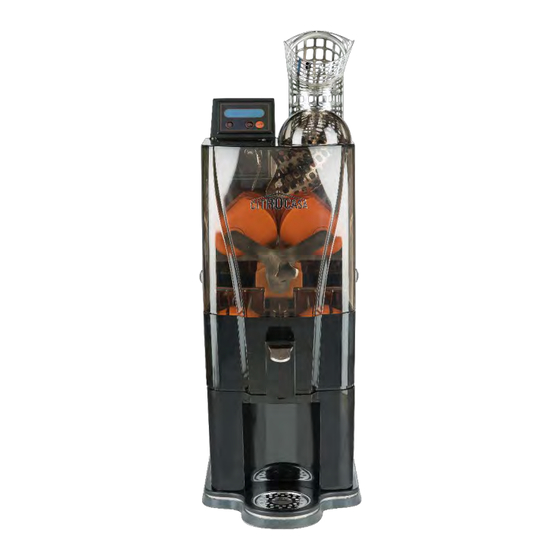
Juicer | Citrocasa Revolution Advance | Art. Nr. 10.000
Version 04-Advance
02.02.2018
When ordering spare parts, be sure to mention machine type, article and serial number.
TMP GmbH | Industriezeile 47 | 4020 Linz | Austria
Tel.: +43 732 75 01 73 – 0 | Fax: +43 732 75 0 73 - 24
Advertisement
Table of Contents

Subscribe to Our Youtube Channel
Summary of Contents for TMP Citrocasa Revolution 10.000
- Page 1 When ordering spare parts, be sure to mention machine type, article and serial number. TMP GmbH | Industriezeile 47 | 4020 Linz | Austria Tel.: +43 732 75 01 73 – 0 | Fax: +43 732 75 0 73 - 24...
-
Page 2: Table Of Contents
Content 1. IMPORTANT GENERAL INFORMATION ........3 1.1. Safety instructions ..............5 2. TECHNICAL SPECIFICATIONS ............5 3. GUARANTEE ................6 4. OPERATION INSTRUCTIONS ............7 4.1. FIRST STEPS ................7 4.2. Language selection..............9 4.3. OPERATION OF THE MACHINE ..........10 4.3.1. -
Page 3: Important General Information
IMPORTANT GENERAL INFORMATION This manual refers to the following model from Citrocasa: Art.Nr.: 10.000 Revolution Advance Version 04 The technical data of the Citrocasa commercial Orange juicers (tension, frequency and other data) is located on the identification plate, which is both on the back page of this operating/instruction manual as well as on the equipment itself. - Page 4 • For safety reasons, only authorized personal are allowed to make any repairs or changes on the machine. Also, no protection or safety equipment is to be changed, removed or tampered with. • Due to the fact that no adjustments on the machine are necessary, we ask you to not open the inside of the machine at any time.
-
Page 5: Safety Instructions
This marking indicates that this product should not be disposed with other household wastes throughout the EU. To prevent possible harm to the environment or human health from uncontrolled waste disposal, recycle it responsibly to promote the sustainable reuse of material resources. -
Page 6: Guarantee
GUARANTEE • Our quality and examination controls ensure that the machine was supplied in perfect condition. • The guarantee covers all complaints caused by construction or material defects which influence the optimal operation of the machine. • The guarantee does not cover any damages caused by improper usage of the machine. •... -
Page 7: Operation Instructions
OPERATION INSTRUCTIONS 4.1. FIRST STEPS In order to achieve an optimum operation of the machine, please follow the below-mentioned steps carefully. • After unpacking and positioning the machine on a level surface, remove the front cover by unscrewing the 2 fastening screws shown in pic. 1. Lift the front cover out of its anchoring to expose the pressing system. - Page 8 • Place the peel basket (pic. 3) and the drip cup as shown (pic 4). Picture 3: trip tray Picture 4: Peel basket • Make sure that the fruit sieve support (inclusive fruit sieve) is in its proper position and the front cover is closed.
-
Page 9: Language Selection
4.2. Language selection It is possible to choose between 5 different display languages: • English • German • Spanish • French • Italian Please follow the points below, to choose your required display language: • Pic. 8: Switch on the main power switch located at the top of the machine. The control lamp lights up. -
Page 10: Operation Of The Machine
4.3. OPERATION OF THE MACHINE • Fill the supply tunnel with oranges. To make sure that the machine works properly, use fruits between 65 – 78 mm in diameter. (pic. 10) min. Ø 65 mm max. Ø 78 mm Picture 10: fruit supply tunnel... -
Page 11: Operation Of Citrocasa Revolution
4.3.1. Operation of Citrocasa Revolution Place a glass or another container under the juice outlet. To begin the pressing procedure, follow the instructions mentioned below: Self-Service Mode: • Pic. 12: Switch on the main power switch located at the side of the machine. The red control lamp lights up. -
Page 12: Continuous-Mode
4.3.2. Continuous-Mode • Pic. 14: Switch on the main power switch located at the top of the machine. The red control lamp lights up. • Pic. 15 No. 1 FUNC button: Select the continuous mode by pressing this button. „Continuous Push “ON”“... -
Page 13: Intelligent Stop-Function
4.3.3. Intelligent Stop-Function With this function you can adjust after which number of fruits the machine should stop. An acoustic signal indicates when the peel bucket is full and need to be emptied. Please follow the description below: • Pic. 17: Switch on the main power switch located at the top of the machine. The control lamp lights up. - Page 14 Attention: Switch off intelligent stop function To switch off the intelligent stop function please adjust to 00 oranges! Switch on intelligent stop function (adjusted orange changed from 00 – XX) Adjust the amount of pressed oranges – start the machine and press one orange – Machine stops automatically –...
-
Page 15: Display Lock/Unlock Function
4.3.4. Display lock/unlock function It is possible to lock the display that the adjusted mode cannot be changed unintentionally. Please find the description below: • Pic. 18: Switch on the main power switch located at the top of the machine. The control lamp lights up. -
Page 16: Cleaning Positions (High- & Low Position)
Picture 20: Display – unlock function Unlock display • Press the FUNC-Button + OFF-Button Display unlocked ( pic. 20, No.1+2) 4.3.5. Cleaning positions (High- & Low position) Picture 22: High-position Picture 23: Low-position Picture 21: Display – cleaning position •... -
Page 17: Display-Function | Pressed Fruits
4.3.6. Display-Function | pressed fruits • Pic 24 No. 1 FUNC button: Press this function button to indicate the total number of pressed fruits. Picture 24 : Display – fruit counter 4.3.7. Display-Function – Operating time • Pic. 25 No. 1 FUNC button: Press this function button to indicate the total operating time. Picture 25 : Display –... - Page 18 Factory mode (only for technicians) The factory mode is used to adjust different parameters of the machine. This function should only be used from technician and is locked with a password. • To skip the factory mode press the FUNC-Button (pic. 26, No. 1) Picture 26 : Display - Factory Mode...
-
Page 19: Cleaning Instruction
4.4. CLEANING INSTRUCTION In order to clean the machine properly, please follow the instructions below: The below-mentioned cleaning steps are to be completed at least twice every 24 hours. IMPORTANT: Before cleaning the machine, ensure that the machine is disconnected from power (unplug the machine). - Page 20 4. Remove the peel bucket. 5. Pull out the fruit sieve support and take out the fruit sieve. 6. Unscrew the Cross Holder screw.
- Page 21 7. Pull out the Cross Holder. 8. Separate the knife guide from the cross holder by pulling out the cross holder screw. (3 individual parts: cross holder, knife guide, screw) Caution: When reinstalling the knife make sure that it rests in the correct position and that the screw is properly tightened by hand.
- Page 22 Unclamp the fixation lever of the feeder and remove the supply tunnel. Remove the knife by pressing the fastening tab up and then lift it out of the anchorage. Remove the front plate/ Double Cover...
- Page 23 Remove the drip cup and the sieve from the cup. Place all mentioned parts (with the exception of the acrylic front cover) in a dishwasher or clean them thoroughly by hand! 11. Clean the housing. The machine must not be cleaned by means of a water jet but with a wet cloth and clear water only.
- Page 24 Cleaning of the Self-Service Tap (SB-Tap) 1. Please remove SB-tap housing by pulling it up. 2. Pull the tap completely out. 3. Turn the tapping lever to the left and pull it out upwards. Dishwasher cleaning of all parts possible!
-
Page 25: Troubleshooting
5. TROUBLESHOOTING PROBLEM POSSIBLE CAUSE SOLUTION The machine is not working Check if machine is plugged Connect to power source into power outlet No electricity from power outlet Check the power outlet for electricity Main switch off Check if main switch on the side of machine is switched on. - Page 26 5.1. Emergency case - resetting In case of blockage of the machine (due to incorrect installation to hard or frozen fruit), there will occure “Overload consult machine” on the display. Please consider the following steps in the resetting of the machine: •...
- Page 27 5.1.2. Emergency case - resetting In case of not solving the blockage of the machine with pressing the buttons, the machine can be reset via allen key. Please consider the following steps in the resetting of the machine: • Pic. 31: Press the power switch to turn off the machine. •...
-
Page 28: Certificates
6. CERTIFICATES... -
Page 36: Important Spare Parts
7. IMPORTANT SPARE PARTS Front Cover Revolution Advance Art. No.: 300104010 300104010 Fruit sieve support Revolution Advance Art. No.: 300114030 300114030 Peel Container Art. No.: 300117032 300117032 Fine sieve Art. No.: 300106012 300106012 Upper pressing element Art. No.: 300107022 300107022... - Page 37 Lower pressing element (fixed in the fruit sieve support) Art. No.: 300108022 300108022 Knife Art. No.: 300211023 300211023 Double Cover (detachable machine back wall) Art. No.: 300226003 300226003 Plastic knob - Cross Holder Art. No.: 300110002 300110002 Cross holder Art. No.: 300249003 300249003...
- Page 38 300253003 Cross Holder Screw Art. No.: 300253003 300109020 Knife guide & guide of peel ejector (rake) Art. No.: 300109020 Art. No.: 300246023 300246023 Rake (Backward peel ejector) Art. Nr.: 300246023 300246023 Electronic box / Main electronics Art. No.: 300006021 300006021 Display complete Art.
- Page 39 SB-Tap complete Art. No.: 300112030 300112030 Fruit supply tunnel Art. No.: 300239043 300239043 Motor Art. No.: 300002021 300002021 Magnet front cover complete Art. No.: 300605007 - Screw Art. No.: 300668017 - Magnet Art. No.: 300128012 - Support...
- Page 40 Fruit sieve Art. No.: 300203033 300203033 Magnet system SB-Tap Art. No.: 300207000 300207000 SB-Tap lever Art. No.: 300215013...
Need help?
Do you have a question about the Citrocasa Revolution 10.000 and is the answer not in the manual?
Questions and answers