
Related Manuals for Seuic AUTOID 9 Series


Summary of Contents for Seuic AUTOID 9 Series
- Page 1 Seuic AUTOID 9/9HC SEUIC Reference Manual AUTOID®9/9HC Series Data Collection Terminal Android system product manual Version 1.0...
-
Page 2: Table Of Contents
Seuic AUTOID 9/9HC Directory 1 Chapter one Usage notes ..................1 1.1 Attentions of laser scanning engine ............... 1 1.2 Safety precautions ................... 1 1.3 Maintenance considerations ................1 2 Chapter two Appearance instructions ..............2 3 Chapter three Keyboard ..................4 4 Chapter four quick use .................. - Page 3 Seuic AUTOID 9/9HC 7.16 Position information ................... 44 7.17 Security ......................45 7.18 Language and input method ..............46 7.19 Backup and reset ..................47 7.20 Add an account .................... 48 7.21 Date and time....................48 7.22 Auxiliary function ..................49 7.23 Developer options ..................
-
Page 4: Chapter One Usage Notes
Seuic AUTOID 9/9HC 1 Chapter one Usage notes 1.1 Attentions of laser scanning engine Laser radiation, please do not look directly at the laser beam. 1.2 Safety precautions Your devices can only use the battery and charger specified by the company. Any other products may cause the battery leakage, overheating, burst and fire. -
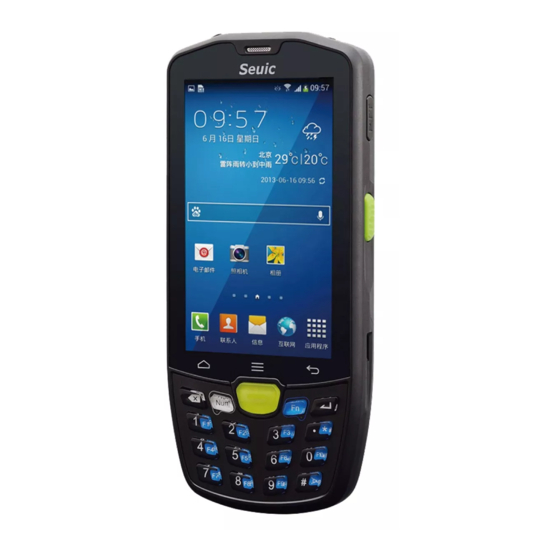
Page 5: Chapter Two Appearance Instructions
Seuic AUTOID 9/9HC For a long time not to use this product, please be sure to download the data to the computer store, and remove the battery. Please separate machine and battery packaging after storage. The battery will take a long time to compete the charge when it is the first time to work or recovery from storage. - Page 6 Seuic AUTOID 9/9HC Picture2-2 frontal view of 17 key Picture2-3 back view...
-
Page 7: Chapter Three Keyboard
Seuic AUTOID 9/9HC 3 Chapter three Keyboard AUTOID® 9/9HC device on the keyboard is 22 key + 2 +PTT keys 1 (AUTOID® 9 series 9HC series less than 4 direction keys and 1 lock screen keys); 3 buttons on the screen (Back, Menu, Home). - Page 8 Seuic AUTOID 9/9HC Enter key confirm Direction key : up Direction key : down Direction key : left Direction key : right Delete 0key Fn mode:F10 key .key Fn mode:*key #key Fn mode: lights number1key Fn mode:F1key number2key , A.B.C...
- Page 9 Seuic AUTOID 9/9HC number3key , D.E.F Fn mode:F3key number4key , G.H.I Fn mode:F4key number5key , J.K.L Fn mode:F5key number6key , M.N.O Fn mode:F6key number7key , P.Q.R.S Fn mode:F7key number8key , T.U.V Fn mode:F8key number9key , W.X.Y.Z Fn mode:F9key...
-
Page 10: Chapter Four Quick Use
Seuic AUTOID 9/9HC 4 Chapter four Quick use 4.1 First time Put on the battery, close the battery cover, press the power button to start. In the system working state, press Power key, the device will enter the dormancy state, in the dormant state, press Power key system will wake up and light up the screen. -
Page 11: Install Sd Card
Seuic AUTOID 9/9HC Picture4-1 insert the SIM card 4.6 Install SD card Please install the SD card for the following instructions: Insert the SD card (microSD or microSDHC) in the direction of the icon. Picture4-2 insert the SIM card Attention : PSAM card is not supported This machine does not support the hot swap card, the card must be reset. - Page 12 Seuic AUTOID 9/9HC Take the battery cover. Picture4-3 Disassemble battery cover Put the battery into the battery compartment in a appropriate angle. Determine the battery contacts at the battery compartment, press the battery. Picture4-4 input the battery Slide the battery lock up and make sure that the battery is locked.
- Page 13 Seuic AUTOID 9/9HC Picture4-5 lock the battery cover Put the battery cover on the back of the card slot. press the lock gently. Picture4-6 close the battery cover Slide the battery cover to the lock end.
-
Page 14: Remove The Battery
Seuic AUTOID 9/9HC Picture4-7 lock the battery cover For shipping or long time no use of the machine, please remove the battery and the machine will be separated from the machine. Note: Any improper use may affect battery life. 4.8 Remove the battery When removing the battery, please follow the following steps: Slide the battery cover to the unlock end. - Page 15 Seuic AUTOID 9/9HC Picture4-9 open the lock Unload battery. Picture4-10 get out the battery...
-
Page 16: Chapter Five Charger
Seuic AUTOID 9/9HC 5 Chapter five Charger Due to the battery in the factory has only a small amount of electricity used for test, when you receive the machine you must charging before use. After you insert the battery, then connect the device to the adapter for charging directly. At the same time, the AUTOID®... -
Page 17: Led Indicator Lamp
Seuic AUTOID 9/9HC Batteries can be charged repeatedly, but the battery is a consumable product, please replace a new battery if you find the device's standby time is greatly reduced. Battery charging time change with temperature and battery usage, please charge at a reasonable temperature range. -
Page 18: Chapter Six Main Screen
Seuic AUTOID 9/9HC 6 Chapter six Main screen AUTOID® 9/9HC series devices are a total of five main screens, sliding screen to the left or right can be switched on each other. In the application of the main screen display, click any application icon, you can open the program. - Page 19 Seuic AUTOID 9/9HC Table6-2 Status icon and notification bar icon Icon Introduction Icon Introduction Detection of available WLAN Signal strength networks Connected WLAN network Not inserted SIM card Mobile network has been Portable WLAN connected Silent mode Airplane mode Vibration mode...
-
Page 20: Chapter Seven Set Up
Seuic AUTOID 9/9HC 7 Chapter seven Set up 7.1 WLAN Find this icon: Settings Wireless and Network WLAN 2.4G Wi-Fi provides the most remote 450 feet (150m), 5G provides the farthest 300 feet (100m) wireless network access range (note, industrial grade AP, open area). To use the Wi-Fi on your device, you must connect to a wireless access point or hot spot. - Page 21 Seuic AUTOID 9/9HC Picture7-1 Wi-Fi menu 4.Set the WLAN band ([advanced] (short press menu to entry) ---- > [WLAN band]), choose to use only the 5GHz band can only search to 5GHz band of AP. Picture7-2 WLAN Frequency band...
- Page 22 Seuic AUTOID 9/9HC 5.Wi-Fi roaming threshold, incremental, interval can be through the advanced settings according to customer demand for their own set ( in the Wi- Fi search interface short press menu button ---- > Advanced). Picture7-3 WLAN Roaming settings...
- Page 23 Seuic AUTOID 9/9HC Picture7-4 Roaming trigger (2)Roaming delta: when the difference between the two AP signal value reaches the set value, roaming connected to the signal value better AP, such as when two AP between signal value difference is greater than 5 DBM (to meet the standards of the roaming threshold), then the normal roaming.
- Page 24 Seuic AUTOID 9/9HC Picture7-7 Wi-Fi Status information 7.WIFI Set Country Code,Click can set the international domain, the default is CHINA. Picture7-8 WIFI Set Country Code 8. Click the restore Wi-Fi to the default configuration button to make WLAN roaming, roaming and roaming threshold increment interval return to the default value. As shown in the figure, after clicking on the Wi-Fi automatically shut down, after the restart Wi-Fi to restore to the default configuration.
- Page 25 Seuic AUTOID 9/9HC Picture7-9 Wi-Fi Reset default settings Note: when the device is connected to a wireless network, the status bar will display the Wi-Fi icon ( ), and display a roughly the amount of the signal intensity (light from the bar). If the touch device is currently connected to the wireless network, it will show the Wi-Fi network name, state, speed, signal strength, security information and IP address.
-
Page 26: Mobile Network
Seuic AUTOID 9/9HC wireless network, you do not need to reenter the appropriate password. Wi-Fi network will search for themselves, that is, the device does not need to perform additional steps can be connected to the Wi-Fi network. Connect to other Wi-Fi networks ... - Page 27 Seuic AUTOID 9/9HC Picture7-12 Mobile data network roaming Network mode: insert different SIM, select the appropriate network mode, can be registered to the network, and can achieve 2G/3G switch. The default network model is CDMA/EvDo/GSM/WCDMA (WCDMA only supports GSM/WCDMA's default network mode for).
- Page 28 Seuic AUTOID 9/9HC CDMA/EvDo/GSM/WCDMA, WCDMA, only GSM/WCDMA, only GSM, in which only GSM only use the 2G network, only WCDMA only use the 3G network, the other is based on the current network type to switch. (2)Insert the SIM card, you can choose the following network mode: Auto CDMA/EvDo/GSM/WCDMA, CDMA, only CDMA/EvDo, in which only CDMA only use the 2G network, the other is based on the current network type to switch.
- Page 29 Seuic AUTOID 9/9HC Note: in addition to the APN, the other option users can according to the requirements of their own access point to the corresponding set up Picture7-15 Add and remove APN 6.Use only GSM network: after selecting, using only GSM network, the device will be forced to downgrade to GSM network even if there is a 3G signal coverage area, saving power.
-
Page 30: Bluetooth
Seuic AUTOID 9/9HC Picture7-16 Use GSM network only 7.Network operators: search to the current environment of network operators resources. 7.3 Bluetooth Find this icon: Settings Wireless and Network Bluetooth 1. Point on the blue / open button, open and search for other Bluetooth devices 2. - Page 31 Seuic AUTOID 9/9HC device Point to open and search for Bluetooth Point by the other device can be detected Picture7-17 Bluetooth menu 4. Paired with a successful device, click on the right side of the set button to rename and cancel the device to the device and other options, according to the needs of...
- Page 32 Seuic AUTOID 9/9HC Picture7-18 Paired Bluetooth device settings Bluetooth transfer: you can choose to send the file, pictures, video, MP3 and other documents, through Bluetooth, such as: share MP3, select a MP3, long press the MP3 to share, the share of the interface select the right Bluetooth, the details of the...
-
Page 33: Flow Usage
Seuic AUTOID 9/9HC Picture7-20 Bluetooth transmission schedule 7.File to complete the corresponding prompt. Picture7-21 Bluetooth shared results 8.Bluetooth headset,,Bluetooth headset can be used for voice communications, multimedia player, etc. 7.4 Flow usage Find this icon: Settings Wireless and Network ... -
Page 34: More
Seuic AUTOID 9/9HC Picture7-22 Flow usage 7.5 More Find this icon: Settings More... -
Page 35: Airplane Mode
Seuic AUTOID 9/9HC Picture7-23 More menu 7.5.1 Airplane mode Check the Airplane mode, the wireless module will automatically shut down. -
Page 36: Vpn
Seuic AUTOID 9/9HC Picture7-24 Airplane mode 7.5.2 VPN After starting VPN, you need to add the VPN private network (for example: want to access the company's internal file servers and other network shared resources), no matter where you can connect to the company's VPN server through the VPN client, after obtaining the VPN account can be accessed through the VPN client side, after dialing the company can access the shared resources. -
Page 37: Portable Hot Spot
Seuic AUTOID 9/9HC together, that can be used to synchronize your application content to each other. At the same time, the installation of third party NFC software, you can read and write RF card operation Picture7-26 NFC function 7.5.4 Portable hot spot (1)Portable hot function, the machine as a Wi-Fi hot spot, for a certain range of the surrounding Wi-Fi module of the mobile phone and computer to provide access. - Page 38 Seuic AUTOID 9/9HC Picture7-27 Portable hot spot settings (3)Configure a portable hot spot, as shown in figure: Picture7-28 Modify WLAN hot spot (4)Search to the other side of the hot spots, enter the appropriate password can share the machine's hot network.
-
Page 39: Prohibit Drop-Down Menu
Seuic AUTOID 9/9HC 7.6 Prohibit drop-down menu Find this icon: Settings menu Prohibit drop-down This function opens: The function is effective immediately, users can not drop down menu. This function closes: The function is immediately effective, users can drop-down menu normally. -
Page 40: Fn Bond Sticky
Seuic AUTOID 9/9HC 7.8 Fn bond sticky Find this icon: Settings Fn bond sticky This function closes: When press the FN button, the FN indicator lights up, at this time click ~,., # key output blue marks that the corresponding, F1~F10 *; and it can be continuous input F1~F10, * and other characters. -
Page 41: Shield Virtual Key Two
Seuic AUTOID 9/9HC 7.10 Shield virtual key two Find this icon: Settings Shield virtual key two This function closes: Home key is available in the middle of the screen, and you can go back to the main desktop. -
Page 42: Display
Seuic AUTOID 9/9HC Picture7-30 voice 7.12 Display Find this icon: Settings Display Brightness: you can move the cursor to adjust the backlight. - Page 43 Seuic AUTOID 9/9HC Picture7-31 Display Wallpaper: you can set up the wallpaper from the source to modify, library, photo album or storage card as you want Picture7-32 wallpaper Automatically rotating screen, after the election, the device rotation, according to the...
- Page 44 Seuic AUTOID 9/9HC rotating angle of the horizontal and vertical screen. Picture7-33 Automatic rotating screen Sleep: set the time to the system will let your device sleep automatically. Picture7-34 Sleep...
-
Page 45: Storage
Seuic AUTOID 9/9HC Font size: According to their own needs to adjust the font size of the system Picture7-35 Font 7.13 Storage Find this icon: Settings Storage To view the available storage space, you can remove the memory card (the memory storage device format), and select the external memory card or external USB device for media scanning. -
Page 46: Battery
Seuic AUTOID 9/9HC Picture7-36 Storage 7.14 Battery Find this icon: Settings Battery You can know the current capacity of the battery Picture7-37 Battery... -
Page 47: Application
Seuic AUTOID 9/9HC 7.15 Application Find this icon: Settings Application Management application: Click the directory (download, SD card, running or all), and select the application you want to uninstall, you will enter the following interface, click the uninstall, and then you can remove the application from the tablet. -
Page 48: Security
Seuic AUTOID 9/9HC Picture 7-39 Position information 7.17 Security Find this icon: Settings Security Set the screen lock, machine main information, encrypted mobile phone, display password, device manager, application operation, unknown sources, unknown source application installation password settings, trusted credentials, from SD card installed,... -
Page 49: Language And Input Method
Seuic AUTOID 9/9HC Picture7-40 Security For unknown source applications, the system is limited to the installation, if you want to install, please check the option of unknown sources, check the process will be prompted to enter a password, enter the appropriate password to install the corresponding application (default password: 4007770876). -
Page 50: Backup And Reset
Seuic AUTOID 9/9HC Picture7-41 Language and input method 7.19 Backup and reset Find this icon: Settings Backup and reset Backup or restore data, restore factory settings. Picture7-42 Restore factory settings... -
Page 51: Add An Account
Seuic AUTOID 9/9HC 7.20 Add an account Find this icon: Settings Add an account Create accounts and sync information (which can be synchronized with the contact information, calendar, etc., to other products in the cloud, you need to set up accounts... -
Page 52: Auxiliary Function
Seuic AUTOID 9/9HC Picture7-44 Date and time 7.22 Auxiliary function Find this icon: Settings Auxiliary function You can set up the system here, including enlarge hand gestures, large fonts, press the power button to end the call, automatically rotate the screen, say the password, auxiliary functions, text to voice (TTS) output as well as touch and hold delay. -
Page 53: Developer Options
Seuic AUTOID 9/9HC 7.23 Developer options Find this icon: Settings Developer options Settings - > About phone -- > version number, click the version number repeatedly, next it will pop-up prompts for a password box, input password 4007770876,then you can open developer options to access some other information, and this method is universal for Android. - Page 54 Seuic AUTOID 9/9HC Picture 7-47 About phone 1 System upgrade: it can realize remote upgrade system version 2 Status information to view the battery status and power of the show, the current network, signal intensity, IMEI number, IP and address, as shown in figure 7-49;...
- Page 55 Seuic AUTOID 9/9HC Picture7-48 Status information...
-
Page 56: Chapter Eight Typical Application
Seuic AUTOID 9/9HC 8 Chapter eight Typical application 8.1 Scan tool . Find this icon , access to the interface Picture8-1 Scan tool main interface Select [bar code set], then you can enter the bar code type setting interface to set up the type of bar code;... - Page 57 Seuic AUTOID 9/9HC Open [basic settings], you can scan duration, angle, time, etc.: Picture8-3 Basic settings Open [application settings], can be set up the basic switch scanning, as shown in figure 8-4: (1) Scan sound: open the scan will have a sound tip;...
- Page 58 Seuic AUTOID 9/9HC the project (not recommended to change), as shown in figure 8-7. Picture8-4 Application settings Picture8-5 Restore bar code default settings Picture8-6 Analog keyboard settings...
-
Page 59: Import Apk Automatically
Seuic AUTOID 9/9HC Picture8-7 Developer options . Program hide or exit (1) Select [hide], the program is running in the background, in any editing interface can be scanned by scanning; (2) Select [exit], the program will exit off. Picture8-8 Hide and exit 8.2 Import APK automatically... - Page 60 Seuic AUTOID 9/9HC Picture8-9 New appBackUp folder 2.Install the application of the APK source program placed into the "appBackUp" folder. Picture8-10 appBackup content 3.Select [Settings] ---- > [backup and reset] ---- > [Restore factory settings] ---- > [Reset the phone] ---- > [Remove all content]. Note: do not check the format of the...
-
Page 61: System Upgrade
Seuic AUTOID 9/9HC Picture8-11 Automatic installation When device restore to the factory settings, it will restart the "appBackUp" directory to install the APK. After the installation is completed, there will be a prompt that “the client application has been completed installation"... - Page 62 Seuic AUTOID 9/9HC Picture8-12 System upgrade Network unobstructed case, click the check Update button, if no update will prompt the current version for the latest version; if there are updates will be prompted to find a new version, click to enter the download interface.
-
Page 63: Mobile Butler
Seuic AUTOID 9/9HC 8.4 Mobile Butler This product in order to achieve the customer’s needs to set up the Android handheld terminal authority, not permit for the use of non-specified APP. Default launcher settings, click the Home virtual keys, as shown below: Picture8-14 Default launcher settings Select [mobile housekeeper], click on the [always] to achieve a permanent role. - Page 64 Seuic AUTOID 9/9HC You need to set the administrator password first, click on the [understand] to close the dialog box prompts. Long press Menu virtual key appears as follows: Picture8-16 Initial password settings In accordance with the requirements of setting up the administrator password, such as: 123456 note: not for air.
- Page 65 Seuic AUTOID 9/9HC Picture8-17 Password input interface Enter the corresponding administrator password (123456). Then you can be verified by the emergence of the following figure: Picture8-18 Add application interface Select the application to add to the [Desktop], click the confirmation to complete the addition;...
- Page 66 Seuic AUTOID 9/9HC Picture8-20 Change password Administrator, name change Get into the settings, you can modify the mobile butler name. Picture8-21 Change the name Wallpaper replacement...
-
Page 67: Hotkey Settings
Seuic AUTOID 9/9HC Enter [Settings] interface, click on the [Wallpaper], the following figure: Picture8-22 Change the wallpaper Lift default Starter Set [Settings]----[Application]----[All],find the application, click the [Clear] can lift the default settings. Picture8-23 Remove default Starter 8.5 Hot key settings This application is used in the setting of shortcut keys (Fn), which is convenient for customers to use frequently. - Page 68 Seuic AUTOID 9/9HC Find this icon: ,enter the hot key settings interface; Picture8-24 The main interface of hot key settings 2.Hot key settings, click the Fn key (such as: F2) to enter the setup interface, as shown below: Picture8-25 Add hot key interface...
- Page 69 Seuic AUTOID 9/9HC Picture8-26 Set Hot key successfully 3.Remove hot key binding, press the Fn key (such as: F2), while the following interface appears: Picture8-27 Lift the key bind Click [lift key bind], you can cancel the hot key settings, click [Cancel] to exit.
-
Page 70: Quick Configuration
XML file as well as the two-dimensional code technology as the input and output interface, the development of this simple and convenient configuration import and export tool, become the SEUIC industry and a new high added value products. - Page 71 Seuic AUTOID 9/9HC file on the external SD card root directory, set to specified file name to achieve the import configuration file. External card system path /geustdefaultinfo.xml (1) Manual import: Put the XML file (file name guestinfo.xml or guestdefaultinfo.xml) into the...
- Page 72 Seuic AUTOID 9/9HC Picture8-30 Import File After the success of the import, pop-up "configuration import completed, please restart the entry into force" prompt, click [immediately restart] after you can complete (if you do not restart some of the configuration will not take effect immediately)
- Page 73 Seuic AUTOID 9/9HC Note: the XML file name must be guestdefaultinfo.xml. Wallpaper import For import wallpaper, wallpaper need to be placed in a fixed directory, that is: after the export file, the wallpaper will be placed in the built-in SD card in the appBackup/wallPaper directory.
-
Page 74: Export
Seuic AUTOID 9/9HC Picture8-33 Two dimensional code import window After the success of the analysis, the pop-up configuration import complete, please restart the entry into force!”, click on [restart at once] Picture8-34 The interface after successful analysis Note: if the two dimensional code density is too large, it will prompt resolution failure. - Page 75 /seuic/ recorded and development needs can be self-induced, users can use the machine to scan.
- Page 76 Seuic AUTOID 9/9HC (1) Enter the once configure, click on the "Export QR", the following interface to show the success: Picture8-37 Export QR Generated two-dimensional code image in the bottom of the application, click on the Export QR small icon, and slide around you can view the two-dimensional code...
-
Page 77: Others
Seuic AUTOID 9/9HC 8.6.3 Others 1.Configuration state The configuration state is used to view the system or other application configuration details, including the standard configuration, the current configuration, and the default configuration. Standard configuration is the standard setting of the import; the current configuration is the machine in real time setting;... - Page 78 Seuic AUTOID 9/9HC Picture8-40 Android Configuration state (2) Scan tool The settings used to see the scan tools, including the standard configuration, the current configuration, and the default configuration Picture8-41 Configuration state of scan tool Butler (3) Mobile Used to view mobile butler related settings, including the standard configuration,...
-
Page 79: Tool Kit
Seuic AUTOID 9/9HC Picture8-42 Configuration state of mobile butler Configuration difference Configuration difference is the default configuration and the configuration of the different parts of the configuration of the configuration of the machine, the user can clearly see the difference... -
Page 80: Chapter Nine Troubleshooting
Seuic AUTOID 9/9HC Picture8-44 tool kit 9 Chapter nine Troubleshooting Problems Reasons Solutions Battery power is too low or Charge or replace the not charged battery Press the power button, Battery installation is not 9/9HC AUTOID is not Properly installed battery... - Page 81 Seuic AUTOID 9/9HC will be closed. set to 15S to 30Min, or never sleep. Charge or replace the Battery dies battery Load scan application in Scan tool is closed AUTOID 9/9HC Set the scanner to the scan In the bar code settings or...
-
Page 82: Technical Support
10 Technical support 2015 SEUIC Company .All rights reserved。 This use guide belongs to seuic for AUTOID 9/9HC.It is made according to the present information, we do not ensure that it is full compliance with the latest situation, so we retain the right of modified at any time and without notice. - Page 83 Seuic AUTOID 9/9HC AUTOID9 series product Rechargeable lithium battery Hand belt Handwriting touch pen USB cable 5-Slot Charging Dock Rated input voltage DC 12V± 5% DC 3A (MAX) Rated input current Rated output voltage DC 5V± 5% Rated output current DC 6A (MAX) Power status indication(Connect the power adapter: show red light)...
- Page 84 Seuic AUTOID 9/9HC 4-Slot Battery Charger Rated input voltage DC 5V± 5% DC 5A (MAX) Rated input current Maximum input power DC 4.35V± 5% Rated output voltage 3.8V Lithium ion battery Applicable specification DC 1.2A* 4 (MAX) Constant current Constant charging voltage DC 4.35V±...
- Page 85 Seuic AUTOID 9/9HC Adsorption charging line...
Need help?
Do you have a question about the AUTOID 9 Series and is the answer not in the manual?
Questions and answers