Advertisement
Quick Links
Quick Set-up Guide
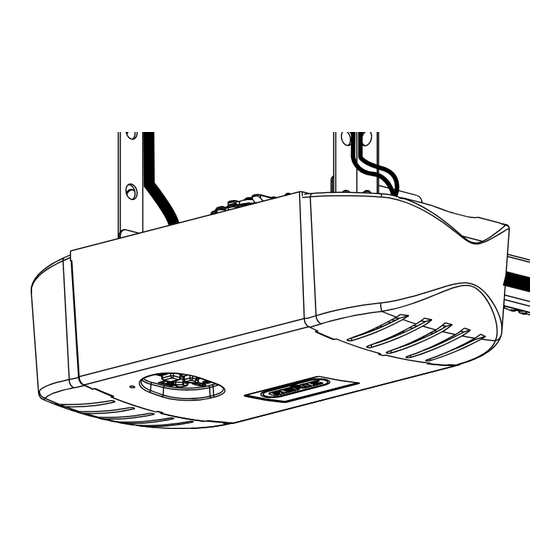
Power Pack
Typical Installation shown.
Installations may vary
For a video of this installation, visit www.GenieCompany.com/AladdinConnect/InstallationVideo
Need help or have questions? Contact Aladdin Connect™ Customer Service at 1-866-599-4995
39386503197 03/16
Aladdin Connect™
Control Wire
Wall Button Wire
Photocell wire
Scan for the
Aladdin Connect™
installation video
Recommended Tools
Drill & 3/32 Bit
Small Common
Screwdriver
5/16 Wrench or
Nut Driver
Phillips Head
Screwdriver
Wire Cutters/
Strippers
Hammer
Scan here for additional
Aladdin Connect™
information
Included Components
DCM
DPS
(Door Control Module)
(Door Position Sensor)
Hardware Bag
Power Pack
Insulated
Staple x30
Wire Spool
1
Advertisement

Related Manuals for Genie Alladin connect


Summary of Contents for Genie Alladin connect
- Page 1 Scan for the Scan here for additional Aladdin Connect™ Aladdin Connect™ installation video information Recommended Tools Included Components Quick Set-up Guide Drill & 3/32 Bit Aladdin Connect™ Control Wire Wall Button Wire Photocell wire Small Common (Door Control Module) Screwdriver (Door Position Sensor) Power Pack 5/16 Wrench or...
-
Page 2: Important Safety Instructions Warning
IMPORTANT SAFETY CONSIGNES DE SÉCURITÉ INSTRUCTIONS IMPORTANTES WARNING AVERTISSEMENT POUR RÉDUIRE LE RISQUE DE BLESSURES TO REDUCE THE RISK OF SEVERE INJURY GRAVES VOIRE MORTELLES, LIRE ET OR DEATH, READ AND FOLLOW ALL COMPRENDRE TOUTES LES INSTRUCTIONS. INSTRUCTIONS. NE JAMAIS laisser les enfants utiliser ou jouer avec les NEVER let children operate or play with the WARNING commandes de l’ouvre-porte. -
Page 3: Android App
STEP 1 STEP 2 In the Home close to Wi-Fi Router: In the Home close to Wi-Fi Router: Remove mounting bracket from back of DCM. FIG.A, Download the Aladdin Connect™ app. Plug Aladdin Connect™ into wall outlet with Power Pack. Scan the QR code below or visit your devices app store FIG. - Page 4 STEP 3 In the Garage: These factors must be determined prior to mounting Aladdin Connect™ (DCM) to the wall or ceiling. 1. Optimal Wi-Fi signal strength. If an optimal signal cannot be located within the garage, move the wireless router closer to the garage or install a Wi-Fi range extender (Available from most electronic stores) 2.
- Page 5 Wire Aladdin Connect™: (Single door install shown) Aladdin Connect™ will wire directly to the wall control connections at the powerhead or directly to the wall control. New Genie models shown. Visit www.GenieCompany.com/AladdinConnect for more information on older models and other brands of garage door openers.
- Page 6 *Wiring methods for other garage door openers. All Genie brand and most competitor brands of garage door openers will operate with Aladdin Connect™. Visit www.GenieCompany. com/AladdinConnect to check compatibility with other manufacturer’s controls or check your garage door opener’s owners manual for...
- Page 7 STEP 6 STEP 5 Mount DPS Module to Garage Door: Mount and Power Aladdin Connect™: TAB” from DPS until directed by the app. DO NOT remove the battery “PULL Using the DCM mounting bracket as a template at the optimal The DPS should be mounted on the TOP door panel only.
- Page 8 NOTE: This kit includes one DPS for use with one door only. The DPS included is already programmed to the DCM . Additional sensors can be purchased separately from your local Genie retailer. To program additional sensors, first complete STEP 7 initial setups and programming, then go to “Add a Door Sensor” under the “Doors” tab inside the app or view the installation video at www.GenieCompany.com/AladdinConnect/InstallationVideo.
Need help?
Do you have a question about the Alladin connect and is the answer not in the manual?
Questions and answers