Table of Contents
Advertisement
Available languages
Available languages
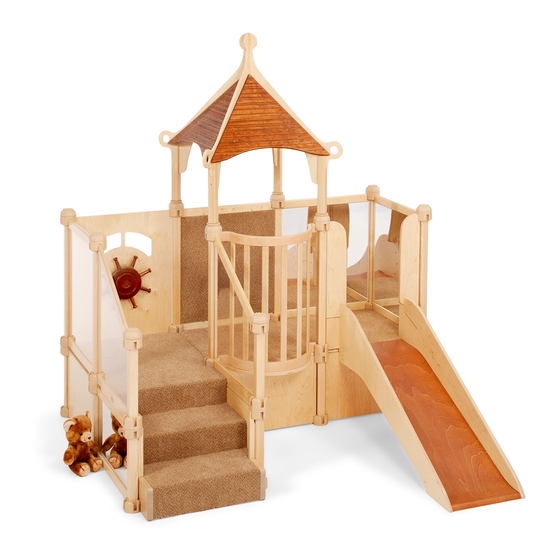
Nursery gym
Thank you for choosing the Nursery gym. I know you are looking at
a pile of cartons right now, and wondering if it is possible to make a
gym out of it all. Of course you can! This guide will lead you along,
step by step. So fix yourself a cup of tea and settle down to read this
guide before beginning to build.
The first pages show what each piece looks like, and how many of
each come with each kit. Then come the basic skills: the real nitty-
gritty techniques you need to build your gym. The best part is next:
choosing which one of the patterns fits your room and your ideas.
IMPORTANT
Retain these instructions for future reference.
© 2011 by Community Products (UK) Ltd
AG79 Eu 0542 Revision 08
Getting started .................................... 2
Maintaining your gym ......................... 3
Basic skills ............................................ 4
Up and over .......................................... 6
Sand dune ............................................ 7
Climb and crawl ................................... 8
Climb and slide .................................... 8
Billy goat's bridge ................................ 9
Knightsbridge .................................... 10
Tower bridge ...................................... 11
Mole hole ........................................... 12
Gnome home ...................................... 13
Rapunzel's tower ............................... 14
Windsor .............................................. 15
The palace .......................................... 16
Brightling Road, Robertsbridge, TN32 5DR UK
communityplaythings.co.uk sales@communityplaythings.co.uk
Phone: 0800 387 457
Advertisement
Chapters
Table of Contents

Related Manuals for Community Playthings Nursery Gym


Summary of Contents for Community Playthings Nursery Gym
-
Page 1: Table Of Contents
Nursery gym Thank you for choosing the Nursery gym. I know you are looking at Getting started ........2 a pile of cartons right now, and wondering if it is possible to make a Maintaining your gym ......3 gym out of it all. Of course you can! This guide will lead you along, Basic skills .......... -
Page 2: Getting Started
Getting started Lay the pieces of your Nursery gym on the floor. You will see which parts you need to build the kit you have using the chart on the facing page. The short panels are for the first layer of the gym; the tall ones are for the second layer. -
Page 3: Maintaining Your Gym
ID code from the product. ers. These may scratch or mar the surface. Nontoxic household plastic cleaners should work well. The terrain platform pad may be removed Use only replacement parts supplied by for cleaning. It must be replaced before use. Community Playthings. communityplaythings.co.uk... -
Page 4: Basic Skills
WALL These basic skills are for building 50 cm minimum or touching wall any of the Nursery gym layouts in this book. After you have read through the basic skills, choose the layout you would like to build and follow the plan provided. - Page 5 Insert the balcony the same way Install both the lower tunnel Once the bridge braces are in place, lay the bridge surface on as any other upper panel. cradles. Place the wooden top. Install the bridge railings barrel in the cradles and add with the brand facing out.
-
Page 6: Up And Over
Up and over Up and over G801 and G806 2.5 m 0.7 m Choose lower mirror locations before you start. 1.8 m 1.4 m Up and over with roof G802 and G807 2.5 m 0.7 m Choose lower mirror locations before you start. Remove four top caps to install roof. -
Page 7: Sand Dune
Up and over continued Up and over with balcony G803 and G808 2.5 m 0.9 m Choose lower mirror locations before you start. 1.8 m Sand dune 1.6 m Sand dune with slide G820 and G825 2.5 m 0.7 m 1.8 m Choose lower mirror locations before you start. -
Page 8: Climb And Crawl
Climb and crawl Climb and crawl G800 and G805 1.9 m 0.7 m Choose lower mirror locations before you start. Climb and slide Climb and slide G810 and G815 2.5 m 1.8 m 0.7 m Choose lower mirror 1.4 m locations before you start. -
Page 9: Billy Goat's Bridge
Billy goat’s bridge Billy goat’s bridge with slide G830 and G835 Choose lower mirror locations 3.4 m before you start. Consider two mirrors under the bridge. 0.7 m 1.8 m 2.2 m Positioning the gym next to the wall creates a little den under the bridge. Spacing it at least 50 cm away makes a crawl-through space under the bridge. -
Page 10: Knightsbridge
Knightsbridge Knightsbridge G832 and G837 1.8 m Choose lower mirror locations 2.1 m before you start. Consider two 3.2 m 1.4 m mirrors under the bridge. Remove four top caps to install roof. 4.0 m 0.7 m Positioning the gym next to the wall creates a little den under the bridge. -
Page 11: Tower Bridge
Tower bridge Tower bridge G842 and G847 3.8 m Choose lower mirror locations 1.8 m before you start. Consider two mirrors under the bridge. Remove four top caps to install roof. 2.3 m 3.2 m Tower bridge with balcony/steering G843 and G848 3.8 m Choose lower mirror locations 1.8 m... -
Page 12: Mole Hole
Mole hole WARNING Any gym with a tunnel must be 50 cm minimum from the wall. Mole hole with slide G850 and G855 1.8 m Choose lower mirror locations before you start. 1.8 m 2.9 m 1.4 m 1.8 m 2.5 m Mole hole with ramp G851 and G856 1.8 m... -
Page 13: Gnome Home
Gnome home WARNING Any gym with a tunnel must be 50 cm minimum from the wall. Gnome home with slide G852 and G857 Choose lower mirror locations before you start. 1.8 m Remove four top caps 1.8 m to install roof. 2.9 m 1.4 m Gnome home with ramp G853 and G858... -
Page 14: Rapunzel's Tower
Rapunzel’s tower Rapunzel with slide G823 and G828 Choose lower mirror 3.0 m locations before you start. 0.9 m 1.8 m 1.9 m Remove four top caps to install roof. Rapunzel with ramp G822 and G827 3.0 m 0.9 m Choose lower mirror locations before you start. -
Page 15: Windsor
Windsor Windsor with terrain G840 and G845 1.8 m Choose lower mirror locations before you start. 1.8 m Remove four top caps to install roof. 3.6 m 1.8 m 0.7 m 2.5 m Windsor with balcony G841 and G846 Choose lower mirror 1.8 m locations before you start. -
Page 16: The Palace
The palace WARNING Any gym with a tunnel must be 50 cm minimum from the wall. The palace G860 and G865 2.5 m Choose lower mirror locations before you start. Consider two 2.1 m mirrors under the bridge. Remove four top caps to install roof. -
Page 17: Community Playthings
Zwergenhaus ......... D13 Rapunzelturm ....... D14 Frau Holle ........D15 Märchenschloss......D16 WICHTIG Community Playthings Bitte heben Sie diese Anleitung zum späteren Nachlesen auf. Brightling Road, Robertsbridge, TN32 5DR UK Deutscher Kundendienst: © 2011 by Community Products (UK) Ltd Tel: 0800 266 7529 Fax: +49 (0)36601 922989 AG79 Eu 0542 Revision 08 communityplaythings.de;... -
Page 18: Erste Schritte
Erste Schritte Packen Sie alle Teile des Bewegungscenters aus und legen Sie sie vor sich auf den Boden. Anhand der Tabelle auf der gegenüberliegenden Seite können Sie feststellen, welche Teile Sie benötigen, um Ihr Bewegungscenter zusammenzubauen. Die niedrigen Paneele gehören zur unteren Ebene des Bewegungscenters, die hohen Paneele Langer Verbindungs- gehören zur oberen Ebene. -
Page 19: Pflege Und Wartung
Bestellung von Ersatzteilen Benutzen Sie beim Reinigen von Plastikteilen keine scharfen Reini- Bitte nehmen Sie Kontakt mit dem Community Playthings Kundendienst gungsmittel oder Lösungsmittel, da der Kunststoff hierdurch beschädigt auf, wenn Sie Ersatzteile benötigen. Beim Anruf sollten Sie die ID oder verkratzt werden kann. -
Page 20: Grundlegende Aufbauregeln
Grundlegende ACHTUNG! Ein Bewegungscenter mit einem Tunnel muss mindestens 50 cm von einer Wand entfernt stehen. Aufbauregeln WAND Aufbau direkt an der Wand oder mit 50cm Mindestabstand Zum Aufbau benötigen Sie kein Werkzeug. Diese grundlegenden Aufbautechniken brauchen Sie für alle Bewegungscenter, die in dieser Anleitung beschrieben werden. - Page 21 Ist der Brücken-Unterbau installiert, Der Balkon wird wie jedes andere Installieren Sie die beiden unteren kann die Brücke aufgelegt werden. hohe Paneel eingebaut. Hälften der Tunnel-Halterungen. Bauen Sie die Brückengeländer so Fügen Sie senkrecht von oben den ein, dass das Logo nach außen zeigt. Tunnel ein und setzen Sie dann die oberen Hälften der Halterungen auf.
-
Page 22: Türmchen
Türmchen Türmchen G801 und G806 2.5 m 0.7 m Bestimmen Sie die Platzierung der niedrigen Spiegelpaneele bevor Sie mit dem Aufbau beginnen. 1.8 m 1.4 m Türmchen mit Dach G802 und G807 2.5 m 0.7 m Bestimmen Sie die Platzierung der niedrigen Spiegelpaneele bevor Sie mit dem Aufbau beginnen. -
Page 23: Sand-Düne
Türmchen Fortsetzung Türmchen mit Balkon G803 und G808 2.5 m 0.9 m Bestimmen Sie die Platzierung der niedrigen Spiegelpaneele bevor Sie mit dem Aufbau beginnen. 1.8 m Sand-Düne 1.6 m Sand-Düne mit Rutsche G820 und G825 2.5 m 0.7 m 1.8 m Bestimmen Sie die Platzierung der niedrigen Spiegelpaneele bevor Sie... -
Page 24: Krabbelberg
Krabbelberg Krabbelberg G800 and G805 1.9 m 0.7 m Bestimmen Sie die Platzierung der niedrigen Spiegelpaneele bevor Sie mit dem Aufbau beginnen. Klettern und Rutschen Klettern und Rutschen G810 und G815 2.5 m 1.8 m 0.7 m Bestimmen Sie die Platzierung der niedrigen 1.4 m Spiegelpaneele bevor Sie mit dem Aufbau beginnen. -
Page 25: Dschungelbrücke
Dschungelbrücke Dschungelbrücke mit Rutsche G830 und G835 Bestimmen Sie die Platzierung der niedrigen Spiegelpaneele 3.4 m bevor Sie mit dem Aufbau beginnen. 0.7 m Tip: Montieren Sie zwei Spiegel unter der Brücke. 1.8 m 2.2 m Beim Aufbau an einer Wand entsteht unter der Brücke ein kleiner Rückzugsraum. -
Page 26: Ritterburg
Ritterburg Ritterburg G832 und G837 1.8 m Bestimmen Sie die Platzierung der niedrigen 2.1 m Spiegelpaneele bevor Sie mit dem Aufbau beginnen. 3.2 m 1.4 m Tip: Montieren Sie zwei Spiegel unter der Brücke. Zur Dachmontage vier Schraubkappen abnehmen. 4.0 m 0.7 m Beim Aufbau an einer Wand entsteht unter der Brücke ein kleiner... -
Page 27: Tower Bridge
Tower Bridge Tower Bridge G842 und G847 3.8 m Bestimmen Sie die Platzierung der niedrigen 1.8 m Spiegelpaneele bevor Sie mit dem Aufbau beginnen. Tip: Montieren Sie zwei Spiegel unter der Brücke. Zur Dachmontage vier Schraubkappen abnehmen. 2.3 m 3.2 m Tower Bridge mit Balkon und Steuerrad G843 und G848 3.8 m Bestimmen Sie die Platzierung der niedrigen... -
Page 28: Grabowski
Grabowski ACHTUNG! Ein Bewegungscenter mit einem Tunnel muss mindestens 50 cm von einer Wand entfernt stehen. Grabowski mit Rutsche G850 und G855 1.8 m Bestimmen Sie die Platzierung der niedrigen Spiegelpaneele bevor Sie 1.8 m 2.9 m 1.4 m mit dem Aufbau beginnen. 1.8 m 2.5 m Grabowski mit Rampe G851 und G856... -
Page 29: Zwergenhaus
Zwergenhaus ACHTUNG! Ein Bewegungscenter mit einem Tunnel muss mindestens 50 cm von einer Wand entfernt stehen. Zwergenhaus mit Rutsche G852 und G857 Bestimmen Sie die Platzierung der niedrigen Spiegelpaneele bevor Sie mit dem Aufbau beginnen. 1.8 m Zur Dachmontage vier 1.8 m Schraubkappen abnehmen. -
Page 30: Rapunzelturm
Rapunzelturm Rapunzelturm mit Rutsche G823 und G828 Bestimmen Sie die Platzierung der 3.0 m niedrigen Spiegelpaneele bevor Sie 0.9 m 1.8 m mit dem Aufbau beginnen. 1.9 m Zur Dachmontage vier Schraubkappen abnehmen. Rapunzelturm mit Rampe G822 und G827 3.0 m 0.9 m Bestimmen Sie die Platzierung der niedrigen Spiegelpaneele bevor Sie mit dem Aufbau... -
Page 31: Frau Holle
Frau Holle Frau Holle mit Sensorik-Plattform G840 und G845 Bestimmen Sie die Platzierung der 1.8 m niedrigen Spiegelpaneele bevor Sie 1.8 m mit dem Aufbau beginnen. Zur Dachmontage vier Schraubkappen abnehmen. 3.6 m 1.8 m 0.7 m 2.5 m Frau Holle mit Balkon G841 und G846 Bestimmen Sie die Platzierung der 1.8 m niedrigen Spiegelpaneele bevor Sie... -
Page 32: Märchenschloss
Märchenschloss ACHTUNG! Ein Bewegungscenter mit einem Tunnel muss mindestens 50 cm von einer Wand entfernt stehen. Märchenschloss G860 und G865 2.5 m Bestimmen Sie die Platzierung der niedrigen Spiegelpaneele bevor Sie mit dem Aufbau beginnen. 2.1 m Tip: Montieren Sie zwei Spiegel unter der Brücke. Zur Dachmontage vier Schraubkappen abnehmen.
Need help?
Do you have a question about the Nursery Gym and is the answer not in the manual?
Questions and answers