Table of Contents
Advertisement
Quick Links
Konformitätserklärung gemäß Richtlinie Radio Equipment Directive (RED)
2014/53/EU
Declaration of Conformity in accordance with the Radio Equipment Directive (RED) 2014/53/EU
Déclaration de conformitè CE (RED) 2014/53/EU
Hiermit wird erklärt, dass das Produkt:
I hereby declare that the product:
dèclarons sous notre seule responsabilitè que le produit:
Artikelnummer:
Product number:
9270 (EAN: 4250684192706)
Numèro d'article:
H4819
Bei bestimmungsgemäßer Verwendung den grundlegenden Anforderungen nach Artikel 3 und den
übrigen einschlägigen Bestimmungen der Richtlinie (RED) 2014/53/EU entspricht.
Complies with the essential requirements and the other relevant provisions of the Directive (RED)
2014/53/EU, when used for it intended purpose.
Est conforme aux exigences des directives et ordonnances suivantes (RED) 2014/53/EU.
In Übereinstimmung mit den folgenden harmonisierten Normen gefertigt:
Manufactured in accordance with the following harmonised standards:
Et a ètè fabriquè conformèment aux norms harmonisèes suviantes:
EN 62479:2010
Draft EN 301 489-1 V2.2.0 (2017-03)
Final Draft EN 301 489-3 V2.1.1 (2017-3)
EN 61000-6-3:2007 + A1:2011 +AC:2012
EN 61000-6-1:2007
EN 300 440 V2.1.1 (2017-03)
Directive TSD 2009/48/EC Safety of Toys:
EN71:Part 1:2014, clauses 1-7
EN71:Part 2:2011+A1:2014
EN71Part 3:2013+A2:2017
EN 62115 ELECTRONIC TOYS SAFETY + A2 + A11 + A12- PARTIAL
EN 62115:2005 + A2: 2011 + A11: 2012 + A12: 2015 "Electric toys – Safety"
Hersteller / verantwortliche Person:
drive & fly models, Jürgen Kamm
Manufacturer / responsible Person:
Drahthammer Str. 22
Fabricant / personne responsable:
92224 Amberg, Germany
Jürgen Kamm
Geschäftsführer / managing director / directeur général
Ort/ Datum:
place of issue/ date:
Amberg (Germany), 10.06.2018
Lieu de dèlivrance/ Date:
EIRP Power (Max.): 2460MHz-2472MHz | 4.38dBm (2.74mW)
The source-based time-averaging power which is below the max permitted sending level of 20 mW,
and then the EUT is not needed to conduct SAR measurement.
Frequenzbereich: 2460-2472 MHz
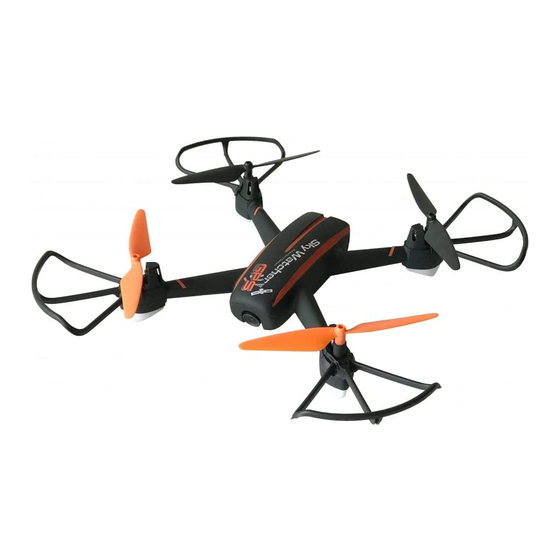
SkyWatcher GPS
N°9270
Manual
Impressum
Diese Bedienungsanleitung ist eine Publikation der Firma df models, Drahthammer Strasse 22, D-92224 Amberg.
Alle Rechte einschließlich Übersetzung vorbehalten. Reproduktionen jeder Art, z. B. Fotokopie, Mikroverfilmung,
oder die Erfassung in elektronischen Datenverarbeitungsanlagen, bedürfen der schriftlichen Genehmigung des
Herausgebers. Nachdruck, auch auszugsweise, verboten. Diese Bedienungsanleitung entspricht dem technischen
Stand bei Drucklegung. Änderung in Technik und Ausstattung vorbehalten.
© Copyright 2018 by df models
Advertisement
Table of Contents

Related Manuals for DF-models Sky Watcher


Summary of Contents for DF-models Sky Watcher
- Page 1 Impressum EIRP Power (Max.): 2460MHz-2472MHz | 4.38dBm (2.74mW) Diese Bedienungsanleitung ist eine Publikation der Firma df models, Drahthammer Strasse 22, D-92224 Amberg. Alle Rechte einschließlich Übersetzung vorbehalten. Reproduktionen jeder Art, z. B. Fotokopie, Mikroverfilmung, The source-based time-averaging power which is below the max permitted sending level of 20 mW, oder die Erfassung in elektronischen Datenverarbeitungsanlagen, bedürfen der schriftlichen Genehmigung des...
- Page 2 (3). Please be sure that all the propellers are undamaged and are terms and all applicable policable polices and guidelines DF MODELS installed in the right orientation. may make avaliable.
- Page 3 3. Use of Battery Specification (1) Please ensure batteries are fitted in the correct orientation as shown Drone Transmitter in the instruction manual. Item no.:H4819 Operating Frequency: 2.4GHz (2) Avoid short circuits by fiting the batteries incorrectly, and do not crush Weight: 178.0g Max transmission distance: 200m or squeeze the batteries as this could carry the risk of an explosion.
- Page 4 insert the battery into charging box 4xAAA batteries (not included) Charging the drone battery Always use alkaline batteries Never mix old and new batteries 1.Remove the battery from the drone and insert the battery into the 1.Unscrew the battery cover,and insert 4xAAA batteries(not included), charging box.
- Page 5 2. Push the left joystick on the remote control to the top for two seconds, Pairing your drone to the controller then pull the left joystick to the bottom for two seconds. (At this time, the remote control indicator light turns to green color and flashes slowly.) Release the left joystick, when the front and rear lights of the drone flash quickly at the same time, the frequency pairing is successful.
- Page 6 (2).Pick up the drone to keep it in the air horizontally, then slowly rotate 6.Gps search satellites the drone clockwise, and wait for the green lights to flash slowly to The drone must has enough GPS signal to fly in outdoor GPS mode. The indicate that the horizontal alignment is complete.
- Page 7 8.Landing Method 1: Press the “one key stop” button for 2-3 seconds,the drone will land by Altitude & rotate: itself. Method 2: Push the “throttle left stick” lever down until the drone lands. Use “throttle left stick” Method 3: lever to control the Press auto return home button for 2 to 3 seconds, the drone will return altitude &...
- Page 8 Indoor flight non-GPS mode Features 1.First turn on the power button of the remote control, the red light of the remote control flashes quickly and makes two beeps; long press the power switch of the drone, the lights on the drone will flash slowly. 2.Push the left joystick on the remote control to the top for two seconds, then pull the left joystick to the bottom for two seconds;...
- Page 9 4.Pairing drone: GPS mode /Surround flight: Press and hold the button , at the same time, turn on the remote During the flying, the end users can enjoy the surround flight mode by control power switch and then release the two buttons (the remote pressing the GPS mode button for 2 to 3 seconds until the remote control indicator light flashes quickly).Press and hold the drone power beeps "di, di"...
- Page 10 Auto return home: For outdoor flying, we strongly recommend the end user to choose an When the drone flies too far in GPS mode, consumers can't tell the open area, as the GPS signal will be strong enough. The GPS signal directions of the drone, then consumers can operate it in below 2 ways will be too wake to have a enjoyful flying if the end user choose to fly to fly back the drone to the takeoff place:...
- Page 11 Left and right hand throttle switch Calibrate gyroscope The remote control throttle of the factory products defaults to the When the flight of the drone is unstable or deviated from the left and left-handed joystick. Consumers can switch between left and right hand right after take-off, the consumer can correct the gyroscope and the mode according to the following operations.
- Page 12 Insert the SD card Adjust Camera The camera can be manually rotated 90 degrees. Insert the SD card (not included) to the slot in right direction. If the SD card was inserted upside down, it will get stuck and the camera will not work.
- Page 13 Install phone holder Install the protection ring Insert the protection ring to the motor arm correspondingly 1.Insert the phone holder to the middle of remote controller. 2.Use the screws which behind the phone holder to adjust the tightness between the holder and the remote. 3.Pull out the holder and place the phone on the holder.
- Page 14 problem possible cause solution Trouble flying The indicator lights of the 1.Transmitter is not synced 1.Refer to the preparation drone are flashing and does to the drone. for FLIGHT and pair again. not respond to the transmitter. 2.Insufficient battery power. 2.Recharge the battery.
- Page 15 How to replace the gear Warning: since the gear will be in heavy loss after long time flying, consumers should replace the gear in time. 2. Remove the motor cover from 3. Remove the damaged motor. the top. 1. Loosen the propeller screw and 2.
- Page 16 How to download, install and use the camera’s software For iPhone, please scan the QR Code (Apple Software) on the packaging or below, or type WOWI PRO , to go to the App store to download the software; For Android mobile phone, please scan the QR Code (Android Software) on the packaging or below, or type WOWI PRO, to go to the Android Eloquent Market / Google play to download the software.
- Page 17 Connect to the APP: Follow Me 1.Connect your drone. 2.Access the settings of your phone and activate the WiFi connection. 3.Search a WiFi network from your drone and connected to it. 4.Click the icon to access the control interface. At this point you can see the video that captures the drone in real time.
- Page 18 Waypoint flight Surround flight Since the drone has GPS function, when the drone is connected to the Since the drone has GPS function, when the drone is connected to the smart phone's wifi, when the consumer clicks the waypoint flight icon on smart phone's wifi, when the consumer clicks the surround flight icon on the APP shown on the phone, the APP will pop up a map interface, and the APP shown on the phone, the APP will pop up a map interface, and...
Need help?
Do you have a question about the Sky Watcher and is the answer not in the manual?
Questions and answers