Table of Contents
Advertisement
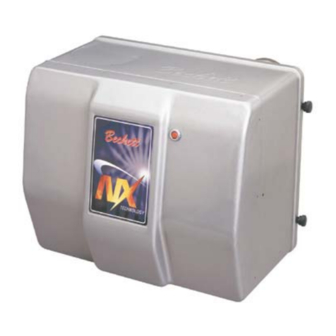
Model
!
WARNING
Potential for Fire, Smoke and Asphyxiation Hazards
Incorrect installation, adjustment, or misuse of this burner could result in death, severe
personal injury, or substantial property damage.
To the Homeowner or Equipment Owner:
•
Please read and carefully follow all instructions
provided in this manual regarding your responsi-
bilities in caring for your heating equipment.
•
Contact a professional, qualifi ed service agency
for installation, start-up or service work.
RWB 6104 BNX R02
Oil
NX
Burner
To the Professional, Qualifi ed Installer or
Service Agency:
•
Please read and carefully follow all instructions
provided in this manual before installing, starting,
or servicing this burner or heating system.
•
The Installation must be made in accordance with
all state and local codes having jurisdiction.
Page 1
Advertisement
Table of Contents

Related Manuals for Beckett NX


Summary of Contents for Beckett NX
- Page 1 Model WARNING Potential for Fire, Smoke and Asphyxiation Hazards Incorrect installation, adjustment, or misuse of this burner could result in death, severe personal injury, or substantial property damage. To the Homeowner or Equipment Owner: • Please read and carefully follow all instructions provided in this manual regarding your responsi- bilities in caring for your heating equipment.
-
Page 2: Table Of Contents
Check Retention Head Alignment and Cad Cell Sighting ... 13 Check/Adjust “Zero” Calibration ... 13 Blower Wheel Replacement ... 14 Replacement Parts Diagram Replacement Parts Diagram ... 15 Replacement Parts List ... 15 Beckett Limited Warranty Information Page 2 Table of Contents ... 4 ... 8 ... 10 ... -
Page 3: General Information
NX burner. Your NX burner will provide years of effi cient operation if it is professionally installed and maintained by a quali- fi ed service technician. If at any time the burner does not appear to be operating properly, immediately con- tact your qualifi... -
Page 4: General Information
fi le the appropriate claim. When contacting Beckett for service information — Please record the burner serial number (and have available when calling or writing). You will fi nd the serial number on the silver label located on the left rear of the burner. -
Page 5: Combustion Air Supply
Part Number 1014U), refer to the instruction sheet supplied with the adapter. This kit allows combus- tion air to be piped directly to the burner. The NX outside air adapter kit may also be used for chim- ney vent applications that require outside combus- tion air. -
Page 6: Prepare The Burner
Check head/air adjusting plate Low Firing Rate Baffl e (If specifi ed) • The NX Low Firing Rate Baffl e (LFRB), refer to Fig- ure 2, reduces the burner airfl ow and pressure. Re- fer to the appliance manufacturer’s instructions or the Beckett OEM Specifi... -
Page 7: Start The Burner And Set Combustion
Wiring Connections Diagram • Refer to the appliance manufacturer’s wiring dia- gram prior to connecting the burner wiring. All wir- ing must be in accordance with the latest revision of National Electric Code NFPA 70 and all local codes and regulations. -
Page 8: Start-Up And Initial Settings
6. RUN. The burner runs until the call for heat is sat- isfi ed. The burner is then sent to burner motor off delay, if applicable, or it is shut down and sent to standby. - Page 9 0.45 – 0.60 0.55 – 0.70 0.65 – 0.80 0.75 – 0.90 0.85 – 1.00 Table 3b. – NX Burner with Low Fire Rate Baffl e (LFRB) Installed NX Air Tube & Head Combinations Head/Air LG - (9-slot head) Setting LH - (6-slot head) –...
-
Page 10: Set Combustion With Test Instruments
Trained Service Technician’s Regular Maintenance • Set Combustion with Test Instruments Allow the burner to run for approximately 5 to 10 minutes. Set the stack or over-fi re draft to the level speci- fi ed by the appliance manufacturer. •... -
Page 11: Removing Nozzle Line For Service
fi re or asphyxiation hazards. Use only nozzles having the brand, fl ow rate (gph), spray angle and pattern specifi ed by the appliance manufactur- er or Beckett Residential Burner OEM Spec Guide, Part #6711. Follow the appliance manufacturer’s specifi cations for the required pump outlet pressure for the nozzle, since this affects the fl... -
Page 12: Nozzle Installation
Insert the nozzle into the adapter and secure fi nger tight. Finish tightening with a 5/8” open-end wrench. Use care to avoid bending the burner head support legs or electrodes. Do not over-torque the nozzle when install- ing. -
Page 13: Nozzle Line/Head/Air Tube Assembly
If the zero calibration has not been set, perform the following procedure: Install the nozzle line, with the adjustment plate assembly attached, into the burner. Electrode Extension Rods Electrode Extension Rods Install and tighten the rear door to hold the air adjustment plate assembly in position. -
Page 14: Blower Wheel Replacement
Figure 9. – Blower wheel assembly • Blower Wheel Replacement For installation or replacement of a blower wheel, insure that there is a space between the blower wheel and the motor face of 0.115”. Refer to Figure SK9670 Page 14 RWB 6104 BNX R02... -
Page 15: Replacement Parts Diagram
Cover, Burner Mounting Plate, Burner Cover Specify Thumbscrews, Cover mounting Specify * For retention head assemblies that do NOT have a sight- 51811U ing hole, contact Beckett’s customer service for appropri- 32058U ate part number. SK967101 Part No. 51771U 51942U... -
Page 16: Beckett Limited Warranty Information
Beckett Burners, Beckett-branded major components and non-Beckett-branded major components that came as original equipment on a Beckett burner or were sold as a replacement part by Beckett should be returned, freight prepaid, to Beckett’s home office. Credit will be issued to the customer unless the returned equipment is determined by Beckett to be out of warranty or damaged by user, in which case the equipment will be scrapped.
Need help?
Do you have a question about the NX and is the answer not in the manual?
Questions and answers