
Subscribe to Our Youtube Channel
Related Manuals for Murska 1400S2X2


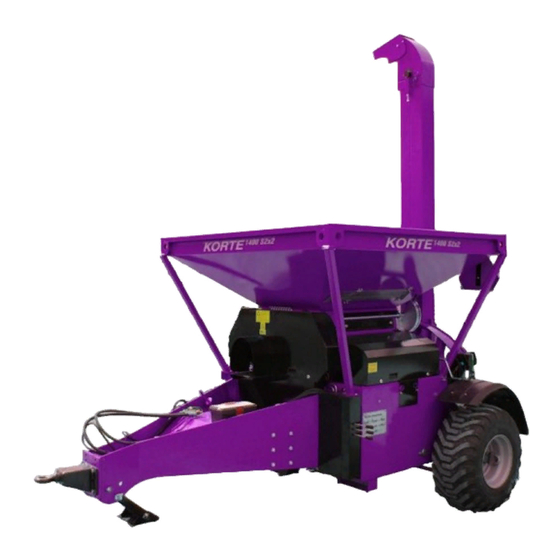
Summary of Contents for Murska 1400S2X2
- Page 1 Murska 1400S2X2 / 2000S2X2 Operator`s Manual V. 7/08 Roller Cassette Nr. Machine Nr. Date of Purchase...
-
Page 3: Table Of Contents
INDEX INDEX ................................2 EC DECLARATION OF CONFORMITY FOR MACHINERY ................3 WARRANTY ..............................3 PRODUCT IDENTIFICATION ........................... 4 CONTROLS & FEATURES..........................5 ACID PUMP PDH-10 ............................7 INTRODUCTION ............................... 8 GENERAL SAFETY ............................9 OPERATING INSTRUCTIONS ........................11 CHECK-LIST ..............................12 ROLLER CHECKING AND ADJUSTMENT .................... -
Page 4: Ec Declaration Of Conformity For Machinery
Aimo Kortteen Konepaja Oy Pohjolantie 2 FI-84100 Ylivieska Finland Herewith declares that Murska 1400 / 2000 S2x2 is in conformity with the provisions of the Machine Directive (Directive 89/392/EEC), as amended, and with national implementing legislation. Aimo Korte Managing Director... -
Page 5: Product Identification
PRODUCT IDENTIFICATION ID-number CE-marking Model Date of manufacture CE -marking... -
Page 6: Controls & Features
CONTROLS & FEATURES Feeder belt tensioner Taper lock drive pulleys (6pcs) Hydraulic Rams & Springs Feeder drive belt for Roller Tensioning Guard magnets Scraper knives, adjustments Feeding door controls... - Page 7 Elevator hat adjustment Tractor brake hose. Elevator adjusting hose. Toolbox Support leg...
-
Page 8: Acid Pump Pdh-10
ACID PUMP PDH-10 (ACCESSORY) PDH-10 pump-unit PDH-10 pump-unit Flow control Filter Acid nozzles fitting plate. The minimum 2,5 bar pressure is needed to work properly. -
Page 9: Introduction
INTRODUCTION Korte Roller Mill - model 1400 S2x2 - model 2000 S2x2 Purpose: The machine can be used for crimping high moisture grains and for rolling dry grains. Made in Finland, EU. Technical Data 1400 S2x2 2000 S2x2 Crimping capacity, max. 30 tonnes/h 40 tonnes/h Power demand... -
Page 10: General Safety
GENERAL SAFETY 1. While operating, the machine must be on 5. Do not stand on the PTO shaft or a solid base. linkage or between the tractor and the machine. 2. The machine should not be moved when 6. Nobody should enter the tractor cabin the grain hopper is full or during filling. - Page 11 Read the operator`s manual carefully Do not operate the machine with before using the machine. Follow the roller clearence less than 0.3 mm. A operation- and safety-instructions smaller clearence makes the rollers during the crimping. wear sooner and may cause damage to the rollers.
-
Page 12: Operating Instructions
OPERATING INSTRUCTIONS Recommended Procedures: Take notice, that the Crimper machine has two pairs of rollers, a pair on each side. All adjusting, maintenance and operating procedures apply for both pairs individually. 1. Check-List Carry out first before proceeding to any other routines, also once a day when the machine is in daily use, and each time the machine is started after a period of being idle. -
Page 13: Check-List
CHECK-LIST Carry out first before proceeding to any other routines, also once a day when the machine is in daily use, and each time the machine is started after a period of being idle. 1. Check all nuts, bolts and screws for correct tightness. Replace or tighten if required. - Page 14 3. Check the Feeder Belt tension. Adjust or replace if required. 4. Check Auger / Elevator Belt tension. Adjust or replace if required. 5. Check Force Feeder. Clean and straighten if necessary. 6. Check and clean the protective magnets. 7. Observe the functioning of the hydraulic components. 8.
-
Page 15: Roller Checking And Adjustment
ROLLER CHECKING AND ADJUSTMENT Re-adjust the rollers always at the beginning of crimping season. During the season check and correct the roller adjustment at daily basis. Carry out this adjusting procedure for both pairs of rollers, one side at a time Roller checking 1. - Page 16 3. Check the clearance between rollers with feeler gauge (both ends of roller) If the clearance between rollers is correct and rollers are parallel, adjustment is not needed.
-
Page 17: Roller Adjustment
ROLLER ADJUSTMENT 1. Release Locking Nuts and release all pressure on Spacer Bolts, from both end of adjustable rollers. 2. Adjust Roller tension Spring to a reasonable tension by pumping the Hydraulic Hand Pump (half the maximum pressure, see pressure gauge). Note: when the pressure / tension of hydraulic ram is fully released, the transmission gears at the rollers may not be in touch. - Page 18 Roller adjusting crank Hydraulic cylinder Spacer bolt Feeder door control Locking nut...
-
Page 19: Roller Adjustment During Crimping
ROLLER ADJUSTMENT DURING CRIMPING Rollers adjust during crimping from rollers adjusting crank. If the grain is too rough adjust rollers closer to each other by roller adjusting crank ( turn counter clockwise) and if the grain is too crushed adjust rollers farther from each other by adjusting crank (turn clockwise) Sampling shovel... -
Page 20: Starting Up
STARTING UP 1. Ensure that the Check-list has been carried out. 2. Ensure that the Roller Adjustment has been carried out. 3. Ensure that the Machine is horizontal plane. The towing bar must be adjusted individually for various tractors to keep the machine in horizontal position. - Page 21 13. The degree of crimping is also increased by reducing the output (Feeder Hatch). 14. Start the Liquid Applicator when a sample is produced where all grain is crimped and no dough balls are produced (= rollers are in optimal adjustment) 15.
-
Page 22: Closing Down
CLOSING DOWN 1. Close the Liquid applicator and the Feeder Hatches. 2. Wind the Adjusting Cranks clockwise 3-4 turns to increase the space between (= open) the rollers. Let the machine run until the hopper is empty and the machine is clean of grain. -
Page 23: Fault Finding
FAULT FINDING 1. Grains are too crushed, i.e. have a doughy appearance: Rollers are adjusted too close to each other. Machine speed is too high. Add the distance between the rollers and reduce the speed so that the grain slides through the rollers and does not stick to the roller surface. - Page 24 5. If the tractor stalls or the PTO slips: Close applicator and water. Switch off the power and disconnect PTO. Close grain feeder hatches. Release pressure on hydraulic rams. Remove auger well cover and elevator belt cover to clear blockage. ...
-
Page 25: Daily Maintenance
DAILY MAINTENANCE Switch off all power to the machine before any maintenance. Carry out these checks daily during the season. Check the Belts The Auger Belts has pulley tensioner, the Feeder Belts are spring loaded. Replace worn out belts. Check the Elevator Chain When the Elevator is in vertical position, the Chain can be checked through the Auger Access Hatch. -
Page 26: End-Of-Season Maintenance
END-OF-SEASON MAINTENANCE Switch off all power to the machine before any service. 1. Clean the crimper thoroughly with a power hose. Do not aim the jet of water straight on the bearings. 2. Clean and oil the elevator chain, replace worn-out paddles. 3. -
Page 27: Hydraulic Elevator Angle Adjustment
HYDRAULIC ELEVATOR ANGLE ADJUSTMENT The hydraulic movement speed must be adjusted according to the tractor hydraulic pump pressure and oil flow: The hydraulic pressure valve has two separate adjustments, for both movement directions. First close the adjustment screws, then carefully open the screws and test the movements from the valve. Too fast movements stress the elevator and may damage the elevator. -
Page 28: Crimping Grade Checking
CRIMPING GRADE CHECKING After adjusting the rollers and checking the output: check the crimped grain regulary during crimping; crimping grade may vary according the moisture level of grain, size of grain, temperature of rollers, etc. There is a shovel with the crimper for taking samples of crimped grain from the bottom sump during crimping. -
Page 29: Pto-Shafts
PTO-SHAFTS There slip-clutch must be installed at the crimpers end. Korte-model Power Torsion Splined-shaft Clutch demand (540 r/min) (at end of roller shaft) 1 ¾” 6-splined K 1400 S2x2 75 kW 1300 Nm Friction lamell clutch 1 ¾” 6-splined K 2000 S2x2 95 kW 1800 Nm Friction lamell clutch... -
Page 30: Pulley Assembly And Removal
PULLEY ASSEMBLY AND REMOVAL Pulleys fastened to shaft with a separate taper hub (feeder-shaft pulleys, auger belt pulleys, roller shaft pulleys) Assembly 1. Clean protective grease from taper hub and pulley nave. 2. Place taper hub inside the pulley nave and align the holes. 3. -
Page 31: Tightening Torque Of Bolts
TIGHTENING TORQUE OF BOLTS ATTENTION !! For fixing Cardan Shaft to Mill, please, Tightening torque of bolts [Nm] only 49 Nm strenght for Bolts M10 For Bolts 4545 of Super Rollers ->”HD” (for fixing Taper Hub) Strenght 10.9 12.9 use tightening torque 400 Nm 1050 1220... -
Page 32: Brakes, Wheels
BRAKES, WHEELS - hydraulic drum brakes (for transporting the crimper with tractor in traffic) - brakes are connected to tractor’s hydraulic brake circuit. - break in the brakes with low braking pressure; this will balance the brakes - check also the tyre-pressure regularly (normal 1,5-2 bar) -
Page 33: Extra Hopper
EXTRA HOPPER Volume - 5 m³ Loading width: - with wings open 3,0 m - without wings 2,5 m... -
Page 34: Notes
NOTES ____________________________________________________________________ ____________________________________________________________________ ____________________________________________________________________ ____________________________________________________________________ ____________________________________________________________________ ____________________________________________________________________ ____________________________________________________________________ ____________________________________________________________________ ____________________________________________________________________ ____________________________________________________________________ ____________________________________________________________________ ____________________________________________________________________ ____________________________________________________________________ ____________________________________________________________________ ____________________________________________________________________ ____________________________________________________________________ ____________________________________________________________________ ____________________________________________________________________ ____________________________________________________________________ ____________________________________________________________________ ____________________________________________________________________ ____________________________________________________________________ ____________________________________________________________________ ____________________________________________________________________ ____________________________________________________________________ ____________________________________________________________________ ____________________________________________________________________ ____________________________________________________________________ ____________________________________________________________________ ____________________________________________________________________ ____________________________________________________________________ ____________________________________________________________________ ____________________________________________________________________ ____________________________________________________________________ ____________________________________________________________________ ____________________________________________________________________ ____________________________________________________________________ ____________________________________________________________________... -
Page 35: Spare Part Catalogue
SPARE PART CATALOGUE... - Page 36 Elevator cylinder bracket AKK-1603 Ref. Part Description Pcs. Hex screw M8x16 Washer M8 AKK-1331 Cylinder shaft AKK-1921 Elevator support plate Lock screw M10x50 AKK-1803 Cylinder bracket front part AKK-1804 Cylinder bracket back part Washer M10 Hex nut Nyloc nut M10 Washer M10 Hex screw M10x25 708385...
- Page 37 Rollers gearwheel greasing Ref. Part Description Pcs. AKK-1797 Greasing brush stand Adjustable angle nipple 609452 Reducer 1/4"-1/8" Washer M6 Hex screw M6x20 Greasing brush fastener 709027 Greasing brush A410 Nyloc nut M6...
- Page 38 Belt quard plate, top AKK-1241 Ref. Part Description Pcs. AKK-1239 Fastening plate Belt quard plate, top 7011729 Guard hinge 218-9102 Washer M6 Nyloc nut M6 7011715 Handle 213-0703,03 704891 Locking housing 211301 704893 Locking square 221311 7011373 Bolt 232117 Locking washer M5 Hex screw M5x20...
- Page 39 Description Pcs. AKK-1738 Cover plate Washer M8 Hex screw M8x16 AKK-1734 Stopper AKK-1408 Hinge pin Hex screw M5x20 Locking washer M5 7011373 Bolt 232117 AKK-1469 Checking window 1400S2x2 AKK-1749 Checking window 2000S2x2 704891 Locking housing 211301 704893 Locking square 221311...
- Page 40 Pcs. AKK-1125 Square bar 6111383 Sealing 90x140x13 201684 Bearing 22218 W33 6111785 Sealing 95x160x13 Roller 1400S2x2 (Adj.) 603908 Nut M16 Hex screw M16x80 AKK-1344 Adj. roller bearing housing back, right AKK-1800 Adj. roller bearing housing back, left Washer M 12...
- Page 41 Roller guard Ref. Part Description Pcs. AKK-1232 Adj. Roller quard, left 1400S2x2 AKK-1772 Adj. Roller quard, left 2000S2x2 AKK-1264 Adj. Roller quard, right. 1400S2x2 AKK-1774 Adj. Roller quard, right 2000S2x2 7011715 Handle 213-0703,03 704893 Locking square 221311 7011769 Locking square extension 271103...
- Page 42 AKK-1814 Bracket, right Allen screw M6x20 AKK-1531 Controller AKK-1334 Magnets and stone trap frame, left 1400S2x2 AKK-1742 Magnets and stone trap frame, left 2000S2x2 AKK-1335 Magnets and stone trap frame, right 1400S2x2 AKK-1743 Magnets and stone trap frame, right 2000S2x2...
- Page 43 Fixed roller Ref. Part Description Pcs. 6111383 Sealing 90x140x13 MP6114 Bearing housing (fixed roller), right 101684 Bearing 22218 W33 206111785 Sealing 95x160x13 Fixed roller MP11544 Bearing housing (fixed roller), left Spring pin 10x24 Washer M12 Hex screw M12x50 10,9...
- Page 44 Splined shaft fastening (Elevator version) Ref. Part Description Pcs. AKK-1974 Splined shaft 1 ¾ Hex screw M10x30 Washer M10 AKK-1901 Three-furrow spline pulley 1011563 Spline steel 20x12 11402 Taper hub 3030-70 AKK-1236 Fastening taper hub Washer M12 Hex screw M12x50...
- Page 45 Part Description Pcs. AKK-1203 Scraper knife blade 1400S2x2 AKK-1770 Scraper knife blade 2000S2x2 AKK-1298 Scraper knife frame, right 1400S2x2 AKK-1766 Scraper knife frame, right 2000S2x2 AKK-1297 Scraper knife frame, left 1400S2x2 AKK-1767 Scraper knife frame, left 1400S2x2 Washer M8 Hex screw M8x16...
- Page 46 Description Pcs. AKK-1241 Belt quard plate, top 11771 Spring 201,5-150 300N AKK-1710 Bracket AKK-1232 Adj. Roller quard, left 1400S2x2 AKK-1772 Adj. Roller quard, left 2000S2x2 AKK-1260 Belt quard plate, bottom AKK-1631 Bottom fastener Toolbox AKK-1264 Adj. Roller quard, right 1400S2x2 AKK-1774 Adj.
- Page 47 Rear axle with brakes Ref. Part Description Pcs. AKK-1574 Bottom arm, left AKK-1807 Brake tube into frame Ø6mm 1400S2x2 Brake tube into frame Ø6mm 1400S2x2 Straight connector EL-6 MP11831 Brake hose l=3400 with 1/4" brake connector Brake connector AKK-1808 Brake tube, left...
- Page 48 509843 Hose composition ¼” l=2590mm 509844 509720 Hydraulic cylinder Ø60/63x89mm MP7478 Leaf spring 90x20x465mm MP11829 Hose composition 3/8" AKK-1726 Hydraulic tube Ø10mm 1400S2x2 Hydraulic tube Ø10mm 2000S2x2 MP11826 Hose composition 1/4" 5011853 Valve 11762 Hydraulic cylinder 50/30 400 11914 Hose composition 1/4" 300mm 11916 Hose composition 1/4"...
- Page 49 Magnet Ø80 12 or 16 Washer M8 Allen screw M8x16 AKK-1771 Holder AKK-1397 Closing trap 1400S2x2 AKK-1759 Closing trap 2000S2x2 AKK-1376 Corner tube, right 1400S2x2 AKK-1763 Corner tube, right 2000S2x2 AKK-1375 Corner tube, left 1400S2x2 AKK-1762 Corner tube, left 2000S2x2...
- Page 50 Pull shaft Ref. Part Description Pcs. AKK-1541 Pull shaft Nyloc nut M20 Washer M20 Hex screw M20x60 Nyloc nut M16 Washer M16 AKK-2412 Support leg Ring pin AKK-2335 Hinge plate into support leg Washer M8 Hex screw M8x20 Hex screw M16x50 AKK-1525 Hitch AKK-2038 Universal shaft bearing MP5950...
- Page 51 Fender stand and lights Ref. Part Description Pcs. 11228 Tail light set AKK-1324 Fender stand, left Hex screw M12x40 Nut M12 Washer M6 Nyloc nut M6 Washer M8 Hex screw M8x16 11228 Tail light set AKK-1802 Fender stand, right...
- Page 52 Fender Ref. Part Description Pcs. 8690 Fender curve, left 8691 Fender curve, right Hex screw M8x20 Washer M8 Nyloc nut M8 AKK-1816 Fender frame, left AKK-1817 Fender frame, right...
- Page 53 Elevator and bottom auger Ref. Part Description Pcs. MP4475 Elevator tube AKK-1603 Cylinder bracket AKK-1611 Elevator curve MP7689 Bottom auger belt clamp Screw M8x20 251676 Taper hub 2012 / 35 251661 Pulley SPB 140-3 / 2012 209242 Bearing UCF 210 Hex screw M14x40 MP9558 Bottom Auger Bearing Sealing...
- Page 54 Parts of packing tunnel New Bottom Auger S2x2CB...
- Page 56 Aimo Kortteen Konepaja Oy Pohjolantie 2 84100 YLIVIESKA FINLAND Tel. +358 8 411 0500 Fax.+358 8 425 422 www.murska.fi...
Need help?
Do you have a question about the 1400S2X2 and is the answer not in the manual?
Questions and answers