Table of Contents
Advertisement
Advertisement
Table of Contents

Subscribe to Our Youtube Channel
Related Manuals for Essence Care@Home Pro


Summary of Contents for Essence Care@Home Pro
- Page 1 Care@Home ™ System Installation Guide ESUG05049 Version 2.2 December 2017...
-
Page 2: Table Of Contents
Table of Contents Table of Contents Overview ..............................4 1.1. Care Web Application ........................ 4 1.2. The Care@Home ™ CMS System....................5 1.3. Reference Materials ........................6 1.4. System Basic Configuration ......................7 1.5. Sensor Functionality ........................8 1.6. Peripherals ..........................8 1.6.1 Kit Pre-Configured Activity Peripherals ................ - Page 3 Table of Contents 3.8.2 Close the CP ........................ 25 Best Practices ............................26 4.1. Positioning per Location ......................26 4.2. Special Cases ..........................27 4.2.1 Living Room vs Bedroom ..................... 27 4.2.2 Combined Bathroom ....................27 4.2.3 Pets on the Premises ....................28 Care@Home™...
-
Page 4: Overview
Overview 1. Overview Based on the Personal Emergency Response System (Social Alarm), and enhanced by the Care@Home ™ analytics functionality, the Care@Home ™ product suite focuses on providing an all- encompassing monitoring environment that captures the daily routine of the resident. The Care@Home system is designed to alert healthcare service providers or family members of any ™... -
Page 5: The Care@Home ™ Cms System
Overview Figure 1: Care Web Application For information about the administrator user and the Care web application, refer to the ESUG05051 Care@Home Administrator User Guide. ™ 1.2. The Care@Home ™ CMS System The Care@Home CMS software application allows the system administrator to configure and define ™... -
Page 6: Reference Materials
1.3. Reference Materials This guide references detailed information found in the Care@Home ™ product suite user guides provided by Essence. For an index of additional materials, refer to 5 Care@Home™ Documentation on page 29. You can access the materials at: http://www.essence-grp.com/resources/smart-care-download.html... -
Page 7: System Basic Configuration
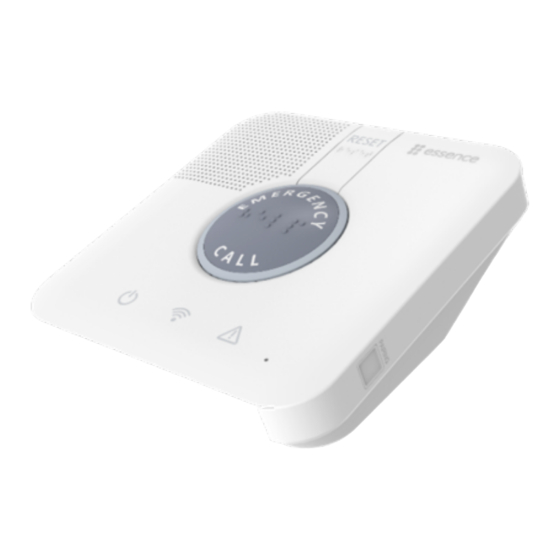
Overview 1.4. System Basic Configuration Figure 3: The Care@Home System ™ The Care@Home ™ system is a combination of motion detectors and specialized sensors, calibrated to: Recognize activity Determine the nature of the activity Distinguish between an acceptable event and a threat to the security and safety of the resident Care@Home™... -
Page 8: Sensor Functionality
Overview Acceptable events are used to define the profile of the resident’s habits and daily routine. Threat events include safety and security related incidents, in addition to activities that are exceptions to the resident’s profile. Threat events are reported to the monitoring station and the caregiver for further investigation and resolution. -
Page 9: Kit Pre-Configured Activity Peripherals
Overview Activity reported by a peripheral device installed in or on one of these locations is identified by the parallel activity type. For example, an activity recognized in the living room is categorized as living room activity. 1.6.1 Kit Pre-Configured Activity Peripherals The standard kit for the Care@Home system is based on the floor plan, and includes the following ™... -
Page 10: Optional Safety Peripherals
Overview 1.6.3 Optional Safety Peripherals To further ensure resident safety, you can consider adding safety peripherals to your Care@Home ™ system configuration. The following are the available safety peripherals: Emergency Pendant Advanced (EPA): An emergency call peripheral with active fall detection. For information about the EPA, refer to the ESUGSC032 Care@Home ™... -
Page 11: Pre-Installation
(or the family of the resident) to find out the information you need. 2.1. Residence Floor Plan Survey Essence recommends that, during the interview, the resident (or the family of the resident) fills-out a short questionnaire about the floor plan of the premises. The questionnaire should cover specific issues such as: ... -
Page 12: Prerequisites
Information about the CP allocated to the resident: Resident Account Number (mandatory) Essence Panel Account Number (mandatory) Essence Panel Serial Number (mandatory) SIM-card Number for CP Cell number (optional) For instructions on adding a new resident, refer to Adding a User in the ESUG05051 Care@Home ™... -
Page 13: Tools And Equipment
Pre-Installation Refer to the ESUG05051 Care@Home ™ Administrator User Guide. For instructions about: Adding a new caregiver, refer to Adding a User Assigning a resident to a caregiver, refer to Resident/Caregiver Assignment 2.3.3 Tools and Equipment The following is a list of the tools and equipment needed to perform the installation: ... -
Page 14: Installation
Installation 3. Installation Table 1 lists, in sequence, the steps to follow to install the Care@Home ™ system, including references to the sections for each step of the installation process. Table 1: Installation Process Step Description Section Page Plan the installation Install the CP Activate the installation mode Map peripherals to their locations... -
Page 15: Ensuring Sufficient Installation Equipment
Installation 1. Tour the premises with the questionnaire and verify that the information gathered in the questionnaire is accurate. 2. Record any discrepancies in the questionnaire information, especially if the discrepancy requires additional installation tasks. 3. Review the discrepancies and adjust the installation plan accordingly. 4. -
Page 16: Installing The Cp
For position considerations for a specific peripheral, refer to the user guide for that specific peripheral. For an index of the user guides, refer to 5 Care@Home™ Documentation on page 29. You can access the guides at: http://www.essence-grp.com/resources/smart-care-download.html 3.2. Installing the CP To install the CP, you need the following: ... -
Page 17: Activate The Installation Mode
Installation Check the cellular reception of a mobile device using the same cellular service provider. Ensure the reception level is at least two bars. Check the GSM coverage in the CMS Panel Info window or the CMS Home screen after connecting the CP to the CMS application. -
Page 18: Mapping Peripherals To Their Locations
The peripherals in the kit are pre-configured to communicate with the CP included in the kit. Each peripheral is assigned a location on the premises where the peripheral must be installed. Essence provides you with a few ways to ensure that you install the peripherals in their assigned locations. -
Page 19: Peripheral Location Labels
CP. 3.4.2 Peripheral Location Labels To further ensure that the peripherals are installed in their assigned locations, Essence provides you with location labels, as shown in Figure 7. Figure 7: Peripheral Location Label Apply the location labels to the peripherals according to their serial numbers in the list provided on the kit label, on the inside of the kit cover. -
Page 20: Installation Mode Guidance
Installation Figure 8: Location Label Adhered to a Peripheral NOTE: For PIR and IPD, do not apply location labels on the lens. For additional peripherals, apply the appropriate label when the installation mode identifies the activity type of the peripheral. 3.4.3 Installation Mode Guidance Pre-configuration of the CP and its peripherals allows the CP to recognize each of the peripherals when they are activated. -
Page 21: Installing Peripherals
™ peripherals, pre-configured to communicate with the installed CP. Essence recommends you install the peripherals in the following sequence: 1. Install a magnetic sensor (MGLS) on the refrigerator door. 2. Install an MGLS on the front door. 3. Install a motion detector (PIR) in the bedroom. -
Page 22: Checking Active Service Settings
Installation a. Tap Security App > Permissions, and toggle Autostart to on for Care@Home™ Pro Active b. Tap Settings > Battery & Performance > Manage apps battery usage > Choose apps > Care@Home™ Pro Active, and set to no restrictions 4. -
Page 23: Outgoing Call Settings
Installation 3.6.2 Outgoing Call Settings You can change the outgoing call settings, if required. If Enable Outgoing Call is On, a telephone call is triggered when there is an emergency alarm. If Call Default Emergency Number is: On, the emergency alarm call goes to the telephone number specified by the service ... -
Page 24: Testing Peripheral Installation
Installation 3.7. Testing Peripheral Installation 1. Perform the following test on the premises: c. Open and close the main door. Ensure that the MGLS on the door sends a detection event to the CP. d. Open and close the refrigerator door. Ensure that the MGLS on the door sends a detection event to the CP. -
Page 25: Ending Installation
Installation b. Check the list of troubleshooting solutions. Refer to 6 Troubleshooting on page 30. c. Contact professional services or technical support for assistance. 3.8. Ending Installation The installation process is complete when you: Test the Care@Home ™ Pro system. Refer to 3.6 Testing Peripheral Installation on page 21. ... -
Page 26: Best Practices
PIRs and IPDs should be installed with the spherical lens facing downwards. 4.1. Positioning per Location For the best results, follow Essence guidelines when choosing a position to install each of the peripheral devices in their assigned locations: ... -
Page 27: Special Cases
Best Practices Door MGLS (for either the refrigerator or front doors): Position the magnet: o Next to the detector so that the line marks on both the magnet and the detector are aligned o No further than 3 cm (1 in.) from the detector 4.2. -
Page 28: Pets On The Premises
Best Practices Detection overlap can cause possible fall events not to be reported. There is a timer in the PIR that is triggered when the PIR senses movement. The timer monitors the time until the next movement. If movement is not detected within a pre-determined time frame, the Care@Home ™... -
Page 29: Care@Home™ Documentation
Care@Home™ Documentation 5. Care@Home™ Documentation The following is a list of the documentation available to help you install, implement, operate, and maintain the Care@Home™ system. Control Panel User Guides ESUGSC003 Care@Home CP User Guide ™ ESUG05075 Care@Home CP Quick User Guide ™... -
Page 30: Troubleshooting
Before relabeling a peripheral, verify that the other kit peripherals are recognized by the pre- configured CP and assigned to locations on the premises. If not, contact Essence professional services. Care@Home™ Pro System Installation Guide... -
Page 31: Appendix A Floor Plan Questionnaire
Floor Plan Questionnaire Floor Plan Questionnaire Appendix A The following is an example of the questions to include in a questionnaire for the resident or the resident’s family. It is important to complete the questionnaire prior to determining the configuration of the Care@Home ™... -
Page 32: Appendix B Batteries
Table 3: Batteries Required for the Care@Home System ™ Quantity Voltage Size Chemistry Recommended Product per Device Manufacturer Control Panel 3.7 V Lithium Polymer Essence only rechargeable Emergency Pendant CR2450 Lithium Energizer, Duracell, GP Advanced Emergency Pendant CR2450 Lithium Energizer, Duracell, GP Plus Motion Detector CR123A... -
Page 33: Appendix C Screws And Wall Anchors
Table 4 is a summary of Essence recommendations regarding the option to install the devices using screws and wall anchors. Table 4: Screws and Wall Anchors Needed for the Care@Home System ™... - Page 34 Nothing contained herein shall be construed as conferring by implication, estoppels, or otherwise any license or right, either express or implied, under any patent or trademark of Essence or any third party. No use of any trademark may be made without the prior written authorization of Essence.
Need help?
Do you have a question about the Care@Home Pro and is the answer not in the manual?
Questions and answers