Advertisement
Quick Links
Advertisement

Related Manuals for Beeverycreative B2X300


Summary of Contents for Beeverycreative B2X300
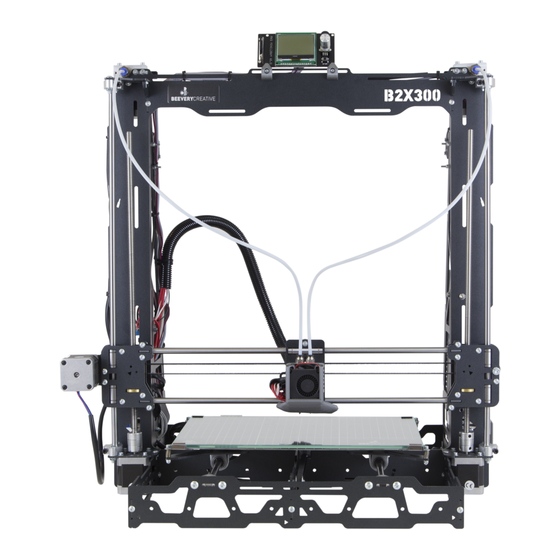
- Page 1 B2X300 DIY 3D PRINTER KIT...
- Page 2 VERSIONS ....................................2 FIRST CHECKS BEFORE TURNING B2X300 ON .........................3 Z .............................3 ARALLELISM BETWEEN LINEAR GUIDES IN ..................4 ARALLELISM BETWEEN LINEAR GUIDES IN AND TRAPEZOIDAL THREADED RODS ...............................5 EATED ORIZONTALITY .....................................6 UBRICATION B2X300 FIRST USE ..................................7 ..................................7 IRMWARE PDATE ..............................8 NITIAL OFFSET CALIBRATION ...................................11...
- Page 3 VERSION DATE DESCRIPTION PART NUMBERS V1.20181126 November 2018 Launch Version 1212300001 to --------...
- Page 4 Procedure watch video Measure the distance between both positions with a measuring tape, at the top and at the bottom. Adjust until you reach the same distance on both.
- Page 5 Procedure watch video Using a measuring tape, check the distance between the nuts and the left linear guide in both positions, at the top and at the bottom. Adjust until they are at the same distance. Repeat the procedure for the left side.
- Page 6 Procedure watch video Make sure that the screw length after the nut is the same on both four corners. You can even use a measuring device to check the distance between the PCB heated bed and the structure that holds the table to the bearings and make sure it is at the same distance on all four corners.
- Page 7 Procedure watch video Add a small amount of lubricant: On X Axis bearings. On Y Axis bearings. On the top of the copper nut in each one of the Z threaded rod.
- Page 8 B2X300_Firmware Updater Download the ’s B2X300 updater at folder B2X300 repository. Install this software. Connect the 3D printer to your computer through the USB cable. Turn on your 3D printer. Start the B2X300 updater software and follow the instructions given.
- Page 9 It is necessary to confirm that both nozzles are at the same height. This ensures the inactive nozzle won’t collide with the parts already printed. This procedure is essential both for the dual extrusion but also for the single nozzle extrusion. Procedure Lower the X axis, rotating both the Z axis screws at the same time, until the nozzles are close to the hotbed, then center the carriage.
- Page 10 Adjust both until the distance is the same. Untighten the 4 screws that hold the extruder heatsink.
- Page 11 Rotate the extruder heatsink until both nozzles have the same distance from the hotbed. Maintaining that position, re-tighten the 4 screws.
- Page 12 To ensure the proper functionality of the 3D printer, after you turn on your 3D printer, a Self-test Wizard will be executed. This procedure will validate and calibrate the main parameters. This procedure is not optional on the first use but it can be repeated if necessary, accessible at LCD Machine Settings/ Self-test Wizard menu: Just follow the instructions shown on the LCD display.
- Page 13 It is necessary to confirm that both nozzle are at the same height. This ensures the inactive nozzle won’t collide with the parts already printed. This procedure is essential both for the dual extrusion but also for the single nozzle extrusion. Procedure Turn on your 3D printer.
- Page 14 Rotate the sheet of paper and pay attention to which nozzle is the paper rotating under. Adjust the threated rod, rotate clockwise to move up the nozzle that is holding the sheet of paper, until you feel the paper is looser. Adjust the threated rod opposite from the one you already adjusted on step 9, rotating it counterclockwise to lower the nozzle.
-
Page 15: Add Printer
Next, you will learn how to set up your computer for operating the 3D printer. The recommended slicer software for operating this 3D printer is Cura 3, for which there is a project file (.3mf) for. This file is already set up for B2X300 and includes an optimized profile for PLA for this Printing_Profiles B2X300 3D printer. - Page 16 Finish. On the next screen, click the Procedure: Open Cura. Open the file .3mf in the SD card or download it in folder Printing_Profiles\B2X300_Cura_Projects B2X300 repository.
- Page 17 Open as project Select option. Open Select for the B2X300 profile to be imported.
- Page 18 Print Setup Custom. Change option...
- Page 19 Procedure Open the STL file in Cura, in alternative you can drag the file to the printer’s table in Cura. By default, with the 3D printer profile, an STL file of a bee will appear when the profile is imported. You can print it as a first test.
- Page 20 Insert the SD card on your computer. Press Save to Removable Drive on the lower right corner of Cura, it will save the Gcode onto your SD card. You will also find an estimated print time as well as the material consumption. Save to Removable Drive Save to file Alternatively, you can press the arrow next to the...
- Page 21 Procedure Make sure the 3D printer is turned on. Maintenance> Change filament. Press the LCD button and select: Select the correct options according to the extruder and filament you wish to use. Usually Extruder 1 is used for single nozzle extrusion and Extruder 2 is only used for dual extrusion or if you selected...
- Page 22 Extrude more extrusion is over and then select the option. Exit Back Select the option and press until you are back to the initial screen. Procedure Insert the SD card on your B2X300 LCD screen.
-
Page 23: Print Option
Print Press the LCD button and select the option. Select the Gcode you want to print from the list that will show up on the screen. Wait until the 3D printer heats up and stabilizes the temperature of the heated bed. Level Bed Wait until the 3D printer executes the procedure, where it will measure the heated... - Page 24 To be able to use both extruders on your B2X300, you will have to calibrate the distance between both nozzles, as well as make sure the height on both nozzles is the same. Please check chapter 3.4 on this manual to learn how to calibrate nozzle height.
- Page 25 Print On the main screen, press the LCD button and select the Select the Gcode offset_x, also available here. Wait until the printing is done. Look at the line and find the point where the lines of both extruders are aligned on the X axis.
- Page 26 From the centre of the object where there is the bigger line, count how many lines until you find the best result. From the centre to the right, the value is positive and from the centre to the left, the value is negative. Multiply the value obtained by 0.05mm, that will be your offset on the X axis, you should save this value.
- Page 27 Multiply the value obtained by 0.05mm, that will be your offset on the Y axis. Example: -8 x 0.05 = -0.4 Open Cura. Make sure you have already imported the file with the B2X300 settings as mentioned on the chapter 4.1.
- Page 28 Make sure you have selected the proper printer. Settings > Printer > Manage printer. Go to Machine Settings Select option...
- Page 29 Extruder 2 Choose and insert the values previously measured on the X Offset and the Y Offset.
- Page 30 Execute the solutions sequentially until the problem is solved, if you can’t solve the problem you can contact us through: customer_service@beeverycreative.com or through our forum. Symptom Solution a. Make sure the glass is clean and prepared for printing ( adhesive anti warping spray for 3D Printers(or similar), First layer won’t adhere to the...
- Page 31 Symptom Solution The extruder continuously hits Machine settings > Motion > Trinamic settings > Sensorless homing Auto a. Select the options and select the the right side of the structure adjus ” option. / the heated bed continuously b. Run the Self-test wizard by accessing the menu and selecting Machine settings and check to see if any error hits the front of the structure.
- Page 32 Menu Action Info Screen Initial screen where you can check the current status of your printer (temperatures, axes positions, fan speed, feed rate and print progress). Back Go back to previous screen. Restore print (Only visible if there is a print to be restored) Restore print after a power failure.
- Page 33 PLA 210 ºC Pre-heat the selected extruder to 210ºC (works with most PLA filaments). PETG 230 ºC Pre-heat the selected extruder to 230ºC (works with most PETG filaments). ABS 240 ºC Pre-heat the selected extruder to 240ºC (works with most ABS filaments). PC 260 ºC Pre-heat the selected extruder to 260ºC (works with most PC filaments).
- Page 34 Stealth mode Select stealth operation mode (less torque, lower printing speeds, even quieter operation). Temperature Set and configure temperature parameters. Back Go back to previous screen. Temperature E1 Adjust Extruder 1 temperature. Temperature E2 Adjust Extruder 2 temperature. Temperature bed Adjust Heated Bed temperature.
- Page 35 Y (mA) Electronically adjust Y-axis current. Z (mA) Electronically adjust Z-axis current. E (mA) Electronically adjust extruder motors current. Sensorless homing Adjust and calibrate the parameters for axes “zero”-position detection. Back Go back to previous screen. Auto adjust Automatically calibrate the axes “zero”-position detection parameters. This process might take up to 5 minutes and some noise and impacts are expected.
- Page 36 A-max X Adjust the maximum acceleration factor for X-axis movements. A-max Y Adjust the maximum acceleration factor for Y-axis movements. A-max Z Adjust the maximum acceleration factor for Z-axis movements. A-max E Adjust the maximum acceleration factor for the current extruder movements. A-max E1 Adjust the maximum acceleration factor for Extruder 1 movements.
- Page 37 Confirm to save and store the factory default settings into the EEPROM. About Check the current installed firmware version and some diagnostic flags. When contacting the customer service (customer_service@beeverycreative.com) you should always communicate the information on this screen to help the diagnostic process.
- Page 38 CODE SITUATION ERROR PROPOSED SOLUTION 1. Turn the printer off. Extruder 1 2. Check if the temperature sensor on Extruder 1 is correctly connected to the control board. ST11 Setup Wizard temperature is less 3. Make sure it is properly inserted and in the right socket. then -14ºC 4.
- Page 39 CODE SITUATION ERROR PROPOSED SOLUTION 3. Check if the heating element is correctly seated on the heating block for Extruder 2 (on the right). Check if the temperature sensor for Extruder 2 is correctly connected to the control board and inserted into the heating block for the Extruder 2. 4.
-
Page 40: Proposed Solution
CODE SITUATION PROCEDURE PROPOSED SOLUTION 1. Grab a paper sheet (standard 70-100g/m²) and wait for the printer to stop moving. Place the paper sheet between the 2 nozzles and the printing surface. 2. Turn the knob on the LCD screen to adjust the offset between the nozzle and the printing surface. - Page 41 © 2018 BEEVERYCREATIVE www.beeverycreative.com All rights reserved.
Need help?
Do you have a question about the B2X300 and is the answer not in the manual?
Questions and answers