Table of Contents
Advertisement
Advertisement
Table of Contents

Related Manuals for Beeverycreative Hello BEE Prusa


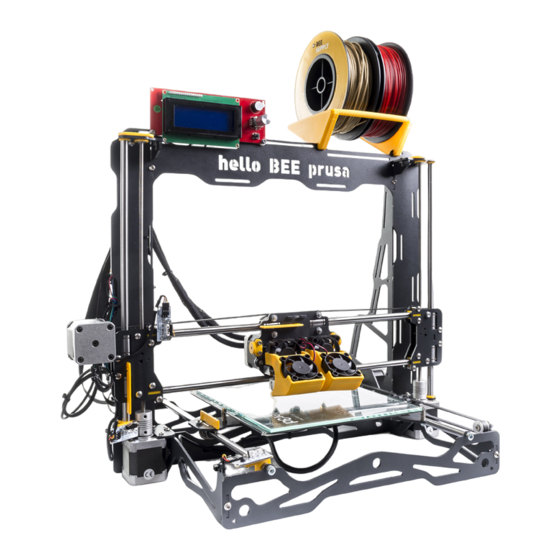
Summary of Contents for Beeverycreative Hello BEE Prusa
- Page 1 ASSEMBLY MANUAL...
- Page 3 V3.310815...
- Page 4 NEEDED TOOLS Before you start to build your helloBEEprusa, check if you have the necessary tools to do it. You will need the following: SOFT FACE HAMMER SET OF HEX KEYS FILE You will need a set of hex key for the assembly. Sometimes you might need to use some Some of the structure’s metal components There is a 1.5mm hex key supplied with the kit.
- Page 5 WHAT COMES WITH THE PACKAGE To make recognizing each type of component easier, we’ve assigned a shape and colour to each type. Structure parts Mechanics Printed parts Electronics This way, we tried to divide all the components in boxes, just to make it easy for you. BOX 3 BOX 3 All the motors needed...
- Page 6 HOW TO READ THIS MANUAL We have divided the manual into 6 chapters, from A to F, with each chapter describing a part of the assembly process. Within each one, we’ve numbered every step. This way, we will have the following chapters: A –...
-
Page 7: Technical Specifications
TECHNICAL SPECIFICATIONS LAYER RESOLUTION 20 - 300 microns (user defined) PRINT TECHNOLOGY PRINTING MATERIAL PLA, ABS, PVA, PLA-PHA, Nylon, Wood Composits, Metal Composits, HIPLA, ABS-PC, HIPS, Carbon Composits (ø1.75mm) MAX. BUILD VOLUME (up to) 185 x 200 x 190mm (7.28 x 7.87 x 7.48 in) HEATED BUILD PLATE Yes - MK2b (with 3mm removable glass surface) HEATED BUILD PLATE MAX TEMPERATURE... - Page 8 Other information you need to know After assembling your helloBEEprusa, don’t drop/knock/damage it and don’t connect it to anything that hasn’t been previously validated by BEEVERYCREATIVE. Make sure gases, explosive and other flammable materials aren’t kept, stored or transported with your helloBEEprusa 3D printer or its parts.
- Page 9 - If inappropriate handling during assembly takes place. - If the user makes incorrect connections, breaks or damages parts during assembly. Before assembling your helloBEEprusa you must read thoroughly the Terms and Conditions of the BEEVERYCREATIVE Standard Warranty on our website: www.beeverycreative.com.
- Page 10 ASSEMBLING THE STRUCTURE...
- Page 11 STRUCTURE...
- Page 12 STRUCTURE BUTTON HEAD SCREW DIN7380 M4X10 SERRATED LOCK WASHER DIN6798J M4 HEX. THIN NUT 1 DIN439 M4...
- Page 13 STRUCTURE BUTTON HEAD SCREW DIN7380 M4X10 SERRATED LOCK WASHER DIN6798J M4 HEX. THIN NUT 1 DIN439 M4...
- Page 14 BUTTON HEAD SCREW DIN7380 M4X10 SERRATED LOCK WASHER DIN6798J M4 HEX. THIN NUT 1 DIN439 M4...
- Page 15 STRUCTURE BUTTON HEAD SCREW DIN7380 M4X10 SERRATED LOCK WASHER DIN6798J M4 HEX. THIN NUT 1 DIN439 M4...
- Page 16 STRUCTURE BUTTON HEAD SCREW DIN7380 M4X10 SERRATED LOCK WASHER DIN6798J M4 HEX. THIN NUT 1 DIN439 M4...
- Page 17 BUTTON HEAD SCREW DIN7380 M4X10 SERRATED LOCK WASHER DIN6798J M4 HEX. THIN NUT 1 DIN439 M4...
- Page 18 BUTTON HEAD SCREW DIN7380 M4X10 STRUCTURE SERRATED LOCK WASHER DIN6798J M4 HEX. THIN NUT 1 DIN439 M4...
- Page 19 Y AXIS NEMA17 STEPPER MOTOR CYL. HEAD SCREW DIN912 M3X8 PLAIN WASHER DIN125 M3 Z AXIS NEMA17 STEPPER MOTORS...
- Page 20 A.10 You will need the hex key supplied with the kit to screw on the flex coupling FLEX COUPLING 5MM...
- Page 21 A.11 In this step you must leave the pulley about 5-6mm away from the struture, and align it with the flat belt pulley HEX. THIN NUT 1 DIN439 M4 SERRATED LOCK WASHER DIN6798J M4 CYL. HEAD SCREW DIN912 M4X16 SPACER 8X7MM HOLE 4,3MM PULLEY GT2 20 TOOTH FLAT BELT PULLEY...
- Page 22 ASSEMBLING THE BUILD PLATE STRUCTURE...
- Page 23 From now on, you might need the Spanner supplied in the kit. Later it can be used as a Spool Holder STRUCTURE...
- Page 24 8MM LINEAR BEARING SERRATED LOCK WASHER DIN6798J M4 HEX. THIN NUT 1 DIN439 M4 “U” CLAMP A2 M4 20X20,5MM...
- Page 25 CYL. HEAD SCREW DIN912 M3X20 PCB HEATED BED MK2B 214X214MM BED SPRING ø 0.8X2.5 PLAIN WASHER DIN125 M3 NYLOC NUT DIN985 M3...
- Page 26 END STOP LEVER X/Y...
- Page 27 BUTTON HEAD SCREW DIN7380 M4X10 Y SUPPORT SERRATED LOCK WASHER DIN6798J M4 LINEAR GUIDE 8X310MM (Y) HEX. THIN NUT 1 DIN439 M4...
- Page 28 BUTTON HEAD SCREW DIN7380 M4X10 SERRATED LOCK WASHER DIN6798J M4 HEX. THIN NUT 1 DIN439 M4...
- Page 29 ASSEMBLING THE EXTRUDER...
- Page 30 STRUCTURE...
- Page 31 ADJUSTMENT FOR BEARING COVER CYL. HEAD SCREW DIN912 M3X16 CLAMP NYLOC NUT DIN985 M3 PLAIN WASHER DIN125 M3 HEX HEAD SCREW DIN933 M3X20...
- Page 32 STRUCTURE U-GROOVE WHEEL CYL. HEAD SCREW DIN912 M3X16 NYLOC NUT DIN985 M3 HEX HEAD SCREW DIN933 M5X10...
- Page 33 8MM LINEAR BEARING SERRATED LOCK WASHER DIN6798J M4 HEX. THIN NUT 1 DIN439 M4 “U” CLAMP A2 M4 20X20,5MM...
- Page 34 For some steps, you will need a marker to mark some of the labels to tell apart different cables. This will help you when assembling the electronics. Mark 0 and 1 as shown above and never forget to do so every time you see this icon. EXTRUDER NEMA17 STEPPER MOTORS CYL.
- Page 35 EXTRUDER HOT END EXTRUDER HEAT SINK 24V HEAT CARTRIDGE Ø6 mm EXTRUDER TEMPERATURE SENSOR Ø4 mm SOCKET SET SCREW DIN914 M3X4...
- Page 36 All cables go through here EXTRUDER FAN 24V CYL. HEAD SCREW DIN912 M3X30...
- Page 37 All cables go through here Write on "B" for Blower on both labels CYL. HEAD SCREW DIN912 M3X16 EXTRUDER FAN 24V NYLOC NUT DIN985 M3 BLOWER...
- Page 38 END STOP LEVER X/Y...
- Page 39 ASSEMBLING THE X-AXIS...
- Page 40 STRUCTURE X SUPPORT HEX. THIN NUT 2 D439 M5 LINEAR GUIDE 8X385MM (X)
- Page 41 Screw each Screw bit by bit, not one Screw all at once STRUCTURE BUTTON HEAD SCREW DIN7380 M4X20 SERRATED LOCK WASHER DIN6798J M4 HEX. THIN NUT 1 DIN439 M4 8MM LINEAR BEARING...
- Page 42 HEX. THIN NUT 1 DIN439 M4 SERRATED LOCK WASHER DIN6798J M4 CYL. HEAD SCREW DIN912 M4X30 SPACER 8X7MM HOLE 4,3MM FLAT BELT PULLEY...
- Page 43 X SUPPORT C - EXTRUDER HEX. THIN NUT 2 DIN439 M5...
- Page 44 STRUCTURE...
- Page 45 Screw each Screw bit by bit, not one Screw all at once STRUCTURE BUTTON HEAD SCREW D7380 M4X20 SERRATED LOCK WASHER D6798J M4 HEX. THIN NUT 1 D439 M4 8MM LINEAR BEARING...
- Page 46 Align the Pulley GT2 with the Flat Belt Pulley. The Pulley GT2 must have a small clearance from the motor casing. X AXIS NEMA17 STEPPER MOTOR CYL. HEAD SCREW D912 M3X8 PLAIN WASHER D125 M3 PULLEY GT2 20 TOOTH...
- Page 47 CYL. HEAD SCREW D912 M3X30 ADJUSTABLE Z END STOP...
- Page 48 HOW THE 3 AXES AND ALL THEIR COMPONENTS COME TOGETHER...
- Page 49 Use the Soft Hammer carefully when you feel the need to use some extra strengh putting the components in their places GUIDE SHOE...
- Page 50 Guides should slide freely LINEAR GUIDE 8X335MM (Z)
- Page 51 After this step, move the extruder to feel if it slides freely on both axies (X and Z)
- Page 52 Z 1 SUPPORT Z 2 SUPPORT Z 1 SUPPORT BUTTON HEAD SCREW DIN7380 M4X10 SERRATED LOCK WASHER DIN6798J M4 Z 2 SUPPORT HEX. THIN NUT 1 DIN439 M4...
- Page 53 THREADED ROD DIN976 A2 M5X320...
- Page 54 Place to put the Cable Tie Use the Cutter Pliers to cut the Rubber Belt and the Cable Tie tip STRUCTURE GT2 RUBBER BELT CABLE TIE 2.5X100MM...
- Page 55 Place to put the Cable Tie GT2 RUBBER BELT CABLE TIE 2.5X100MM...
- Page 56 ASSEMBLING THE ELECTRONICS...
- Page 57 Repeat the same process for the other two End Stops. END STOP SUPORT END STOP CYL. HEAD SCREW DIN912 M3X8 END STOP CABLING PLAIN WASHER DIN125 M3 NYLOC NUT DIN985 M3...
- Page 58 (X) (Y) (Z) (X) (Y) (Z) Use the marker to mark both labels (X) (Y) (Z) of each cables with X, Y and Z. CYL. HEAD SCREW DIN912 M3X16 NYLOC NUT DIN985 M3...
- Page 59 CYL. HEAD SCREW DIN912 M3X16 DISPLAY SPACER CONTROL PANEL NYLOC NUT DIN985 M3 CONTROL PANEL CABLES...
- Page 60 CAUTION HIGH AC VOLTAGE WHEN CONNECTED TO THE SOCKET POWER SUPPLY 24V 15A 360W BUTTON HEAD SCREW DIN7380 M4X10 SERRATED LOCK WASHER DIN6798J M4 POWER SUPPLY > SOCKET POWER SUPPLY>MOTHERBOARD...
- Page 61 CABLE CASING ø 15.8 Carefully apply the cable casing to the wiring coming out of the extruder before connecting everything to the motherboard MOTHERBOARD MKS GEN V1.2 CYL. HEAD SCREW D912 M3X30 Z END STOP ADJUSTABLE PLAIN WASHER D125 M3 CABLE CASING ø...
- Page 62 ELECTRONICS COOLING FAN 24V WHITHOUT LABEL +H-BED- +FAN- +HE0- +HE1- -12/24V+ -12/24V+ Δ ENDSTOP [X] [Y] [Z] Δ ENDSTOP [X] [Y] [Z] Δ ENDSTOP [X] [Y] [Z] Δ Extruder Sensor Δ Extruder Sensor [E0] [E1] [E0] [E1] Δ Bed Sensor EXP2 EXP1 ELECTRONICS COOLING FAN 24V...
- Page 63 ELECTRONICS COOLING FAN 24V WHITHOUT LABEL CYL. HEAD SCREW DIN912 M3X16 FAN SUPPORT NYLOC NUT DIN985 M3...
- Page 64 CAUTION HIGH AC VOLTAGE WHEN CONNECTED TO THE SOCKET SWITCH ON/OFF BOX BUTTON HEAD SCREW DIN7380 M4X10 ELECTRIC FUSE 2A=230V / ELECTRIC FUSE 3A=115V SERRATED LOCK WASHER DIN6798J M4 Check the power unit to make sure HEX. THIN NUT 1 DIN439 M4 AC SOCKET it’s set for your country’s voltage, and place the fuse with the proper amperage...
- Page 65 GLASS 3MM 214X200MM BINDER CLIPS 19MM...
- Page 66 The STL files are available from our website, and you can also download free add-ons to print and improve your HelloBEEprusa. You will find the sources here: https://github.com/beeverycreative/helloBEEprusa-hardware Hope you enjoy your helloBEEprusa! Join us and share your experience here: www.beeverycreative.com/forum.
- Page 67 © 2015 BEEVERYCREATIVE www.beeverycreative.com All rights reserved. www.linkedin.com/company/beeverycreative www.instagram.com/beeverycreative www.pinterest.com/beeverycreative...
Need help?
Do you have a question about the Hello BEE Prusa and is the answer not in the manual?
Questions and answers